GROM Audio VLINE TOY6 User manual

GROM-VLINE SYSTEM
www.gromaudio.com
www.gromaudio.com/support.html
TOY6

CONTENTS
Package contents......................................................................................................4
CHAPTER 1 — INSTALLATION. .........................................................................4
1.1 Before Installation 4
1.2 Tools 4
1.3 Vehicle Installation 4
1.4 Safety Guidelines & Appropriate Use 5
Connect supplied Display Harness Cable to factory Display...............................6
Connect VLine Interface cable to Factory Head unit. ...........................................7
Connecting to VLine
Routing the GPS Antenna. .......................................................................................8
Routing the Microphone..........................................................................................9
Mounting the VLine Module. ................................................................................10
Understanding VLine Ports. ...................................................................................11
Chapter 2 — getting started. ........................................................................12
2.1 Initializing
2.2 Functions
Initial configuration. ...............................................................................................13
Setting up WIFI 13
Setting up Bluetooth...............................................................................................15
Chapter 3— Advanced setup (Optional)......................................................25
3.1 Installing Google Apps
Adding Apps to Home Launcher...........................................................................28
Signing onto Google Account................................................................................29
Changing Text-to-Speech Output. ........................................................................32
Chapter 3 — MEDIA PLUGINS........................................................................17
A2DP Stream............................................................................................................18

Adding Apps to Home Launcher...........................................................................28
Signing onto Google Account. ..............................................................................29
Changing Text-to-Speech Output. ........................................................................32
3.2 Maps Installation.........................................................................................32
Chapter 4— MEDIA PLUGINS........................................................................17
A2DP Stream. ................................................................................18Google music .
..................................................................................................................................19
Local Music .............................................................................................................20
Spotify......................................................................................................................21
Web Radio................................................................................................................22
Chapter 5— VLine OTA update. ....................................................................23
SUPPORT..........................................................................................................34
WARRANTY. ....................................................................................................34
EIGHTEEN MONTH (18) LIMITED WARRANTY
GRANT OF LICENSE.........................................................................................35
OPERATIONAL WARNING AND SAFETY INSTRUCTIONS..............................36

4
1.1 Before Installation
Before starting work with any wiring, please wait 90 seconds after turning the
Ignition to the OFF position and disconnecting the negative (-) terminal of the
battery. This is to ensure that no SRS airbags faults are triggered during the
installation when disassembling the vehicle’s panels and wiring connections
for the VLINE module installation.
Please review the entire manual to familiarize yourself of the VLINE module
and the installation requirements before installing the unit and using it.
1.2 Tools
Have Tools ready for disassembling the dashboard panels to remove the
stereo.
Some basic tools will be required for stereo removal and installation, Plastic
prying tools, Phillips head screwdriver,10mm socket and ratchet. Additional
tools may be required depending on vehicle and installation preference.
1.3 Vehicle Installation
Each model vehicle disasembles differently. The removal of the stereo and
CHAPTER 1 — INSTALLATION
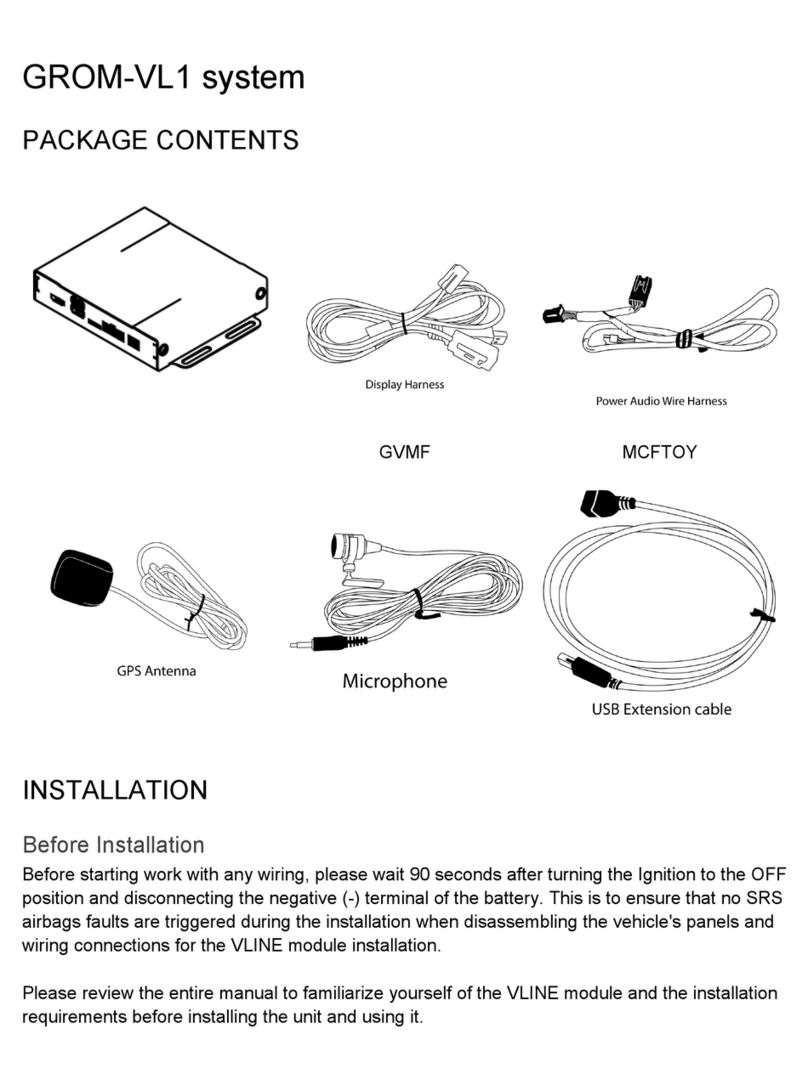
PACKAGE CONTENTS
GROM-VLINE SYSTEM
GVMF
Display Harness
Microphone USB Extension cable
VLine module
GPS Antenna
MCFTOY
Power Harness

5
wiring installation requires special technical skills and experience. If you do
not feel comfortable doing the installation please consult with your local
car audio shop or installation professional for instructions or assistance if
necessary.
Carefully remove the factory Stereo and Display out of the dash cavity with
proper tools.
It may be necessary to disconnect items surrounding the stereo and display
to remove them and gain access to the back of the stereo to make your
connections.
1.4 Safety Guidelines & Appropriate Use
By using VLine you agree:
• to operate VLine only when there are safe driving conditions;
• to follow any applicable state and traffic laws;
• to keep an eye on the road at all time while driving;
• do not attempt to play video (such as YouTube) on a display while the
vehicle is in motion;
• do not use VLine without running the engine for the extended period of
time as it can drain the battery.
Do not use Vline in a manner that would distract the driver or that may
otherwise cause injury or death to vehicle occupants or bystanders.
IT IS ILLEGAL IN MOST STATES OF THE UNITED STATES AND MAY BE ILLEGAL
IN OTHER JURISDICTIONS FOR ANY TELEVISION OR OTHER VIDEO DISPLAY,
STREAM, TRANSMISSION OR BROADCAST TO BE VISIBLE TO THE DRIVER
WHILE THE VEHICLE IS IN MOTION. YOU AGREE NOT TO USE ANY VISUAL
COMPONENT OF VLine WHILE IN CONTROL OF A MOVING VEHICLE WHERE
DOING SO WOULD BE ILLEGAL OR DANGEROUS TO VEHICLE OCCUPANTS OR
BYSTANDERS. DOING OTHERWISE CAN LEAD TO SERIOUS INJURY OR DEATH
TO YOU AND OTHERS. PLEASE FIND A SAFE PLACE TO PARK AND ENGAGE
THE PARKING BRAKE BEFORE VIEWING ANY VIDEO DISPLAYS, STREAMS,
TRANSMISSION, OR BROADCAST AVAILABLE THROUGH VLINE.

6
Connect supplied Display Harness Cable to factory Display
Locate BLUE Display port on rear of Multi Display ECU.
If the port is Empty, plug in supplied video cable (GVMF) into port and leave
female portion of cable with nothing attached.
If there is cable plugged in, disconnect factory Display cable (typically Blue in
color). Then plug in supplied Y cable and reconnect disconnected cable into
female plug of the supplied Display cable.

7
Display Harness Power Audio Harness
Connect VLine Interface cable to Factory Head unit
Locate 12-pin connector at the back of the stereo,as shown on one illus-
tration on page 6. Unplug what was previouslyconnected,if anything. Plug
in supplied Power Audio Wiring Harness Interface cable (MCFTOY) into 12-
pin . Replug back to the other end of MCFTOY cable previously unplugged
factory cable.
Note that if external factory USB interface is present, you will need to
locate it and disconnect from the car stereo system. You will loose factory
USB interface in order to use VLine in your vehicle.
Connecting to VLine
Route the unused end of Display Cable and Power Audio Cable to the VLine
module and connect them to the correctly labeled ports.

8
Routing the GPS Antenna
The GPS Antenna module is magnetic as well as supplied with double sided
tape.
It can be mounted to the top of dashboard or to outside of vehicle whichever
you prefer. Route to desired location. We recommend mounting on inside of
vehicle on passenger side of the Dashboard as shown below.
Plug the GPS antenna into the port labeled CAMERA AV1 on the VLine
Module

9
Routing the Microphone
Route microphone to a location where it will be able to pick up voice clearly.
We recommend to mount MIC nearby the rear view mirror but not directly
on windshield glass. Avoid sticking to the hard surface as it will pick up more
noise.
Plug the microphone into the MIC port of the VLine module

10
Mounting the VLine Module
Mount module in location free of any moving parts. We strongly recommend
mounting the module in an easily accessible location such as the glove
compartment for easy access to the USB ports and in case of needing to
upgrade firmware on the VLine module.
Securely mount and install the interface in a location free from heat,
humidity, moving parts, or direct sunlight. Beware of hot-air flow from your
vehicle’s climate control system. The interface should be secured in a suitable
location, free of sharp metal edges, using double-sided tape, Velcro, or wire
ties. The adapter’s operating temperature range is -30°C to +70°C (-24°F to
+158°F)

11
USB1
iPhone connection
Any other USB device (Keyboard / Mouse)
USB2
USB flash drive
Any USB device (Android, Keyboard / Mouse)
MicroSD
Insert microSD card (*pin side up) to increase storage space for
Vline (up to 128GB supported). The microSD should be formatted
FAT32. File system format exFAT and NTFS are not supported.
HDMI IN
HDMI input connection to connect external video sources.
(add plugin to Dashlinq Launcher to use feature)
HDMI OUT
N/A, not used
MIC
Microphone input, Connect 3.5mm Mono Microphone
Understanding VLine Ports
HDMI IN
HDMI Input MicroSD Card
(Pin side up*)
Pin Side Up
N/A
Not Used
GPS / AV / Camera
Input
WiFi / Bluetooth
Antenna
Microphone
USB2
OTG/USB storage
MIC
CAMERA AV1
HDMI OUT
USB 2
USB 1
USB1
iPhone

12
2.1 Initializing
After connecting the VLine module to the stereo, an Ignition Cycle will have
to be performed for the stereo to discover Vline and allow Vline to self
configure.
To INITIALIZE:
1. Put Ignition Switch to “ACC” or “ON” position
2. Wait up to 5 Seconds
3. Put Ignition Switch to “OFF” position
4. Wait 1 minute
5. Turn Ignition Switch back to “ACC” or “ON” Position
6. Press the DISC button until you are able to select the VLINE interface.
(may take more than 2 presses of the DISC for accessing as first press is
for built-in CD/DVD changer in most cases)
2.2 Functions
The GROM VLINE emulates the factory external CD changer mode or USB
mode of the stereo depending on vehicle year and model that it is installed
into.
No factory functions of the stereo will be disabled. Factory Bluetooth,
Navigation, Radio and CD player will remain functional.
Selecting the VLINE mode:
Press the DISC button to access the USB mode of the stereo to enter into
VLINE interface mode (may need to press DISC few times).
CHAPTER 2 — GETTING STARTED

13
Settings
Initial configuration
Setting up WIFI
The VLINE module will require a data connection while vehicle is in mobile on
road to take advantage of majority of its features.
Adjusting Audio Bass, Treble, Balance/Fade for VLINE Mode.
To adjust, press SCAN button 3(three) times. Factory display will switch from
VLine Interface into factory CD changer interface to adjust Audio settings.
Press SCAN button 3 (three) times again to switch back into VLine Interface
mode again
Track selection can be done with the stereo’s SEEK TRACK ^ and v buttons or
steering wheel buttons.

14
Settings
Wireless & networks
Wi-Fi Bluetooth
Data usage More
Display Sound & notification
Device
Settings
On
Vline Setup
CBCI-1EA1-2.4
ATT896
CBCI-44AB-2.4
Go into WiFi Settings
Select WiFi channel to connect

15
Settings
On
Vline Setup
CBCI-1EA1-2.4
ATT896
CBCI-44AB-2.4
Password
Show password
Advanced options
CONNECTCANCEL
VLine Setup
Settings
Wireless & networks
Wi-Fi Bluetooth
Data usage More
Display Sound & notification
Device
Enter In [Password] and select on CONNECT
Setting up Bluetooth
Select Settings->Bluetooth
NOTE: Please check with Mobile Carrier for Hotspot data usage limits.
Depending on mobile provider you might be a subject to mobile data and
tethering charges.

16
Avialable devices
Vline is visible to nearby devices while Bluetooth settings is open
Bluetooth
On
Android
Iphone
Avialable devices
Vline is visible to nearby devices while Bluetooth settings is open
Bluetooth
On
Device
Iphone
Pairing code
622398
Pairing grants access to your contacts and call
history when connected
PAIRCANCEL
Bluetooth pairing request
Use your phone to find VLine device
Confirm PIN code on VLine and Phone
NOTE: Bluetooth Connection will allow for A2DP music streaming only

17
Settings
CHAPTER 3— ADVANCED SETUP
3.1 Installing Google Apps
Installing Google Apps will provide you with Google Play Services on the
VLINE as well as add an option for Google Play Store App to download any
application available.
That includes Google and Waze Maps, and other apps available at Google
Play Market. This is strictly optional to install but with it installed it will
open up more functional for the VLINE module.
You also need to install G-Apps in order for Voice Activation button to
work.
To install the Gapps Package:
Go into Settings

18
VLine system updates
Legal information
Regulatory information
Status of the battery, network, and other information
Status
About device
System updates
About Device
Settings
Accounts Language & input
Backup & reset
Accessibility
Date & time
Printing About device
System
Scroll down all the way to the bottom and select “About Device”
Then select “VLINE System Updates

19
Additional System Updates
Gapps
VL1.0.1.0
Install Gapps
Grom OTA
Installed version
Check to availabke updates
Check to update
Additional System Updates
Gapps
Wed Dec 31 16:00:00 PST 1969
Installed
Grom OTA
Installed version
Check to availabke updates
Check to update
Download size: 158.3MiB
VL1.0.1.0 relase
Ready to install
Install
VLine Update System
Select “Install GApps”
Press the “Install” button to apply update.
Wait for update to download and apply. The VLINE will restart during the
process (this may take up to 10 minutes)
If System does not boot up within 15 minutes, Please turn off Ignition
and wait 1 minute and then turn Ignition on again.

20
Adding Apps to Home Launcher
Select Empty Spot You Wish to Add Icon to
Select the Application/Shortcuts/Plugins you wish to add,
in this case the “Play Store” Application.
Other manuals for VLINE TOY6
1
Table of contents
Other GROM Audio Automobile Electronic manuals
GROM Audio
GROM Audio VLINE LEX7 User manual

GROM Audio
GROM Audio VLINE LEX3 User manual

GROM Audio
GROM Audio VLINE LEX7T/8T User manual

GROM Audio
GROM Audio VLINE LEX9T User manual

GROM Audio
GROM Audio LEX5VL1 User manual
GROM Audio
GROM Audio VLINE LEX4 User manual
GROM Audio
GROM Audio NIS9VL1 User manual
GROM Audio
GROM Audio VLINE LEX6RT User manual
GROM Audio
GROM Audio Vline LEX5LSVL2 User manual
GROM Audio
GROM Audio VLINE LEX6 User manual