GROM Audio VLine VL1 User manual

GROM-VL1 system
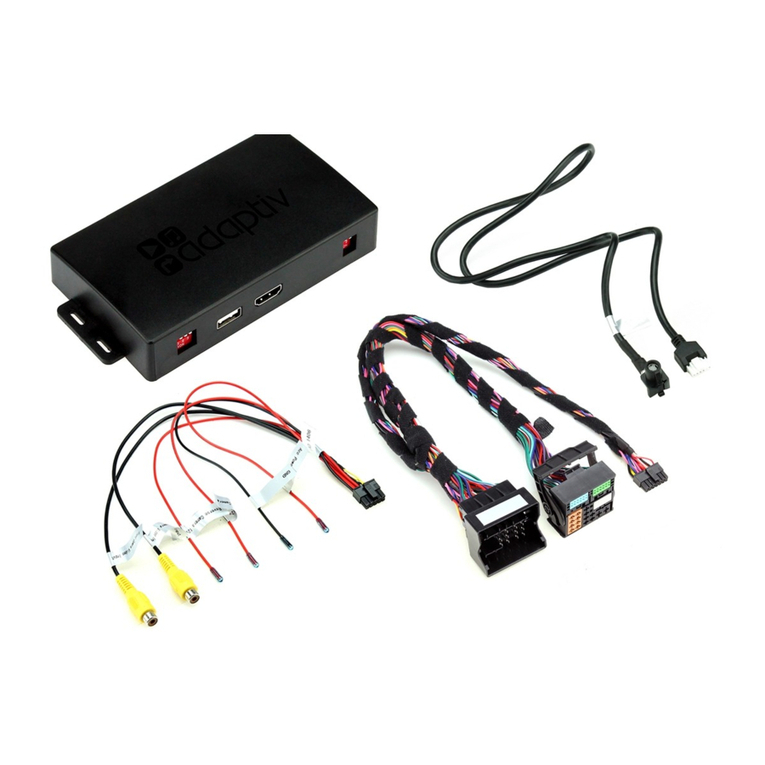
PACKAGE CONTENTS
GVMF MCFTOY
INSTALLATION
Before Insta ation
Before starting work with any wiring, p ease wait 90 seconds after turning the Ignition to the OFF
position and disconnecting the negative (-) termina of the battery. This is to ensure that no SRS
airbags fau ts are triggered during the insta ation when disassemb ing the vehic e's pane s and
wiring connections for the VLINE modu e insta ation.
P ease review the entire manua to fami iarize yourse f of the VLINE modu e and the insta ation
requirements before insta ing the unit and using it.

Too s
Have Too s ready for disassemb ing the dashboard pane s to remove the stereo.
Some basic too s wi be required for stereo remova and insta ation, P astic prying too s, Phi ips
head screwdriver,10mm socket and ratchet. Additiona too s may be required depending on
vehic e and insta ation preference.
Vehic e Insta ation
Each mode vehic e dissemb es different y. The remova of the stereo and wiring insta ation
requires specia technica ski s and experience. If you do not fee comfortab e doing the
insta ation p ease consu t with your oca car audio shop or insta ation professiona for
instructions or assistance if necessary.
Carefu y remove the factory Stereo and Disp ay out of the dash cavity with proper too s.
It may be necessary to disconnect items surrounding the stereo and disp ay to remove them
and gain access to the back of the stereo to make your connections.
Safety guide ines and appropriate use
By using VLine you agree:
- to operate VLine on y when there are safe driving conditions;
- to fo ow any app icab e state and traffic aws;
- to keep an eye on the road at a time whi e driving;
- do not attempt to p ay video (such as YouTube) on a disp ay whi e the vehic e is in motion;
- do not use VLine without running the engine for the extended period of time as it can drain the
battery.
Do not use V ine in a manner that wou d distract the driver or that may otherwise cause injury or
death to vehic e occupants or bystanders.
IT IS ILLEGAL IN MOST STATES OF THE UNITED STATES AND MAY BE ILLEGAL IN
OTHER JURISDICTIONS FOR ANY TELEVISION OR OTHER VIDEO DISPLAY, STREAM,
TRANSMISSION OR BROADCAST TO BE VISIBLE TO THE DRIVER WHILE THE VEHICLE
IS IN MOTION. YOU AGREE NOT TO USE ANY VISUAL COMPONENT OF VLine WHILE IN
CONTROL OF A MOVING VEHICLE WHERE DOING SO WOULD BE ILLEGAL OR
DANGEROUS TO VEHICLE OCCUPANTS OR BYSTANDERS. DOING OTHERWISE CAN
LEAD TO SERIOUS INJURY OR DEATH TO YOU AND OTHERS. PLEASE FIND A SAFE
PLACE TO PARK AND ENGAGE THE PARKING BRAKE BEFORE VIEWING ANY VIDEO
DISPLAYS, STREAMS, TRANSMISSION, OR BROADCAST AVAILABLE THROUGH VLINE.
Connect supp ied Disp ay Harness Cab e to factory Disp ay
Locate BLUE Disp ay port on rear of Mu ti Disp ay ECU.
If the port is Empty, p ug in supp ied video cab e into port and eave fema e portion of cab e with
nothing attached.
If there is cab e p ugged in, disconnect factory Disp ay cab e (typica y B ue in co or). Then p ug
in supp ied Y cab e and reconnect disconnected cab e into fema e p ug of the supp ied Disp ay
cab e.

Connect VLine Interface cab e to Factory Head unit
Located 12-pin connector and unp ug. P ug in supp ied Power Audio Wiring Harness Interface
cab e. Reconnect back what was disconnected from the rear of the stereo back into the fema e
p ug of the supp ied interface cab e.
Connecting to VLine
Route the unused end of Disp ay Cab e and Power Audio Cab e to the VLine modu e and
connect them to the correct y abe ed ports.

Routing the GPS Antenna
The GPS Antenna modu e is magnetic as we as supp ied with doub e sided tape.
It can be mounted to the top of dashboard or to outside of vehic e whichever you prefer. Route
to desired ocation. We recommend mounting on inside of vehic e on passenger side of the
Dashboard as shown be ow.
P ug the GPS antenna into the port abe ed CAMERA AV1 on the VLine Modu e

Routing the Microphone
Route microphone to a ocation where it wi be ab e to pick up voice c ear y.
We recommend to mount MIC nearby the rear view mirror but not direct y on windshie d g ass.
Avoid sticking to the hard surface as it wi pick up more noise.
P ug the microphone into the MIC port of the VLine modu e

Mounting the VLine Module
Mount modu e in ocation free of any moving parts. We strong y recommend mounting the
modu e in an easi y accessib e ocation such as the g ove compartment for easy access to the
USB ports and in case of needing to upgrade firmware on the VLine modu e.
Secure y mount and insta the interface in a ocation free from heat, humidity, moving parts, or
direct sun ight. Beware of hot-air f ow from your vehic e’s c imate contro system. The interface
shou d be secured in a suitab e ocation, free of sharp meta edges, using doub e-sided tape,
Ve cro, or wire ties. The adapter’s operating temperature range is -30°C to +70°C (-24°F to
+158°F)

Understanding VLine Ports
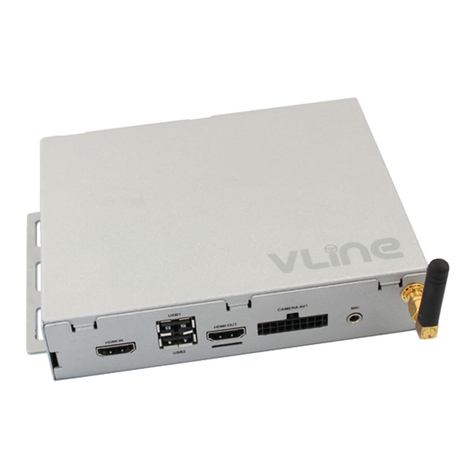
USB1
Ipod/Iphone connection
Any other USB device (Android phone, Keyboard / Mouse, USB f ash drive)
USB2
Any other USB device (Android phone, Keyboard / Mouse, USB f ash drive)
MicroSD
Insert micro SD card to increase storage space for V ine (up to 128GB supported)
HDMI IN
HDMI input connection to connect externa video sources.
(add p ugin to Dash inq Launcher to use feature)
HDMI OUT
N/A, not used
MIC
Microphone input, Connect 3.5mm Mono Microphone

GETTING STARTED
Initia izing
After connecting the VLine modu e to the stereo, an Ignition Cyc e wi have to be performed for
the stereo to discover V ine and a ow V ine to se f configure.
To INITIALIZE:
1. Put Ignition Switch to “ACC” or “ON” position
2. Wait up to 5 Seconds
3. Put Ignition Switch to “OFF” position
4. Wait 1 minute
5. Turn Ignition Switch back to “ACC” or “ON” Position
6. Press the DISC button unti you are ab e to se ect the VLINE interface. (may take more
than 2 presses of the DISC for accessing as first press is for bui t-in CD/DVD changer in
most cases)
Functions
The GROM VLINE emu ates the factory externa CD changer mode or USB mode of the stereo
depending on vehic e year and mode that it is insta ed into.
No factory functions of the stereo wi be disab ed. Factory B uetooth, Navigation, Radio and CD
p ayer wi remain functiona .
Se ecting the VLINE mode:
Press the DISC button to access the externa CD changer mode of the stereo to enter into
VLINE interface mode (may need to press DISC few times).

djusting udio Bass, Treble, Balance/Fade for VLINE Mode.
To adjust, press SCAN button 3(three) times. Factory disp ay wi switch from VLine Interface
into factory CD changer interface to adjust Audio settings.
Press SCAN button 3(three) times again to switch back into VLine Interface mode again
Track selection can be done with the stereo's SEEK TRACK ^ and v buttons or steering whee
buttons.
Initia configuration
Setting up WIFI
The VLINE modu e wi require a data connection whi e vehic e is in mobi e on road to take
advantage of majority of its features.

Go into WiFi settings
Se ect WiFi you wou d ike to connect to

Enter In password and c ick CONNECT
NOTE: P ease check with Mobi e Carrier for Hotspot data usage imits. Depending on mobi e
provider you might be a subject to mobi e data and tethering charges.
Setting up B uetooth
Se ect Settings->B uetooth

Use your phone to find VLINE device
Confirm PIN code on VLINE and Phone
NOTE: B uetooth Connection wi a ow for A2DP music streaming on y

MEDIA PLUGINS
VLINE provides media p ugins with an optimized interface with bo d graphics and easy to press
buttons for the vehic e environment. Most of these p ugins require a Data connection to work
besides Loca Music and A2DP Stream
To add p ugin onto the Home screen, se ect EMPTY “+” where you wou d ike to p ace the icon.
Then scro to P ugins and se ected desired p ugin to add

A2DP STREAM
•B uetooth Music streaming from a B uetooth enab ed device
•Grey icon means there is no B uetooth connection from Phone to VLine
•B ue icon means B uetooth device is connected and ready to stream audio.
(P ease refer to B uetooth setup portion of manua )
•Song/artist info wi disp ay on screen
•A bum artwork wi disp ay if VLINE is connected to WiFi data connection,
(P ease refer to WiFi setup portion of manua )

GOOGLE MUSIC
•A ows access to your Goog e P ay music Purchased/up oaded*
•Wi require Gapps to be insta ed on VLINE (P ease refer to Gapps Insta ation
of manua )
•To use Gapps you must have a Goog e account and be signed into the account
•*On y Purchased music ibrary and Up oaded media wi work, un imited
subscription/radio music wi not work

LOCAL MUSIC
•P ay music/audio stored on VLINE, USB drive or microSD card
•P ugin wi read the music on se ected storage and automatica y organize music
ibrary by categories (Fo der,P ay ist, A bum, Artist and Songs)
•Create P ay ists from within the P ugin.

SPOTIFY
•Mi ions of songs on Spotify.
•P ay your favorites, discover new tracks, and bui d the perfect co ection.
•Requires Spotify premium account and to be ogged in (free Spotify account wi
not work with this p ugin)

WEB RADIO
•Stream Radio stations from around the wor d as we as oca radio stations
•Listen to 100,000+ ive radio stations, p us on-demand content ike podcasts &
shows anywhere you go.
•Searchab e Stations by Loca , Trending, Music Genre, Sports, News, Location,
and Language.
•Star your favorite radio stations so you can easi y access next time
•Record what is current y p aying and isten to it ater without WiFi connection.

VLINE OTA UPDATE
Periodica y there wi be Updates avai ab e for the VLINE to enhance features or to fix minor
bugs.
NOTE: Make sure you are connected to a Wifi Connection before checking for update.
To insta OTA updates go to “Settings->About Device”
Se ect “VLINE System Updates”
Table of contents
Other GROM Audio Automobile Electronic manuals

GROM Audio
GROM Audio VLINE LEX3 User manual

GROM Audio
GROM Audio VLINE TOY6 User manual

GROM Audio
GROM Audio VLINE LEX7 User manual

GROM Audio
GROM Audio VLINE LEX9T User manual

GROM Audio
GROM Audio Vline LEX5LSVL2 User manual

GROM Audio
GROM Audio LEX5VL1 User manual

GROM Audio
GROM Audio VLINE LEX7T/8T User manual

GROM Audio
GROM Audio VLINE LEX6RT User manual

GROM Audio
GROM Audio VLINE TOY6 Manual

GROM Audio
GROM Audio VLINE LEX6 User manual