manuals.online logo
Brands
  1. Home
  2. •
  3. Brands
  4. •
  5. Grunbeck
  6. •
  7. Water Dispenser
  8. •
  9. Grunbeck HEH 9 User manual

Grunbeck HEH 9 User manual

Leakage test
The HEH 9 water softener needs to be
checked for tightness after installation and
after each maintenance. In order to do so,
apply the highest operating pressure that
might occur and check the HEH 9 water
softener visually for tightness.
Documentation water meter
Prior to each filling resp. refilling of the
heating system, the water meter reading
and consequently the soft water capacity
needs to be checked and the exchanger
resin must be replaced, if necessary.
The water volume that has passed through
and the raw water hardness must be doc-
umented in table 1.
The max. soft water volume that can be
achieved subject to the raw water hardness
is indicated in fig. 6.
In case the soft water is blended to a de-
sired residual hardness, the soft water
volume achieved (blending water) will
increase accordingly.
Examples
Raw water hardness 20 °dH (35.6 °f)
900 litres with 0 °dH (0 °f).
Raw water hardness 20 °dH (35.6 °f) and soft
water hardness of 10 °dH (17.8 °f)
1800 litres with 10 °dH (17.8 °f).
Conversion factors regarding water hardness
Water hardness °dH °f mmol/l =
mol/m³
German degrees 1 °dH ≙1 1,78 0,178
French degrees 1 °f ≙0,56 1 0,1
Alkaline earth ions 1 mmol/l = mol /m³ ≙5,6 10 1
10 | Soft water capacity
0
5
10
15
20
25
30
35
0 200 400 600 800 1000 1200 1400 1600 1800
0,0
10,0
20,0
30,0
40,0
50,0
60,0
70,0
°dH
°f
Soft water capacity
Row water hardness [°dH]
Row water hardness [°f]
achievable soft water volume [l]
Fig. 6: Achievable soft water volume (0 °dH, 0 °f)
If several filling procedures are done with
one HEH 9 water softener, the soft water
needs to be checked (water test kit) subject
to the raw water hardness during the filling
process and the results must be document-
ed (refer to table 1).
Table 1: Operating values
Date Raw water
hardness Water
meter
readin
g
Soft water
volume
achieved
[°dH] [°f] [l] [l]
11 | How to re-
place the ex-
changer resin
If the exchanger resin of the HEH 9 water
softener is exhausted, it must be replaced.
Depressurise the HEH 9 water softener
(close inlet and outlet - open sampling
valve). Unscrew the union nuts at the
distributor valve and dismount the entire
distributor valve from the exchanger tank.
Remove the riser pipe from the exchanger
tank and completely drain the exchanger
tank. Wash out any residues with water.
Note: The exchanger resin may be dis-
charged together with the domestic waste
(waste code number 57125).
Insert the riser pipe into the exchanger tank
again. Close the riser pipe (by means of a
plug or adhesive tape). Fill in the new
exchanger resin into the exchanger tank.
Centre the riser pipe - remove resin sticking
to the thread and riser pipe - and remove
the plug from the riser pipe. Remount the
distributor valve. Remount the connection
hoses. Deaerate the HEH 9 water softener.
Document the water meter reading and the
raw water hardness.
12 | Inspection The inspection only comprises a functional
check (check of soft water hardness at
sampling valve) and its documentation.
13 | Consumables
Consumables and spare parts can be pur-
chased from the sanitary trade or from your
local Grünbeck technical service.
Water test kit "Total hardness" °dH
Order no. 170 145 (1 piece)
Order no. 170 100 (10 piece)
Water test kit "Total hardness“ °f
Order no. 170 182 (1 piece)
Refill pack of exchanger resin (4 litres)
Order no. 190 575
Operation Manual
HEH 9 Water Softener
Edition February 2014
Order no. 106 190 957-inter
Grünbeck Wasseraufbereitung GmbH
Josef-Grünbeck-Strasse 1
89420 Hoechstaedt/Danube · GERMAN
Y
Phone +49 9074 41-0 · Fax +49 9074 41-10
0
www.gruenbeck.com · info@gruenbeck.com
A company certified by TÜV SÜD
in accordance with DIN EN ISO 9001, DIN
EN ISO 14001, DIN EN ISO 13485 and SCC
1 | General notes The HEH 9 water softener must be installed
by an authorised specialist of the sanitary
and heating trade.
Check the HEH 9 water softener for
transport damage.
The HEH 9 water softener must be protect-
ed from frost and may not be installed next
to heat sources which radiate a lot of heat.
Attention! After completion of the
heating make-up feed, the shut-off valves
upstream and downstream of the HEH 9
water softener need to be closed and the
HEH 9 water softener must be depressur-
ised by means of the sampling valve.
Warning! The installation room must
have a floor drain. If no floor drain is
available, a corresponding water stop
device must be available.
2 | Components of the HEH 9 water softener
Fig. 1: Exploded drawing of HEH 9 water softener
1
Connection hoses
5
Soft water outlet
2
Exchanger tank
6
Dosing point (male thread ½“)
3
Raw water inlet
7
Sampling valve
4
Distributor valve
8
Water test kit "Total hardness"
3 | Designated
application
The HEH 9 water softener is designed for
the filling/refilling of heating circuits. It must
not be incorporated into the heating circuit.
4 | Scope of
supply
Exchanger tank incl. distributor valve
2 Connection hoses (length = 1.5 m)
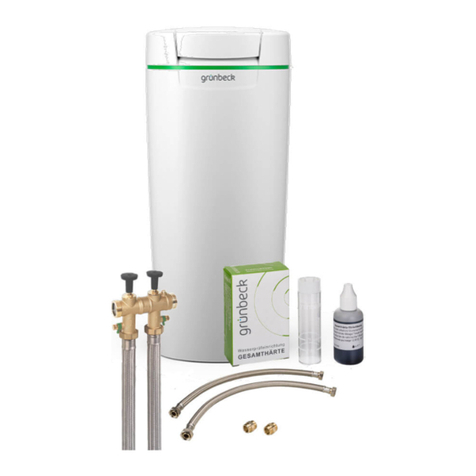
Water test kit "Total hardness“
Operation manual
5 | Technical specifications
Water softener HEH 9
Nominal connection diameter 3/4“ (female thread)
Nominal diameter [DN] 12
Nominal flow [m³/h] 0.3
Resin volume [l] 4
Nominal capacity [m³ x °dH] 18
[m³ x °f] 32
Max. admissible operating pressure [bar] 8
Max. water temperature [°C] 45
Total height approx. [mm] 580
Empty weight [kg] 8
Order no. 190 570
6 | Installation
requirements
Please observe local installation directives,
general guidelines and technical specifications.
The installation site must ensure the protection
of the HEH 9 water softener from chemicals,
dyes, solvents, vapours and direct sunlight.
A shut-off valve must be installed upstream
and downstream of the HEH 9 water softener
in order to shut it off.
In order to monitor the soft water capacity, a
water meter with roller-type counter needs to
be installed downstream of the HEH 9 water
softener (refer to accessories).
For pressure control, we recommend installing
a corresponding pressure gauge in close prox-
imity, so that the admissible pressure for the
heating system will not be exceeded during
filling/refilling process.
7 | Accessories The GENO-therm®filling device Basic
consists of:
Insulated housing, system separator BA, two
shut-off valves, pressure reducer unit incl.
pressure gauge, water meter and connections
for all full demineralisation or softening prod-
ucts of the heating protection series.
Order no. 707 120
Fig. 2: GENO-therm®filling device Basic
Fig. 3: Water meter
Water meter with connection material
with roller-type counter to monitor the
make-up water feed volume, for installation
at the HEH 9 water softener.
Order no. 702 845
Fig. 4: Blending housing
Blending housing
to set the desired water hardness.
Order no. 707 056
8 | Installation
The HEH 9 water softener has to be in-
stalled in the cold water pipe, directly
upstream of the filling tap.
Note: Only connect the soft water hose
after completion of the deaeration
(refer to paragraph 7).
Edited by: KONS-mha-rg G:\BA-190957-INTER-MOB-HEIZUNGBEF-HEH 9.DOC
Fig 5: Flow chart: filling of heating systems with HEH 9 water softener
1
Drinking water filter (e. g. BOXER®KD)
2
GENO-therm®filling device Basic (accessory)
9 | Start-up
After installation of the HEH 9 water soften-
er, deaerate the HEH 9 by opening the shut-
off valve (inlet). Keep the sampling valve
open until water flows from the connection
hose (soft water outlet).

Other Grunbeck Water Dispenser manuals

Grunbeck GENO-mat MN-Z 20/10 User manual

Grunbeck

Grunbeck GENO-mat MN-Z 20/10 User manual

Grunbeck GENO-mat ZF 65 User manual

Grunbeck

Grunbeck GENO-mat ZF 65 User manual

Grunbeck GENO-mat duo WE User manual

Grunbeck

Grunbeck GENO-mat duo WE User manual

Grunbeck GENO-mat WF Series User manual

Grunbeck

Grunbeck GENO-mat WF Series User manual

Grunbeck softliQ:MD32 User manual

Grunbeck

Grunbeck softliQ:MD32 User manual

Grunbeck GENO-mat duo WE-X Series User manual

Grunbeck

Grunbeck GENO-mat duo WE-X Series User manual

Grunbeck SODA JET Office User manual

Grunbeck

Grunbeck SODA JET Office User manual

Grunbeck AVRO-flex 400 User manual

Grunbeck

Grunbeck AVRO-flex 400 User manual

Grunbeck softliQ:MD Series User manual

Grunbeck

Grunbeck softliQ:MD Series User manual

Grunbeck SODA JET III Premium User manual

Grunbeck

Grunbeck SODA JET III Premium User manual

Grunbeck softliQ:SD Series User manual

Grunbeck

Grunbeck softliQ:SD Series User manual

Grunbeck softliQ:MC User manual

Grunbeck

Grunbeck softliQ:MC User manual

Grunbeck GENO-fine FS-B User manual

Grunbeck

Grunbeck GENO-fine FS-B User manual

Grunbeck softliQ:PA User manual

Grunbeck

Grunbeck softliQ:PA User manual

Grunbeck WINNI-mat VGX User manual

Grunbeck

Grunbeck WINNI-mat VGX User manual

Grunbeck Delta-p User manual

Grunbeck

Grunbeck Delta-p User manual

Grunbeck pureliQ:A User manual

Grunbeck

Grunbeck pureliQ:A User manual

Grunbeck Weichwassermeister GSX 5 User manual

Grunbeck

Grunbeck Weichwassermeister GSX 5 User manual

Grunbeck GENO-mat duo WF User manual

Grunbeck

Grunbeck GENO-mat duo WF User manual

Grunbeck softliQ:SC User manual

Grunbeck

Grunbeck softliQ:SC User manual

Grunbeck SODA JET Office Installation guide

Grunbeck

Grunbeck SODA JET Office Installation guide

Grunbeck GENO-mat duo WE-X 65 User manual

Grunbeck

Grunbeck GENO-mat duo WE-X 65 User manual

Grunbeck Delta-p User manual

Grunbeck

Grunbeck Delta-p User manual

Popular Water Dispenser manuals by other brands

Haier HLM-801B user manual

Haier

Haier HLM-801B user manual

Phanteks Glacier G1080 installation guide

Phanteks

Phanteks Glacier G1080 installation guide

Hasley Taylor HAC8FSTXQ 1A Series owner's manual

Hasley Taylor

Hasley Taylor HAC8FSTXQ 1A Series owner's manual

Follett 110 Series Installation & service manual

Follett

Follett 110 Series Installation & service manual

AquaScape 77005 Instructions & maintenance

AquaScape

AquaScape 77005 Instructions & maintenance

SlimLine Eco 17L Technical manual

SlimLine

SlimLine Eco 17L Technical manual

Crystal Mountain Blizzard quick start guide

Crystal Mountain

Crystal Mountain Blizzard quick start guide

Elkay EMASM Installation and use manual

Elkay

Elkay EMASM Installation and use manual

KitchenAid KHWC160 Series Installation instructions and use and care guide

KitchenAid

KitchenAid KHWC160 Series Installation instructions and use and care guide

Pentair Fleck 2850s Service manual

Pentair

Pentair Fleck 2850s Service manual

Culligan HE owner's guide

Culligan

Culligan HE owner's guide

Mediclinics FA0028 Installation, use and maintenance handbook

Mediclinics

Mediclinics FA0028 Installation, use and maintenance handbook

Aqua Computer Aquaduct 240 Operating and assembly manual

Aqua Computer

Aqua Computer Aquaduct 240 Operating and assembly manual

Bloomfield 1223EX owner's manual

Bloomfield

Bloomfield 1223EX owner's manual

Whirlpool WDAB600XWX Use & care guide

Whirlpool

Whirlpool WDAB600XWX Use & care guide

Avalon A10-TL Use and care guide

Avalon

Avalon A10-TL Use and care guide

Honeywell HWDT-620W owner's manual

Honeywell

Honeywell HWDT-620W owner's manual

Crystal Mountain Storm Service manual

Crystal Mountain

Crystal Mountain Storm Service manual

manuals.online logo
manuals.online logoBrands
  • About & Mission
  • Contact us
  • Privacy Policy
  • Terms and Conditions

Copyright 2025 Manuals.Online. All Rights Reserved.