manuals.online logo
Brands
  1. Home
  2. •
  3. Brands
  4. •
  5. Grundig
  6. •
  7. Radio
  8. •
  9. Grundig FR200 Operating instructions

Grundig FR200 Operating instructions

Other Grundig Radio manuals

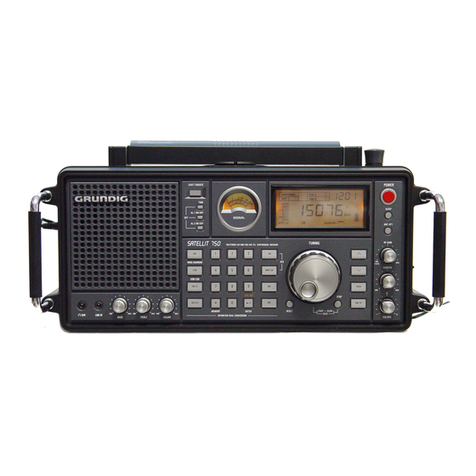
Grundig G1100 User manual

Grundig

Grundig G1100 User manual

Grundig satellit 3400 professional User manual

Grundig

Grundig satellit 3400 professional User manual

Grundig DTR 5000 X User manual

Grundig

Grundig DTR 5000 X User manual

Grundig BOY 55 User manual

Grundig

Grundig BOY 55 User manual

Grundig G5 GLOBE TRAVELER User manual

Grundig

Grundig G5 GLOBE TRAVELER User manual

Grundig G6 AVIATOR User manual

Grundig

Grundig G6 AVIATOR User manual

Grundig TR 2500 DAB+ User manual

Grundig

Grundig TR 2500 DAB+ User manual

Grundig G2 REPORTER User manual

Grundig

Grundig G2 REPORTER User manual

Grundig Eaton G4000A User manual

Grundig

Grundig Eaton G4000A User manual

Grundig Sonoclock SC 5340 LW Technical manual

Grundig

Grundig Sonoclock SC 5340 LW Technical manual

Grundig G5 GLOBE TRAVELER User manual

Grundig

Grundig G5 GLOBE TRAVELER User manual

Grundig GDR740DABER User manual

Grundig

Grundig GDR740DABER User manual

Grundig Sonoclock 30 SC 3000 Technical manual

Grundig

Grundig Sonoclock 30 SC 3000 Technical manual

Grundig TRAVELER II DIGITAL G8 User manual

Grundig

Grundig TRAVELER II DIGITAL G8 User manual

Grundig Sonoclock 50 Technical manual

Grundig

Grundig Sonoclock 50 Technical manual

Grundig Sonoclock 30 Technical manual

Grundig

Grundig Sonoclock 30 Technical manual

Grundig RR 335 User manual

Grundig

Grundig RR 335 User manual

Grundig Cosmopolit 4 WEB DAB+ User manual

Grundig

Grundig Cosmopolit 4 WEB DAB+ User manual

Grundig MINI 300PE User manual

Grundig

Grundig MINI 300PE User manual

Grundig S350DL User manual

Grundig

Grundig S350DL User manual

Grundig World Receiver G-2000A User manual

Grundig

Grundig World Receiver G-2000A User manual

Grundig Cosmopolit 7 WEB User manual

Grundig

Grundig Cosmopolit 7 WEB User manual

Grundig 5450DLX User manual

Grundig

Grundig 5450DLX User manual

Grundig Heinzelmann Radio User manual

Grundig

Grundig Heinzelmann Radio User manual

Popular Radio manuals by other brands

Makita DMR114 instruction manual

Makita

Makita DMR114 instruction manual

PURE Move R3 manual

PURE

PURE Move R3 manual

Motorola CP040 Detailed service manual

Motorola

Motorola CP040 Detailed service manual

Bosch GPB18V-5C Operating/safety instructions

Bosch

Bosch GPB18V-5C Operating/safety instructions

Ocean Digital WR-230 user manual

Ocean Digital

Ocean Digital WR-230 user manual

Realistic TRC-457 owner's manual

Realistic

Realistic TRC-457 owner's manual

Uniden AX 144 owner's manual

Uniden

Uniden AX 144 owner's manual

SIGNIFY EA2173 instruction manual

SIGNIFY

SIGNIFY EA2173 instruction manual

auna multimedia 10026443 user manual

auna multimedia

auna multimedia 10026443 user manual

GME TX680 instruction manual

GME

GME TX680 instruction manual

Motorola MTM5 00 Series Basic service manual

Motorola

Motorola MTM5 00 Series Basic service manual

Tivoli Audio ONE+ owner's manual

Tivoli Audio

Tivoli Audio ONE+ owner's manual

Sirius Satellite Radio SDVK1 installation guide

Sirius Satellite Radio

Sirius Satellite Radio SDVK1 installation guide

Sirius XM RAdio EDGE user guide

Sirius XM RAdio

Sirius XM RAdio EDGE user guide

Trevi XF 100 user guide

Trevi

Trevi XF 100 user guide

EisSound KBSound iSelect user manual

EisSound

EisSound KBSound iSelect user manual

Kirisun DM588-02 user manual

Kirisun

Kirisun DM588-02 user manual

VDigi DD3.0 Operation manual

VDigi

VDigi DD3.0 Operation manual

manuals.online logo
manuals.online logoBrands
  • About & Mission
  • Contact us
  • Privacy Policy
  • Terms and Conditions

Copyright 2025 Manuals.Online. All Rights Reserved.

HOW TO USE
YOUR GRUNDIG
FR200AM/FM/
Shortwave Radio
DO YOU NEED HELP? We've tried to make these instructions easy
to follow. Please read them carefully.
If you need help call us toll free:
Monday-Friday, 8:30 a.m. - 4:00 p.m., Pacific Standard Time.
1-800-872-2228 from the U.S.
1-800-637-1648 from Canada
1-650-361-1611 from anywhere
3
TABLE OF CONTENTS
Thank you for purchasing the FR200 AM/FM/Shortwave Radio.
This radio has been designed and manufactured to high quality
standards, and will provide reliable operation for many years.
Please carefully read the Operation Manual in order to take
advantage of the many interesting features that will provide
listening to radio broadcasts around the world.
Page #
DESCRIPTIONAND FUNCTIONS OF FRONT .............................. 6
DESCRIPTIONAND FUNCTIONS OF BACK ................................7
CONNECTION POWER SOURCES 7
EXTERNAL POWER 7
BATTERY POWER 7
DYNAMO POWER 7
REPLACINGTHE RECHARGEABLE BATTERY PACK ................... 8
OPERATION GUIDE
USING DYNAMO POWER ................................................ 8
USINGTHE BATTERIES ORA DC SOCKET 8
PRECAUTIONS ........................................................................... 9
SERVICE INFORMATION ........................................................... 10
ONE YEAR LIMITED WARRANTY ............................................. 11
4
FEATURES
The FR200AM/FM/Shortwave Radio is fully portable and with
many functions and features:
- Four Band Tuning - receives AM, FM and shortwave (SW1,and
SW2)
- Built-in power generator - you can“crank up” the radio and
listen to it under emergency conditions, or when no power is
available
- Rechargeable Battery Pack - provides reliable, renewable,
internal power for everyday use
- 2 1/2” Diameter Speaker - provides clear dynamic audio
- Emergency light -built-in light for emergency use
- Fine tuning control - optimizes reception of stations
- DC jack - a built-in 4.5V DC jack has been provided for
external power connection
- Earphone jack “Ear” - 3.5mm stereo earphone socket
-Antennas - rotatable telescopic antenna provides the best
radio signal for FM and SW. A built-inAM antenna provides
better sensitivity forAM reception
- Battery - can be operated on threeAA size batteries
5
6
DESCRIPTION AND FUNCTIONS OF FRONT DESCRIPTION AND FUNCTIONS OF BACK
1. DYNAMO-CRANK
2. COIN OPENING GAP (FOR
CHANGING LIGHT BULB)
3. DYNAMO CHARGING INDICATOR
4. CARRYING HANDLE
5. TOUCH LIGHT
6. TUNING KNOB
7. FINETUNING KNOB
8. POWER SELECTOR (DYNAMO
POWER OR BATTERIES AND
DC POWER)
9. LIGHT ON/OFF SWITCH
10. VOLUME
11.BAND SELECTOR
4.
5.
3.
7.
6.
10.
2.
1.
12.
9.
8.
11.
13. 14. 16.
15.
EXTERNAL POWER
A DC input socket has been provided for external power connection.
It requires a 4.5V DC power source, negative polarity, 200
milliamperes or greater. Ensure that the polarity is correct.
BATTERY POWER
This radio is designed to operate on threeAA batteries (alkaline for
longest play-time). Remove the battery compartment cover and fit the
batteries in the battery compartment following the diagram on the
back of the battery door.
DYNAMO POWER
This radio incorporates a rechargeable battery pack that can be
recharged by the dynamo-crank.
1. Switch the power selector to the off position.
2. Lift the dynamo-crank and rotate it either clockwise or counter-
clockwise. (The “Charging LED”will be lighted if it is charging.)
7
CONNECTING POWER SOURCES
12. ANTENNA
13. EARPHONE JACK
14. DC JACK (4.5V)
15. RECHARGEABLE BATTERY (INSIDETHE COMPARTMENT,NOT SHOWN)
16. BATTERY COMPARTMENT (THREE AA BATTERIES, NOT INCLUDED)
OPERATION GUIDE
3. Radio operation time depends on the number of turns and
time per turn. For example, approximately 2 turns per second
for 90 seconds will provide 40 - 60 minutes of radio opera-
tion at a medium to low volume level.This can be done with
the radio on or off.
4. Return the crank to the folded position.
Note: (If turning the crank at about 2 turns per second for about
90 seconds does not power the radio for at least 15 minutes,
replace the rechargeable battery pack.)
REPLACINGTHE RECHARGEABLE BATTERY PACK
Replacing the rechargeable battery pack (Ni-MH NS-2/3AA, 3.6V,
600 Mah or equivalent).
1. Remove the battery compartment cover.
2.Lift the battery pack out from the slot and unplug the battery’s
pack connector.
3.Insert the new battery packs plug into the socket; then place
the battery into the slot.
4. Replace the compartment cover.
1. Select the power source:
Using the Dynamo Power: Rotate the crank until the
rechargeable pack has been charged if you want to power the
radio using the generator, then switch the power selector to
“DYNAMO” position. or
Using the batteries or DC socket: Remove the battery
compartment, install threeAA batteries into the compartment
following the diagram on the back of the battery door.To
power the radio using the batteries or DC input socket, switch
the power selector to “BATT/ADAPTOR”.
Note: If the DC-4.5V socket is in use,the battery supply will be
switched off automatically.
8
OPERATION GUIDE
2.Adjust the volume to the desired listening level.
3.For FM reception, switch the“Band Selector” to FM band.
Select the desired radio station by turning theTuning Knob.
4.For AM/SW reception, Select the desired band with the “Band
Selector”, and select the desired station by turning the tuning
knob.
5.For best FM or SW reception, fully extend theTelescopic
Antenna.
6.TheAM band uses a built-in directional ferrite bar antenna.You
can rotate the aerial by turning the radio itself for the best
reception.
7.To turn the radio off, select the“Power Off”from the Power
Selector.
8.Using the emergency touch light:simply turn the “Light”switch
to the ON position.
9.For private listening, insert the earphone plug into the Earphone
jack “Ear”.The built-in speaker will be switched off automati-
cally, when your earphone has been plugged in the jack.
PRECAUTIONS
1. Do not drop and keep away from fire.
2. Do not use abrasive powders to clean the cabinet.Wipe it
with a soft cloth moistened with a mild soap and water
solution.
3. Do not leave the unit in a location near heat sources, or in a
place subject to direct sunlight, excessive dust or mechanical
shock.
4. Do not use old and new batteries together or different brands
and types together.
5.Always remove the batteries from the radio when it is not
going to be used for a long time.This will prevent the
batteries from leaking inside the battery compartment.
9
CONNECTING POWER SOURCES