GSC LSOPT7 User manual

1
GSC International
Phone: 417.374.7431
Fax: 417.374.7442
Toll Free: 888.756.4592
service@gosciencecrazy.com
2076 James River Court
Nixa, Missouri 65714
Introduction
Lasers are an ideal tool for demonstrating the various behaviors of
light. They differ from light sources like light bulbs or the sun, which
produce light of many different wavelengths and in all directions,
because their wavelengths are spatially coherent, essentially meaning
that the individual wavelengths in the laser are focused tightly
into a narrow beam. This quality of lasers makes them ideal for
demonstrating behaviors of light such as reection and refraction.
Reection describes light when it bounces off o f a surface, and
refraction describes light when it passes through a new material
causing it to change its speed and direction.
This kit will allow you to visually explore reection and refraction using a laser box that can produce a single beam,
three parallel beams, or ve parallel beams .
Laser Optics Kit
#LSOPT7
Warning:
•Not a toy; use only
in a laboratory or
educational setting.
•California Proposition
65 Warning: This product
can expose you to chemicals including nickel,
lead, and styrene, which are known to the
State of California to cause cancer, birth
defects, or other reproductive harm. For more
information go to www.P65Warnings.ca.gov.

2
Components
1. Storage Case
2. Laminated Protractor and Ruler
3. Magnetic Protractor and Ruler
4. Quick Reference Sheet
5. Laser Ray Box
6. Refraction Tank (60mm)
7. Cleaning Cloth
8. Mirror
9. Bi-convex Acrylic Shape
10. Isosceles Triangle Acrylic Shape
11. Rectangular Acrylic Shape
12. Power Cord
13. Bi-concave Acrylic Shape
14. Semi-circle Acrylic Shape
15. Trapezoid Acrylic Shape
1 2
6
9
13
3
8
11
7
15
10
14
5
12
4

3
How to Use
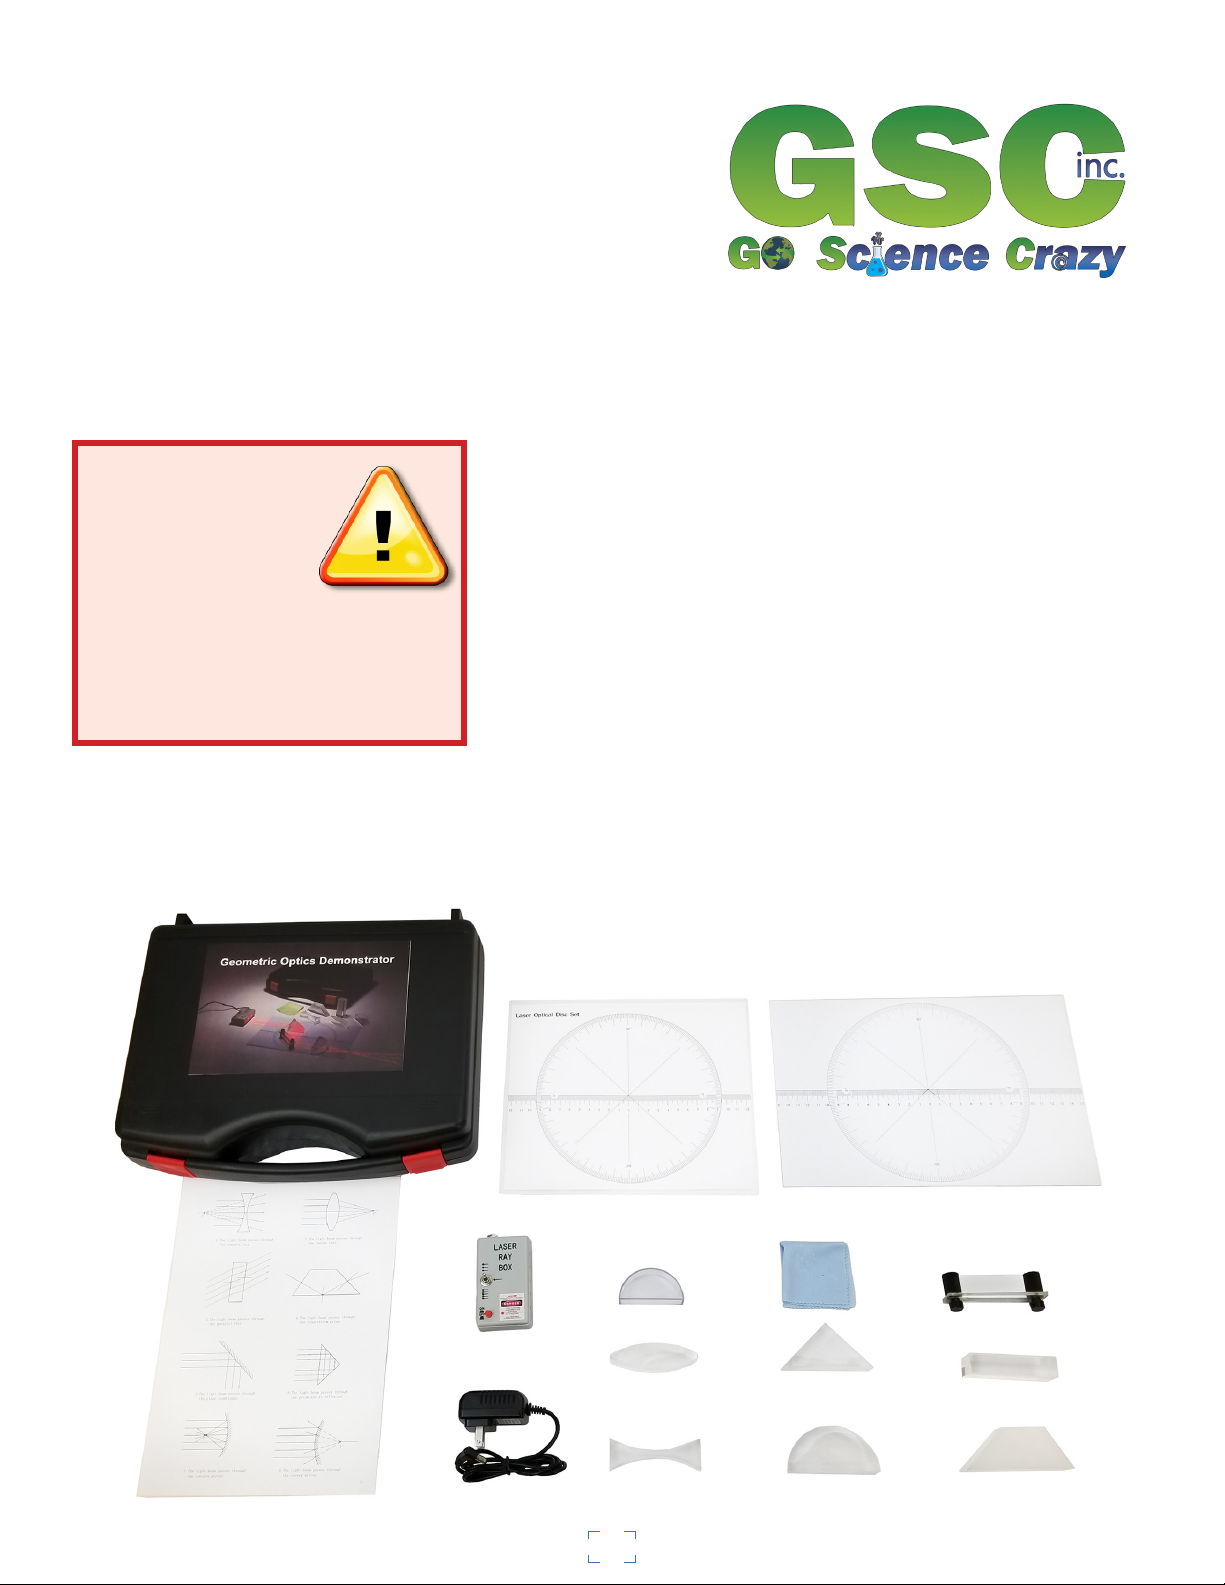
Your laser optics kit contains a variety of components that you can use to experiment. Each piece in the kit can
be used in combination with others to manipulate your lasers. Page 2 of this guide will be referenced to call out
each piece when necessary. How you use your kit is up to your imagination, but the following instructions will
provide you with a baseline understanding of each piece’s use:
Using Your Laser Ray Box
1. Gather your laser ray box (#5) and its power cord (#12).
2. Plug your power cord into a wall outlet, and then plug its other end into to port on your laser ray box.
3. Press the small red switch in the bottom left corner of the face of the box to turn it on. (Caution: Pay attention
when turning your laser ray box on to make sure it is not pointing in the direction of anyone’s eyes. Lasers can
cause damage to eyes.)
4. Use the silver toggle switch on the box to choose how many lasers your box produces. The upright, center
position of the switch will produce a single laser from the middle of the box. When the switch is toggled up
towards the top of the box, the middle three lasers will turn on. When it is toggled down towards the bottom
of the box, all ve lasers will turn on. All lasers on the box are parallel and equally spaced apart. Using the single
beam will allow you to easily measure specic angles of refraction and reection. The multi-laser settings are
useful for visually comparing the paths the lasers take when they come into contact with different shapes and
angles.
Using You Acrylic Shapes
1. Chose which shape(s) (#6, #9, #10, #11, #13, #14, #15) you wish to use to obstruct your laser’s path.
2. Clean your shape(s) with your cleaning cloth (#7) to make sure any smudges and dirt don’t affect your lasers.
3. Place your shape down onto your workstation with its frosted side in contact with the table. This will allow you
to see the laser pass through the shape.
Using Your Mirror
1. Decide how you want to congure your kit’s exible mirror (#8). Using the two posts on either side of the
mirror, you can choose whether you want a at reecting surface, a concave reecting surface, or a convex
reecting surface. For a at surface, make sure the notches in the posts that hold your mirror are facing each
other, and then tighten the mirror into position using the tightening screws on the underside of the posts. For a
concave or convex surface, twist the posts until the notches on the posts both angle upwards so that the mirror
held between them has an even curve, and then tighten the screws on the posts. (Note: Do not bend your
mirror too harshly, as you can cause permanent damage to it.)
2. Clean your mirror with your cleaning cloth (#7) to make sure any smudges and dirt don’t affect your lasers.
Experimenting with Your Mirror and Shapes
1. Turn your laser box on. Determine if you will be measuring specic angles or comparing laser paths in relation
to where they come in contact with the shape(s) you chose.
2. Use your quick reference sheet (#4) to help you determine how you want to watch your laser(s) behave
according to the obstructions you place in front of them.
3. Experiment with using multiple shapes and your mirror to see what paths you can make your laser(s) take.
4. Place your protractors and rulers (#2 and #3) beneath your shapes if you wish to measure the effects different
shapes have on your lasers’ paths.

4
How to Measure Refractive Indices with Snell’s Law
Your kit, in addition to being a great tool for visualizing reflection and refraction, is also equipped to teach the
principle behind refraction known as Snell’s Law.Refraction is the change in the direction of a wave due to it
changing phase velocity when passing through a new material. This phenomena takes place with any waves passing
through two different media. It is accurately measured and predicted by Snell’s Law, which mathematically links
the indices of refraction of the two substances a wave passes through with the angles of incidence and of
refraction. Below you will read how to use your kit to learn this principle:
1. Locate your semi-circle acrylic shape (#14) for this experiment. This shape will allow you to nd the refractive
index of the acrylic used in your kit.
2. Place the midpoint of the at edge of your shape onto the center of one of your kit’s protractors.
3. Turn your laser ray box on with it set to project a single laser beam.
4. Using the illustration below as a guide, shine your single laser beam onto the midpoint of the at edge of your
shape.
5. Calculate the refractive index of the acrylic in your shape (n2) using Snell’s Law.
6. Once you have determined the refractive index of the acrylic, you can conrm Snell’s Law by calculating the
angle of refraction using a different angle of incidence than the one you used in step 4 to predict the path the
laser before actually shining the beam through the shape.
7. Locate your refraction tank (#6) to use place of your semi-circle shape. This tank can be lled with any uid in
order to measure its refractive index. When empty, it can be used to test the refractive index of air.
8. Repeat steps 4 through 7 using your refraction tank lled with the uid of your choosing.
Snell’s Law
•n1=Refractive Index (1)
•n2=Refractive Index (2)
•θ1=Angle of Incidence
•θ2=Angle of Refraction
Other GSC Science Education Product manuals
Popular Science Education Product manuals by other brands

KOKEN
KOKEN Maternity Model Type II instruction manual

3B SCIENTIFIC
3B SCIENTIFIC 1009934 instruction manual

Educational Insights
Educational Insights GeoSafari Jr. Kidscope Instruction guide

Assan
Assan GA-250 quick start guide

KOKEN
KOKEN LM-060 instruction manual

Horizon Educational
Horizon Educational EDUSTAK JUNIOR user manual