manuals.online logo
Brands
  1. Home
  2. •
  3. Brands
  4. •
  5. GSi
  6. •
  7. Industrial Equipment
  8. •
  9. GSi PNEG-728 Instruction Manual

GSi PNEG-728 Instruction Manual

1
Autoflow Operation
1
Autoflow Operation
PNEG-728
Autoflow Operation
2
This page was left blank intentionally.
3
Autoflow Operation TABLE OF CONTENTS
Roof Damage Warning and Disclaimer.............................................................................4
Safety.............................................................................................................................5
Safety Precautions........................................................................................................6
Safety Sign-Off Sheet...................................................................................................7
Electrical Power Supply................................................................................................8
Electronic Monitoring Control System..............................................................................9
Dryer Control Panel..............................................................................................10
Set-Up Standard...................................................................................................14
Set-Up Extended...................................................................................................15
Fill System Control Box..............................................................................................18
Error Messages.............................................................................................................20
Pre-Season Checks......................................................................................................24
Top Dry Autoflow Theory of Operation.....................................................................27
Start Up Procedure......................................................................................................29
TopDry Autoflow Drying Rates for Shelled Corn......................................................32
TopDry Batch Drying Rates for Shelled Corn............................................................33
Warranty.....................................................................................................................34
Autoflow Operation
4
Roof Damage Warning and Disclaimer
WARNING! BE ALERT!
Personnel operating or working
around electric fans should read this
manual. This manual must be
delivered with the equipment to its
owner. Failure to read this manual
and its safety instructions is a
misuse of the equipment.
The symbol shown is used to call your
attention to instructions concerning
your personal safety. Watch for this
symbol; it points out important safety
precautions. It means "ATTENTION",
"WARNING", "CAUTION", and
"DANGER". Read the message and
be cautious to the possibility of per-
sonal injury or death.
Safety Alert Symbol
GSI DOES NOT WARRANT ANY ROOF DAMAGE
CAUSED BY EXCESSIVE VACUUM OR INTER-
NAL PRESSURE FROM FANS OR OTHER AIR
MOVING SYSTEMS. ADEQUATE VENTILATION
AND/OR "MAKEUP AIR" DEVICES SHOULD BE
PROVIDED FOR ALL POWERED AIR HANDLING
SYSTEMS. GSI DOES NOT RECOMMEND THE
USE OF DOWNWARD FLOW SYSTEMS (SUC-
TION). SEVERE ROOF DAMAGE CAN RESULT
FROM ANY BLOCKAGE OF AIR PASSAGES.
RUNNING FANS DURING HIGH HUMIDITY/
COLD WEATHER CONDITIONS CAN CAUSE AIR
EXHAUST OR INTAKE PORTS TO FREEZE.
Thank you for choosing a Top Dry Series Autoflow.
It is designed to give excellent performance and ser-
vice for many years.
This manual describes the installation for all
standard production Top Dry single fan, multi-fan
and Heater Control units. Different models are avail-
able for liquid propane or natural gas fuel supply,
with either single-phase 230 volt, or three-phase 208,
220, 380, 460 or 575 volt electrical power.
The principal concern of The GSI Group, Inc.
("GSI") is your safety and the safety of others asso-
Fan/Heater Installation & Operating Instructions
SAFETY
As owner and/or operator, it is your responsi-
bility to know what requirements, hazards and pre-
cautions exist, and to inform all personnel associ-
ated with the equipment or who are in the fan area.
Avoid any alterations to the equipment. Such al-
terations may produce a very dangerous situation,
where serious injury or death may occur.
ciated with grain handling equipment. This manual
is written to help you understand safe operating pro-
cedures and some of the problems that may be en-
countered by the operator or other personnel.
5
Autoflow Operation
The GSI Group Inc. recom-
mends contacting your local
power company, and having a
representative survey your instal-
lation so the wiring is compatible
with their system, and adequate
power is supplied to your unit.
Safety decals should be read
and understood by all people in
the grain handling area. The ro-
tating blade, fire warning decals
and voltage danger decal must be
displayed on the fan can. The bot-
tom right decal should be present
on the inside bin door cover of
the two-ring door, 24" porthole
door cover and the roof manway
cover.
If a decal is damaged or is
missing,contact:
The GSI Group Inc.
1004 E. Illinois St.
Assumption, IL 62510
217-226-4421
A free replacement will be sent to
you.
SAFETY
Autoflow Operation
6
DECAL PLACEMENT
7
Autoflow Operation
1. Read and understand the operating manual before trying to operate the
dryer.
2. Power supply should be OFF for service of electrical components. Use
CAUTION in checking voltage or other procedures requiring power to
be ON.
3. Check for gas leaks at all gas pipe connections. If any leaks are de-
tected, do not operate the dryer. Shut down and repair before further
operation.
4. Never attempt to operate the dryer by jumping or otherwise bypassing
any safety devices on the unit.
5. Set pressure regulator to avoid excessive gas pressure applied to burner
during ignition and when burner is in operation. Do not exceed maxi-
mum recommended drying temperature.
6. Keep the dryer clean. Do not allow fine material to accumulate in the
plenum or drying chamber.
7. Use CAUTION in working around high speed fans, gas burners, augers
and auxiliary conveyors which START AUTOMATICALLY.
8. Do not operate in any area where combustible material will be drawn into
the fan.
9. Before attempting to remove and reinstall any propeller, make certain to
read the recommended procedure listed within the servicing section of
the manual.
10. Clean grain is easier to dry. Fine material increases resistance to airflow
and requires removal of extra moisture.
This product is intended for the use of grain handling only. Any other
use is considered a misuse of the product.
Some edges of the product components can be sharp. It is recommended
that each component of this product be examined to determine if there
are any safety considerations to be taken. Any and all necessary personal
protective equipment should be worn at all times when handling, assem-
bling, installing and operation of the product and/or components.
Guards are removed for illustration purpose only. All guards must be
in place before/during operation.
Use Caution in the
Operation of this
Equipment
The design and manufacture of this
dryer is directed toward operator
safety. However, the very nature of
a grain dryer having a gas burner,
high voltage electrical equipment
and high speed rotating parts, does
present a hazard to personnel which
cannot be completely safeguarded
against without interfering with ef-
ficient operation and reasonable ac-
cess to components.
Use extreme caution in working
around high-speed fans, gas-fired
heaters, augers and auxiliary con-
veyors, which may start without
warning when the dryer is operat-
ing on automatic control.
READ THESE INSTRUCTIONS
BEFORE OPERATION AND SERVICE
SAVE FOR FUTURE REFERENCE
Continued safe, dependable opera-
tion of automatic equipment de-
pends, to a great degree, upon the
owner. For a safe and dependable
drying system, follow the recom-
mendations within this manual, and
make it a practice to regularly in-
spect the operation of the unit for
any developing problems or unsafe
conditions.
Take special note of the safety pre-
cautions listed above before at-
tempting to operate the dryer.
KEEP THE DRYER CLEAN
DO NOT ALLOW FINE
MATERIAL TO ACCUMULATE
IN THE PLENUM CHAMBER
OR SURROUNDING THE
OUTSIDE OF THE DRYER
SAFETY PRECAUTIONS
Autoflow Operation
8
Date Employers Signature Employee
________________________________________________________________________________________________________________________
_________________________________________________________________________________________________________________________
________________________________________________________________________________________________________________
___________________________________________________________________________________________________________________________
________________________________________________________________________________________________________________________
_____________________________________________________________________________________________________________________________
__________________________________________________________________________________________________________________________
_______________________________________________________________________________________________________________________________
_____________________________________________________________________________________________________________________________
______________________________________________________________________________________________________________________________
___________________________________________________________________________________________________________________________
______________________________________________________________________________________________________________________
_________________________________________________________________________________________________________________________
_____________________________________________________________________________________________________________________
______________________________________________________________________________________________________________________
_________________________________________________________________________________________________________________________
______________________________________________________________________________________________________________________
_______________________________________________________________________________________________________________________
______________________________________________________________________________________________________________________
______________________________________________________________________________________________________________________
_____________________________________________________________________________________________________________________
________________________________________________________________________________________________________________________
______________________________________________________________________________________________________________________
_____________________________________________________________________________________________________________
_______________________________________________________________________________________________________________________
_____________________________________________________________________________________________________________________
___________________________________________________________________________________________________________________
SAFETY SIGN-OFF SHEET
9
Autoflow Operation
Power Supply
An adequate power supply and proper wiring are impor-
tant factors for maximum performance and long life of
the dryer. Electrical service must be adequate enough to
prevent low-voltage damage to motors and control cir-
cuits (see Electrical Load Information). In 220V 1-phase
and 220V 3-phase systems, a separate neutral wire is
required for the 120V heater circuit, and should be
connected to terminal #1 in the master heater. Do not
run in conduit with motor power lines.
It is necessary to know the distance from the unit to the
available transformer, and the horsepower of your fan
unit. Advise the service representative of your local power
supplier that an additional load will be placed on the line.
Each fan motor should be wired through a fuse or circuit
breaker disconnect switch. Check on KVA rating of trans-
formers, considering total horsepower load. The power
supply wiring, main switch equipment and transformers
must provide adequate motor starting and operating volt-
age. Voltage drop during motor starting should not ex-
ceed 14% of normal voltage, and after motor is running
Transformer and Wiring Voltage Drop
ELECTRICAL POWER SUPPLY
Dave, any ideas what to put here,if anything?
at full speed, it should be within 8% of normal voltage.
Check Electrical Load Information for HP ratings and
maximum amp loads to properly size wire and fusing
elements. Standard electrical safety practices and codes
should be used. (Refer to National Electrical Code Stan-
dard Handbook by National Fire Protection Association).
It is very important that a Machine To Earth Ground
Rod be installed at the fan. This is true even if there is
a ground at the pole 15 feet (4.572 meters) away. Place
the ground rod that comes standard, within 8 feet
(2.438 meters) of the dryer, and attach it to the dryer
control panel with at least a #6 solid, bare, copper
ground wire and the clamp provided. The grounding
rod located at the power pole will not provide adequate
grounding for the dryer. The proper grounding will
provide additional safety in case of any short and will
ensure long life of all circuit boards, and the ignition
system. The ground rod must be in accordance with
local requirements.
Machine to Earth Grounding
Autoflow Operation
10
CONTROL SYSTEM
Electronic Monitoring Control System
11
Autoflow Operation
Dryer Control Panel Featuring the
Electronic Monitoring Control System
The control panel provides easy access to gauges
and controls, and the illuminated switches provide a
quick reference for every operating function. The
patent pending Electronic Monitoring Control
System is a computerized control system that gives
instant information regarding dryer operation.
Moisture Control Thermostat
This electronic thermostat controls the moisture
level of discharged grain by sensing grain column
temperature using the four (4) RTD temperature
sensors located in the drying chamber. The moisture
control thermostat indicates the current grain
temperature in the drying chamber with LEDs. The
grain temperature setpoint is set on the moisture
control thermostat. In the Autoflow mode, when the
grain temperature reaches the grain temperature
setpoint, and the dry timer has reached zero, the
dryer will dump the third driest portion of grain
from the drying chamber into the storage chamber.
In the Autobatch mode the dryer will dump all of the
grain into the storage chamber.
Moisture Control Switch
This switch turns the power on or off to the moisture
control thermostat. When placed in the on
position, the dryer will not enter the dump cycle
until the grain temperature has reached the grain
temperature setpoint on the moisture control thermo-
stat and the dry timer has reached zero. When
placed in the on position, the moisture control
switch lights up when the grain temperature is below
the grain temperature set point on the moisture
control thermostat. When placed in the off
position, the dryer ignores the grain temperature and
operates strictly off the dry timer. When placed in
the off position, the moisture control switch does
not light up.
Control Power Switch
The power to the Electronic Monitoring Control
System is turned on or off with the control power
CONTROL SYSTEM
switch. The switch lights up when placed in the
on position. If the switch is placed in the on
position, and the light does not light up, make sure
that the emergency stop switches located on the
Autoflow control box is pulled out.
24-Volt Power Switch
This switch turns the power on or off to the actuator
control box. The switch lights up when placed in the
on position. If the switch is placed in the on
position, and the light does not light up, make sure
that the emergency stop switch located on the
actuator control box is pulled out (1997 model only).
Aeration Fan Switch
This switch controls the operation of the aeration fan
located at the bottom of the bin. The switch lights
up when the aeration fan comes on. When placed in
the auto position, the aeration fan starts and stops
with the main drying fans. When placed in the off
position, the aeration fan will not run. When placed
in the on position, the aeration fan comes on when
the dryer is running.
Load Auger Switch
This switch controls the operation of the fill
system(s) that load grain into the drying chamber.
The switch lights up when the fill system(s) are
running. When placed in the auto position, the fill
system(s) start and stop automatically depending on
the level of grain relative to the drying chamber high
level rotary switch. When operating in the
Autobatch mode, the fill system(s) will shut off 2/3
(two-thirds) of the way through the dry cycle, even
if grain has not reached the drying chamber high
level rotary switch. When placed in the off
position ,the fill system(s) will not run. When
placed in the on position, the fill system(s) come
on and stay on when the dryer is running.
Fan Switch
This switch controls the operation of the main
drying fan(s). The switch lights up when the
airswitch located in the sidewall next to the master
Autoflow Operation
12
Heater Switch
This switch controls the operation of the
burner(s). The switch lights up when the burner is
on. When the burner is on, small lights above and
below the heater switch indicate if the burner(s)
are in high fire or low fire. In the Autoflow mode,
when placed in the auto position, the burner(s)
fire when grain reaches the drying chamber low
level rotary switch and do not stop until the dryer
shuts down or is stopped manually by pressing the
stop switch. In the Autobatch mode, the burner(s)
shut off automatically in the cool and dump cycle.
When placed in the off position, the burner(s)
will not fire. When placed in the on position,
the burner(s) fire anytime the main drying fan(s)
are running.
drying fan senses an increase in static pressure and
closes. In the Autoflow mode, when placed in the
auto position, the main drying fan(s) start when
grain reaches the drying chamber low level rotary
switch and do not stop until the dryer shuts down
or is stopped manually by pressing the stop switch.
In the Autobatch mode, the main drying fan(s)
shut off automatically in the dump cycle. When
placed in the off position, the main drying fan(s)
will not run. When placed in the on position, the
main drying fan(s) come on and stay on when the
dryer is running.
Fan Switch
This switch controls the operation of the main
drying fan(s). The switch lights up when the
airswitch located in the sidewall next to the master
drying fan senses an increase in static pressure and
closes. In the Autoflow mode, when placed in the
auto position, the main drying fan(s) start when
grain reaches the drying chamber low level rotary
switch and do not stop until the dryer shuts down
or is stopped manually by pressing the stop switch.
In the Autobatch mode the drying fan(s) will not
run. When placed in the on position, the main
drying fan(s) come on and stay on when the dryer
is running.
Dryer Control Panel, continued
Dump Switch
This switch controls the operation of the linear
actuator housed in the actuator control box. The
switch lights up when the linear actuator is mov-
ing. When placed in the manual close position,
the linear actuator in the actuator control box
retracts, raising the dump chutes. When placed in
the auto position, the linear actuator extends at
the beginning of the dump cycle- lowering the
dump chutes, and retracts at the end of the dump
cycle, raising the dump chutes. When placed in
the manual open position, the linear actuator
extends, lowering the dump chutes. This switch is
disabled when the dryer is running. The dryer
must be stopped to manually dump.
Dry And Hold Switch
When placed in the on position, the grain in the
drying chamber will not be dumped into the
storage chamber at the end of the dry cycle, and
the dryer will stop. This switch can be used to
hold the last batch of grain in the drying chamber
and stop the dryer. When placed in the off
position, the dryer will operate normally. The
switch lights up when placed in the on position.
Dryer Power Start Switch
This switch starts and operates the dryer based on
switch settings. The switch lights up when the
dryer is running. The dump switch is disabled after
this switch has been pushed.
Dryer Power Stop Switch
This switch stops all dryer functions. If an auto-
matic dryer shutdown occurs, first determine and
correct the cause of the shutdown. Press the dryer
power stop switch to reset the dryer before starting.
CONTROL SYSTEM
13
Autoflow Operation CONTROL PANEL
Autoflow Operation
14
CONTROL SYSTEM
Electronic Monitoring Control System
15
Autoflow Operation
Electronic Monitoring
Control System
The Electronic Monitoring Control System
controls all timing functions and safety circuit
checks. It is designed to simplify dryer operation
by providing printed messages and warnings on its
liquid crystal display (LCD).
Turning On The Electronic Monitoring
Control System
Turn the control power switch to the on
position. The monitor will display a copyright
message, software version number, total running
time in hours and minutes and the model number,
and the serial number and current time and date.
When the serial number and current time and date
are displayed, press the reset button to activate the
controller and enter the main drying screen.
Setting The Dry, Cool And Unload Timers
These switches are used to set the dry, cool
and dump cycle times. The current settings on
these timers are displayed directly above their timer
button. To change the setting of these timers do the
following:
1) Press the dry, cool or unload timer
button.
2) Press the modify button.
3) Press the increase or decrease button to
adjust the settings.
4) Press the enter button.
5) To enter the new value into memory
immediately, press the reset button.
During operation, the remaining time on
each timer is displayed on the screen. If the power
goes out or the dryer is stopped, these times are
saved by the controller. When the dryer is restarted,
the timers will continue timing down. The timers
will return to their initial settings by pressing the
reset button. The cool timer is not used in an
Autoflow system.
CONTROL SYSTEM
Setting The Aux. 1 Timer
The value set on the aux. 1 timer acts as a
buffer to allow grain to fall away from the drying
chamber low level rotary switch after the drying
fans start without giving an error. When grain
reaches the drying chamber low level rotary
switch, the drying cycle starts (if the fan switch is
placed in the auto or on position) and the aux.
1 timer begins to time down. If grain falls away
from the drying chamber low level rotary switch
before the time on the aux 1 timer reaches zero, no
error is given and the dryer continues in the drying
cycle. If grain falls away from the drying chamber
low level rotary switch after the aux. 1 timer
reaches zero, a drying chamber no grain error is
given and the dryer shuts down. The aux. 1 timer
should be set long enough so that the fill system(s)
have sufficient time to make up the grain that falls
away from the drying chamber low level rotary
switch when the fan(s) and heater(s) start; but,
should not be set too long. If the linear actuator
fails to retract, the dump chutes and grain runs
directly from the drying chamber to the storage
chamber without being dried, then the grain would
fall away from the drying chamber low level
rotary switch and a drying chamber no grain error
would be given. If the aux. 1 timer is set too long
and the linear actuator failed to retract, an unac-
ceptable amount of wet grain could flow from the
drying chamber to the storage chamber before a
drying chamber no grain error is given and the
dryer shuts down. The aux. 1 timer is set using
the same procedure as the dry and unload timers,
but the reset button does not need to be pressed to
enter the new values into memory immediately.
Setting the Out of Grain Timer
The value set on the out of grain timer is
the amount of time that grain has to reach the
drying chamber low level rotary switch when the
dryer is refilling after the dump cycle in an
Autobatch system. When the dump cycle is
complete, the out of grain timer begins to count
down. If grain does not reach the drying chamber
low level switch before the out of grain timer
reaches zero, the dryer will give an out of grain
error and shut down. The out of grain timer is not
used in an Autoflow system.
Autoflow Operation
16
Setting the Load Delay
The value set on the load delay is the amount
of time that fill system number two runs after grain
reaches the drying chamber high level rotary switch.
This delay is not used with only one fill system con-
trolled by the Autoflow. The load delay should be set
long enough so that the drying chamber high level
rotary switch is covered with enough grain that the fill
system do not start and stop frequently in the dry cycle
due to settling or shrinkage; but, the load delay should
be set short enough so that grain does not reach the
drying chamber overflow rotary switch. The load
delay is set using the same procedure as the dry and
unload timers, but the reset button does not need to be
pressed to enter the new values into memory immedi-
ately.
Setting the Aux. 1 Delay
In units that the Autoflow controls one fill
system, the value set on the aux. 1 delay is the amount
of time that fill system number one runs after grain
reaches the drying chamber high level rotary switch.
The aux.1 delay should be set long enough so that the
drying chamber high level rotary switch is covered
with enough grain that the fill system does not start and
stop frequently in the dry cycle due to settling or
shrinkage; but, the aux. 1 delay should be set short
enough so that grain does not reach the drying chamber
overflow rotary switch.
In units that the Autoflow controls two fill
systems, the value set on the aux. 1 delay is the amount
of time that fill system number one runs after fill
system number two shuts off. Fill system number one
is the fill system that directly puts grain in the drying
chamber. The aux. 1 delay should be set long enough
so that all grain present in fill system number one is
loaded into the drying chamber before it shuts off.
This will decrease the current required to start fill
system number one the next time the dryer calls for
grain. The aux. 1 delay is set using the same procedure
as the dry and unload timers, but the reset button does
not need to be pressed to enter the new values into
memory immediately.
Setting the Unload Delay
The value set on the unload delay is the
amount of time that both fill system number one
and fill system number two run after grain falls
away from the wet supply rotary switch before the
unit shuts down and gives a wet supply hopper
empty error. In units that the Autoflow controls
only one fill system, the value set on the unload
delay is the amount of time that fill system number
one runs after grain falls away from the wet supply
rotary switch. The unload delay should be set long
enough so that the fill system(s) clean out before
the dryer shuts down; but, should be set short
enough to avoid running the fill system (s) empty
for an excessive amount of time. The unload delay
is set using the same procedure as the dry and
unload timers, both the reset button does not need
to be pressed to enter the new values into memory
immediately.
Setting the Aux. 2 Delay
The aux. 2 delay is not currently being
used.
Viewing operation time and total cycles
The total operation time and total cycles
can be viewed at any time the dryer is in the main
drying screen by pressing the increase button.
Diagnostics Mode-Resetting Batch Counter
The Electronic Monitoring Control System
can perform a self-diagnostic exam. With the dryer
stopped and in the main drying screen, press and
hold down the reset button for several seconds.
After the self-diagnostic exam is complete, the
display will read the results of the exam and will
then give the user the option to reset the batch
counter. The batch counter can be cleared by
pressing the reset button or left as-so by pressing
the enter button. After choosing an option, the user
is taken to the shutdown history retrieval. To view
past shutdowns and the time and date the shutdown
occurred, press the decrease button. Press the enter
button at any time to return to the main drying
screen.
CONTROL SYSTEM
17
Autoflow Operation CONTROL SYSTEM
Set-up Mode
The set-up mode is used to program the
computer with different variables that influence how
the dryer will operate. With the dryer stopped and in
the main drying screen, press the increase and
decrease buttons at the same time to enter the set-up
mode.
1). The first variable to be set is the
number of fill system that are to be con-
trolled by the dryer. Use the increase and
decrease buttons to toggle between one
or two fill systems. Press the enter button
when the number of fill systems displayed
on the screen equals the number of fill
systems that the computer will be control-
ling. If one fill system is selected, only one
fill system will be controlled by the
computer. The aux. 1 delay will be used to
delay the shut off of the fill system after
the drying chamber is full. The load delay
will have no effect on the operation of the
fill system. If two fill systems are selected,
two fill systems will be controlled by the
computer. Both the load delay and the aux.
1 delay are used by the computer to delay
the shut-off of the fill system(s) after the
drying chamber is full.
2). The second variable to set is
whether the drying fan(s) will start with the
drying chamber high level or drying
chamber low level rotary switch. Use the
increase and decrease buttons to toggle
between starting the fan(s) with the high or
low level rotary switch. Press the enter
button when the correct rotary switch is
displayed. In most situations, the fan(s)
should be started with the drying chamber
low level rotary switch. If the drying
chamber high level rotary switch is se-
lected to control the starting of the main
drying fan(s), the dry cycle and main drying
fan(s) will not start until grain reaches the
drying chamber high level rotary switch.
Again, this mode of operation is not
recommended.
3). The third variable to set is the
dryer model. Use the increase and de-
crease buttons to select one of the four
model types that fits your system. The four
models are as follows:
AF2-Autoflow with two main drying fans
AF1-Autoflow with one main drying fans
AB2-Autobatch with two main drying fans
AB1-Autobatch with one main drying fans
Most systems will be either an
Autoflow with one fan or an Autoflow with
two fans. Press the enter button when the
correct model number is displayed.
4). The fourth variable is the current
year. Use the increase and decrease
buttons to select the correct year. Press the
enter button when the correct year is
displayed.
5). The fifth variable is the current
month. Use the increase and decrease
buttons to select the correct month. Press
the enter button when the correct month is
displayed.
6). The sixth variable is the current
day of the month. Use the increase and
decrease buttons to select the correct day of
the month. Press the enter button when the
correct day is displayed.
7). The seventh variable is the current
hour. Use the increase and decrease
buttons to select the correct hour. Press the
enter button when the correct hour is
displayed.
8). The eighth variable is the current
minute. Use the increase and decrease
buttons to select the correct minute. Press
the enter button when the correct minute is
Autoflow Operation
18
displayed.
9). The ninth variable is the airswitch
test. Use the increase and decrease buttons
to toggle between yes or no. If no is
selected, the dryer does not require proof
of airflow before the burner lights. If yes
is selected, the dryer requires proof of
airflow to light the burner. Each time the
dryer control power is shut off, the
airswitch test defaults to yes.
10). The tenth variable is the fan delay.
The fan delay is the delay in seconds
between the starting of the master fan unit
and the slave fan unit. In systems with
220v 1-ph electrical power, the fan delay
should be set at small value, less than 3
seconds. If the fan delay is set too long,
the slave fan could rotate fast enough
backwards to start in a reverse rotation.
Use the increase and decrease buttons to
select the fan delay. Press the enter button
when the correct fan delay is displayed. In
single fan units the fan delay is not appli-
cable.
11). The eleventh variable is the high
flame delay. The high flame delay is the
amount of time the burner remains in low
fire on ignition. In normal operation the
high flame delay is set at one second. Use
the increase and decrease buttons to select
the high flame delay. Press the enter
button when the correct high flame delay
is displayed.
12). The twelfth variable is the status
of the wet grain and drying chamber low
level rotary switches. By pressing the dry
timer switch, the user can directly enter the
shutdown history retrieval. By pressing the
unload timer switch, the status of these two
rotary switches can be altered. Use the
increase and decrease buttons to make the
selection. Press the enter button when the
correct selection is displayed. When the
wet supply test is on, the dryer monitors the
wet supply rotary switch. When the wet
supply test is off, the dryer does not
monitor the wet supply rotary switch. The
computer responds as though there is wet
grain in the wet storage tank. When the
chamber low test is off, the dryer does not
monitor the drying chamber low level
rotary switch. The computer responds as
though there is grain in the drying chamber
against the low level rotary switch. When
the chamber low test is off, the display on
the dryer control panel reads yes at the
grain low level status line.
After the set-up mode is complete
the user is taken directly to the shutdown
history retrieval. To view past shutdowns
and the time and date the shutdown oc-
curred, press the decrease button. Press the
enter button at any time to return to the
main drying screen.
CONTROL SYSTEM
19
Autoflow Operation CONTROL SYSTEM
Autoflow Operation
20
CONTROL SYSTEM

Other GSi Industrial Equipment manuals

GSi DMC Design III Series User manual

GSi

GSi DMC Design III Series User manual

GSi EVO-50 Instructions for use

GSi

GSi EVO-50 Instructions for use

GSi JS500 User manual

GSi

GSi JS500 User manual

GSi 40 Series Instructions for use

GSi

GSi 40 Series Instructions for use

GSi 40 Series User manual

GSi

GSi 40 Series User manual

GSi 2021 User manual

GSi

GSi 2021 User manual

GSi Flex-Flo 220 Guide

GSi

GSi Flex-Flo 220 Guide

GSi Agri-Alert 128 Touch Manual

GSi

GSi Agri-Alert 128 Touch Manual

GSi VersaLoop 8 User manual

GSi

GSi VersaLoop 8 User manual

GSi 40 Series Instructions for use

GSi

GSi 40 Series Instructions for use

GSi Cumberland FLX-4629 User manual

GSi

GSi Cumberland FLX-4629 User manual

GSi PNEG-1828 Installation instructions

GSi

GSi PNEG-1828 Installation instructions

GSi 40 Series User manual

GSi

GSi 40 Series User manual

GSi TopDry User manual

GSi

GSi TopDry User manual

GSi 1200 User manual

GSi

GSi 1200 User manual

GSi PNEG-222 User manual

GSi

GSi PNEG-222 User manual

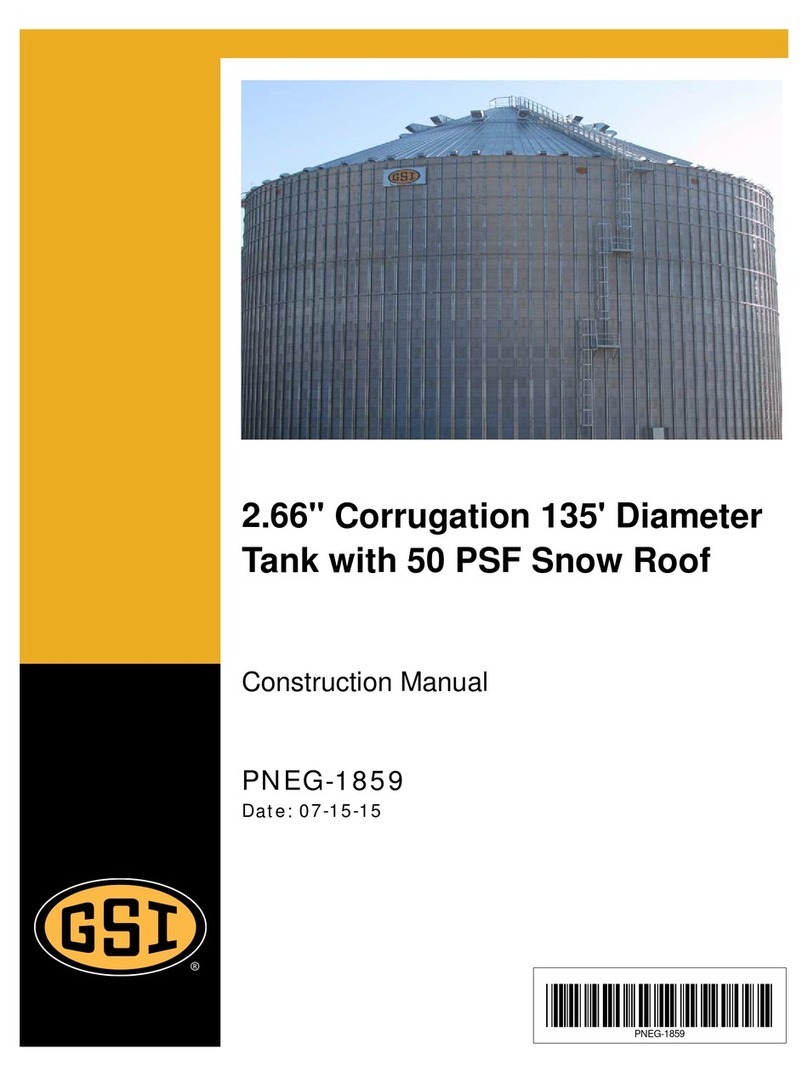
GSi PNEG-1859 Instructions for use

GSi

GSi PNEG-1859 Instructions for use

GSi PNEG-1831 User manual

GSi

GSi PNEG-1831 User manual

GSi PNEG-1162CEX User manual

GSi

GSi PNEG-1162CEX User manual

GSi 2000 Series User manual

GSi

GSi 2000 Series User manual

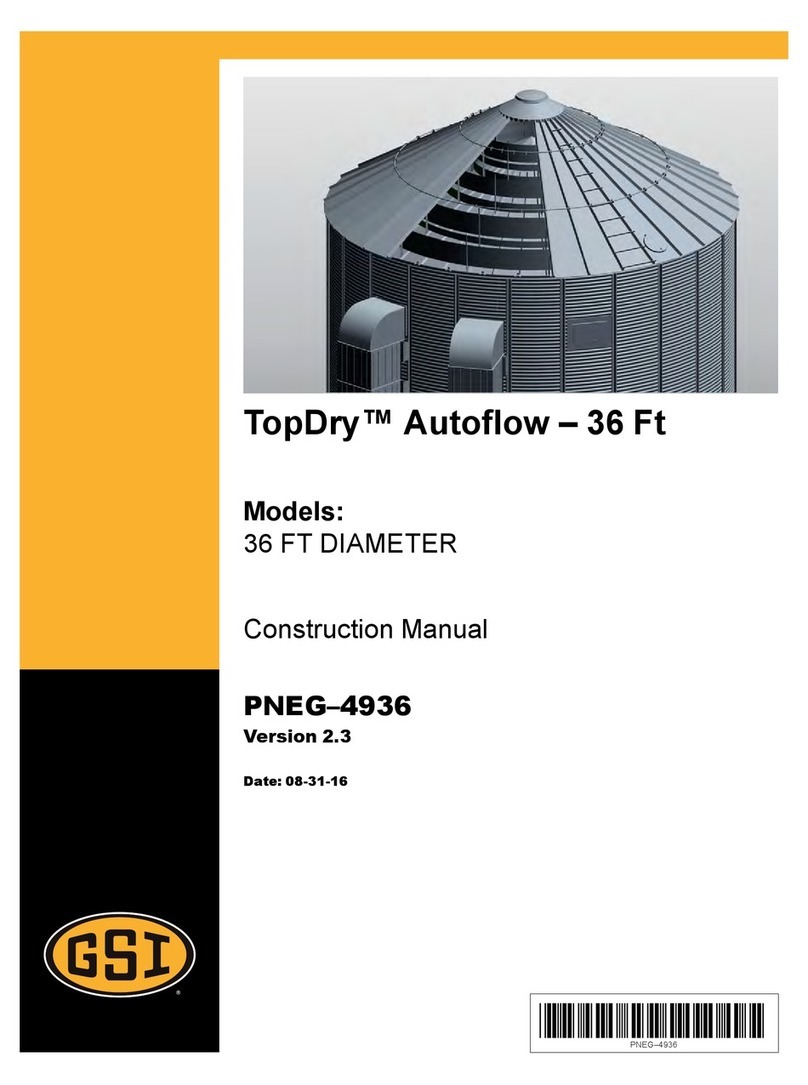
GSi TopDry Autoflow 36 FT DIAMETER Instructions for use

GSi

GSi TopDry Autoflow 36 FT DIAMETER Instructions for use

GSi 40 Series Instructions for use

GSi

GSi 40 Series Instructions for use

GSi PNEG-2286 User manual

GSi

GSi PNEG-2286 User manual

GSi RSG1212GM-X21 User manual

GSi

GSi RSG1212GM-X21 User manual

Popular Industrial Equipment manuals by other brands

ABB HT574306 Operation manual

ABB

ABB HT574306 Operation manual

Eaton Crouse-hinds series operating instructions

Eaton

Eaton Crouse-hinds series operating instructions

Hypertherm Powermax45 XP Field Service Bulletin

Hypertherm

Hypertherm Powermax45 XP Field Service Bulletin

Cooper Tools Cleco SBA-12 Operation & service manual

Cooper Tools

Cooper Tools Cleco SBA-12 Operation & service manual

Aventics MSC Series RE-ASSEMBLY INSTRUCTIONS

Aventics

Aventics MSC Series RE-ASSEMBLY INSTRUCTIONS

Gilson SP-55 operating manual

Gilson

Gilson SP-55 operating manual

ABB HT608705 Operation manual

ABB

ABB HT608705 Operation manual

Wilo Stratos GIGA2.0-I Installation and operating instructions

Wilo

Wilo Stratos GIGA2.0-I Installation and operating instructions

Lennox HP21 installation instructions

Lennox

Lennox HP21 installation instructions

Bühler technologies Smart-Sample-Tube Brief instructions

Bühler technologies

Bühler technologies Smart-Sample-Tube Brief instructions

DuctSox SkeleCore Pull-Tight Cable installation manual

DuctSox

DuctSox SkeleCore Pull-Tight Cable installation manual

Enerpac PAR-K1 instruction sheet

Enerpac

Enerpac PAR-K1 instruction sheet

Romer PROTON II manual

Romer

Romer PROTON II manual

FLO-DYNAMICS BrakeMate Quick start instructions

FLO-DYNAMICS

FLO-DYNAMICS BrakeMate Quick start instructions

Atlas Copco POWER FOCUS 6000 Product instructions

Atlas Copco

Atlas Copco POWER FOCUS 6000 Product instructions

Gervall Overspeed Governor ALJO 2129 Assembly and maintenance instructions

Gervall

Gervall Overspeed Governor ALJO 2129 Assembly and maintenance instructions

JCM GLOBAL VEGA-RC Twin Series Integration guide

JCM GLOBAL

JCM GLOBAL VEGA-RC Twin Series Integration guide

Grizzly H7590 instruction sheet

Grizzly

Grizzly H7590 instruction sheet

manuals.online logo
manuals.online logoBrands
  • About & Mission
  • Contact us
  • Privacy Policy
  • Terms and Conditions

Copyright 2025 Manuals.Online. All Rights Reserved.