Contents
Guide to the Television........................................................................................................................ 4
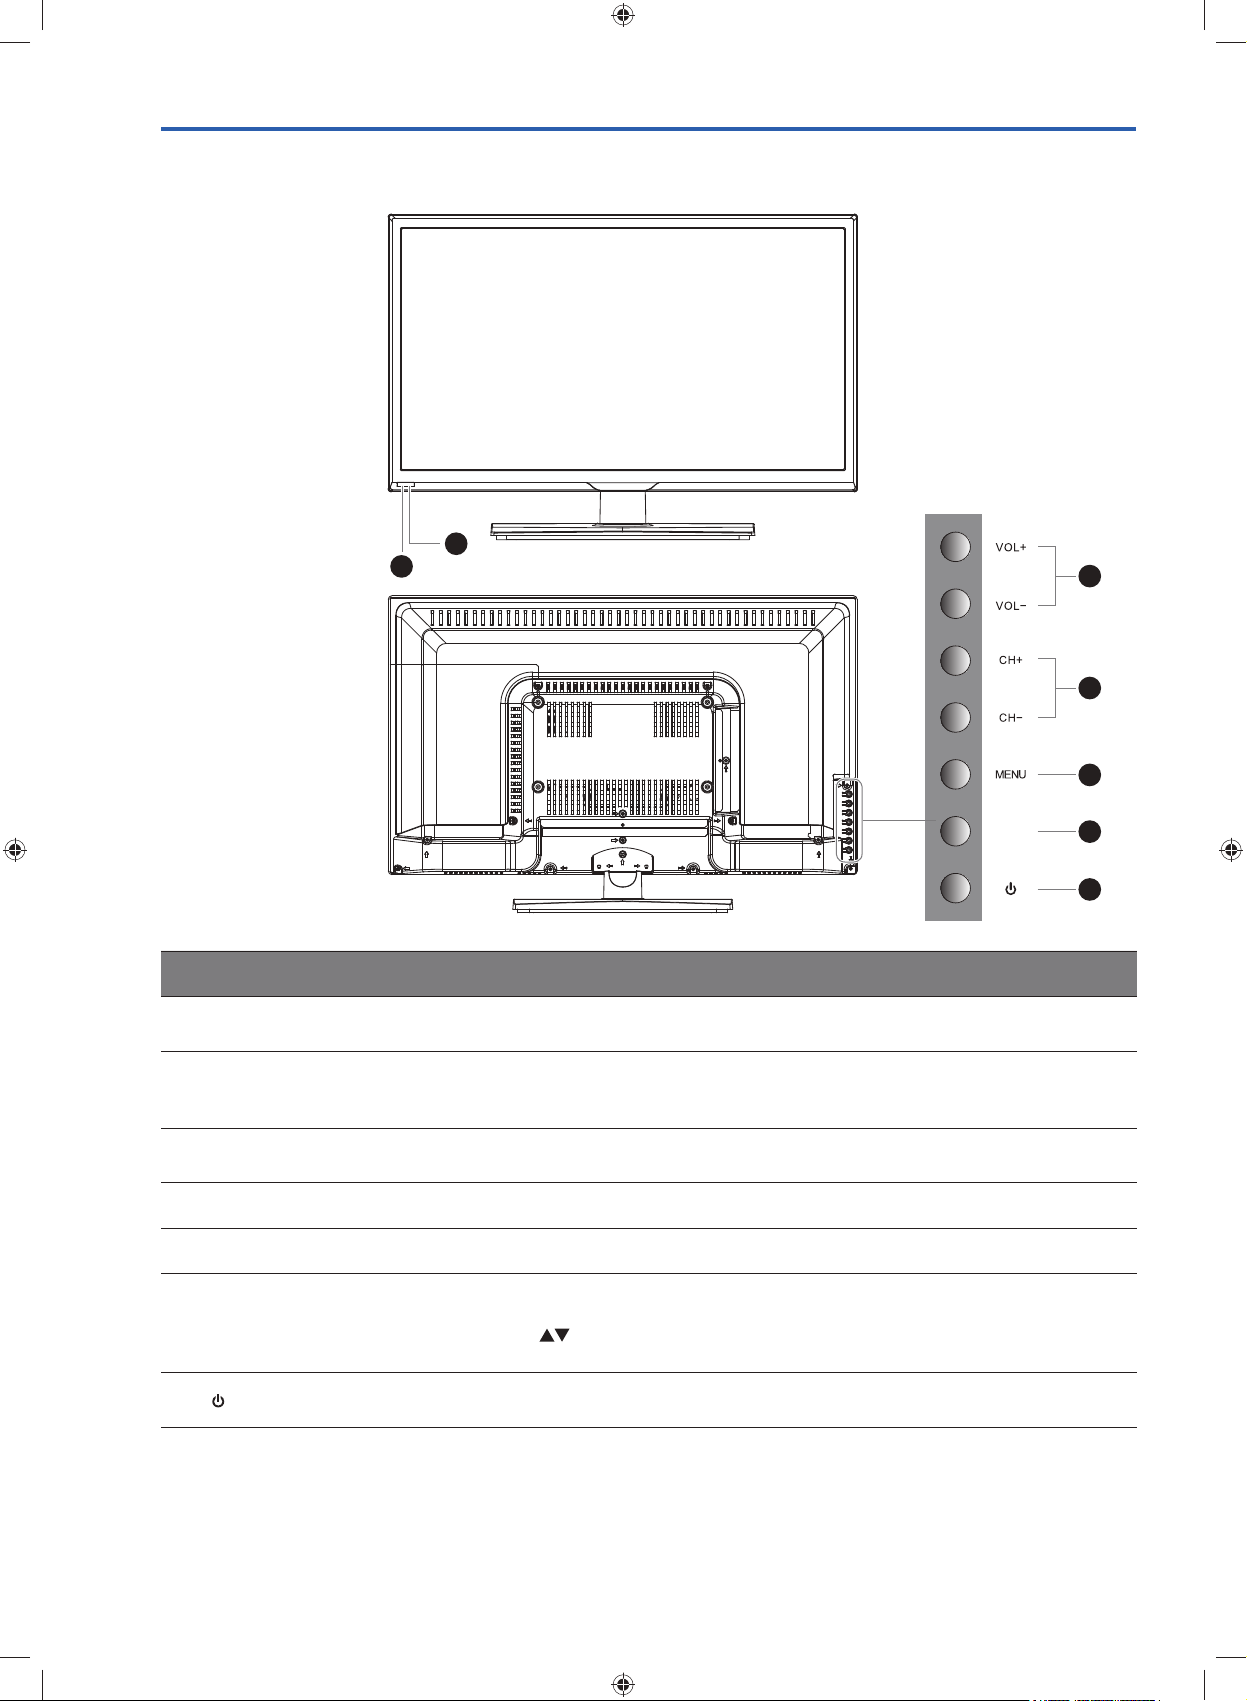
Front / Right Side View and Rear Controls................................................................................................................. 4
Rear View and Sockets ............................................................................................................................................5
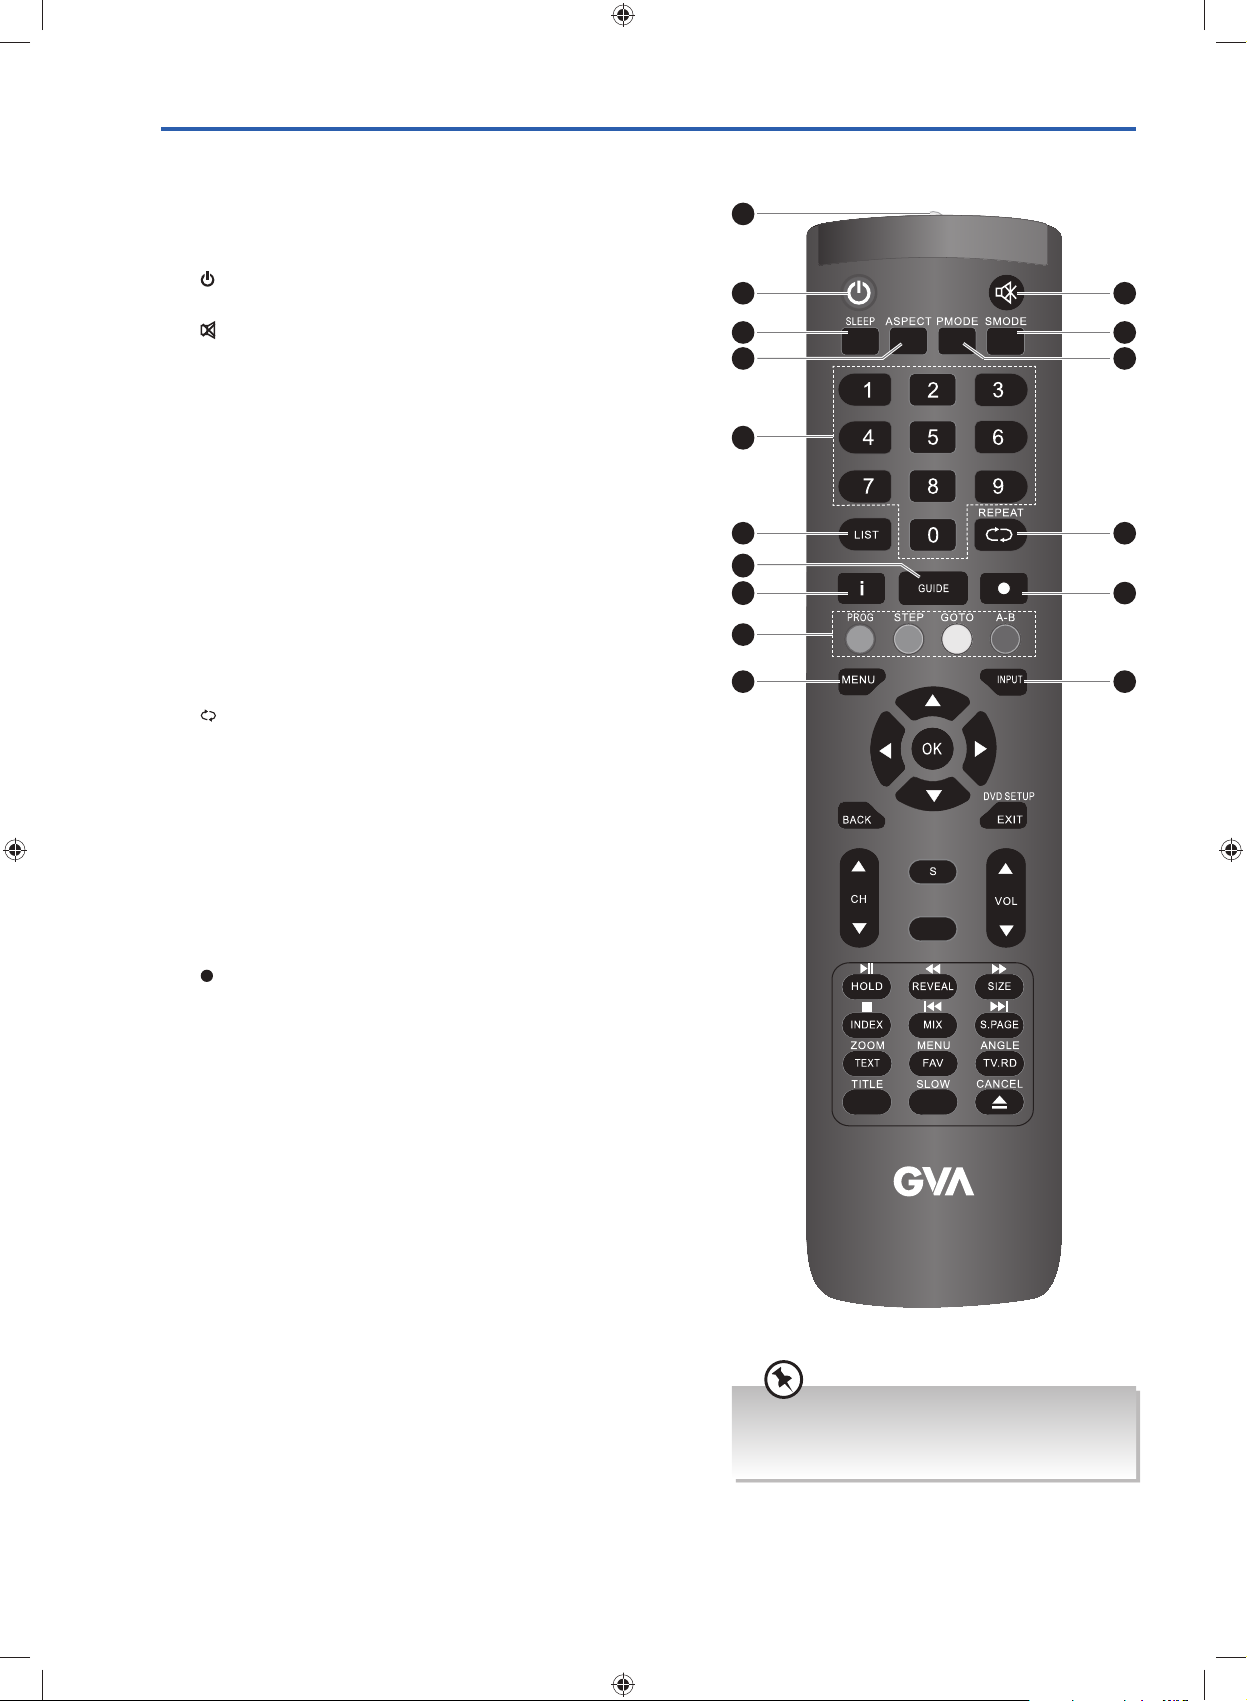
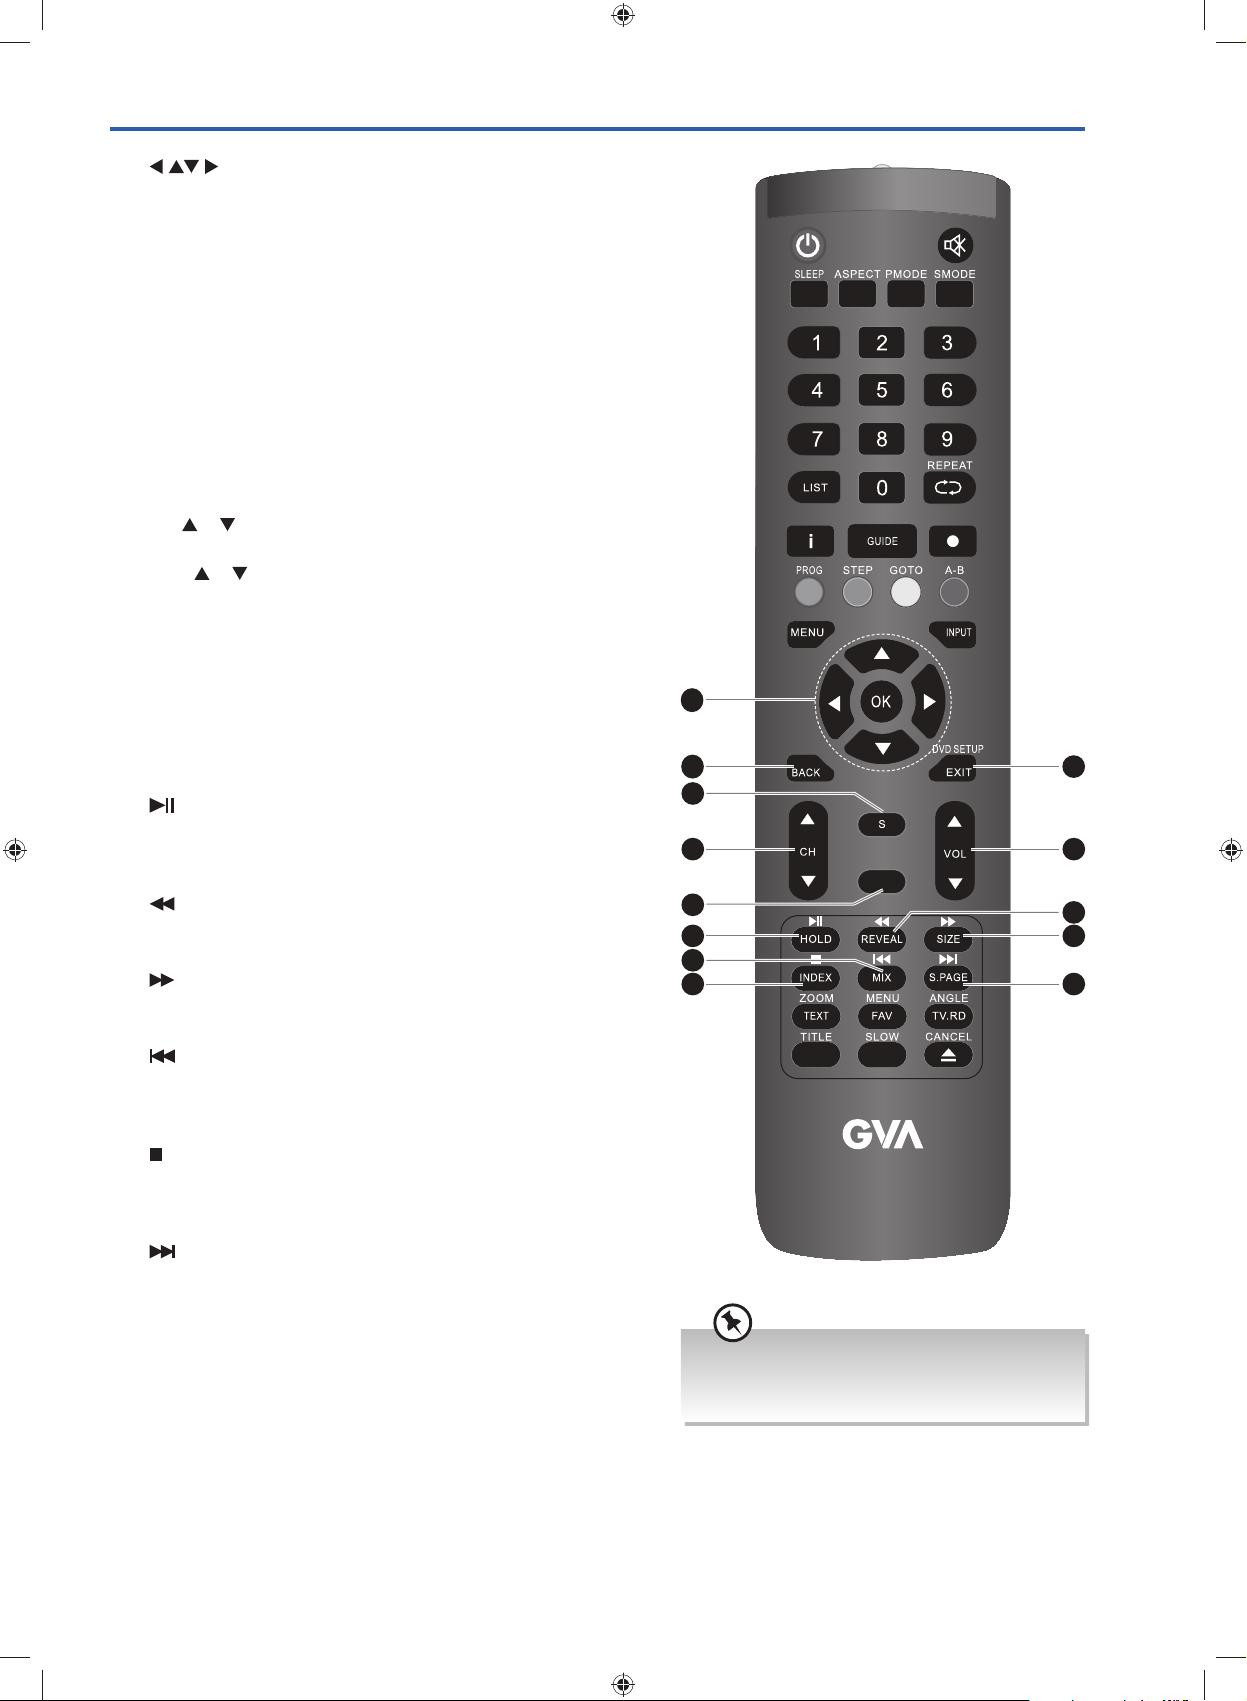
Remote Control .......................................................................................................................................................6
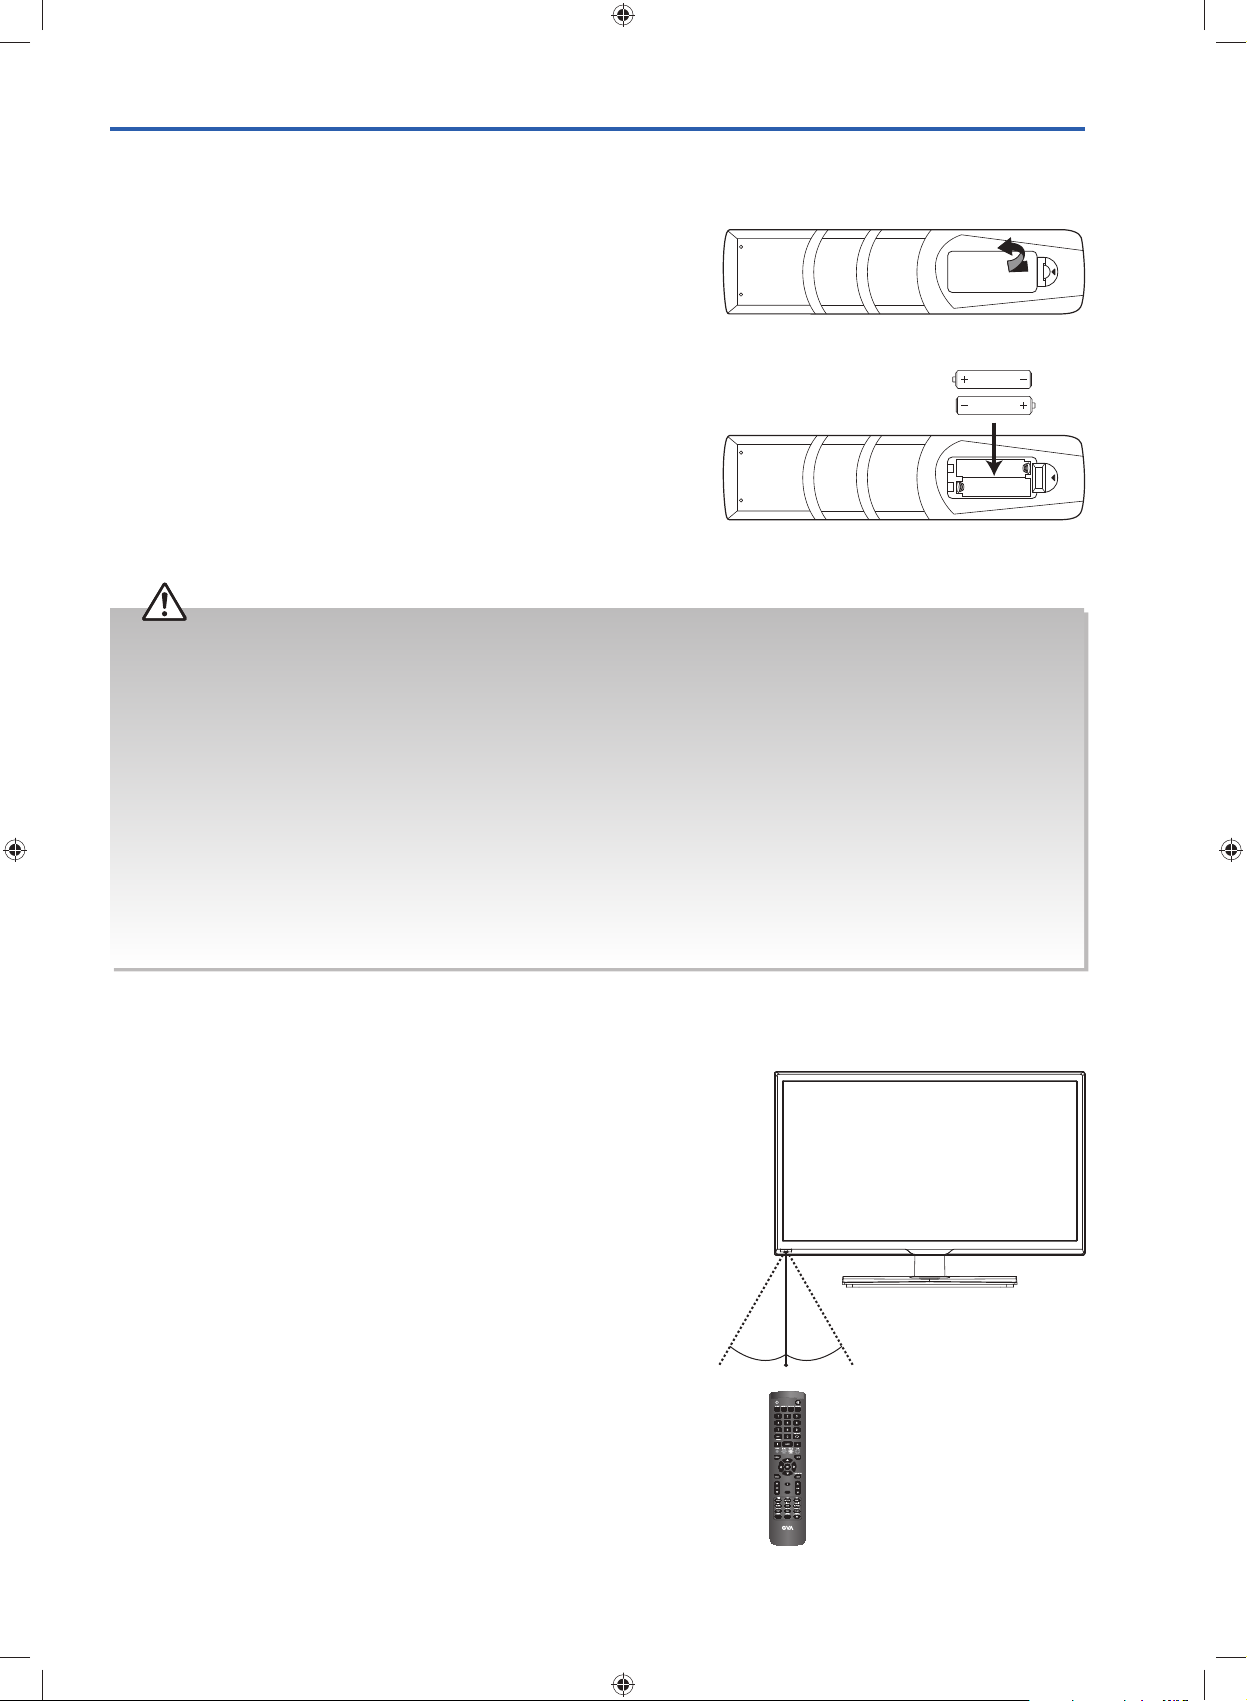
Installing Batteries in the Remote Control ...................................................................................................................9
Remote Control Operation Range .............................................................................................................................9
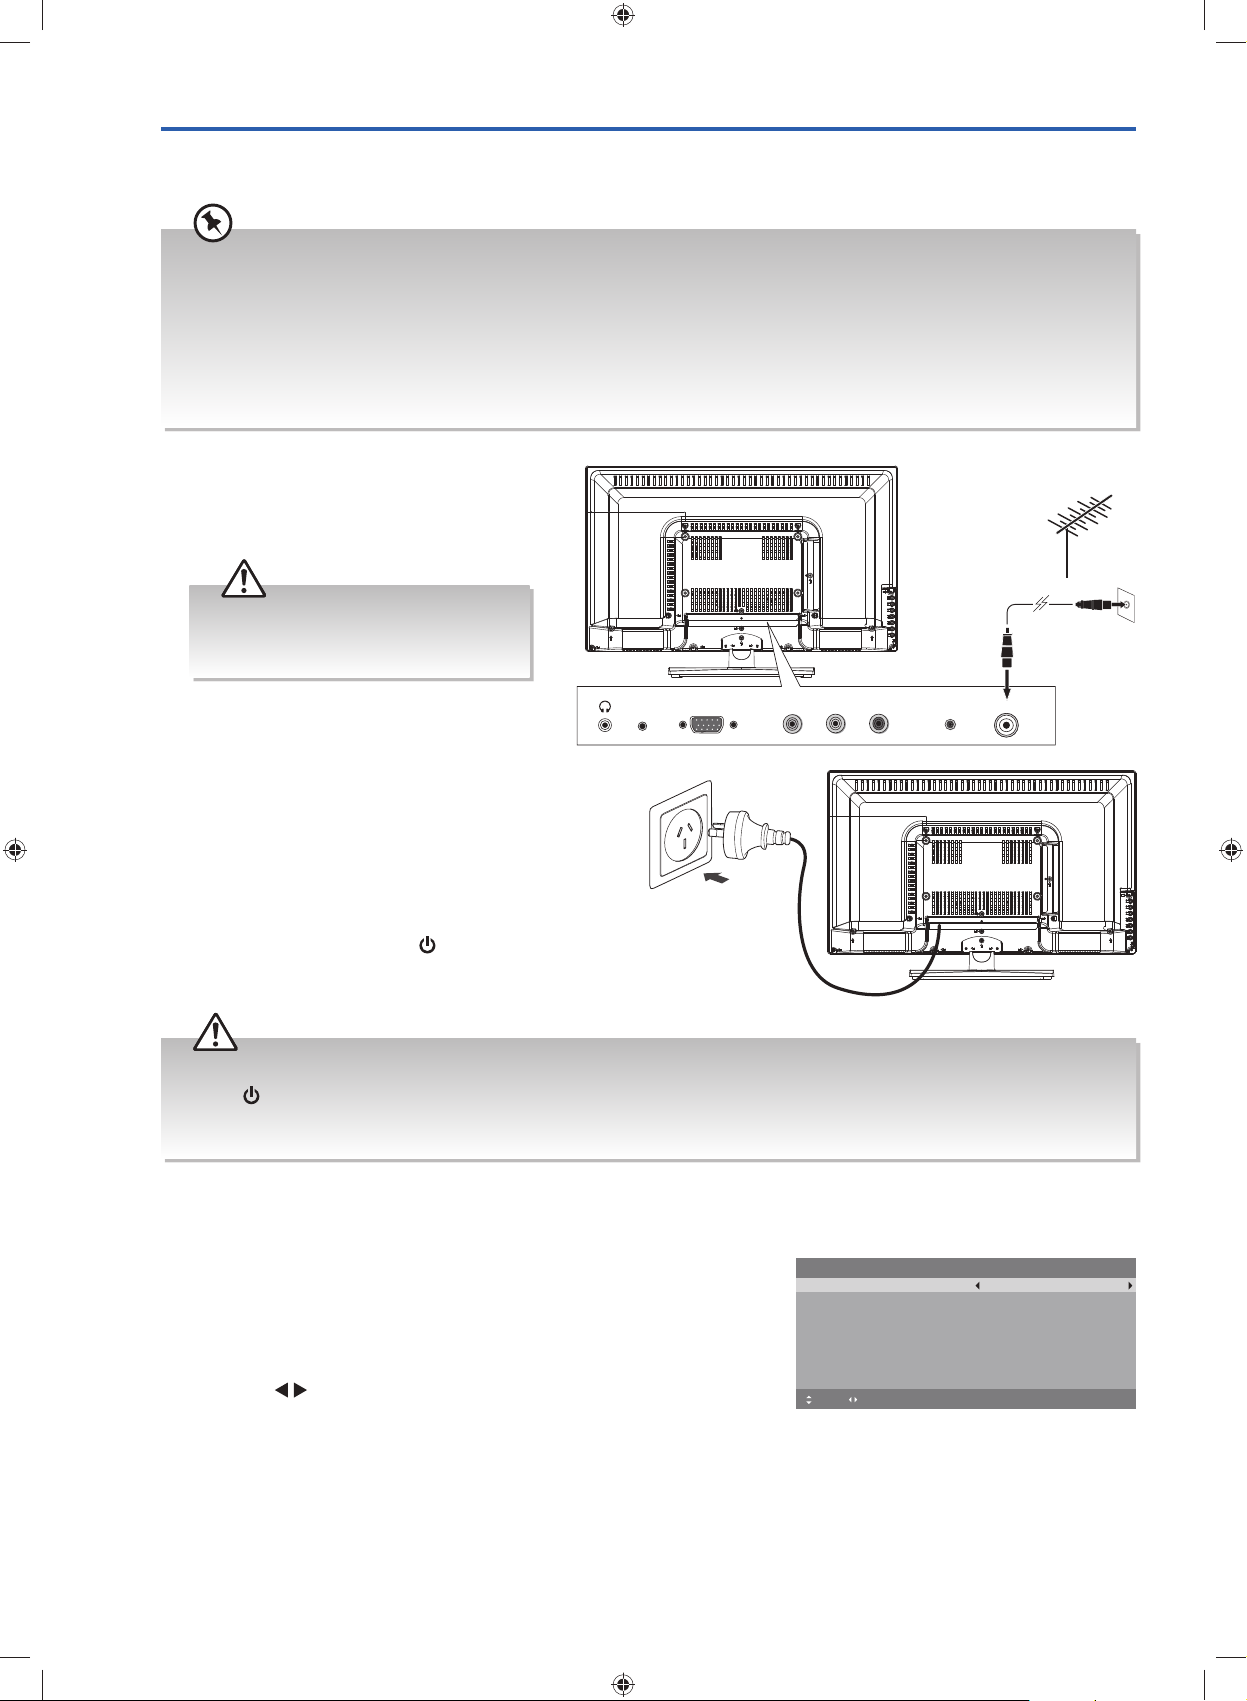
Turning the TV On for the First Time ........................................................................................................................ 10
−First Time Setup ............................................................................................................................................ 10
−Selecting the Input Source.............................................................................................................................. 12
−Channel Selection ........................................................................................................................................ 12
−Listening to the Radio (Radio Mode) ............................................................................................................... 12
−Display Channel Information.......................................................................................................................... 12
−Volume Adjustment ....................................................................................................................................... 12
Caring for the Environment ................................................................................................................13
Responsible Disposal of the Packaging .................................................................................................................... 13
Responsible Disposal of Appliance.......................................................................................................................... 13
Safety Information and Warnings......................................................................................................14
Symbols................................................................................................................................................................ 14
Important Safety Instructions................................................................................................................................... 14
Item in the Box ..................................................................................................................................16
Basic Set Up.......................................................................................................................................17
Installing the Base Stand......................................................................................................................................... 17
Mounting the TV to a Wall ..................................................................................................................................... 18
Advanced Connection Diagrams.........................................................................................................19
Making Video and Audio Connections.................................................................................................................... 19
Connecting an AV Device Using an HDMI Cable...................................................................................................... 19
Connecting a Computer Using a VGA Cable ........................................................................................................... 20
Connecting an AV Device Using a Component (YPbPr) Cable.................................................................................... 20
Connecting an AV Device Using Composite Cable.................................................................................................... 21
Connecting a Coaxial Audio Receiver ..................................................................................................................... 21
Connecting Headphones........................................................................................................................................ 22
Advanced Features ............................................................................................................................23
Picture Setting ....................................................................................................................................................... 23
Sound Setting........................................................................................................................................................ 24
−Stereo / Dual Sound Reception (ATV Mode) ................................................................................................... 24
Channel Setting..................................................................................................................................................... 25
−Auto Scan.................................................................................................................................................... 25
−DTV Manual Scan (DTV Mode)...................................................................................................................... 26
−ATV Manual Scan (ATV Mode)...................................................................................................................... 27
−Auto Channel Update (DTV Mode)................................................................................................................. 28
−Channel Edit (DTV Mode).............................................................................................................................. 28
−Channel Edit (ATV Mode).............................................................................................................................. 29
−Favourite Manager .......................................................................................................................................30
−Signal Information (DTV Mode)...................................................................................................................... 31
Lock Setting .......................................................................................................................................................... 32
−Lock System.................................................................................................................................................. 32
−Channel Locks .............................................................................................................................................. 33
−Parental Rating (DTV Mode) .......................................................................................................................... 34
−Lock Keypad ................................................................................................................................................ 35
−New Password ............................................................................................................................................. 36
−Clear Lock.................................................................................................................................................... 36
Setup Setting......................................................................................................................................................... 37
−OSD Language............................................................................................................................................. 37
G24HTV16_IB_160630-V2_Annie.indd 2 30/6/16 下午5:44