haacon 1889 User manual

haacon hebetechnik gmbh
Josef-Haamann-Str. 6
D-97896 Freudenberg/Main
Tel: +49 (0) 93 75/84-0
Fax: +49 (0) 93 75/84-66
e-mail: [email protected]
Internet: www.haacon.de
haacon hilft heben
094252_c_gb_hebvrr_s haacon hebetechnik gmbh – Phone +49 (0) 9375 - 84-0 – Fax +49 (0) 9375 - 8466 1
Operating manual
Lifting device for standard
removable versions
Type 1889

094252_c_gb_hebvrr_s haacon hebetechnik gmbh – Phone +49 (0) 9375 - 84-0 – Fax +49 (0) 9375 - 8466 2
This operating manual is to be kept on the lifting device. It must be ensured that everybody who must comple-
te work on the lifting device can examine this operating manual at any time. In addition, the operating manuals
described in the Safety of Work Law and the Equipment Usage Directive must be provided.
All safety and operating notice signs on the machine are to be kept in a clearly legible condition at all times.
Damaged or illegible signs are to be replaced immediately.
Content
1. Safety instructions................................................................................................................3
2. Technical data......................................................................................................................5
3. General ...............................................................................................................................6
4. Structure .............................................................................................................................6
5. Delivery ...............................................................................................................................6
6. Mounting the lifting device ....................................................................................................7
7. Operating ............................................................................................................................9
8. Servicing ...........................................................................................................................10
9. Spare parts........................................................................................................................ 12
10. Electric drive unit for lifting device Type 1889 (optional) .......................................................12
11. Stowing device for Type 1889 (optional)..............................................................................15

094252_c_gb_hebvrr_s haacon hebetechnik gmbh – Phone +49 (0) 9375 - 84-0 – Fax +49 (0) 9375 - 8466 3
1. Safety instructions
Duty of care of the operator
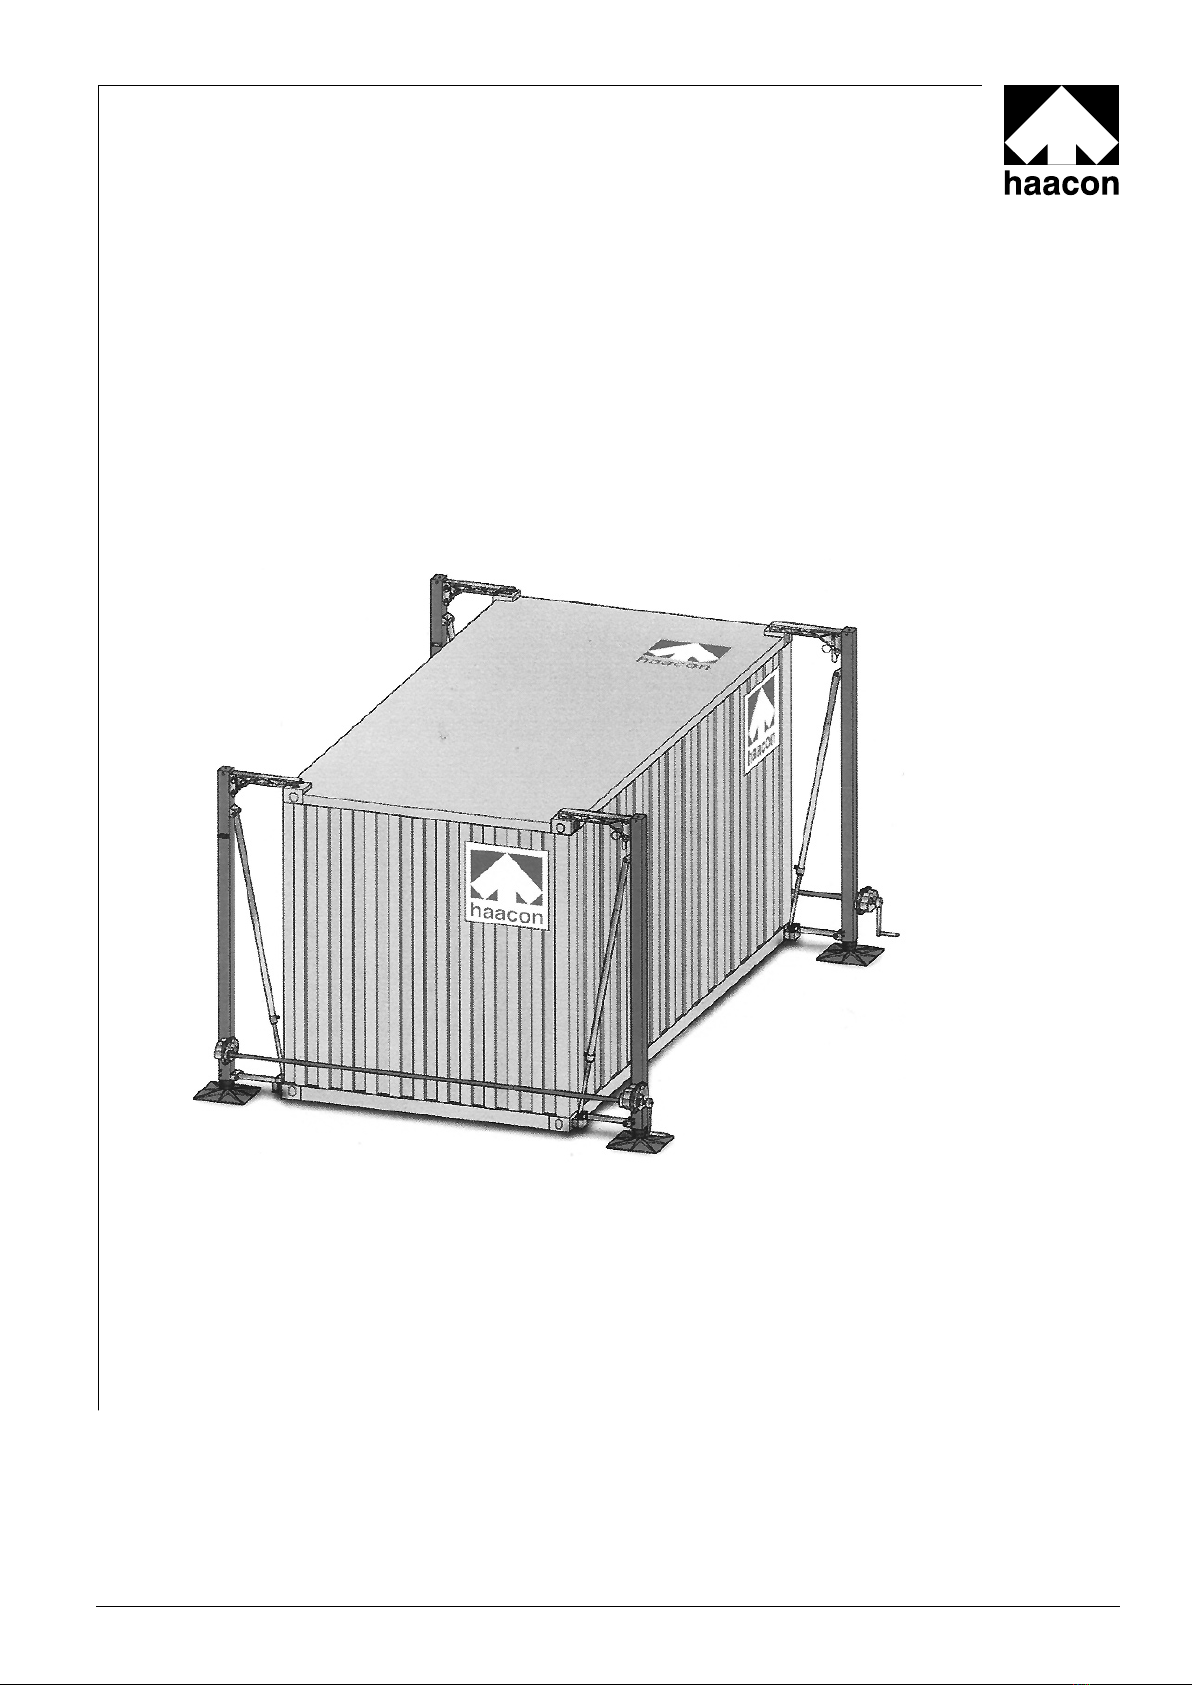
The lifting device Type 1889 has been designed and
built to after the careful selection of the harmonised
standards with which it must comply and other tech-
nical specifications. It is therefore state of the art and
offers maximum safety.
However, this safety level can only be achieved in
practice if all the action required for it is actually taken.
It is a matter for the operator of the lifting device to
plan this action and to check that it is implemented.
The operating must in particular ensure that
the lifting device is only used for the purpose for
which it is design (see the section entitled General).
the lifting device is only operated if it is in perfect
working order and special safety equipment is
checked regularly to ensure that it remains fully
functional.
the operating manual is available at the place of use
of the lifting device at all times in legible condition.
only suitably qualified and authorised personnel is
allowed to operating, service and repair the lifting
device.
this personnel is instructed at regular intervals in
all matters of industrial safety and environmental
protection and that they are familiar with the opera-
ting manual and the safety instructions contained
there in.
all the safety and warning notices on the lifting
device remain on the device and are kept in legible
condition.
nobody is on, in or under the container with the
mounted lifting device during the lifting or lowering
procedure.
persons only enter the system if the distance bet-
ween the bottom of the container and the ground is
less than 400 mm or load holders are fitted to act as
additional safety devices pursuant to VBG 14.
Basic safety action
To prevent damage and fatal injuries when operating
the lifting device, do not
exceed the maximum (see section entitled Techni-
cal data).
allow people to ride on the device.
work in, on or under the raised load if it exceeds
the maximum height off the ground or load holders
pursuant to VBG 14 are fitted.
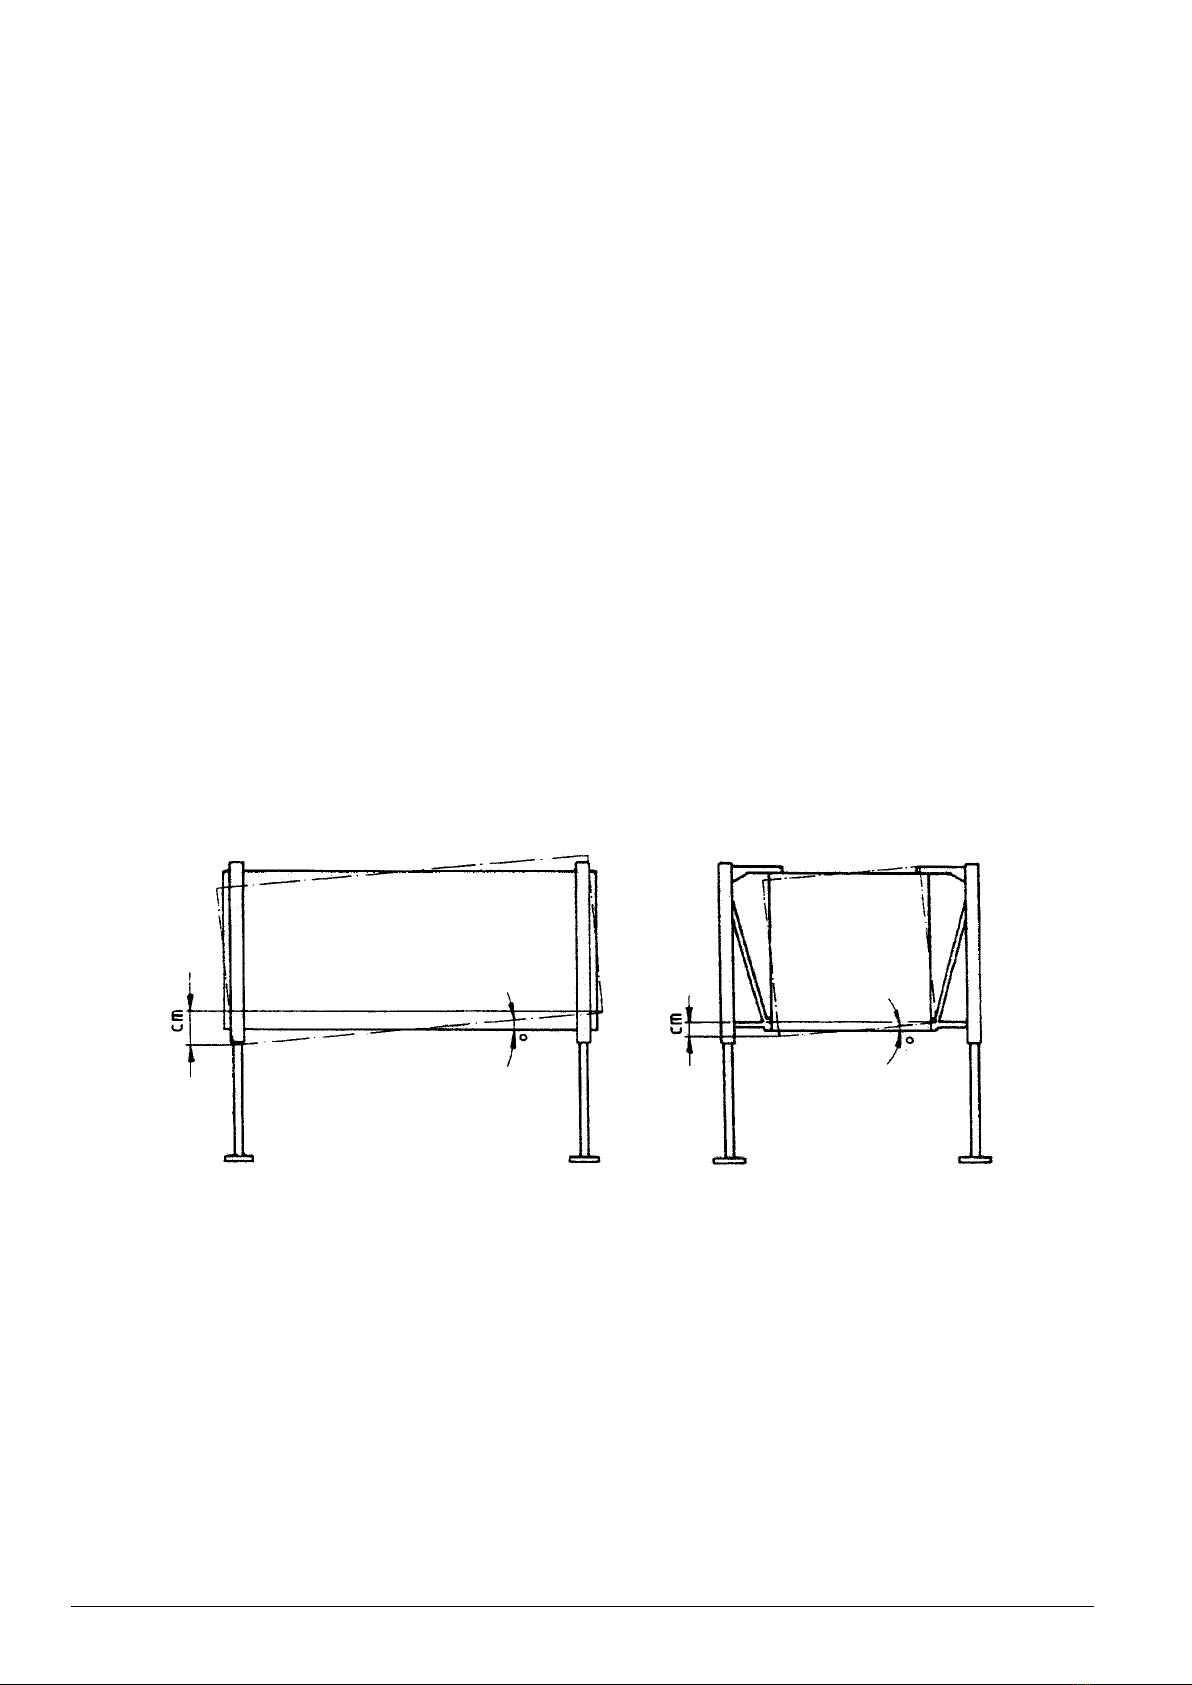
exceed the maximum angle (see section entitled
Other instructions).
set up the device in wind speeds in excess of
64 kph.
–
–
–
–
–
–
–
–
–
–
–
–
–
You must also ensure that if you wish to lift the maxi-
mum load the centre of gravity of the load is
positioned as centrally as possible between the sup-
ports.
Requirements on the operating personnel
The lifting device Type 1889 may only be operated by
people who have been trained, instructed and autho-
rised to do so. These people must be familiar with the
operating manual and act accordingly. The authority of
the operating personnel must be defined clearly.
Damage or defects on the lifting device are to be re-
ported to the appropriate person without delay. Do not
work with the lifting device until the damage or defect
has been rectified.
Servicing and repair work
Servicing and repair work may only be completed by
trained personnel.
Do not make any unauthorised modifications to the
lifting device for safety reasons – this particularly
applies to welding work on load-bearing parts. All
planned modifications must be approved in writing by
haacon hebetechnik gmbh.
Only use original spare parts / original wear parts.
These parts have been specially designed for the
machine. If you use other parts it cannot be guaran-
teed that they are designed and built to withstand the
stresses safely. Parts and special equipment that are
not supplied by haacon hebetechnik gmbh have not
been approved for use on the lifting device.
The maintenance work set out in the operating manual
(cleaning, lubrication, servicing, inspection, etc.) must
be completed on schedule.

23
3
3
12
094252_c_gb_hebvrr_s haacon hebetechnik gmbh – Phone +49 (0) 9375 - 84-0 – Fax +49 (0) 9375 - 8466 4
Other instructions
Important!
Exercise great care when driving the carrier vehicle
below the container. The lorry must not strike the
container since otherwise there is a risk that the
lifting device will bend.
Have somebody guide the lorry!
People must not be allow to stand in, on or under the
container during the lifting and lowering procedure.
People may stand on and in the raised container
if it is no more than 400 mm off the ground or load
holders pursuant to VBG 14 are fitted.
The lifting device with a container must not be
made to vibrate by means of crank impulses.
The container may only be placed on solid ground
by the lifting device.
The area on which the container is placed or from
which it is lifted must be as flat as possible.
1.
2.
3.
4.
5.
6.
The maximum angle of 3° applies to all types with a
maximum load and at full lifting height.
If the site incline is greater than 3°,
all four supports must be loaded uniformly.
the cab must be aligned horizontally.
To eliminate the bending stress on the gear rack tu-
bes, the stress must be removed form the supports
individually.
the sag of the gear rack tubes must be
observed. It must be even.
additional safety devices may be required if larger
angles are used or the gear rack tubes are exposed
to considerable sag.
the centre of gravity of the container must be cen-
tral.
9. Do not set up the device in storms.
7.
8.
–
–
–
–
–
Side view
Max. incline with a cab width,
for example, of 2.2 m = 12 cm
Length view
Max. incline with a cab length,
for example, of 4.25 m = 23 cm
Figure 1-1

094252_c_gb_hebvrr_s haacon hebetechnik gmbh – Phone +49 (0) 9375 - 84-0 – Fax +49 (0) 9375 - 8466 5
Technical instructions on the lifting device
To prevent accidents and damage, notice signs (figure 1-2) are affixed to the landing gear (figure 1-3) , and the
instructions there on must be followed:
Figure 1-2
Figure 1-3
All the safety signs and operating instruction signs on the lifting device are to be kept clearly legible at all times.
Damaged or illegible signs are to be replaced without delay.
2. Technical data
TYPE 1889.5 1889.10 1889.20
Maximum load / set t 5 10 20
Maximum load / support t 2,5 5 10
Weight / set approx. kg 260 355 570
Installation time / 2 men min. 10 10 15
Lifting time min. 10 20 40
Crank force / Support pair N 150 150 170
Lift / Turn of crank mm 5,8 2,9 1,4
Lift mm 1750 1750 1750
Design height mm 2330 2330 2330
Working temperature -33°C to +50°C
*) Minimum design height with a lift of 1750 mm.

094252_c_gb_hebvrr_s haacon hebetechnik gmbh – Phone +49 (0) 9375 - 84-0 – Fax +49 (0) 9375 - 8466 6
3. General
The lifting device Type 1889 is designed to move and position containers with a maximum gross weight of 5, 10,
20 tonnes. It consists of four rack supports with spur gears and fold-out suspension unit.
The support plate, top arm, crank handles and connection shafts are removable.
To transport it the lifting device is removed and stowed in crates or in the container.
The loaded supports must not exceed the container height and width (max. container width 2500 mm).
Larger container heights require the use of adapters (optional, for example 1/2“ or 1“ adapters).
The lifting device Type 1889 has a self-inhibiting spur gear, which holds the load securely at any height (you must
nevertheless comply with the safety instructions).
The rack supports form a stable unit with the container. The large support plates means that the device can be
used anywhere in the open air where there is firm ground.
The rack supports are connected using two telescoping connection shafts.
Exception: Version with automatic levelling device.
They are driven in pairs using connecting crank handles.
This operating manual applies to the removable standard lifting device Type 1889 for shelters and con-tainers
with ISO corner fittings at the top and bottom.
Alternatively haacon has several modified versions in its product range, for example lifting devices that are per-
manently mounted, swinging devices, lifting devices for containers without ISO corners, lifting doors and
bespoke versions.
Supplementary operating manuals are available for these modified versions.
4. Structure
The lifting device has a robust tubular steel construction.
The gear rack support is a product that has proven its worth over many decades that offers a long service life and
operational reliability. A removable connection shaft and a ratchet crank handle are supplied with each pair of
supports.
Accessories for retrofitting are available for all type 1889 lifting devices.
The gear rack support complies with BGV D8 and the EC Machine Directive 98/37/EEC and subsequent direc-
tives. When the load holders (additional safety devices on the rack) are used with the device at a standstill the
support complies with VBG 14.
5. Delivery
1 lifting device set Type 1889 consists of:
4 rack supports with fold-out suspension unit
4 top arms
4 support plates
2 telescoping connection shafts
2 Ratchet cranks
1 open-ended spanner, 30 mm
Accessories (optional)
Electric drive
Winch
Stowing device
Load holder VBG 14
Adapter (1/2“ or 1“) for higher supports
Crank handle case extension
–
–
–
–
–
–
–
–
–
–
–
–

094252_c_gb_hebvrr_s haacon hebetechnik gmbh – Phone +49 (0) 9375 - 84-0 – Fax +49 (0) 9375 - 8466 7
6. Mounting the lifting device
1. Take the crank out of its storage position and fit
it on the gear.
2. Fit the top arm.
2.1 If a loading device is used with high containers,
fit an adapter (optional).
2.2 Fit the adapter at the end of the support using
pins. Fit the top arm.
3. Align the supports individually, place them on
the ground and unfold the suspension unit.
4. Support ready for mounting.

094252_c_gb_hebvrr_s haacon hebetechnik gmbh – Phone +49 (0) 9375 - 84-0 – Fax +49 (0) 9375 - 8466 8
5. Raise the support until the top arm projects over
the cabin.
6. Crank downwards until the journal engages in
the top corner fitting and the arm sits on the
cabin.
7. Insert the locking bolt on the bottom support
arm in the corner fitting, turn it through 90° and
engage the locking lever in the mounting.
8. Turn the nut on to the locking bolt by hand and
then tighten it with a 30 mm ring spanner.
9. Align the container with the crank handles until it
is horizontal and insert the connection shaft.
10. Lifting device ready for use.

094252_c_gb_hebvrr_s haacon hebetechnik gmbh – Phone +49 (0) 9375 - 84-0 – Fax +49 (0) 9375 - 8466 9
11. Container raised 500 mm. 12. Raised 1600 mm. Ready for the truck to be
driven under it.
Dismantle following the above procedure in reverse.
Positioning plan
2
2
2
2
1
1
1
1
connecting shaft
connecting shaft
Rear
Plan view
Mark the bottom ISO
corner fittings, supports
and stowing device with
numbers 1 and 2.
Front of vehicle
Door side
⇑
direction of moving
The positioning plan shows the numbering of supports 1 and 2 depending on the position of the ISO corner fit-
tings on the container. The individual supports must be fitted in the order of these numbers.
If the connection shaft is fitted along the longitudinal axis of the container rather than as shown on the position
plan, no positioning is required. In this configuration all the supports are identical and can there-fore be inter-
changed.
7. Operating
To avoid danger for persons and the machine, before you lift a container it is essential to ensure the following
The container has been released from the carrier vehicle.
The rack supports have been mounted in their correct operating position.
The lifting capacity has not been exceeded.
Adequately compacted ground is available.
To raise the container, first make sure that the gear rack supports are in contact with the ground using the ratchet
cranks. Align the container by adjusting each support separately.
Extend the supports with the inserted connection shafts in pairs and raise the container to the required height.

094252_c_gb_hebvrr_s haacon hebetechnik gmbh – Phone +49 (0) 9375 - 84-0 – Fax +49 (0) 9375 - 8466 10
8. Servicing
The lifting device Type 1889 is to be inspected by an expert at intervals that depend on the conditions in which it
is used, but at least once per year (annual safety inspection pursuant to Accident Prevention Directive
BGV D8, §23, Sub-Section 2). In addition to the annual inspection all the safety parts must be tested every ten
years (including all gear parts such as the safety lock, etc.). We recommend that you have this safety check con-
ducted by haacon hebetechnik gmbh.
Experts are persons who, as a result of their training and experience, have adequate knowledge in the field of
winches, lifting and towing equipment and are familiar with the relevant state industrial safety directives, regula-
tions and generally acknowledged rules of engineering (for example DIN EN standards) so that they can assess
the safe condition of winches, lifting and towing equipment.
Servicing work
Description Intervals Parts / Numbers
Grease gear Depending on usage,
at least every month Grease nipple
Gleitmo 805 K
Clean and grease gear rack Every month Steel brush,
spray on Gleitmo 805 K
Grease all the moving parts of
the suspension construction Every quarter 55, 56, 57, 59, 69, 75
Gleitmo 805 K
Fuchs Lubritech
1. Open the gear
1.1 Remove the screws (38 - 41) and take off the casing plate (28).
1.2 Remove the gear wheel (8), centre drive (14) and gear wheel (13).
1.3 Remove the complete crank drive (29 - 34). Ensure that the locking pawls (32) are installed again in the
same position.
1.4 Remove the complete safety lock (19).
1.5 To remove the rack drive (7), pull out the rack to the end of the stroke since there is only a bevel on the top
tooth on the rack, which allows the rack to be installed and removed.
2. Remove the rack (4)
2.1 Before pulling out the rack, remove the gear parts as described in 1.2 to 1.5.
3. Remove the arm and rack (53 - 67)
3.1 Drive out the clamp sleeve (68).
3.2 Remove the bolt (67).
3.3 Drive out the clamp sleeve (63).
3.4 Release the threaded hub (64).
3.5 The parts can now be removed.
4. Remove the locking bolt (36, 55 - 57)
4.1 Drive out the clamp sleeve (36).
4.2 Remove the handle (57).
4.3 Unscrew the nut (56).
4.4 The parts can now be removed.
5. Remove the connection shaft (110 - 121)
5.1 Knock out the heavy duty pins (111, 112, 114, 117, 120).
5.2 The remainder of the removal work is as shown in the exploded drawing.

094252_c_gb_hebvrr_s haacon hebetechnik gmbh – Phone +49 (0) 9375 - 84-0 – Fax +49 (0) 9375 - 8466 11
Assemble the parts following the above instructions in reverse.

094252_c_gb_hebvrr_s haacon hebetechnik gmbh – Phone +49 (0) 9375 - 84-0 – Fax +49 (0) 9375 - 8466 12
9. Spare parts
Only use original spare parts / original wear parts. These parts have been specially designed for the machine.
If you use other parts it cannot be guaranteed that they are designed and built to withstand the stresses safely.
Parts and special equipment that have not been supplied by us have not been approved by us for use on the
lifting device.
Please quote the following to order spare parts:
Type: – See model plate
Factory No: – See model plate
Part No: – See spare parts list / drawing
Description: – See spare parts list / drawing
Spare parts list / drawing
See attachments
10. Electric drive unit for lifting device Type 1889 (optional)
Retrofit kit in the versions listed below
— Save time by using the motor drive unit.
— 20% reduced lifting times compared to manual drive.
10.1 Technical data
Unit 24 V
Direct current 230 V
Alternating current 400 V
Alternating current
Rating W 2 x 700 2 x 750 2 x 750
Weight, approx. kg
Protection type – IP 54 IP 54 IP 54
Ratio i – 14 10 14 14 10 14 14 10 14
Drive speed *) min -1 100 140 100 100 140 100 100 140 100
Maximum load / set t 5 10 20 5 10 20 5 10 20
Lift / minute mm 580 406 140 580 406 140 580 406 140
Lifting time, approx. min 3:00 4:20 12:30 3:00 4:20 12:30 3:00 4:20 12:30
Current consumption A 0,5
*) The drive speed of the electric drive unit is the same as the input speed of the lifting gear

094252_c_gb_hebvrr_s haacon hebetechnik gmbh – Phone +49 (0) 9375 - 84-0 – Fax +49 (0) 9375 - 8466 13
10.2 Structure
Of the four rack support, two are powered electrically. The two passive supports can be connected mechanically
using removable connection shafts in the same way as on the manual version.
The container is to be raised evenly using this configuration.
Control using the mobile controller.
Connection for motors and limit switches
The pin assignment of plug connectors A and B
(connection between the controller and the support)
is to be made as set out in the following table.
Plug Connector
Pin 24 V
Direct current 230 V
Alternating current 400 V
Alternating current
A
1Motor connection
Positive pole
0 - Main motor coil N - Main motor coil
2 L1 - Main motor coil L1 - Main motor coil
3 - C - Capacitor -
4Motor connection
Negative pole
Z1 - Auxiliary motor coil L2 - Main motor coil
5 Z2 - Auxiliary motor coil L3 - Main motor coil
B
1Positive pole
24 V Fuses with 1 A L1 fused with 1 A as a common fuse for limit switches
2 Top limit switch
3 -
4 Bottom limit switch
5 Zero Volts Motor temperature switch
The inputs for the limit switches are isolated in floating form by two optocouplers.
For two of them the switch threshold can be set using trimmers.
The monitor the motor temperature and thus allow PTC‘s to be used as a temperature sensors.
If the system does not have a motor temperature monitor, pin B5 is to be connected in the plug with pin B1 (on
the 230 V and 400 V version).
Each motor has its own fuse.
To protect the semi-conductors these fuses must only be replaced with equivalent types.
On the 24 V direct current version: -10 x 38 mm, 25 A, GOULD series aM for motor circuits
- rated voltage 500 V, 120 kA switch rating
On the 230 V alternating current version: -10 x 38 mm, 10 A, GOULD series aM for motor circuits
- rated voltage 500 V, 120 kA switch rating
On the 400 V alternating current version: -10 x 38 mm, 6 A, GOULD series aM for motor circuits
- rated voltage 500 V, 120 kA switch rating
The fuses for the limit switches are also inside the controller, they measure 5 x 20 mm, 1 A.
The controller houses a 4-way DIP switch using which the direction of rotation of the motors can be changed if
necessary.
DIP 1 turns the first motor, DIP 2 the second.
All the components in the controller are designed for operation in temperatures as low as - 32° C. Nevertheless
in temperatures below -20°C before you start work with the controller you should check that the joystick can be
moved easily in all direction.

094252_c_gb_hebvrr_s haacon hebetechnik gmbh – Phone +49 (0) 9375 - 84-0 – Fax +49 (0) 9375 - 8466 14
10.3 Delivery
The electric drive unit for the lifting device Type 1889 consists of the following:
2 gear motors
1 control box
2 drive cables
2 limit switch cables
4 fitted limit switch casings
1 installation kit (connection flange, mounting bolts, etc.)
10.4 Mounting
Connect the gear motors with a positive connec-
tion and so that they are protection from torsion
by inserting the drive square into the mounting
hole on the gear of the support marked ‚1‘ or ‚2‘.
Secure the gear motors during the lifting process
to prevent their coming away by inserting the
locking spring in the stop bolt.
Connect the connection cable for the gear
motors to the corresponding connector on the
support and secure it.
Connect each pair of supports via a limit switch
cable using a screw connector.
Important: The cable ends have socket and plug
connectors.
Connect the drive cables to the supports marked
‚1‘ and ‚2‘ and secure them.
Important: The cable ends have socket and plug
connectors.
Connect the drive cable to the control box and
secure it.
Important: Connect the drive cable from support
‚1‘ to connector ‚1‘ on the control box and con-
nect the drive cable from support ‚2‘ to connec-
tor ‚2‘ on the control box.
10.5 Operating
To avoid any risk to persons and the lifting device, before you raise the container ensure that
→The container has been released from the carrier vehicle.
→The rack supports have been correctly mounted in their operating positions.
→The control and power cables have been connected properly.
→The lifting capacity has not been exceeded.
→At the end of the lifting process or if it is interrupted, the main switch on the controller is always
turned off.
The adjustment to the ground conditions is conducted across the container by hand using the crank handle and
along the container using the electric drive unit (see point 7).
Do not operate the device without supervision.
If the device is not in use cover the connectors with safety caps.
→Connect the extension cable (not supplied) for the power connection to the control box and to the power
supply.
→Switch the main switch to "ON".
→You can now complete the following functions using the joystick.
The operator must be positioned on the drive side of the container.
–
–
–
–
–
–
1.
2.
3.
4.
5.
6.
Drive cable
Locking spring
Connection cable
Limit switch cable
Drive square
Drive cable
Locking spring
Connection cable
Limit switch cable
Drive square

094252_c_gb_hebvrr_s haacon hebetechnik gmbh – Phone +49 (0) 9375 - 84-0 – Fax +49 (0) 9375 - 8466 15
Joystick up Both supports move upwards.
Joystick down Both supports move downwards.
Joystick up left The left support ‘2’ moves upwards and the right support ‘1’ moves
downwards, or down right the container rolls clockwise
Joystick up right The right support ‘1’ moves upwards and the left support ‘2’ moves
downwards, or down left the container rolls anti-clockwise
The LED‘s on the control desk have the following functions
GREEN Activation of the electric motors
In addition on the 24 V version: If the power consumption rises to over 55 A per motor the LED will
flash and the motor current will be electronically limited.
ORANGE At least one limit switch on the supports has been tripped.
RED Excess temperature on the power section in the controller. If the green LED is also lit, the drive
has suffered an overload.
10.6 Spare parts
Only use original spare parts / original wear parts. These parts have been specially designed for the machine.
If you use other parts it cannot be guaranteed that they are designed and built to withstand the stresses safely.
Parts and special equipment that have not been supplied by us have not been approved by us for use on the
lifting device.
Please quote the following to order spare parts:
Type: – See model plate
Factory No: – See model plate
Part No: – See spare parts list / drawing
Description: – See spare parts list / drawing
Spare parts list / drawing
See attachments
11. Stowing device for Type 1889 (optional)
The lifting device Type 1889 can be stowed for transport on or in the container.
When they are required for use, the supports can be taken out of their mounting by the user and then mounted
on the container.
Adapter (optional) in the stowing position.
Stowing device
The stowing device is bolted to a defined hole pattern on the front wall of the cabin. Support sections with plastic
rollers allow the rack supports to be rolled up and down easily. The parts of the lifting device are held securely by
bars with locking bolts.
Delivery
1 stowing device set for Type 1889 consists of the following:
2 support sections with rollers
2 locking bars with locks and brackets
4 support plate holders
(When ordering this equipment please refer to the hole pattern for the stowing device).
–
–
–

094252_c_gb_hebvrr_s haacon hebetechnik gmbh – Phone +49 (0) 9375 - 84-0 – Fax +49 (0) 9375 - 8466 16
Operating
1. Lifting device stowed away at shelter front. 2. Fold away hinged securing bars.
3. Pull out the supports to the side, two to the right,
two to the left.
4. Position one lifting element at each shelter corner.
5. Withdraw connecting shaft to side after unlocking. 6. Lifting device ready for assembly. Securing bars
back in their brackets and relocked.

094252_c_gb_hebvrr_s haacon hebetechnik gmbh – Phone +49 (0) 9375 - 84-0 – Fax +49 (0) 9375 - 8466 17
Other manuals for 1889
1
Table of contents
Other haacon Lifting System manuals
Popular Lifting System manuals by other brands

Ranger
Ranger RFJ-3TQP Installation and operation owner's manual

DoorHan
DoorHan MT Series Installation and operation instruction

PVI Industries
PVI Industries ATH1232 quick start guide

Wahlberg
Wahlberg 281 user manual

EKKO
EKKO EB12E Series manual

Pittsburgh
Pittsburgh 68892 Owner's manual & safety instructions