manuals.online logo
Brands
  1. Home
  2. •
  3. Brands
  4. •
  5. Hacker
  6. •
  7. Toy
  8. •
  9. Hacker HURRICANE User manual

Hacker HURRICANE User manual

MFORCE
3536CA-8
min 5 1200mm 1030mm >950g
20230828
ARF
WORLD WAR 2 COMBAT FIGHTER WORLD WAR 2 COMBAT FIGHTER
ZWEITER WELTKRIEG JAGDFLUGZEUG ZWEITER WELTKRIEG JAGDFLUGZEUG
SOUBOJOVÁ STÍHAČKA 2. SVĚTOVÉ VÁLKYSOUBOJOVÁ STÍHAČKA 2. SVĚTOVÉ VÁLKY
WORLD WAR 2 COMBAT FIGHTER
ZWEITER WELTKRIEG JAGDFLUGZEUG
SOUBOJOVÁ STÍHAČKA 2. SVĚTOVÉ VÁLKY
Kat.č./No.
HC 1760A - desert,
HC 11760B - sea
DESERT
SEA
www.hacker-model.com
TOP FLYER
ALMOST UNBREAKABLE
Technická data / Technical data:
HURRICANE
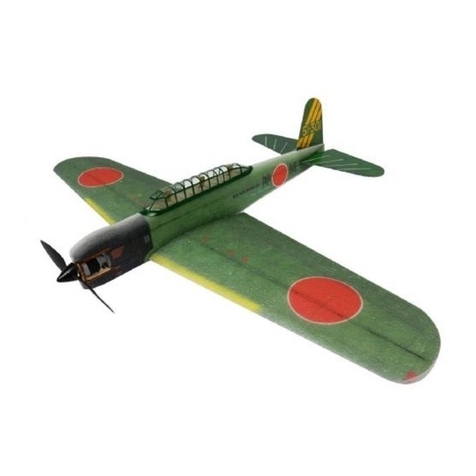
Thank you for purchasing the Hacker Model Production Hurricane. The
model is based on the real Hawker Hurricane fighter aircraft that served in
the RAF and other Allied air forces during World War II. It is not scale, but a
model to resemble the original. The model is suitable for intermediate and
advanced pilots. The model can handle basic aerobatics and is ready to fly
combat in addition to normal flying. The wing is removable for better
storage. The wing can be attached with rubber or with screw.
1. Your Hurricane should not be considered a toy, but rather a
sophisticated, working model that functions very much Iike a full-size
airplane. Because of its performance capabilities, the Hurricane, if not
assembled and operated correctly, could possibly cause injury to yourself
or spectators and damage to property.
2. You must assemble the model according to the instructions. Do not
alter or modify the model, as doing so may result in an unsafe or unflyable
model. In a few cases the instructions may differ slightly from the photos. In
those instances the written instructions should be considered as correct.
3. You must take time to build straight, true and strong.
4. You must use an R/C radio system that is in first-class condition. This
model requires a midi size receiver and mini servos (10-15g).
5. You must correctly install all R/C and other components so that the
model operates correctly on the ground and in the air.
6. You must check the operation of the model before every flight to insure
that all equipment is operating and that the model has remained
structurally sound. Be sure to check clevises or other connectors often and
replace them if they show any signs of wear or fatigue.
7. If you are not already an experienced R/C pilot, you should fly the model
only with the help of a competent, experienced R/C pilot.
Note: We, as the kit manufacturer, provide you with a top quality kit and
great instructions, but ultimately the quality and flyability of your finished
model depends on how you build it; therefore, we cannot in any way
guarantee the performance of your completed model and no
representations are expressed or implied as to the performance or
safety of your completed model.
Remember: Take your time and follow directions to end up with a
well-built model that is straight and true.
If you're an inexperienced modeler, we recommend that you get
assistance from an experienced, knowledgeable modeler to help you with
assembly and your first flights. You'lI learn faster and avoid risking your
model before you're truly ready to solo.
Please inspect all parts carefully before starting to build. If any parts
are missing, broken or defective, or if you have any questions about
building or flying this airplane, please give us a call at +420 313 562
258 or e-mail us at [email protected] and we'lI be glad to help. If
you are calling for replacement parts, please reference the part
numbers and have them ready when calling.
INTRODUCTION
FOLLOW THESE IMPORTANT
SAFETY PRECAUTIONS
This is a partial list of items required to finish the Hurricane that must be
purchased separately. For some of these items there is more than one
option which will require a bit of decision making ahead of time. Order
numbers are provided for your convenience.
For the equipment of the model we recommend:
Brushless motor with power 300-350W, 900-1000kV with a suitable
regulator approx. 45A, e.g. Tuning combo No. HC3542 (includes Hacker
MASTER FORCE 3536CA-8 No. HC3512 and ESC MASTER CONTROL-
45A No. HC3375).
Battery LiPo 2300-2700mAh 3S or 4S.
Propeller according to battery type APC 11/5.5E (3S battery) or APC 10/5-
10/6E (4S battery). Depending on battery capacity and flight style, flight
time is around 7-10 minutes.
Metal gear servos 10-15g. For aileron and elevator servos 15g, e.g.
MASTER FORCE MF D-933MG No. HC4357 and for the rudder a smaller
servo 10g is sufficient, e.g. MASTER FORCE MF A-1109MG No. HC4310.
The tail servo cables need to be extended, use 30cm extension cables
(2x). For more convenient connection of aileron servos to the receiver, use
extension cables with length 10-15cm (2x).
You will also need basic tools. When cutting the EPP material from which
the model is made, make sure your hobby knife is always sharp! The whole
model is glued with thin CA glue with activator. Contact adhesive is used
for gluing the servos. Use recommended glue!
This EPP plane should be hung from it’s prop when not in use, doing
otherwise could cause the airframe to twist. Storage in a hot car could also
cause damage. When you will attach the wing with rubber relase the
rubber after flying and remove the wing.
Model by měl být skladován nejlépe zavěšený volně v prostoru za vrtuli
jinak se může drak modelu kroutit. K poškození může také dojít pokud
model necháte ve vyhřátém autě. U upevnění křídla gumou po létání vždy
gumu sundejte.
ITEMS REQUIRED
TO FINISH PLANE
STORAGE
SKLADOVÁNÍ
Děkujeme, že jste si zakoupili model Hurricane od firmy Hacker Model
Production a.s. Předlohou modelu je skutečný bojový letoun Hawker
Hurricane, který sloužil v RAF a v letectvech dalších spojeneckých armád
během druhé světové války. Nejedná se o přesnou maketu, ale o model,
který má originál připomínat. Model je vhodný pro středně pokročilé a
pokročilé piloty. Model zvládne základní akrobacii a kromě běžného létání
je připraven na létání leteckých soubojů. Křídlo je odnímatelné pro lepší
skladnost. Upevnění křídla je variantně gumou nebo šroubem.
1. Váš Hurricane není hračka, ale model letadla, který funguje jako
skutečné letadlo. Proto musí být velmi pečlivě sestaven a správně a
bezpečně pilotován, aby nedošlo ke zranění vás či přihlížejících a ke
škodě na majetku.
2. Model musíte sestavit podle návodu. Neměňte ani neupravujte model,
protože následkem by mohl být špatně ovladatelný až nebezpečný model.
V některých případech se pokyny mohou mírně lišit od fotografií. V těchto
případech platí psaný text.
3. Model musí být sestaven přesně. Jednotlivé části modelu musí být
pečlivě a důkladně spojeny (lepením, sešroubováním).
4. Musíte použít RC systém, který je v prvotřídním stavu. Tento model
vyžaduje přijímač střední velikosti a mini serva (10-15g).
5. Musíte správně nainstalovat všechny součásti RC vybavení a další
komponenty tak, aby model fungoval správně na zemi i ve vzduchu.
6. Musíte zkontrolovat funkčnost modelu před každým letem, abyste se
ujistili, že veškeré vybavení je v bezvadném stavu, a že motor má správný
zvuk a je bez vibrací. Ujistěte se, že táhla a konektory jsou v pořádku a
pokud vykazují známky opotřebení, vyměňte je.
7. Pokud nejste zkušený RC pilot, měli byste první lety absolvovat pod
dohledem zkušeného RC pilota.
Poznámka: My, jako výrobce, Vám poskytujeme kvalitní stavebnici a
stavební návod, ale nakonec kvalita a letuschopnost Vašeho hotového
modelu závisí na tom, jak ho postavíte. Proto nemůžeme v žádném
případě zaručit uvedené výkony ani bezpečnost Vámi dokončeného
modelu.
Důležité: Udělejte si čas a postupujte podle pokynů v návodu, aby
váš model byl dobře postaven.
Pokud jste začínající modelář, doporučujeme požádat o pomoc
zkušeného modeláře, který vám pomůže s přípravou, montáží a prvními
lety s modelem. Naučíte se tak s modelem manipulovat, létat lépe a
předejdete riziku, že svůj model rozbijete.
Prosím, zkontrolujte všechny díly dříve, než začnete stavět. Pokud
některé části chybí, jsou poškozeny nebo jsou vadné, nebo máte-li
jakékoli dotazy týkající se stavby či létání s tímto modelem, prosím,
zavolejte nám na telefonní číslo +420 313 562 258 nebo napište
emailovou zprávu na adresu [email protected] a my vám rádi
pomůžeme.
Toto je základní seznam položek potřebných k dokončení modelu
Hurricane, které je nutné zakoupit samostatně. Pro některé z těchto
položek je více než jedna možnost, která bude vyžadovat trochu
rozhodování při vašem výběru. Objednací čísla jsou k dispozici pro
zjednodušení vašeho výběru.
Pro vybavení modelu doporučujeme:
Střídavý motor s výkonem 300-350W, 900-1000kV s vhodným
regulátorem cca 45A, např. Tuning combo kat.č. HC3542 (obsahuje
střídavý motor Hacker MASTER FORCE 3536CA-8 kat.č. HC3512 a
regulátor MASTER CONTROL-45A kat.č. HC3375).
Pohonná baterie LiPol 2300-2700mAh 3S nebo 4S.
Vrtule podle typu baterie APC 11/5.5E (3S baterie), nebo APC 10/5-10/6E
(4S baterie). V závislosti na kapacitě baterie a letovém stylu se doba letu
pohybuje okolo 7-10 minut.
Serva s kovovou převodovkou 10-15g. Na křidélka a výškovku serva 15g,
např. MASTER FORCE MF D-933MG kat.č. HC4357 a na směrovku stačí
menší servo 10g, např. MASTER FORCE MF A-1109MG kat.č. HC4310.
Kablíky serv ocasních ploch je potřeba prodloužit, použijte prodlužovací
kablíky s délkou 30cm (2x). Pro pohodlnější připojení serv křidélek k
přijímači použijte prodlužovací kablíky s délkou 10-15cm (2x).
Dále budete potřebovat základní modelářské nářadí. Při řezání materiálu
EPP, ze kterého je model vyroben, dbejte, aby váš modelářský nůž byl
vždy ostrý! Celý model je lepen řídkým CA lepidlem s aktivátorem. Na
vlepení serv je použito kontaktní lepidlo. Používejte doporučená lepidla!
ÚVOD
DODRŽUJTE NÁSLEDUJÍCÍ DŮLEŽITÁ
BEZPEČNOSTNÍ OPATŘENÍ
POLOŽKY POTŘEBNÉ
PRO DOKONČENÍ MODELU
2www.hacker-model.com
Při přípravě k letu zkontrolujte stav vašeho RC vybavení. Postupujte podle
pokynů, které byly dodány s vaší RC soupravou. Vždy byste měli nabíjet
vysílačové baterie večer před plánovaným létáním, nebo podle
doporučení výrobce RC soupravy.
Před létáním pečlivě vyvažte vrtuli a náhradní vrtule. Zkontrolujte
zda nemáte ohnutou hřídel na motoru. Nevyvážená vrtule nebo
ohnutá hřídel jsou jednou z nejčastějších příčin vibrací, které mohou
poškodit váš model. Vibracemi se mohou uvolnit šroubované spoje,
může dojít také k poškození motorového lože s katastrofálními
účinky pro letadlo. Vibrace mohou poškodit také elektroniku,
kterou máte v modelu (přijímač, baterie, serva atd.).
Předletová kontrola
Než budete létat je třeba provést poslední celkovou kontrolu, abyste se
ujistili, že model je opravdu připraven k letu a že jste nic nepřehlédli. Pokud
nejste důkladně obeznámeni s provozem RC modelů, požádejte
zkušeného modeláře o provedení kontroly. Zkontrolujte, zda máte
správně nainstalován přijímač a zda jsou všechny ovládací prvky správně
připojeny. Zkontrolujte, že se vrtule točí ve správném směru a motor
dosahuje plného výkonu. Zajistěte, aby všechny ovládací plochy
(výškovka, směrovka, křidélka) byly bezpečně spojeny táhly. Ovládací
prvky se musí pohybovat ve správném směru a těžiště musí být ve
správném místě.
Kontrola dosahu
Zkontrolujte dosah vašeho vysílače před prvním letem. Jděte s vysílačem
nejméně 30 metrů od modelu. Je třeba mít pomocníka, který bude stát u
vašeho modelu a bude vám říkat, co ovládané plochy dělají. Tento test
opakujte s běžícím motorem při různých otáčkách s pomocníkem držícím
model, signály ruky vám ukáže, co ovládané plochy dělají. Pokud
ovládané plochy nereagují správně, nelétejte! Najděte a opravte problém.
Podívejte se zda nejsou uvolněná serva, poškozené kabely, staré servo
konektory, špatné kontakty ve vašem akumulátoru.
PŘEDLETOVÁ KONTROLA
BEZPEČNOSTNÍ OPATŘENÍ
Nedodržení těchto bezpečnostních opatření může mít za následek
vážné zranění vás nebo přihlížejících.
Když se učte ovládat motor, požádejte o pomoc zkušeného pilota.
Použijte ochranné brýle při startování nebo chodu motoru. Nespouštějte
motor v oblasti volného štěrku nebo písku, vrtule může takový materiál
nasát a vrhnout vám ho do obličeje a očí. Držte se a taky všechny diváky
mimo rovinu rotace vrtule. Mějte mimo dosah vrtule volné oblečení, rukávy
košile, kravaty, šály, dlouhé vlasy nebo volné předměty, jako jsou tužky
nebo šroubováky, které mohou vypadnout z kapsy košile nebo bundy do
vrtule. Motor se při běhu zahřívá! Nedotýkejte se ho v průběhu nebo
bezprostředně po zastavení.
Elektromotor a baterie používané v modelu Hurricane jsou velmi
výkonné a točc se vrtule má značnou energii. Pokud se dotknete
vrtule když se toč, můžete si způsobit vážná zranění. Respektujte
motor a vrtuli a zajistěte veškerá nezbytná opatření, abyste zabránili
zranění. Pokud nelétáte vždy odpojte a vyjměte baterii.
LÉTÁNÍ
Hurricane je skvěle létající model, který letí plynule a předvídatelně a
přesně reaguje na vaše povely. Hurricane ale nedisponuje stabilizací letu
charakteristickou pro začátečnické školní RC modely. Proto musí být
neustále řízen pilotem.
UPOZORNĚNÍ (platí pro všechny RC modely): Pokud při letu uslyšíte,
neobvyklý zvuk, například hluboké "bzz", může to znamenat, že
ovládané plochy “flatrují”. “Flatr” nastane, když řídicí plocha (například
křidélka nebo výškovka) rychle vibruje nahoru a dolů (a tím způsobuje
hluk). V extrémních případech, není-li to okamžitě rozpoznáno, může
vést flatr k utržení ovládacích ploch, což způsobí ztrátu kontroly nad
modelem a následně havárii. Když zjistíte “flatr”, okamžitě snižte
rychlost modelu (snížením otáček motoru) a ihned se snažte bezpečně
přistát. Zkontrolujte všechna serva, průchodky, táhla a odstraňte
všechny vůle. Některé věci, které mohou způsobit “flatr”: uvolněné
závěsy řídících ploch, uvolněné koncovky táhel v pákách, vybočování
drátěných táhel kormidel, nadměrné vůle v převodech serv, špatné
upevnění serv a jednou ze nejrozšířenější příčiny “flatru” je létání
nadměrnou rychlostí převyšující konstrukční rychlost modelu.
Vzlet
Startujte vždy proti větru hodem z ruky v mírném stoupání. Startujte na cca
2/3 plného výkonu motoru. Pro první lety je vhodné, aby vám model hodil
pomocník a vy jste se mohli soustředit na řízení modelu.
Get help from an experienced pilot when learning to operate motors. Use
safety glasses when starting or running motors. Do not run the motor in an
area of loose gravel or sand; the propeller may throw such material in your
face or eyes. Keep your face and body as well as all spectators away from
the plane of rotation of the propeller as you start and run the motor. Keep
these items away from the prop: loose clothing, shirt sleeves, ties, scarfs,
long hair or loose objects such as pencils or screwdrivers that may fall out
of shirt or jacket pockets into the prop. The motor gets hot! Do not touch it
during or right after operation.
Failure to follow these safety precautions may result in severe injury
to yourself and others.
Range Check
Ground check the operational range of your radio before the first flight of
the day. With the transmitter antenna collapsed and the receiver and
transmitter on, you should be able to walk at least 30 meters (100 feet)
away from the model and still have control. Have an assistant stand by
your model and, while vou work the controls, tell you what the control
surfaces are doing. Repeat this test with the motor running at various
speeds with an assistant holding the model, using hand signals to show
you what is happening. If the control surfaces do not respond correctly, do
not fly! Find and correct the problem first. Look for loose servo connections
or broken wires, corroded wires on old servo connectors, poor solder joints
in your battery pack or a defective cell, or a damaged receiver crystal from
a previous crash.
Ground Check
Before you fly you should perform one last overall inspection to make sure
the model is truly ready to fly and that you haven't overlooked anything. If
you are not thoroughly familiar with the operation of R/C models, ask an
experienced modeler to perform the inspection. Check to see that you
have the radio installed correctly and that all the controls are connected
properly. The motor must also be checked by confirming that the prop is
rotating in the correct direction and the motor sounds Iike it is reaching full
power. Make certain all control surfaces (elevators, rudder, ailerons) are
secure, the pushrods are connected, the controls respond in the correct
direction, radio components are securely mounted and the C.G. is correct.
Carefully balance your propeller and spare propellers before you fly.
Check if the shaft is not bent. An unbalanced prop or bent shaft can be the
single most significant cause of vibration that can damage your model. Not
only will motor mounting screws and bolts loosen, possibly with disastrous
effect, but vibration may also damage your radio receiver and battery.
Follow the instructions that came with your radio to charge the batteries
the evening before you plan to fly. You should always charge the
transmitter batteries before flying and at other times as recommended by
the radio manufacturer.
PREFLIGHT
MOTOR SAFETY PRECAUTIONS
The Hurricane is a great-flying model that flies smoothly and predictably.
The Hurricane does not, however, possess the self-recovery
characteristics of a primary R/C trainer and should be flown only by
experienced R/C pilots. If you are an inexperienced modeler we strongly
urge you to seek the assistance of a competent, experienced R/C pilot to
check your model for airworthiness and to teach you how to fly.
CAUTION (THIS APPLIES TO ALL R/C AIRPLANES): If, while flying,
you notice an alarming or unusual sound such as a low-pitched "buzz,"
this may indicate control surface flutter. Flutter occurs when a control
surface (such as an aileron or elevator) or a flying surface (such as a
wing or stab) rapidly vibrates up and down (thus causing the noise). In
extreme cases, if not detected immediately, flutter can actually cause
the control surface to detach or the flying surface to fail, thus causing
loss of control followed by an impending crash. The best thing to do
when flutter is detected is to slow the model immediately by reducing
power, then land as soon as safely possible. Identify which surface
fluttered (so the problem may be resolved) by checking all the servo
grommets for deterioration or signs of vibration. Make certain all
pushrod linkages are secure and free of play. If it fluttered once, under
similar circumstances it will probably flutter again unless the problem is
fixed. Some things which can cause flutter are; Excessive hinge gap;
Not mounting control horns solidly; Poor fit of clevis pin in horn; Sideplay
of wire pushrods caused by large bends; Excessive free play in servo
gears; Insecure servo mounting; and one of the most prevalent causes
of flutter; Flying an overpowered model at excessive speeds.
FLYING
The electric motor and battery used in your Hurricane are very
powerfull and the spinning propeller has a lot of momentum;
therefore, if you touch the propeller while it is spinning it may inflict
severe injury. Respect the motor and propeller for the damage it is
capable of and take whatever precautions are necessary to avoid
injury. Always disconnect and remove the battery until you are ready
to fly again and always make sure the switches are turned off before
connecting the battery.
www.hacker-model.com 3
Výškovka
Elevator
Přijímač 4 kanálový
Receiver 4 channel
Směrovka
Rudder
Křidélko P
Aileron R
Elektromotor
Electromotor
SEA
Regulátor otáček
Speed controller
Pohonná baterie
Accu pack
Křidélko L
Aileron L
Při jen 4k přijímači použijte pro připojení křidélek Y-kabel.
Use Y-cable to connect aileron servos when 4k receiver only.
Let
Udržujte si přehled o pohybu ostatních modelů ve vzduchu. Je dobré mít
pomocníka, který provoz ostatních modelů sleduje a podává vám
informace. Po startu model srovnejte do vodorovného letu a vytrimujte tak,
aby letěl rovně. Postupně si vyzkoušejte různé režimy letu a manévry. Ve
větší výšce vyzkoušejte také minimální rychlost, abyste se seznámili s
chováním modelu při přistání. Pozor na kapacitu baterie, abyste jste s
modelem stihli včas přistát.
Přistání
Chcete-li zahájit přiblížení na přistání, uberte plyn. Nechte nos modelu
mírně dolů a pomalu snižujte výšku letu a udržujte sníženou rychlost.
Udělejte poslední zatáčku směrem k přistávací dráze (proti větru),
udržujte sestupovou rovinu a rychlost letu.
Po dosažení prahu dráhy stáhněte plyn a přitahujte výškovku až se model
dotkne země.
Takeoff
Remember to takeoff into the wind. Always start upwind with a hand cast
on a slight uphill slope. Start at about 2/3 of full engine power. For first
flights, it is advisable to have a helper throw the model so you can
concentrate on controlling the model.
Flight
For reassurance and to keep an eye on other traffic, it is a good idea to
have an assistant on the flight line with you. Tell him to remind you to
throttle back once the plane gets to a comfortable altitude. While full
throttle is usually desirable for takeoff, most models fly more smoothly at
reduced speeds. Take it easy with the Hurricane for the first flight,
gradually getting acquainted with it as you gain confidence. Adjust the
trims to maintain straight and level flight. After flying around for a while and
while still at a safe altitude with plenty of battery life, practice slow flight and
execute practice landing approaches by reducing the throttle to see how
the model handles at slower speeds. Add power to see how she climbs as
well. Continue to fly around, executing various maneuvers and making
mental notes (or having your assistant write them down) of what trim or
C.G. changes may be required to fine tune the model so it flies the way you
like. Mind your battery charge, but use this first flight to become familiar
with your model before landing.
Poznámka: Výchylka uvedená v mm je měřena na odtokové
hraně kormidla nejdále od osy otáčení. Přesné nastavení si
upravte dle vlastních zvyklostí.
Landing
To initiate a landing approach, lower the throttle while on the downwind leg.
Allow the nose of the model to pitch downward to gradually bleed off
altitude. Continue to lose altitude, but maintain airspeed by keeping the
nose down as you turn onto the crosswind leg. Make your final turn toward
the runway (into the wind) keeping the nose down to maintain airspeed
and control. Level the attitude when the model reaches the runway
threshold, modulating the throttle as necessary to maintain your glide path
and airspeed. If you are going to overshoot, smoothly advance the throttle
(always ready on the right rudder to counteract torque) and climb out to
make another attempt. When you're ready to make your landing flare and
the model is a foot or so off the deck, smoothly increase up elevator until it
gently touches down. One final note about flying your model. Have a goal
or flight plan in mind for every flight. This can be learning a new
maneuver(s), improving a maneuver(s) you already know, or learning how
the model behaves in certain conditions (such as on high or low rates).
This is not necessarily to improve your skills (though it is never a bad
idea!), but more importantly so you do not surprise yourself by impulsively
attempting a maneuver and suddenly finding that you've run out of time,
altitude or airspeed. Every maneuver should be deliberate, not impulsive.
For example, if you're going to do a loop, check your altitude, mind the
wind direction (anticipating rudder corrections that will be required to
maintain heading), remember to throttle back at the top and make certain
you are on the desired rates (high/low rates). A flight plan greatly reduces
the chances of crashing your model just because of poor planning and
impulsive moves. Remember to think.
4www.hacker-model.com
Scheme (minimally 4 channel R/C set with power set)
Schéma zapojení (minimálně 4 kanálová RC souprava s pohonnou jednotkou)
Note: Size of deflection in milimeters is measured at the trailing
edge furthest from the center of rotation. Customize exact
settings by your taste.
Nastavení výchylek kormidel / Control surface deflection settings
Křidélka / Ailerons: +30 -25mm (EXP 30%); Výškovka / Elevator: ±12mm (EXP 30%); Směrovka / Rudder: ±15mm (EXP 30%)
Těžiště / Center of gravity C.G.
Poznámka: S polohou těžiště můžete experimentovat. S
uvedenou polohou těžiště se chová model neutrálně.
Nezapomeňte vyvážit model také příčně.
Note: You can experiment with the C.G. position. With C.G. by
this manual the model flyes neutrally. Do not forget to balance
the model laterally as well.
Barvy - barevné schéma / Colours - Paint scheme
Hurricane je k dispozici ve dvou barevných provedeních.
Pro dobarvení modelu můžete použít tyto barevné odstíny.
Doporučujeme nitro barvy ve spreji dle vzorníku RAL.
Odstíny jsou přibližné.
Hurricane is available in two colours. To finish the model
you can use the following colours. We recommend nitro
spray paints according to RAL. Colours are not accurate.
DESERT
7006
Dark Slate Grey
Extra Dark Sea Grey
Sky (RAF)
Earth Brown
Mid Stone
Azure Blue
7031
6019
1011
8025
5012
RAL RAL
94mm
Seznam dílů / Parts list:
www.hacker-model.com 5
Obsah stavebnice / Kit contens
Hlavní díly / Main parts:
č. ks Popis
No. Qty. Description
1 1 Levá polovina křídla / Left wing panel
2 1 Pravá polovina křídla / Right wing panel
3 1 Trup - pravá strana / Fuselage - right side
4 1 Trup - levá strana / Fuselage - left side
5 1 Výškovka / Elevator
6 1 Směrovka / Rudder
7 1 Ostruha / Tail skid
8 7 Středové díly trupu / Fuselage middle parts
9 1 Výplně zadní části trupu / Fuselage tail fills
10 1 Držák šroubu v křídle / Wing screw holder
11 1 Držák matice / Nut holder
12 1 Držák kolíku křídla / Wing pin holder
13 1 Plato překližka / Plywood sheet 3mm
14 1 Plato překližka / Plywood sheet 5mm
15 1 Lože baterie / Battery holder
16 2 Spojka výztuh křídla / Wing reinforcement joiner
17 1 Šroub uchycení křídla / Screw M4
18 1 Matice / Nut M4
19 4 Vrut (pro motor) / Screw (for motor) 3x13mm
20 1 Plato plast průhledný / Clear plastic sheet 1mm
21 1 Plato plast černý / Black plastic sheet 2mm
22 1 Plato páky kormidel / Control horns sheet
23 1 Kabina / Canopy
24 8 Vidlička táhla s čepem / Clevis with pin
25 1 Suchý zip / Velcro
26 1 Spojovací drát VOP / Elevator wire
27 1 Vázací guma / Wing fixing rubber strip
28 1 Uhlíková tyč / Carbon stick ø3x330mm
29 1 Plastová trubka / Plastic tube ø4x500mm
30 4 Uhlíková tyč / Carbon stick ø2x1000mm
31 3 Uhlíkový pásek / Carbon strip 0.5x3x1000
32 4 Skelná tyč / Glass stick ø1.5x1000mm
33 1 Papírový kokpit s pilotem / Paper sheet (cockpit with pilot)
34 1 Vrtulový kužel / Foam spinner
35 1 Unašeč vrtulového kuželu / Spinner holder
36 1 Podložka / Washer 6mm
37 1 Samolepka maskování kabiny / Masking film for canopy
Poznámka: obrázky nemusí přesně odpovídat vybavení stavebnice
NOTE: Pictures may not exactly match the equipment kit
Malé díly / Small parts:
Poznámka / Note:
1
2
5
3
7
9
468
2
5
3
7
9
4
6
8
1 2
54
7
34
18
19
23
24
27
28 13
37
33
15
17
21
16
14
31
32
30
29
25
26
22
20
8
9
10 11
12
35
6
3
36
Model lze sestavit se dvěma variantami upevnění křídla:
V1. křídlo je upevněno na kolík a šroub. Esteticky lepší varianta vhodná
pro zkušenější piloty. V této variantě není nutné použít díly označené **
Můžete také začít létat s křídlem přivazovaným gumou a později přejít na
uchycení šroubem.
V2. křídlo je přivázáno k trupu gumou. Tato varianta je vhodná pro méně
zkušené piloty, nebo při létání leteckých soubojů a zabraňuje větším
škodám při haváriích. V této variantě není nutné použít díly označené *
The plane can be assembled with two variants of wing mounting:
V1. the wing is fixed with a pin and screw. Aesthetically better variant
suitable for advanced pilots. In this variant it is not necessary to use parts
marked **
V2. the wing is tied to the fuselage with a rubber. This option is suitable
for not advaced pilots or when you will fly combat and prevents fatal
damages in crashes. In this variant it is not necessary to use parts marked *
You can also start flying with a rubber-fixed wing and later switch to a screw-
fixed wing.
Zkontrolujte úplnost stavebnice podle
seznamu v návodu. Důkladně si
přečtěte celý návod.
Check the package contents according
to the list in the manual. Read the
manual carefully.
Doporučujeme serva s kovovou převodovkou s hmotností přibližně
15g ( křidélka, výškovka) a 10g (směrovka).
Our recommendations - use metal gear servos with weight
approximately 15g (ailerons, elevator) and 10g (rudder).
2x
levé křidélko/
left aileron
serva výškovky a směrovky/
elevator and rudder servos
směrovka/
rudder
výškovka/
elevator
pravé křidélko/
right aileron
12.5mm
15g
Provést operaci na levé i pravé straně.
Do operation on both sides, left and right. Správné provedení.
Right!
Špatné provedení.
Bad!
Přišroubovat.
Screw it.
Přilepit kontaktním lepidlem.
Glue with contact glue.
Odříznout / proříznout drážku.
Cut off / Cut the slot.
Přilepit řídkým CA lepidlem.
Glue with thin CA glue.
Počkejte chvíli než CA lepidlo zateče do spáry
a použijte aktivátor CA lepidla ve spreji.
Wait a minute till glue fill the gap and
use CA kicker (accelerator) spray.
ø2mm
1h
Vyvrtejte otvor o ø2mm.
Drill the hole diameter 2mm.
Ohřejte zapalovačem nebo
horkovzdušnou pistolí.
Heat up with lighter or with heat gun.
Počkejte 1 hodinu.
Wait for 1 hour.
Pozor, záleží na správné orientaci dílu.
Be careful, orient correctly, see picture
for reference.
Obruste smirkovým papírem.
Abrade with sandpaper.
Provést operaci na horní i spodní straně.
Do operation on both sides, top and bottom.
Ostříhnout nůžkami.
Trim with scissors. Vyříznout díl pilkou.
Use hand saw.
Nabarvit díl. Při barvení plastů použijte nejdříve
základ na plasty.
Paint the piece. Use primer for plastic when
paint plastic parts.
Zatlačit, zamáčknout.
Push.
Stisknout k sobě.
Press together.
gDovážení - olověná zátěž.
Maintain balance - lead ballast.
Udělejte si značku tužkou.
Make mark with pencil.
12.5mm
15g
15g
10mm
10g
10mm
carbon 0.5x3mmcarbon 0.5x3mmcarbon 0.5x3mm
carbon
carbon
carbon
4x 330mm4x 330mm4x 330mm
25
Na střihání použijte větší nůžky.
Use larger scissors to cut.
spoj zajistit / fix the connectionspoj zajistit / fix the connectionspoj zajistit / fix the connection
550-600mm550-600mm550-600mm
www.hacker-model.com
6
Symboly a značky používané při stavbě / Symbols used in building
31
31
5
prodluž kabely serv výškovky a směrovky /prodluž kabely serv výškovky a směrovky /
adjust lenght of the elevator and rudder servosadjust lenght of the elevator and rudder servos
prodluž kabely serv výškovky a směrovky /
adjust lenght of the elevator and rudder servos
Spoj zajisti pomocí lepící pásky nebo tavného lepidla.Spoj zajisti pomocí lepící pásky nebo tavného lepidla.
Fix the connection using self adhesive tape or hot glute.Fix the connection using self adhesive tape or hot glute.
Spoj zajisti pomocí lepící pásky nebo tavného lepidla.
Fix the connection using self adhesive tape or hot glute.
Nářadí (není součástí stavebnice) / Tools (not included):
- Skalpel (odlamovací nůž), nůžky, pinzeta, křížový a plochý šroubovák, smirkový papír 120-320, malé kleště, pravítko, vrtačka a
vrtáky, kontaktní lepidlo UHU Por na tvrdé pěny (zeleno-žlutá tuba), lepidlo vteřinové (CA) s aktivátorem
- Sharp hobby knife, Scissors, Tweezers, Crosshead and Flathead screwdriver, Sandpaper 120-320, Small pliers, Ruler, Drillbits ,
CA thin + activator, Contact glue UHU Por (foam frendly) - yellow-green tube
Přilepit řídkým CA lepidlem tak,
aby lepidlo vyplnilo spáry
a dokolale slepilo díly.
Glue with thin CA glue and
fill the gap between
parts for perfect sticking.
01 02
03
05
04
06
31
6
65mm
65mm
32.5mm 32.5mm
30mm
90
90
o
o
30mm
2x 207mm2x 207mm2x 207mm
26
26
26
26
26
22
www.hacker-model.com 7
Na povrch naneste řídké CA a nechte vsáknout.
Apply thin CA to the surface and allow to soak in.
10 09
12
14
16
13
15
11
0807
3mm
ø 1.5mm ø 1.5mm ø 1.5mm
25mm
25mm
Zbytky (32) uchovejte pro pozdější použití.
Keep rests of the (32) for later use.
32
32
32
www.hacker-model.com
8
použijte ostrý nůž /použijte ostrý nůž /
use sharp hobby kinfeuse sharp hobby kinfe
použijte ostrý nůž /
use sharp hobby kinfe detaildetaildetail
22
3
4
Následuje sestavení trupu. Na výrobu jde o Následuje sestavení trupu. Na výrobu jde o
nejnáročnější část modelu. Postupujte pečlivě podle nejnáročnější část modelu. Postupujte pečlivě podle
náv o d u . J a ko ochra n u p ř e d C A l e p i d l e m ná vo d u . J a ko o c h ra n u pře d C A l e p i d l e m
doporučujeme použít tenké rukavice, přebytečné CA doporučujeme použít tenké rukavice, přebytečné CA
lepidlo otírejte papírovými ubrousky.lepidlo otírejte papírovými ubrousky.
The next step is to assemble the fuselage. This is the The next step is to assemble the fuselage. This is the
most challenging part of the model to build. Follow most challenging part of the model to build. Follow
the instructions carefully. We recommend to use thin the instructions carefully. We recommend to use thin
gloves as protection against CA glue, wipe off excess gloves as protection against CA glue, wipe off excess
CA glue with paper tissues.CA glue with paper tissues.
Následuje sestavení trupu. Na výrobu jde o
nejnáročnější část modelu. Postupujte pečlivě podle
náv o d u . J a ko ochra n u p ř e d C A l e p i d l e m
doporučujeme použít tenké rukavice, přebytečné CA
lepidlo otírejte papírovými ubrousky.
The next step is to assemble the fuselage. This is the
most challenging part of the model to build. Follow
the instructions carefully. We recommend to use thin
gloves as protection against CA glue, wipe off excess
CA glue with paper tissues.
Po nanesení CA lepidla do spár s výztuhami (32) nechte lepidlo chvíli zatéci. Po nanesení CA lepidla do spár s výztuhami (32) nechte lepidlo chvíli zatéci.
Potom postupujte od jednoho konce bočnice ke druhému a tlačte hrany bočnice Potom postupujte od jednoho konce bočnice ke druhému a tlačte hrany bočnice
k sobě tak, aby došlo k uzavření spáry nad výztuhou. Přebytečné lepidlo otírejte k sobě tak, aby došlo k uzavření spáry nad výztuhou. Přebytečné lepidlo otírejte
papírovým ubrouskem a aplikujte aktivátor. Hrany tiskněte dokud lepidlo papírovým ubrouskem a aplikujte aktivátor. Hrany tiskněte dokud lepidlo
nevytvrdne.nevytvrdne.
After applying the CA glue to the gaps with the reinforcements (32), allow the After applying the CA glue to the gaps with the reinforcements (32), allow the
glue to flow into the gaps for a while. Then work from one end of the sidewall to glue to flow into the gaps for a while. Then work from one end of the sidewall to
the other, pushing the edges of the sidewall together to close the gap above the the other, pushing the edges of the sidewall together to close the gap above the
reinforcement. Wipe off excess glue with a paper tissue and apply CA kicker. reinforcement. Wipe off excess glue with a paper tissue and apply CA kicker.
Press the edges together until the glue will cure.Press the edges together until the glue will cure.
Po nanesení CA lepidla do spár s výztuhami (32) nechte lepidlo chvíli zatéci.
Potom postupujte od jednoho konce bočnice ke druhému a tlačte hrany bočnice
k sobě tak, aby došlo k uzavření spáry nad výztuhou. Přebytečné lepidlo otírejte
papírovým ubrouskem a aplikujte aktivátor. Hrany tiskněte dokud lepidlo
nevytvrdne.
After applying the CA glue to the gaps with the reinforcements (32), allow the
glue to flow into the gaps for a while. Then work from one end of the sidewall to
the other, pushing the edges of the sidewall together to close the gap above the
reinforcement. Wipe off excess glue with a paper tissue and apply CA kicker.
Press the edges together until the glue will cure.
19
21
23
17
20
22
24
18
Jestli nemáte rádi serva vyčnívající v zadní části trupu můžete si je dát jinam, Jestli nemáte rádi serva vyčnívající v zadní části trupu můžete si je dát jinam,
takové řešení ale není předmětem tohoto návodu.takové řešení ale není předmětem tohoto návodu.
If you don't like the servos protruding at the rear of the fuselage you can put If you don't like the servos protruding at the rear of the fuselage you can put
them elsewhere, but such a solution is not the subject of this manual.them elsewhere, but such a solution is not the subject of this manual.
Jestli nemáte rádi serva vyčnívající v zadní části trupu můžete si je dát jinam,
takové řešení ale není předmětem tohoto návodu.
If you don't like the servos protruding at the rear of the fuselage you can put
them elsewhere, but such a solution is not the subject of this manual.
Zopakujte kroky 20-28 i s druhou bočnicí (3).Zopakujte kroky 20-28 i s druhou bočnicí (3).
Repeat steps 20-28 with next sidewall (3).Repeat steps 20-28 with next sidewall (3).
Zopakujte kroky 20-28 i s druhou bočnicí (3).
Repeat steps 20-28 with next sidewall (3).
3
4
29
8
29
29
www.hacker-model.com 9
13
13
3mm3mm3mm
13x ø4-30mm 13x ø4-30mm 13x ø4-30mm
30mm 30mm 30mm
3mm3mm3mm
29
31
33
25
27
30
32
34
26
28
14
www.hacker-model.com
10
Postupně po celém obvodu bočnice nanášejte do spáry lepidlo, stiskněte díly Postupně po celém obvodu bočnice nanášejte do spáry lepidlo, stiskněte díly
k sobě, přebytečné lepidlo setřete ubrouskem a aplikujte aktivátor.k sobě, přebytečné lepidlo setřete ubrouskem a aplikujte aktivátor.
Step by step apply CA glue around of the sidewall into the gaps, press the Step by step apply CA glue around of the sidewall into the gaps, press the
parts together, wipe off excess glue with a tissue and apply CA kicker.parts together, wipe off excess glue with a tissue and apply CA kicker.
Postupně po celém obvodu bočnice nanášejte do spáry lepidlo, stiskněte díly
k sobě, přebytečné lepidlo setřete ubrouskem a aplikujte aktivátor.
Step by step apply CA glue around of the sidewall into the gaps, press the
parts together, wipe off excess glue with a tissue and apply CA kicker.
Bez lepení vyzkoušejte obě části trupu složit.Bez lepení vyzkoušejte obě části trupu složit.
Without gluing, try to assemble both parts of the fuselage.Without gluing, try to assemble both parts of the fuselage.
Bez lepení vyzkoušejte obě části trupu složit.
Without gluing, try to assemble both parts of the fuselage.
39
41
43
35
37
40
42
44
36
38
slepeno / gluedslepeno / gluedslepeno / glued
zaoblit hrany /zaoblit hrany /
round the edgesround the edges
zaoblit hrany /
round the edges
2. fáze finálního slepení trupu2. fáze finálního slepení trupu
Phase 2 of final fuselage assemblingPhase 2 of final fuselage assembling
2. fáze finálního slepení trupu
Phase 2 of final fuselage assembling
www.hacker-model.com 11
Trup se směrem ke konci zužuje. Abyste ho Trup se směrem ke konci zužuje. Abyste ho
neslepili křivě, lepí se nejdříve zadní část a až neslepili křivě, lepí se nejdříve zadní část a až
potom přední část! Pracujte na rovné podložce!potom přední část! Pracujte na rovné podložce!
The fuselage narrows towards the end. To be The fuselage narrows towards the end. To be
glued straight, it must be glued the rear part first glued straight, it must be glued the rear part first
and then the front part! Don´t try to glue it in one and then the front part! Don´t try to glue it in one
step! Use flat surface for assembling!step! Use flat surface for assembling!
Trup se směrem ke konci zužuje. Abyste ho
neslepili křivě, lepí se nejdříve zadní část a až
potom přední část! Pracujte na rovné podložce!
The fuselage narrows towards the end. To be
glued straight, it must be glued the rear part first
and then the front part! Don´t try to glue it in one
step! Use flat surface for assembling!
1. fáze finálního slepení trupu1. fáze finálního slepení trupu
Phase 1 of final fuselage assemblingPhase 1 of final fuselage assembling
1. fáze finálního slepení trupu
Phase 1 of final fuselage assembling
3. fáze finálního slepení trupu3. fáze finálního slepení trupu
Phase 3 of final fuselage assemblingPhase 3 of final fuselage assembling
3. fáze finálního slepení trupu
Phase 3 of final fuselage assembling
Postupně po obvodu bočnice nanášejte do spáry lepidlo, stiskněte díly k Postupně po obvodu bočnice nanášejte do spáry lepidlo, stiskněte díly k
sobě, přebytečné lepidlo setřete ubrouskem a aplikujte aktivátor.sobě, přebytečné lepidlo setřete ubrouskem a aplikujte aktivátor.
Step by step apply CA glue around of the sidewall into the gaps, press the Step by step apply CA glue around of the sidewall into the gaps, press the
parts together, wipe off excess glue with a tissue and apply CA kicker.parts together, wipe off excess glue with a tissue and apply CA kicker.
Postupně po obvodu bočnice nanášejte do spáry lepidlo, stiskněte díly k
sobě, přebytečné lepidlo setřete ubrouskem a aplikujte aktivátor.
Step by step apply CA glue around of the sidewall into the gaps, press the
parts together, wipe off excess glue with a tissue and apply CA kicker.
13
10mm10mm10mm
phase 1phase 1phase 1
phase 2phase 2phase 2
49
51
45
47
50
52
46
48
XXX
X = 2mm
~
X = 2mm
~
X = 2mm
~
Y = 10mm
~
Y = 10mm
~
Y = 10mm
~
XXX
XXX
YYY
YYYYYY
XXXXXXXXX
gg
YYY
g g
phase 3phase 3phase 3
Při položení trupu na jednu i druhou stranu musí být vzdálenost X Při položení trupu na jednu i druhou stranu musí být vzdálenost X
vždy stejná! Opakujte kroky 53 a 54 dokud se tak nestane. Toto je vždy stejná! Opakujte kroky 53 a 54 dokud se tak nestane. Toto je
velmi důležité!velmi důležité!
When you will put fuselage to both sides distance X must be equal! When you will put fuselage to both sides distance X must be equal!
Repeat steps 53 and 54 till you will get it. This is very important!Repeat steps 53 and 54 till you will get it. This is very important!
Při položení trupu na jednu i druhou stranu musí být vzdálenost X
vždy stejná! Opakujte kroky 53 a 54 dokud se tak nestane. Toto je
velmi důležité!
When you will put fuselage to both sides distance X must be equal!
Repeat steps 53 and 54 till you will get it. This is very important!
Při položení trupu na jednu i druhou stranu musí být vzdálenost Y vždy stejná! Opakujte kroky 59 a 60 dokud se tak nestane. Toto je velmi důležité!Při položení trupu na jednu i druhou stranu musí být vzdálenost Y vždy stejná! Opakujte kroky 59 a 60 dokud se tak nestane. Toto je velmi důležité!
When you will put fuselage to both sides distance Y must be equal! Repeat steps 59 and 60 till you will get it. This is very important!When you will put fuselage to both sides distance Y must be equal! Repeat steps 59 and 60 till you will get it. This is very important!
Při položení trupu na jednu i druhou stranu musí být vzdálenost Y vždy stejná! Opakujte kroky 59 a 60 dokud se tak nestane. Toto je velmi důležité!
When you will put fuselage to both sides distance Y must be equal! Repeat steps 59 and 60 till you will get it. This is very important!
www.hacker-model.com
12
9
59
53
55
57
60
54
56
58
www.hacker-model.com 13
3
8
2x2x2x
Tvar trupu zafixujte přilepením Tvar trupu zafixujte přilepením
dílů (8) k bočnici (3) v dílů (8) k bočnici (3) v
motorovém prostoru.motorovém prostoru.
Fix the fuselage shape by gluing Fix the fuselage shape by gluing
the parts (8) to the sidewall (3) the parts (8) to the sidewall (3)
in the place for motor .in the place for motor .
Tvar trupu zafixujte přilepením
dílů (8) k bočnici (3) v
motorovém prostoru.
Fix the fuselage shape by gluing
the parts (8) to the sidewall (3)
in the place for motor .
Zkontrolujte, zda je po celém obvodu trup dobře slepený, případné nedostatky Zkontrolujte, zda je po celém obvodu trup dobře slepený, případné nedostatky
opravte. Nejnáročnější část stavby máte hotovou. Je čas vrhnout se na křídlo.opravte. Nejnáročnější část stavby máte hotovou. Je čas vrhnout se na křídlo.
Check that the fuselage is well glued all around, correct any mistakes. The Check that the fuselage is well glued all around, correct any mistakes. The
most challenging part of the model is done. Now it is time to start with most challenging part of the model is done. Now it is time to start with
assembling the wing.assembling the wing.
Zkontrolujte, zda je po celém obvodu trup dobře slepený, případné nedostatky
opravte. Nejnáročnější část stavby máte hotovou. Je čas vrhnout se na křídlo.
Check that the fuselage is well glued all around, correct any mistakes. The
most challenging part of the model is done. Now it is time to start with
assembling the wing.
70
63
65
67
69
61 62
64
66
68
4x ø 2-595mm4x ø 2-595mm4x ø 2-595mm
ohnout / bendohnout / bendohnout / bend spodní výztuha / bottom reinforcementspodní výztuha / bottom reinforcementspodní výztuha / bottom reinforcement
horní výztuha / upper reinforcementhorní výztuha / upper reinforcementhorní výztuha / upper reinforcement
TOPTOPTOP
BOTTOMBOTTOMBOTTOM
šablona / templatešablona / templatešablona / template
595mm595mm595mm
Ohněte trubku (16) tak, aby tvar odpovídal šabloně.Ohněte trubku (16) tak, aby tvar odpovídal šabloně.
Bend the tube (16) to get shape by template.Bend the tube (16) to get shape by template.
Ohněte trubku (16) tak, aby tvar odpovídal šabloně.
Bend the tube (16) to get shape by template.
Prohlédněte si horní povrch křídla, na koncích polovin Prohlédněte si horní povrch křídla, na koncích polovin
(1, 2) jsou značky pro umístění výztuhy.(1, 2) jsou značky pro umístění výztuhy.
Watch upper surface of wing panels (1, 2). There are Watch upper surface of wing panels (1, 2). There are
markers to place carbon reinforcement.markers to place carbon reinforcement.
Prohlédněte si horní povrch křídla, na koncích polovin
(1, 2) jsou značky pro umístění výztuhy.
Watch upper surface of wing panels (1, 2). There are
markers to place carbon reinforcement.
Ohněte trubku (16) tak, aby tvar odpovídal šabloně.Ohněte trubku (16) tak, aby tvar odpovídal šabloně.
Bend the tube (16) to get shape by template.Bend the tube (16) to get shape by template.
Ohněte trubku (16) tak, aby tvar odpovídal šabloně.
Bend the tube (16) to get shape by template.
Zbytky (30) uchovejte pro pozdější použití.Zbytky (30) uchovejte pro pozdější použití.
Keep rests of the (30) for later use.Keep rests of the (30) for later use.
Zbytky (30) uchovejte pro pozdější použití.
Keep rests of the (30) for later use.
30
16
16
www.hacker-model.com
14
150-200 150-200 150-200
15-20mm 15-20mm 15-20mm
důkladně slepte / glue thoroughlydůkladně slepte / glue thoroughlydůkladně slepte / glue thoroughly
důkladně slepte / glue thoroughlydůkladně slepte / glue thoroughlydůkladně slepte / glue thoroughly důkladně slepte / glue thoroughlydůkladně slepte / glue thoroughlydůkladně slepte / glue thoroughly
Použijte dvoje kleště, neohýbejte druhý konec trubky rukou!Použijte dvoje kleště, neohýbejte druhý konec trubky rukou!
Use two pliers, do not bend the other end of the pipe by hand!Use two pliers, do not bend the other end of the pipe by hand!
Použijte dvoje kleště, neohýbejte druhý konec trubky rukou!
Use two pliers, do not bend the other end of the pipe by hand!
76
78
80
72
74
77
79
71
73
75
4mm
4mm
5mm5mm5mm
značky / markersznačky / markersznačky / markers
střed / centerstřed / centerstřed / center
www.hacker-model.com 15
Tužkou udělejte značky i na spodním povrchu křídla ve Tužkou udělejte značky i na spodním povrchu křídla ve
stejném místě, jako jsou značky na horním povrchu.stejném místě, jako jsou značky na horním povrchu.
Make pencil marks on the bottom surface of the wing in Make pencil marks on the bottom surface of the wing in
the same place as the marks on the top surface.the same place as the marks on the top surface.
Tužkou udělejte značky i na spodním povrchu křídla ve
stejném místě, jako jsou značky na horním povrchu.
Make pencil marks on the bottom surface of the wing in
the same place as the marks on the top surface.
10
TOPTOPTOP
BOTTOMBOTTOMBOTTOM
značky tužkou / pencil markersznačky tužkou / pencil markersznačky tužkou / pencil markers
konec / wingtipkonec / wingtipkonec / wingtip
86
88
90
82
84
87
89
81
83
85
14
28
85mm85mm85mm
g
g
150-200 150-200 150-200
ø3mmø3mmø3mm
80mm80mm80mm
2x2x2x
www.hacker-model.com
16
2x2x2x
BOTTOMBOTTOMBOTTOM
92
94
91
93
95
97
99
96
98
100
10mm10mm10mm
115mm115mm115mm
10mm10mm10mm
10mm10mm10mm
8-10mm8-10mm8-10mm
8-10mm8-10mm8-10mm
21
Tužkou udělejte značku.Tužkou udělejte značku.
Make pencil mark.Make pencil mark.
Tužkou udělejte značku.
Make pencil mark.
Pokud stavíte verzi s upevněním křídla gumou můžete Pokud stavíte verzi s upevněním křídla gumou můžete
uhlíkový kolík před slepením vyjmout.uhlíkový kolík před slepením vyjmout.
If you are building a version with rubber wing attachment you If you are building a version with rubber wing attachment you
can remove the carbon pin before gluing.can remove the carbon pin before gluing.
Pokud stavíte verzi s upevněním křídla gumou můžete
uhlíkový kolík před slepením vyjmout.
If you are building a version with rubber wing attachment you
can remove the carbon pin before gluing.
přesah / overlappřesah / overlappřesah / overlap
3mm
ø 1.5-120mmø 1.5-120mmø 1.5-120mm
2x2x2x
6x 0.5x3-120mm6x 0.5x3-120mm6x 0.5x3-120mm
115mm115mm115mm
3mm
3mm
www.hacker-model.com 17
32
31
101
103
105
107
109
102
104
106
108
110
3mm
5mm5mm5mm
10mm10mm10mm
díly pro variantu uchycení křídla šroubem /díly pro variantu uchycení křídla šroubem /
parts for fixing the wing with screw and pinparts for fixing the wing with screw and pin
díly pro variantu uchycení křídla šroubem /
parts for fixing the wing with screw and pin
oříznout okolo / cut around the screw headoříznout okolo / cut around the screw headoříznout okolo / cut around the screw head
použijte pouze kapky CA / use just drops of CApoužijte pouze kapky CA / use just drops of CApoužijte pouze kapky CA / use just drops of CA
10mm10mm10mm
přesah / overlappřesah / overlappřesah / overlap
ø4mmø4mmø4mm
www.hacker-model.com
18
20
12 11
11
17 18
17
Křídlo je připravené na spojení s trupem.Křídlo je připravené na spojení s trupem.
Now wing is prepared to be joined with fuselage.Now wing is prepared to be joined with fuselage.
Křídlo je připravené na spojení s trupem.
Now wing is prepared to be joined with fuselage.
18
V1V1V1V1V1V1
V1V1V1V1V1V1
V1V1V1V1V1V1
111
113
115
117
119
112
114
116
118
120
www.hacker-model.com 19
na CA lepidle použijte prodloužený aplikátor /na CA lepidle použijte prodloužený aplikátor /
use extender tip on CA glue bottleuse extender tip on CA glue bottle
na CA lepidle použijte prodloužený aplikátor /
use extender tip on CA glue bottle
12
12
11
12
demontujte křídlo / remove the wingdemontujte křídlo / remove the wingdemontujte křídlo / remove the wing 20
V1V1V1V1V1V1
V1V1V1V1V1V1
V1V1V1V1V1V1
V1V1V1V1V1V1
V1V1V1V1V1V1
121
123
125
127
129
122
124
126
128
130
90mm90mm90mm
95mm95mm95mm
2x ø3-95mm2x ø3-95mm2x ø3-95mm
28
www.hacker-model.com
20
17
11
demontujte křídlo / remove the wingdemontujte křídlo / remove the wingdemontujte křídlo / remove the wing
uchycení křídla gumou / rubber-fixed winguchycení křídla gumou / rubber-fixed winguchycení křídla gumou / rubber-fixed wing
131
133
135
137
139
132
134
136
138
140
V1V1V1V1V1V1
V2V2V2V1V1V1
V2V2V2V2V2V2
V1V1V1V1V1V1
V1V1V1V1V1V1

This manual suits for next models

2

Other Hacker Toy manuals

Hacker Hotwing 750 User manual

Hacker

Hacker Hotwing 750 User manual

Hacker RACE1200 Series User manual

Hacker

Hacker RACE1200 Series User manual

Hacker WW2 WARBIRDS AIRCOMBAT Series User manual

Hacker

Hacker WW2 WARBIRDS AIRCOMBAT Series User manual

Hacker Xtra Vector Series MXs-804 Vector Instruction manual

Hacker

Hacker Xtra Vector Series MXs-804 Vector Instruction manual

Hacker SBACH 342 1200 User manual

Hacker

Hacker SBACH 342 1200 User manual

Hacker Master Stick hkpa2000 User manual

Hacker

Hacker Master Stick hkpa2000 User manual

Hacker SPECTRE Reference manual

Hacker

Hacker SPECTRE Reference manual

Hacker RT SUPER SIRIUS User manual

Hacker

Hacker RT SUPER SIRIUS User manual

Hacker FOX Electro SKG Series User manual

Hacker

Hacker FOX Electro SKG Series User manual

Hacker HC 1700A User manual

Hacker

Hacker HC 1700A User manual

Hacker Micro Magic Instruction manual

Hacker

Hacker Micro Magic Instruction manual

Hacker EDGE 540 RACE 1200 User manual

Hacker

Hacker EDGE 540 RACE 1200 User manual

Hacker Skyfighter Evo User manual

Hacker

Hacker Skyfighter Evo User manual

Hacker Ballerina Manual

Hacker

Hacker Ballerina Manual

Hacker Xtra Vector HC 1360A User manual

Hacker

Hacker Xtra Vector HC 1360A User manual

Hacker Calidus 50E User manual

Hacker

Hacker Calidus 50E User manual

Hacker FOX SKG Series User manual

Hacker

Hacker FOX SKG Series User manual

Hacker Sky Fighter User manual

Hacker

Hacker Sky Fighter User manual

Hacker EDGE 540 v3 Toxic User manual

Hacker

Hacker EDGE 540 v3 Toxic User manual

Hacker vagabond xl User manual

Hacker

Hacker vagabond xl User manual

Hacker Hotwing 750 User manual

Hacker

Hacker Hotwing 750 User manual

Hacker ZOOM 4D Instruction manual

Hacker

Hacker ZOOM 4D Instruction manual

Hacker DH 82 TIGER MOTH User manual

Hacker

Hacker DH 82 TIGER MOTH User manual

Hacker Acrostar mk2 XL User manual

Hacker

Hacker Acrostar mk2 XL User manual

Popular Toy manuals by other brands

Tramontina DINDON ROCKING SNAIL ASSEMBLY AND GENERAL INSTRUCTIONS

Tramontina

Tramontina DINDON ROCKING SNAIL ASSEMBLY AND GENERAL INSTRUCTIONS

Viessmann Vollmer 42513 Mounting instruction

Viessmann

Viessmann Vollmer 42513 Mounting instruction

Mega Construx POKEMON FFY81 manual

Mega Construx

Mega Construx POKEMON FFY81 manual

TP active fun Deluxe Meadow Cottage Wooden Playhouse with... Instructions for assembly, maintenance and safe use

TP active fun

TP active fun Deluxe Meadow Cottage Wooden Playhouse with... Instructions for assembly, maintenance and safe use

Hobbico FlyZone Revolt Assembly

Hobbico

Hobbico FlyZone Revolt Assembly

Eduard F-111D/E exterior quick start guide

Eduard

Eduard F-111D/E exterior quick start guide

Topmodel CZ Hotliner NIKE evo manual

Topmodel CZ

Topmodel CZ Hotliner NIKE evo manual

MTHTrains RAILKING M-1a MOUNTAIN STEAM ENGINE operating instructions

MTHTrains

MTHTrains RAILKING M-1a MOUNTAIN STEAM ENGINE operating instructions

THUNDER TIGER Fun Tiger Extra Assembly instructions

THUNDER TIGER

THUNDER TIGER Fun Tiger Extra Assembly instructions

Steren CAR-510 manual

Steren

Steren CAR-510 manual

VTech Baby Sing-Along Spinning Wheel instruction manual

VTech Baby

VTech Baby Sing-Along Spinning Wheel instruction manual

Fisher-Price InteracTV user manual

Fisher-Price

Fisher-Price InteracTV user manual

Faller TOWN CHURCH instructions

Faller

Faller TOWN CHURCH instructions

Braemere Models Littleborough Lancs Bailey Bale Trailer Assembly instructions

Braemere Models

Braemere Models Littleborough Lancs Bailey Bale Trailer Assembly instructions

MGA Entertainment LTXtreme Air Chargers Twisted Turn Crashway... manual

MGA Entertainment

MGA Entertainment LTXtreme Air Chargers Twisted Turn Crashway... manual

Park Scale Models NS-TKAT Assembly

Park Scale Models

Park Scale Models NS-TKAT Assembly

THE WORLD MODELS FUN WORLD 40 instruction manual

THE WORLD MODELS

THE WORLD MODELS FUN WORLD 40 instruction manual

Little Tikes itikes user guide

Little Tikes

Little Tikes itikes user guide

manuals.online logo
manuals.online logoBrands
  • About & Mission
  • Contact us
  • Privacy Policy
  • Terms and Conditions

Copyright 2025 Manuals.Online. All Rights Reserved.