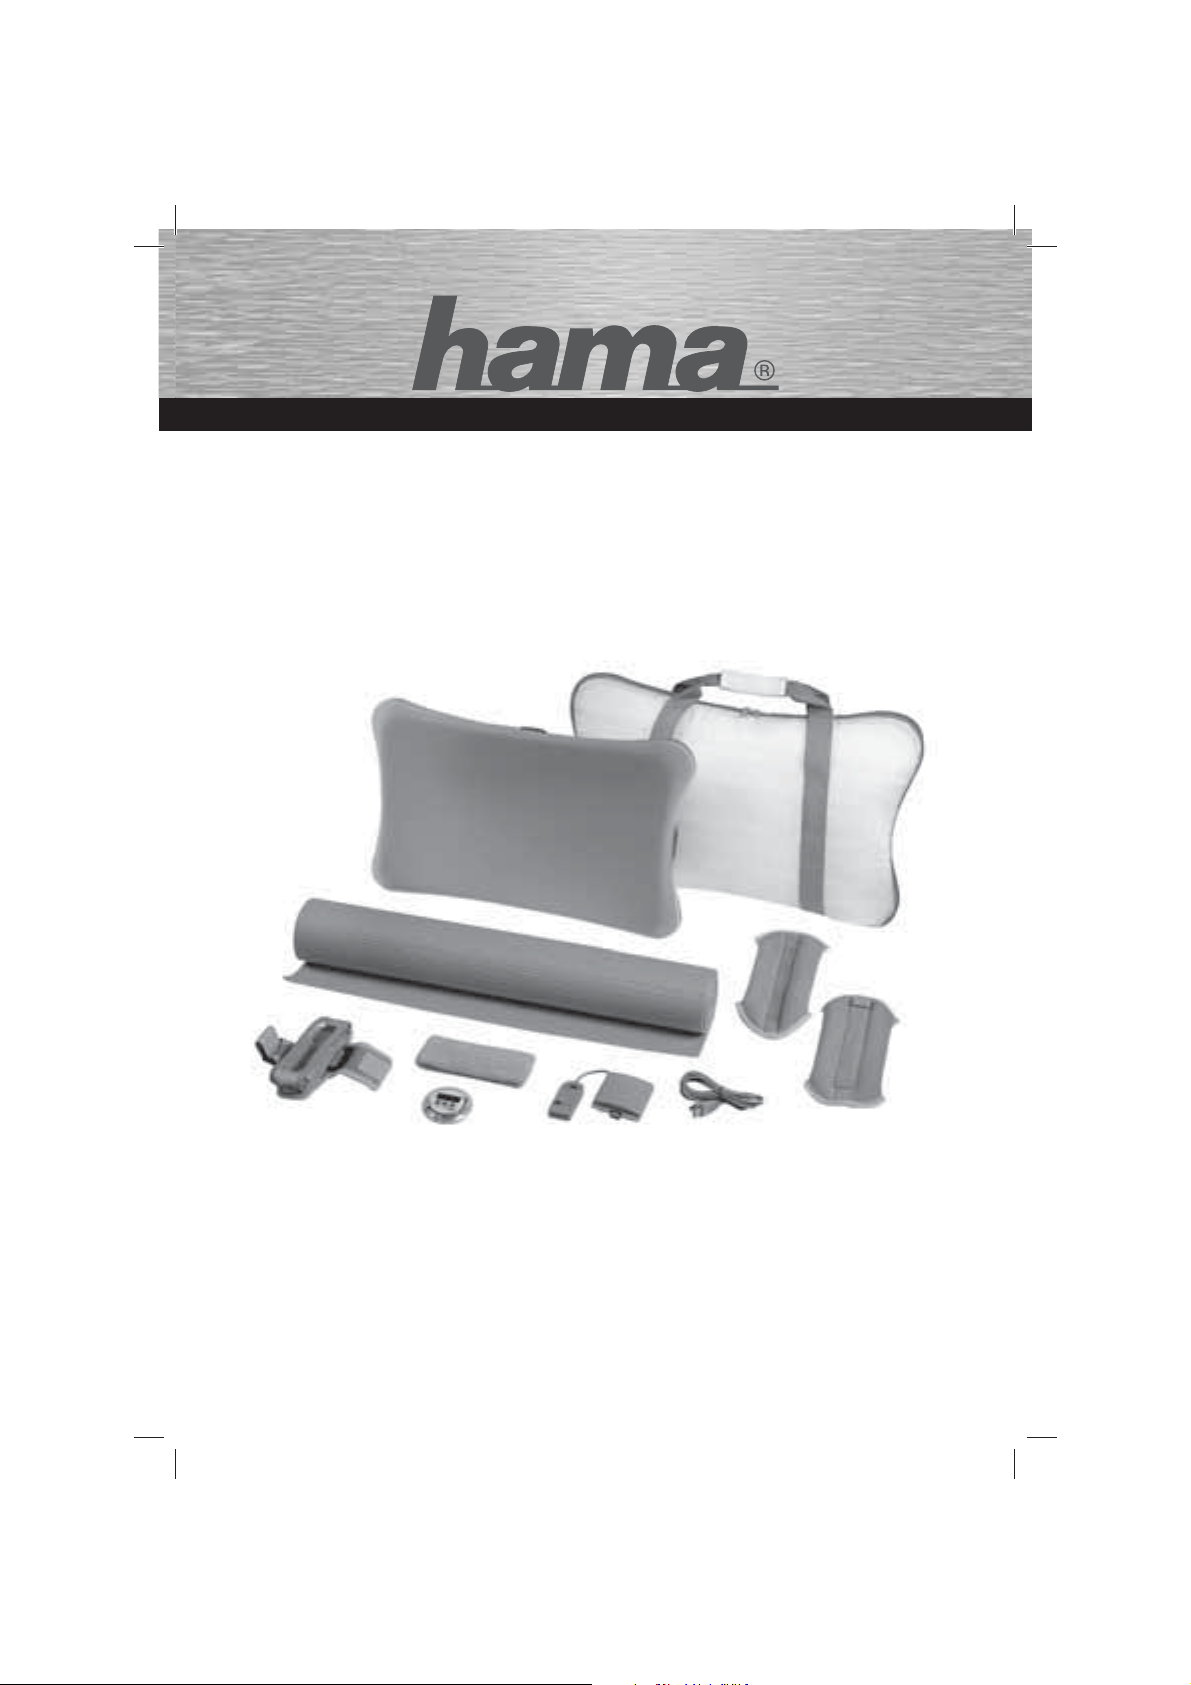
2
I. Vorstellung
Wir freuen uns, dass Sie das Hama Wii Fit Kit gewählt
haben und gratulieren Ihnen zu dieser Entscheidung.
Wir sind überzeugt, dass Ihnen unser Set in den nächsten
Jahren eine gute Unterstützung für Ihr Training auf dem
Wii Balance Board sein wird. Diese Anleitung enthält
Hinweise zum Timer und zum korrekten Anlegen der
Gewichte und der Wii-Mote Halterung.
II. Der Timer
Mit dem Timer können Sie die Gesamt-Dauer Ihres
Trainings festhalten, oder bestimmte Zeitvorgaben für
Ihre Übungen festlegen.
Wenn Sie die Gesamtlänge Ihres Trainings festhalten
wollen, drücken Sie auf den Start-Knopf auf der
Stopp-Uhr, wenn diese auf 0 eingestellt ist.
Der Timer beginnt dann die Gesamt-Zeit festzuhalten.
Unterbrechen können Sie die Zeit-Zählung mit der selben
Taste.
Wollen Sie für eine Übung eine bestimmte Zeitvorgabe,
stellen Sie mit den zwei linken Knöpfen die gewünschten
Minuten und Sekunden ein. Wenn Sie nun den
Start-Knopf drücken, beginnt der Timer rückwärts zu
zählen. Ist die Zeit abgelaufen, werden Sie akustisch
darauf hingewiesen. Drücken Sie anschließend nach
abgelaufener Zeit, erneut auf die Start-Taste, wird die
davor eingegebene Zeit wieder aufgerufen. So können
gleiche Übungen öfter wiederholt werden, ohne
mehrmals die Zeit einstellen zu müssen.
Drücken Sie gleichzeitig die Minuten- und die
Sekunden-Taste, wird der Timer wieder auf 0 eingestellt.
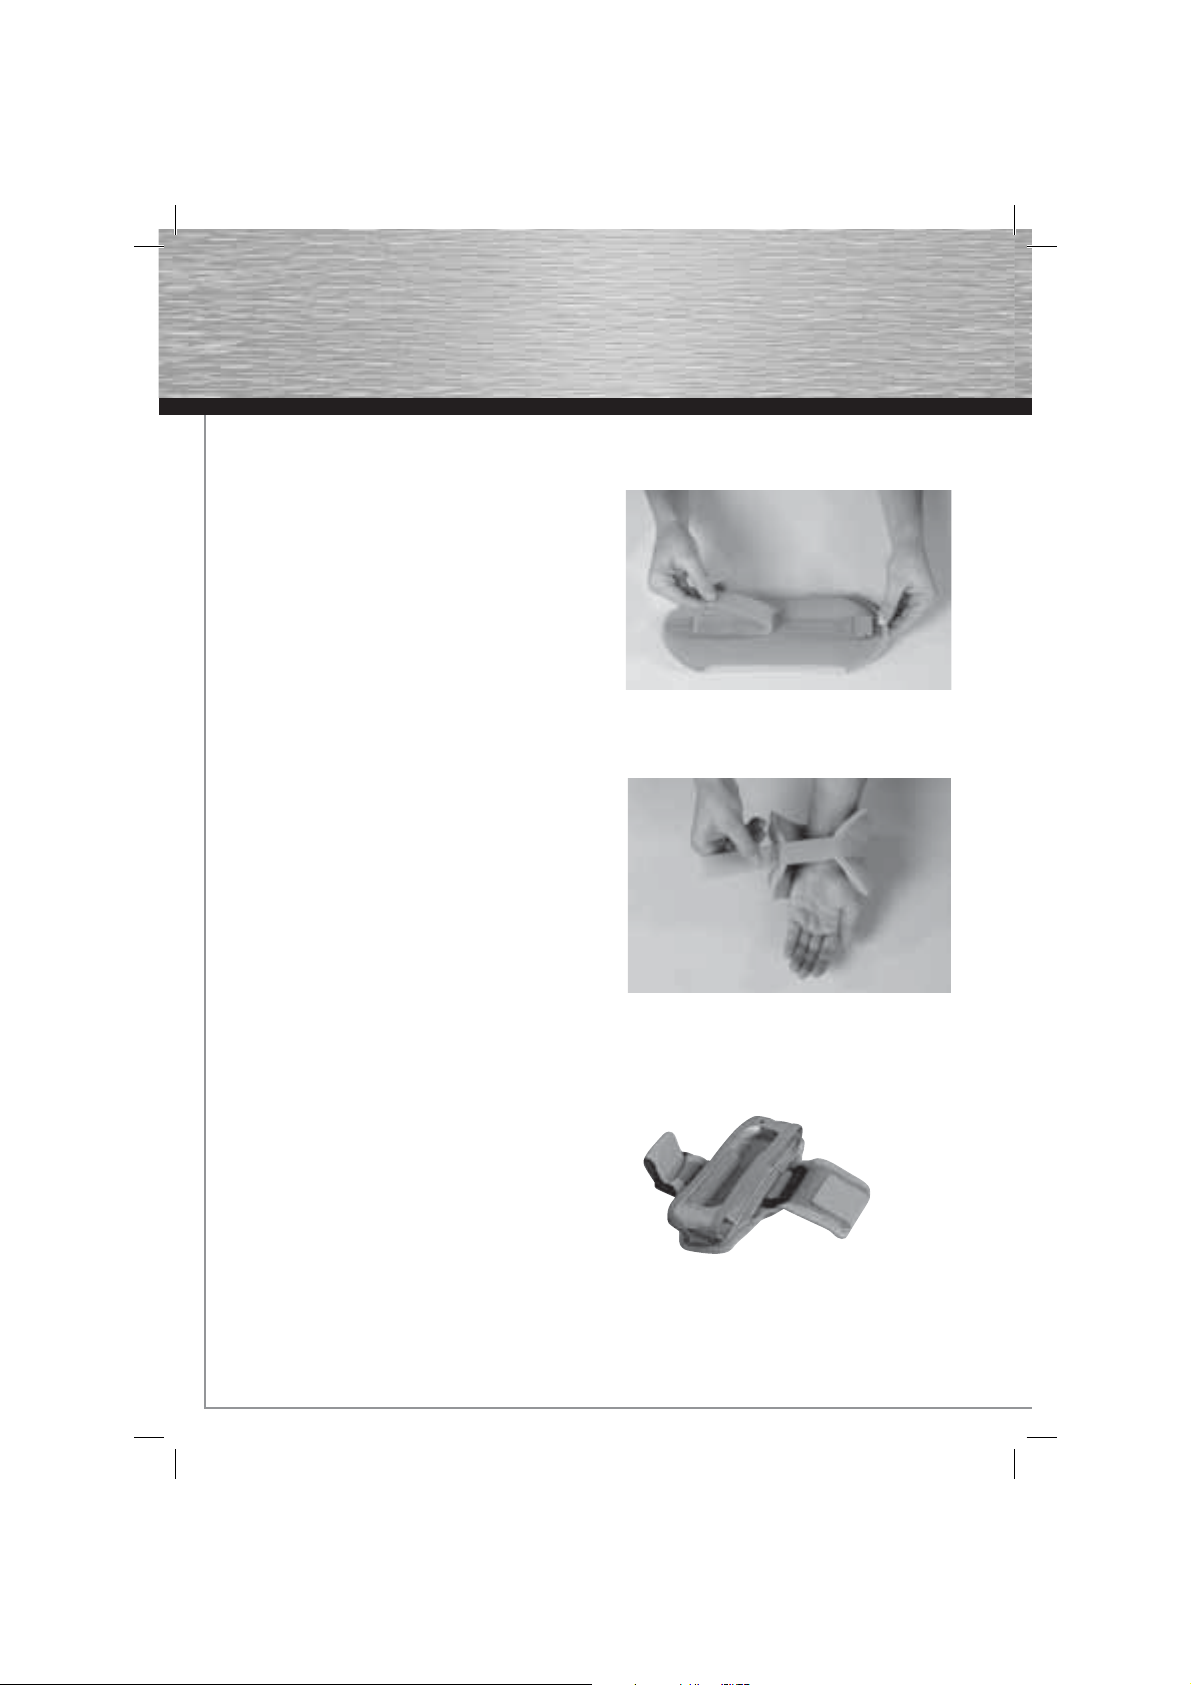
Zum auswechseln der Timer-Batterie muss die Schraube
auf dem Batteriefachdeckel aufgeschraubt werden.
Der Hama Timer für Wii Fit funktioniert mit den
Knopfzellen LR-44.
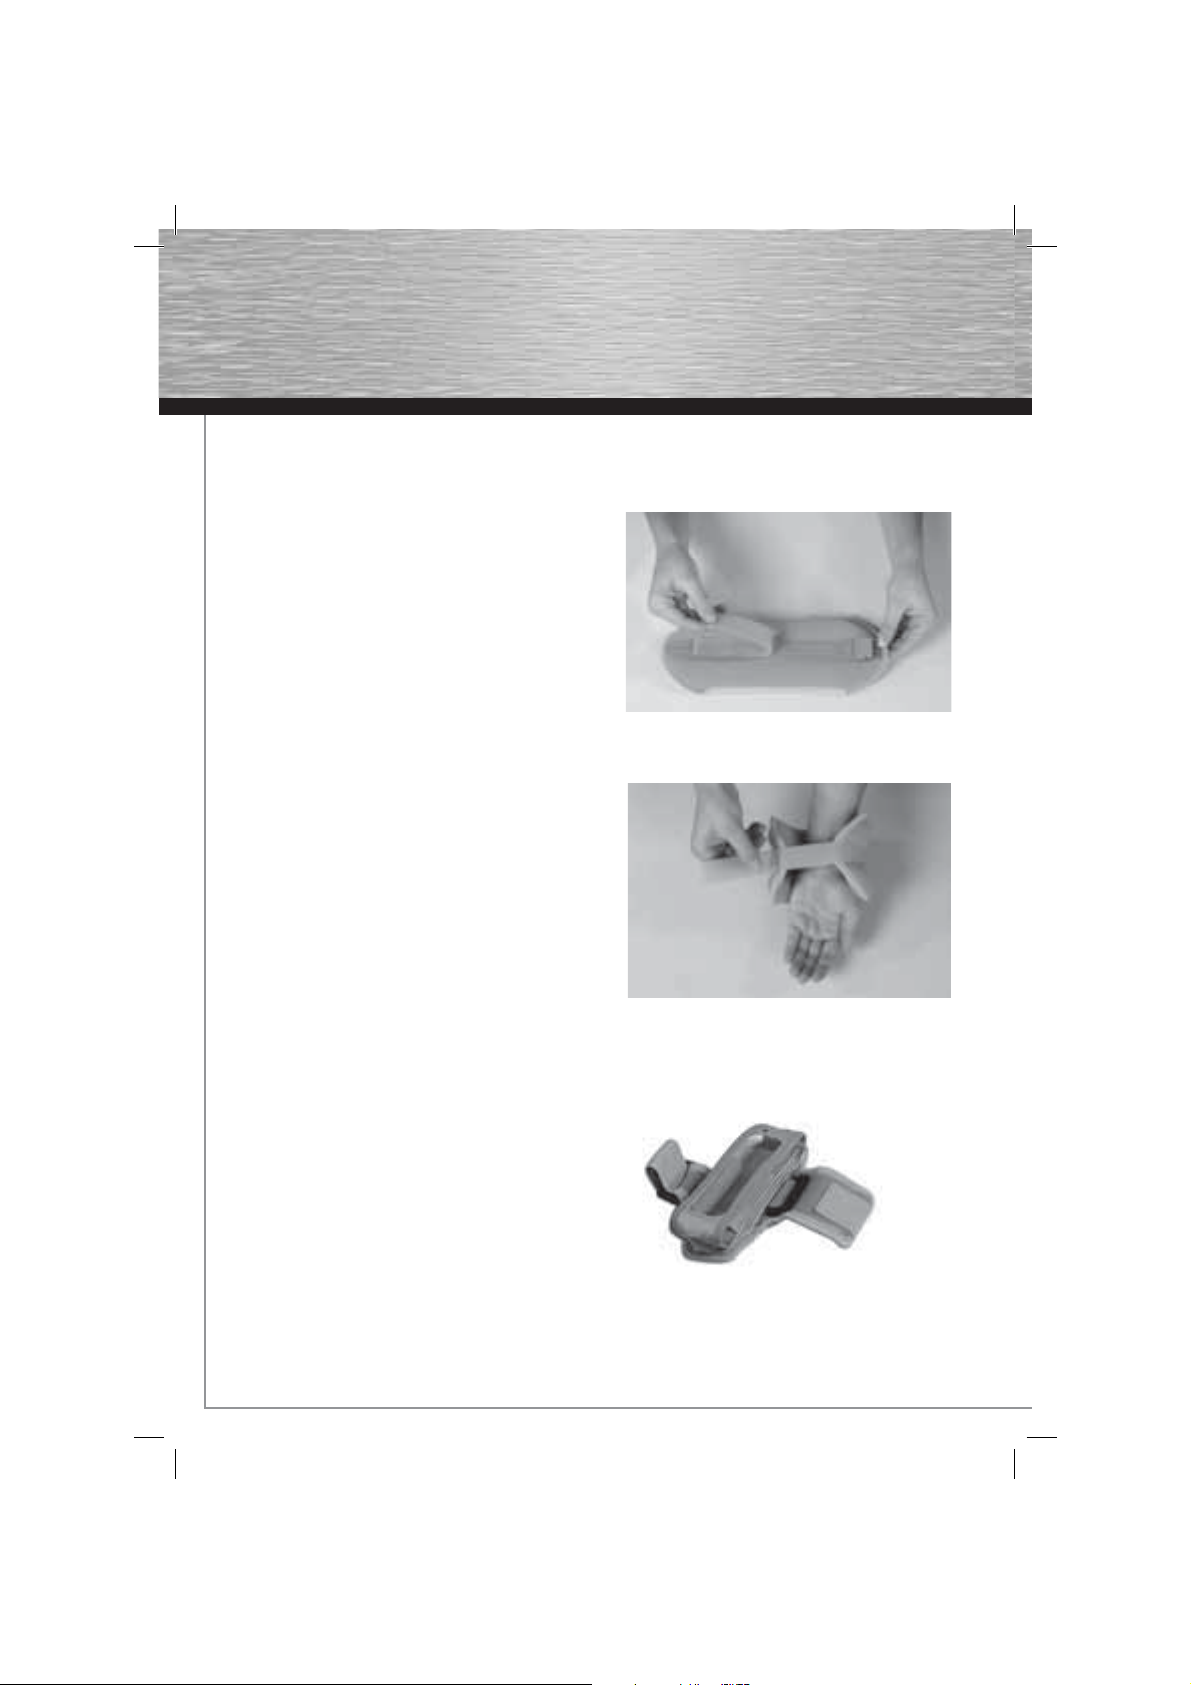
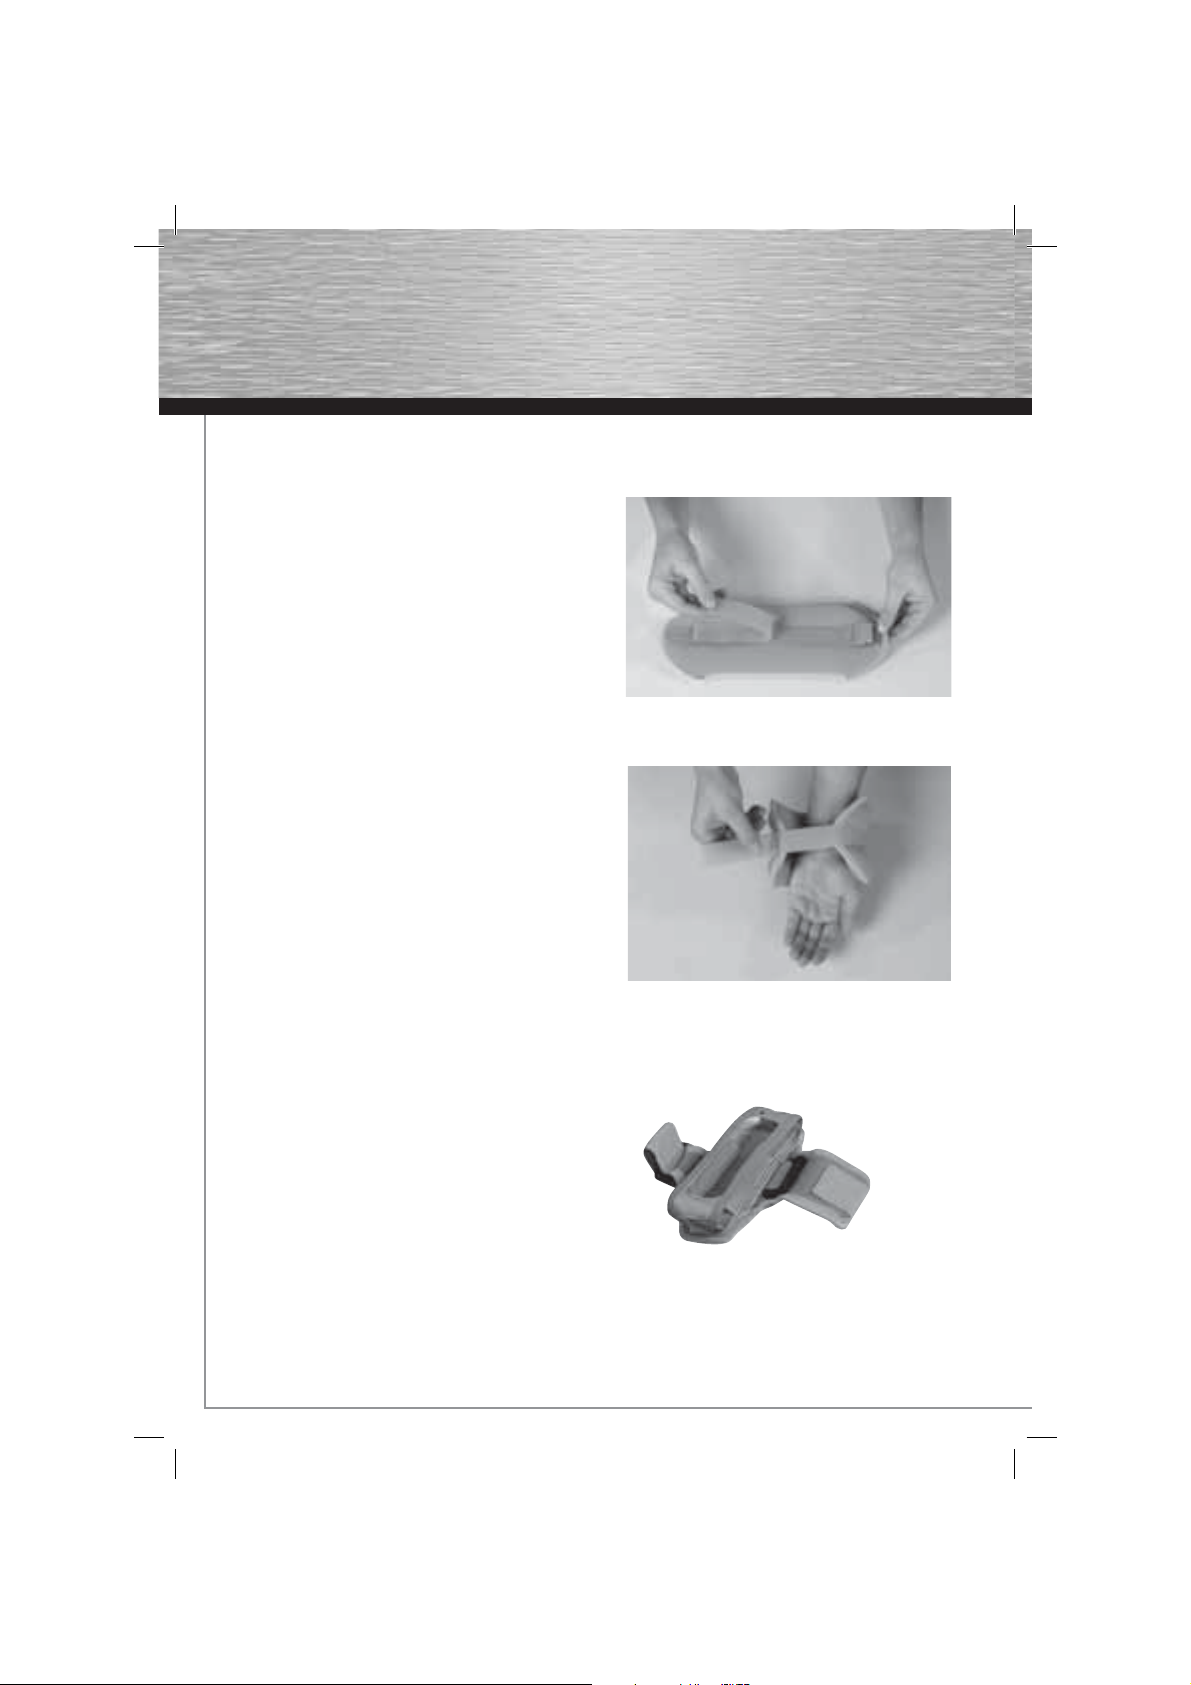
III. Die Hanteln:
In erster Linie dienen die Hanteln dazu, das Training in
Wii Fit und anderen Fitness-Spielen durch zusätzliches
Gewicht zu intensivieren.
Sie können aber auch dazu dienen, Balance-Spiele
schwieriger zu gestalten.
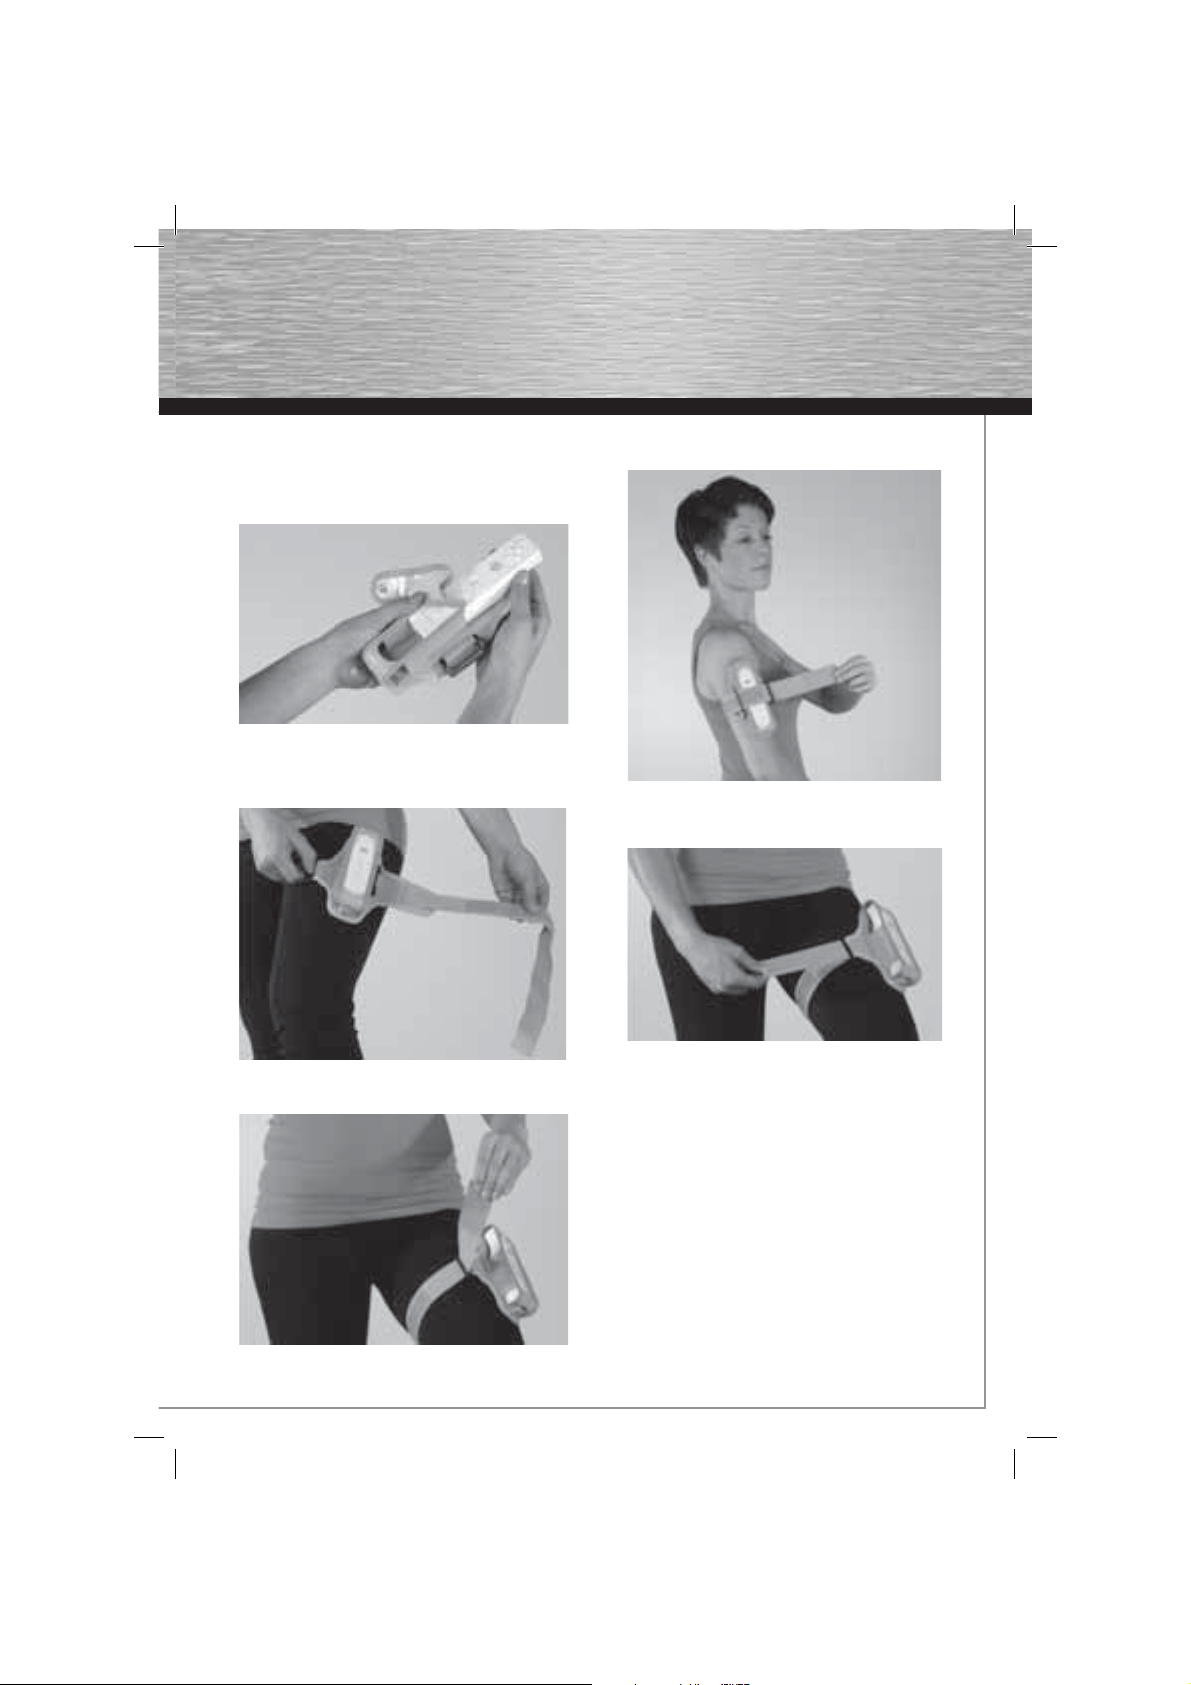
Zur korrekten Befestigung der Hanteln, gehen Sie bitte
wie folgt vor:
1. Öffnen Sie den Klettverschluss auf der Rückseite der
Hanteln.
2. Ziehen Sie den Gurt, wie auf dem Bild gezeigt, durch
die Schlaufe bis die Hantel fest, aber nicht drückend
am Handgelenk oder Knöchel sitzt.
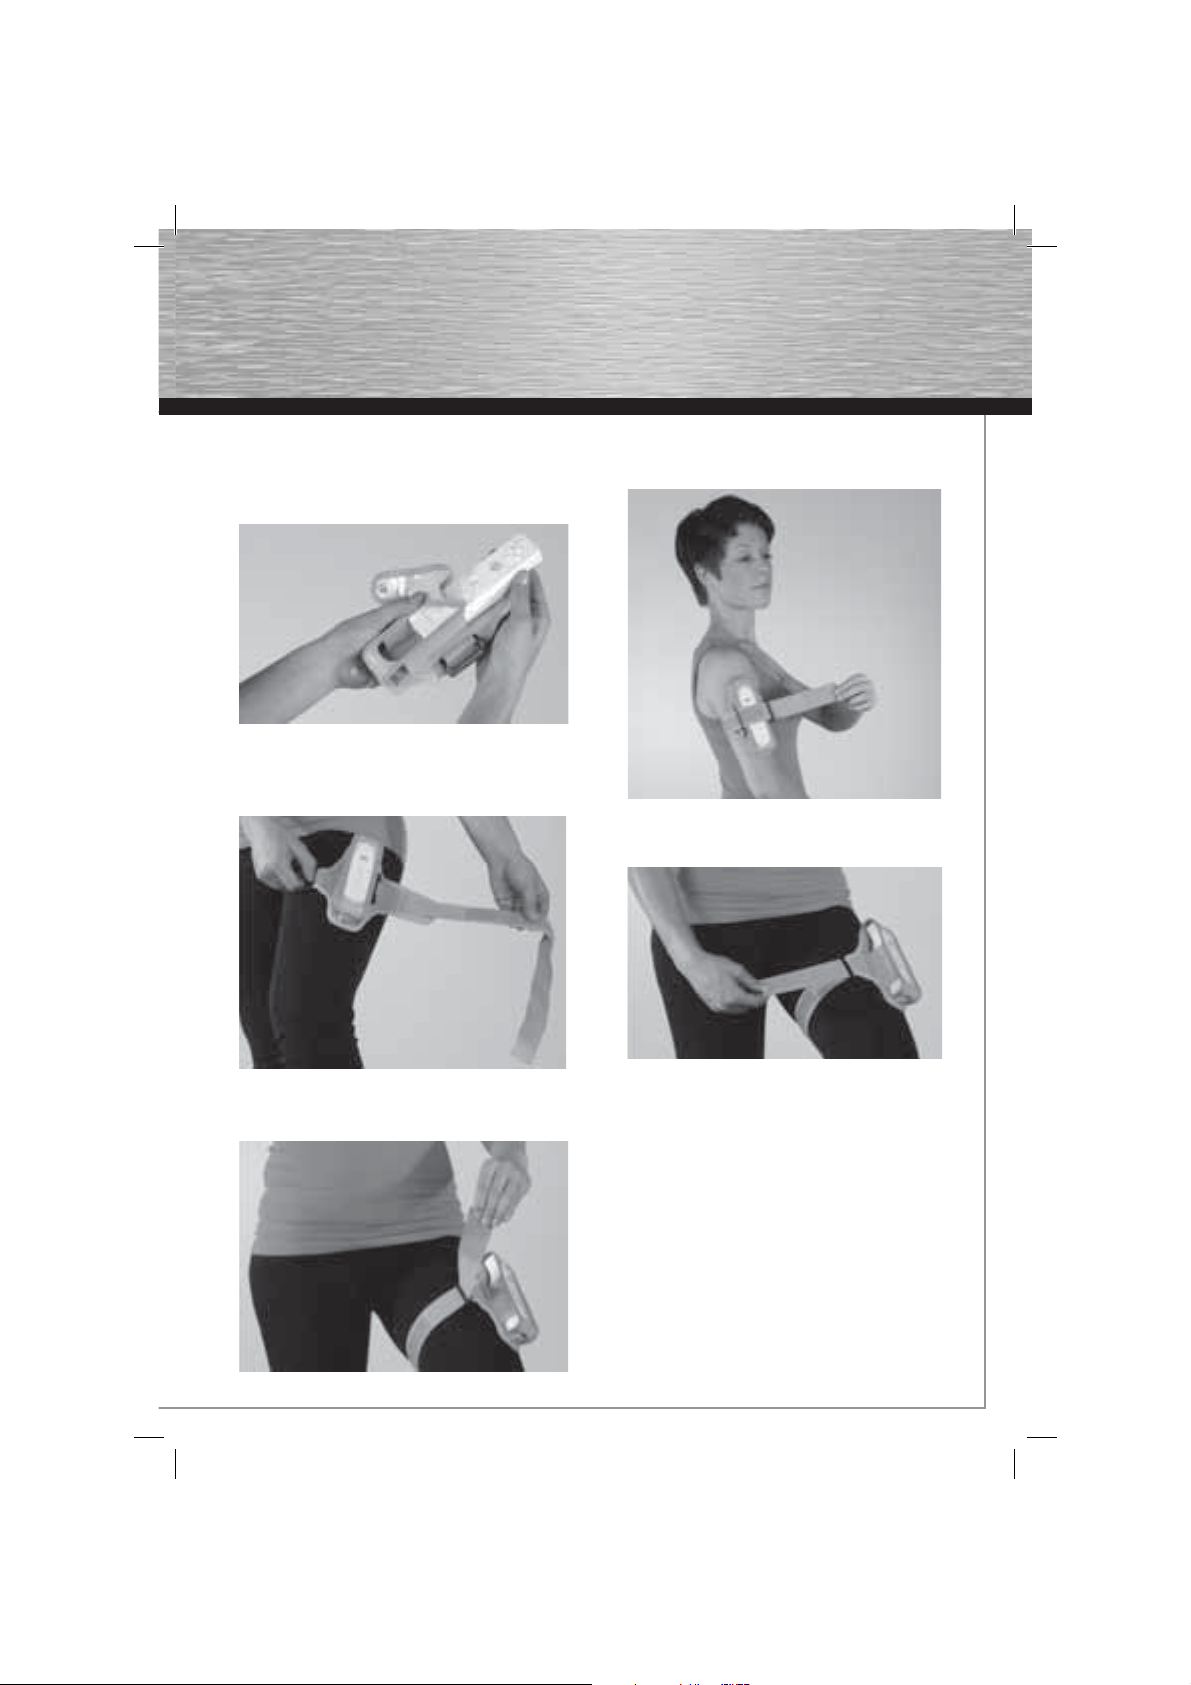
IV. Die Halterung für die Wii-Mote
Die Wii-Mote Tasche ermöglicht das Spielen und
trainieren mit der Wii-Mote, ohne dass diese direkt in der
Hand gehalten werden muss. Die Tasche kann an Armen
und Beinen befestigt werden.
dBedienungsanleitung