Hama DR1500BT User manual

F
D
GB
I
Operating Instructions
Bedienungsanleitung
Mode d‘emploi
Istruzioni per l‘uso
DR1500BTDigital Radio
Digitalradio
00
054812


5
25
1

2
GOperating Instructions
Controls and Displays (Pic.1)
1. SCROLL/OK ►I I
2. MENU/I◄◄ button
3. LCD display
4. INFO/►►I button
5. Volume control
6. Loudspeakers
7. MEMORY button
8. Gbutton
9. MODE button
10. Display lights
11. ALARM/SNOOZE button
12. SLEEP button
13. Telescopic antenna
14. Headphone jack
15. AUX input jack
16. USB connection
17. Jack for mains connection
Thank you for choosing a Hama product.
Take your time and read the following instructions and
information completely. Please keep these instructions
in a safe place for future reference. If you sell the device,
please pass these operating instructions on to the new
owner.
1. Explanation of Warning Symbols and Notes
Warning
This symbol is used to indicate safety instructions or to
draw your attention to specic hazards and risks.
Note
This symbol is used to indicate additional information or
important notes.
Risk of electric shock
This symbol indicates product parts energized with a
dangerous voltage of sucient magnitude to constitute
a risk of electric shock.
2. Package Contents
•Bluetooth/DAB/FM radio
•Power cable
•These operating instructions
3. Safety Notes
•The product is intended for private, non-commercial use
only.
•Protect the product from dirt, moisture and overheating
and use it in dry rooms only.
•As with all electrical devices, this device should be kept
out of the reach of children.
•Do not drop the product and do not expose it to any
major shocks.
•Do not operate the product outside the power limits
given in the specications.
•Keep the packaging material out of the reach of children
due to the risk of suffocation.
•Dispose of packaging material immediately according to
locally applicable regulations.
•Do not modify the device in any way. Doing so voids the
warranty.
Risk of electric shock
•Do not open the device or continue to operate it if it
becomes damaged.
•Do not use the product if the AC adapter, adapter
cable or power cable is damaged.
•Do not attempt to service or repair the device
yourself. Leave any service work to qualied experts.
4. Getting started
Note – Optimal reception
This product has a built-in DAB/FM telescopic antenna
that can be adjusted for optimal reception by using the
hinged joint at the base of the antenna. Note:
•Always fully pull out the antenna.
•For optimal reception we recommend positioning the
antenna vertically
4.1 Switching on
•Connect the enclosed power cable to the power input of
your radio.
•Connect the power cable to a properly installed power
socket.
•Press Gto switch on the radio.

3
Warning
•Only connect the product to a socket that has been
approved for the device. The electrical socket must
always be easily accessible.
•Disconnect the product from the network using the
power button – if this is not available, unplug the
power cord from the socket.
Note – Switching on for the rst time
•The radio switches on automatically with the greeting
(F1) in DAB mode and rst of all sets the time
automatically. This may take several seconds.
•The radio then runs the Auto Scan function.
•During Auto Scan the display shows the message
‚Scanning…‘, a progress bar and the number of
stations currently found. (F2)
•After the Auto Scan process has completed turn SCROLL/
OK ►I I to select a station that you want to listen to from
those found.
•Press SCROLL/OK ►I I to listen to your chosen station.
Note – Auto Scan
•If Auto Scan is unable to nd any stations, switch the
radio to the Tune Select menu.
•Turn SCROLL/OK ►I Ito choose between Manual
Tune or Auto Scan.
•Press SCROLL/OK ►I Ito conrm your choice.
Note – Alarm function features
It is not necessary to set the time on the radio and in fact
not even possible as the radio receives the local time via
the DAB signal and sets itself automatically accordingly.
However, this is not always possible in FM mode as time
data is not transmitted by all stations on that frequency.
Note – Alarm function features
•The DABradio offers two alarm times that can be set
individually.
•The alarm can be set to a ring tone or to a previously
tuned radio station (DAB/FM)
5.1 Setting the alarm time and type
•Press ALARM to open the Alarm menu.
•Use SCROLL/OK ►I Ito select Alarm 1 or 2.
•Press SCROLL/OK ►I Ito conrm your choice.
•Press SCROLL/OK ►I Iagain and use SCROLL/OK ►I Ito
choose the Alarm Setting menu item.
•Press SCROLL/OK ►I Ito conrm your choice. The hour
shown on the display ashes and can be set (F10).
•Turn SCROLL/OK ►I Ito set the hour of your desired
alarm time.
•Press SCROLL/OK ►I Ito conrm your setting.
•Then turn SCROLL/OK ►I Ito set the minute of your
desired alarm time.
•Press SCROLL/OK ►I Ito conrm your setting. After
saving the minute the alarm time is saved and you are
automatically taken to alarm type settings.
•Turn SCROLL/OK ►I Ito choose the preset (see section
6.7) DAB or FM station that you want to wake up to
(F11).
•Press SCROLL/OK ►I Ito save your setting.
•Turn SCROLL/OK ►I Ito choose the ring tone (1 or 2) for
the alarm.
•Press SCROLL/OK ►I Ito save your setting.
•Turn SCROLL/OK ►I Ito adjust the volume of the alarm
(1 - 20) with which you want to be woken up (F10).
•Press SCROLL/OK ►I Ito save your setting.
Note
•Repeat the complete process for the other alarm (1 or
2) if desired.

4
5.2 Activate alarm function
•Press ALARM to open the Alarm menu.
•Use SCROLL/OK ►I I to select Alarm 1 or 2.
•Press SCROLL/OK ►I I to conrm your choice.
•Then use SCROLL/OK ►I I to choose the Alarm Source
menu item.
•Press SCROLL/OK ►I I to conrm your choice.
•Use SCROLL/OK ►I I to choose the alarm type desired.
Turn SCROLL/OK ►I I to cycle through the following
sequence:
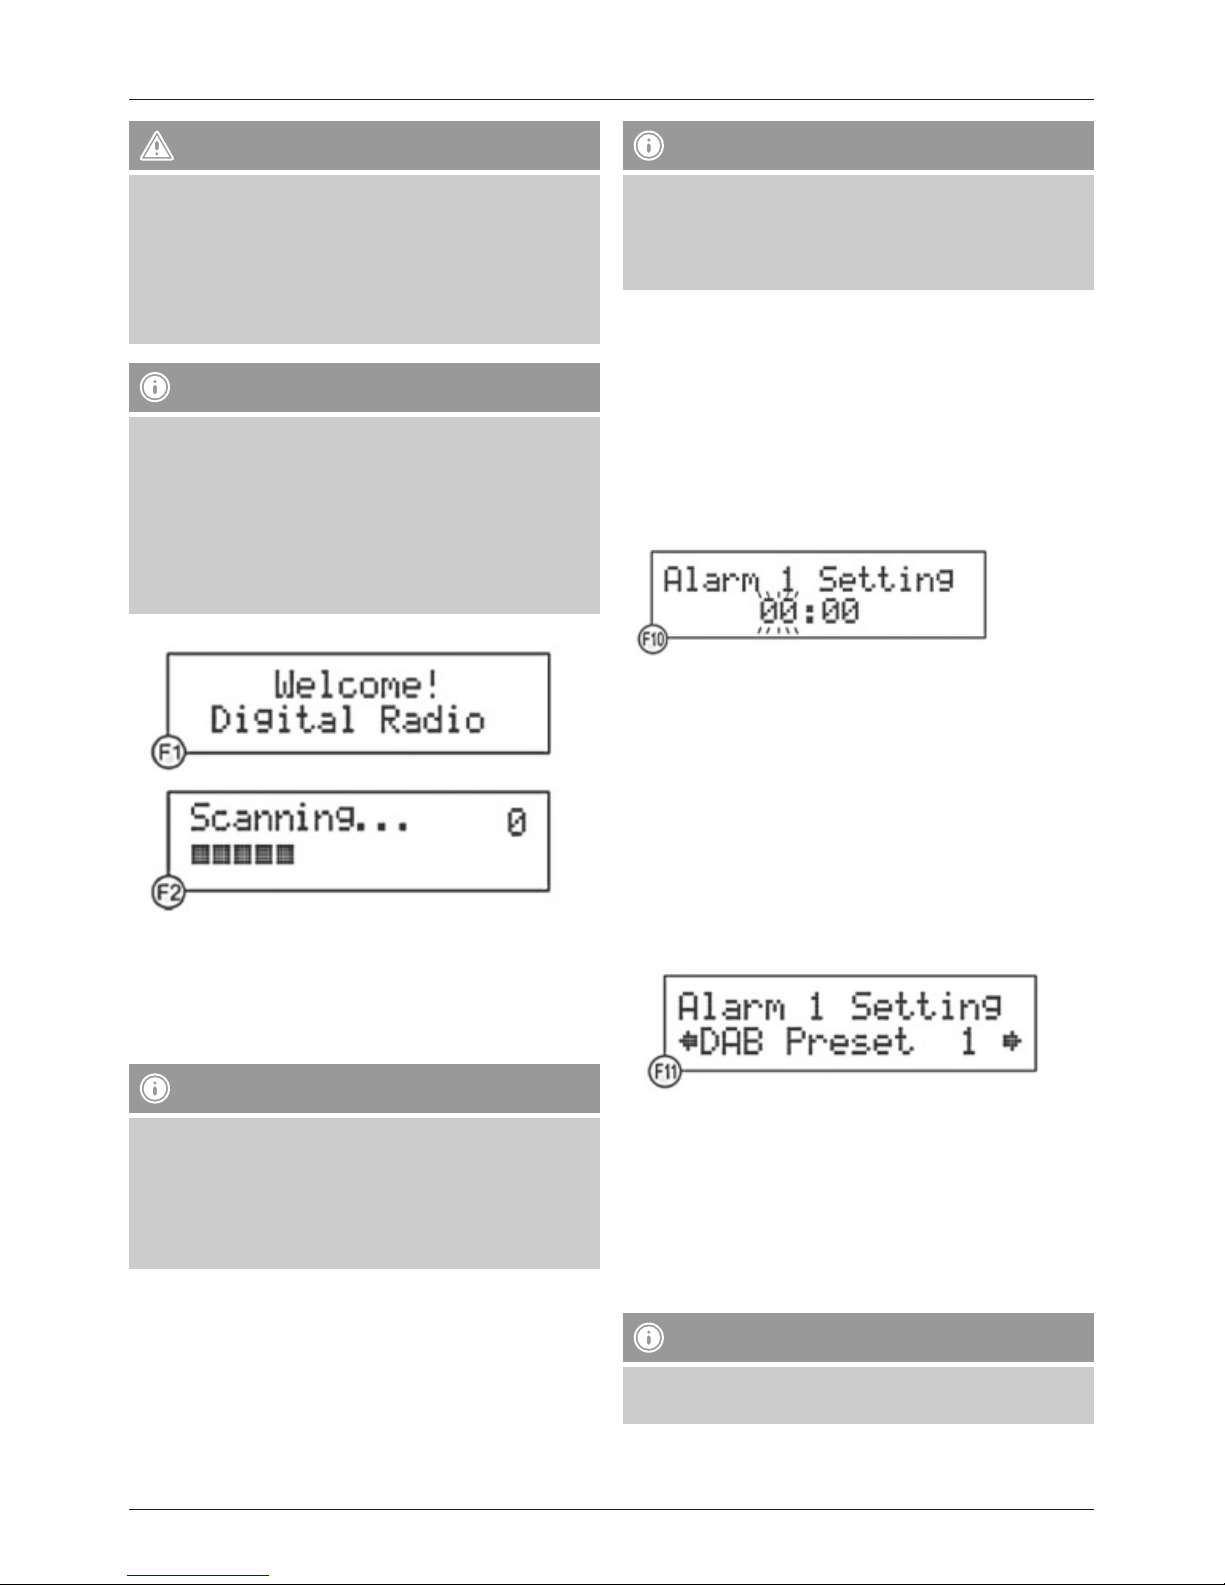
•Press SCROLL/OK ►I I to conrm the selection once the
display shows the desired alarm type. The alarm is now
activated and on the display you will see a bell icon along
with the number 1 or 2 for the selected alarm.
•The alarm sounds at the set time.
•Press Gif you wish to switch off the alarm.
Note
•Take care that the volume has been set at a sucient
level if you wish to be woken up by a DAB or FM
station.
•The tuned station will play for approx. 1 hour, as will a
ring tone if set as an alternative.
5.3 Automatic repeat of alarm and switching off
alarm function
The alarm will automatically repeat every day at the set
time for as long as the alarm function is switched on.
Press ALARM, select Alarm 1 or 2and then select Alarm
# off under the Alarm Source menu item in order to switch
off the relevant alarm function (1or 2).
5.4 Snooze function
Note
•The snooze function only works on the currently active
alarm. If the second one sounds when the rst alarm
is active, this second alarm has to be interrupted
separately with the snooze function.
•Press SNOOZE if you wish to interrupt the alarm but not
fully switch it off. The alarm sounds again after around 5
minutes‘ silence. An active snooze function is indicated
by ‚Zz‘ on the display.
5.5 Timer function
Note
•When the timer function is switched on, the radio
automatically switches off after the chosen time
period.
•The display indicates an activated timer function
using the letter S and a number. The number reects
the chosen time period (e.g. S6 = timer active,
automatic shut-off after 60 minutes).
•To check on timer status press INFO repeatedly in
order to show the relevant information on the display.
•Press SLEEP to switch on the timer function. The display
shows Sleep Timer and switches on using the standard
time period of 90 minutes.
•Press SLEEP repeatedly to choose another time period
after which the radio should switch off automatically.
•You can select from the following sequence, where the
numbers represent the possible shut-off times in minutes:
•Select the desired shut-off time by not pressing SLEEP for
at least 2 seconds. The currently displayed shut-off time is
then adopted automatically.
6. Operation of DAB/FM radio
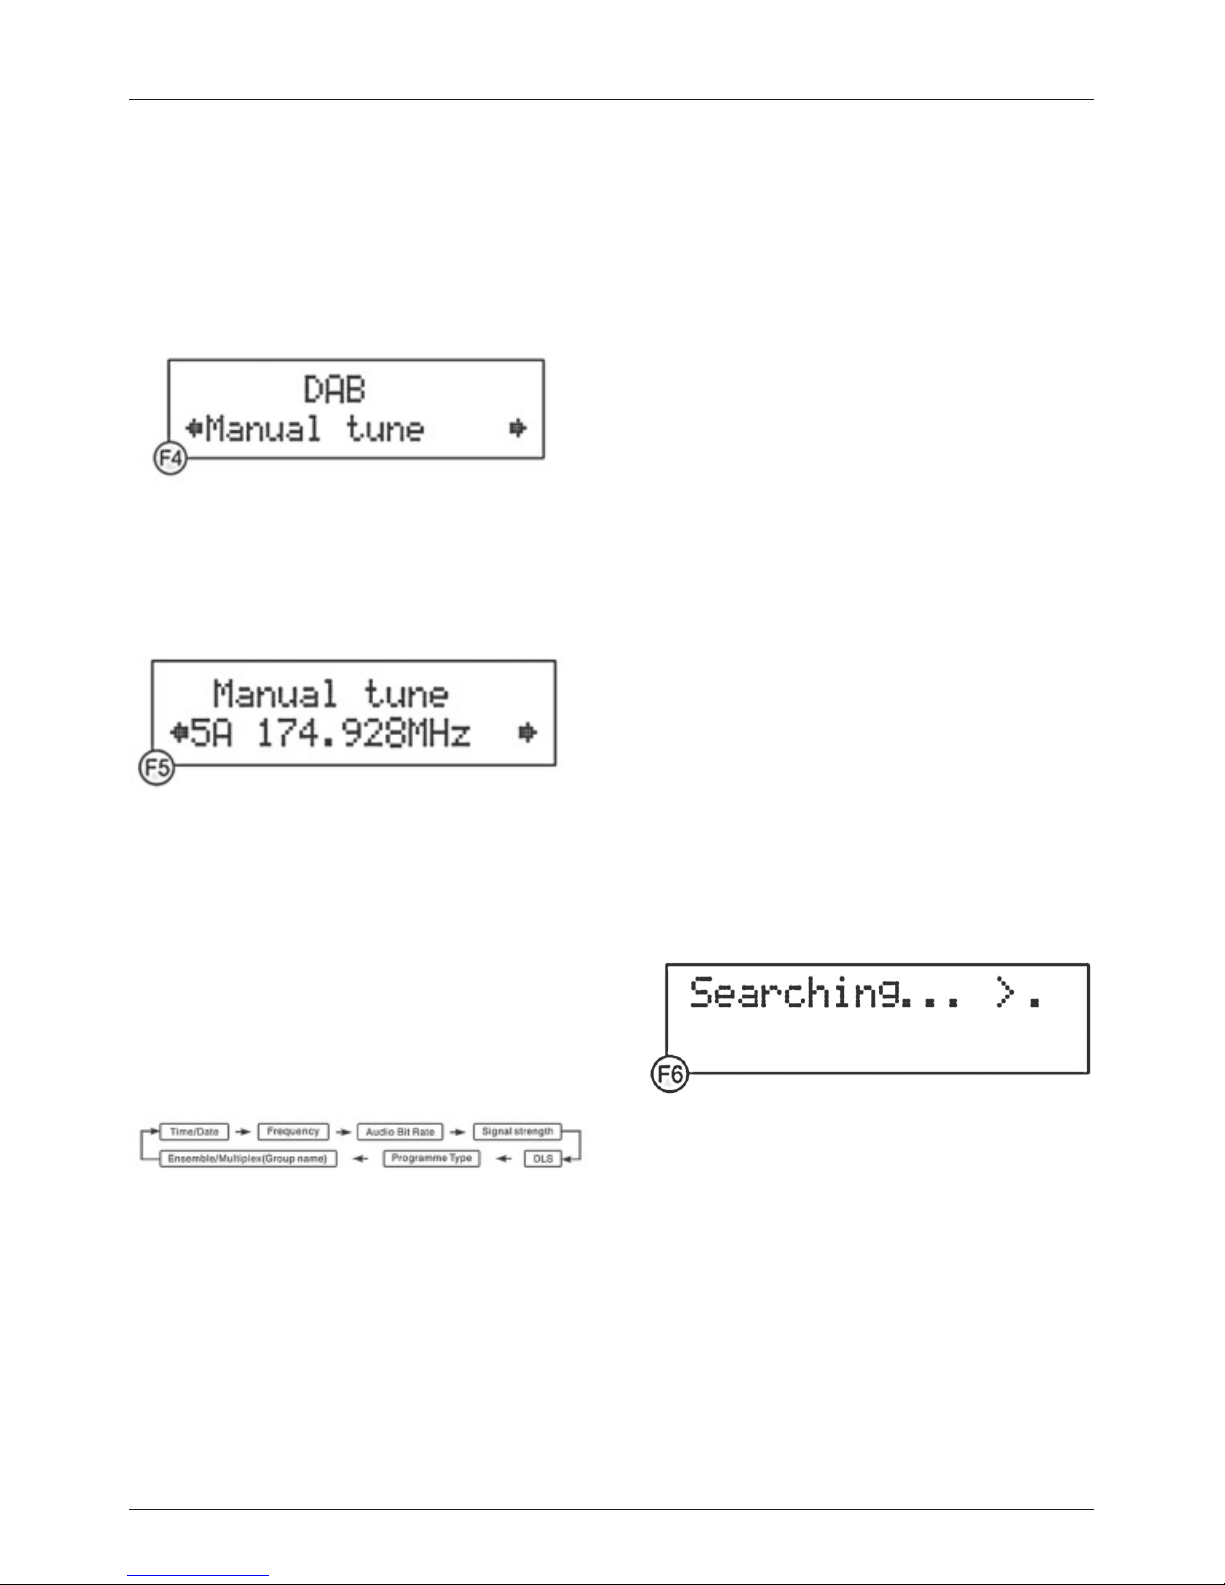
6.1 Automatic DAB station search
The automatic DAB station search scans the DAB III
band for stations with reception. Following the search all
interference-free stations that have been found and can be
received are saved in alphabetical order.
•Press MENU to open the Tune Select menu.
•Turn SCROLL/OK ►I I to chose Autoscan and press
SCROLL/OK ►I I to conrm the selection.
The automatic DAB station search starts automatically and
is shown on the display by ‚Scanning…‘ and a progress
bar. (F2)

5
•Turn SCROLL/OK ►I I , in order to view all located
stations in alphabetical order.
•Press SCROLL/OK ►I I to choose a station to play.
6.2 Manual DAB station search
•Press MENU to open the Tune Select menu.
•Turn SCROLL/OK ►I Ito chose Manual tune and press
SCROLL/OK ►I I to conrm the selection (F4).
•Turn SCROLL/OK ►I I to scan through the DAB
channels.
The display has a reception range of 5A to 13F and
displays the associated frequencies. (F5)
•Turn SCROLL/OK ►I I to select a frequency. The station
name and station group (ensemble/multiplex) are
displayed.
•Press SCROLL/OK ►I I to choose a station to play.
6.3 Additional DAB information
A > after the displayed station name indicates that this
station offers additional information.
•Press INFO repeatedly to display additional information
in the following order:
Time/Date:
Time and date are updated automatically by the broadcast
information. If no time/date information is available the
display just shows <TIME/DATE>.
Frequency:
The frequency of the station received is displayed.
Audio bit rate:
The currently received digital bit rate of the received
station is displayed.
Signal strength:
The signal strength of the received station is displayed via
a bar and its length.
DLS:
Dynamic Label Segment displays additional information
from the station about the programme as a scrolling ticker.
Programme type:
The style of the programme received is displayed. If no
programme information is available the display just shows
<Programme Type>.
Ensemble/Multiplex (Group name):
Ensemble/Multiplex is a combination of various stations
that broadcast on a shared frequency. Usually these
stations have something in common in terms of their local
origin, their style of music or the information they provide.
6.4 Automatic FM station search
•Press MODE repeatedly until ‚Switch to FM‘ is shown
on the display. The display then shows FM and the
current frequency.
•Press and hold SCROLL/OK ►I I until the automatic
station search starts.
While scanning the display shows ‚Searching…‘ (F6). If a
station is found, the search stops and the station plays.
•Start the search again as described above in order to
search for other stations.

6
6.5 Manual FM station search
•Press JOG MODE/SELECT.
•Turn VOLUME/SELECT to tune to a specic frequency as
soon as the display shows <Tuning>.
6.6 Mono/stereo mode
While a station is playing, press SCROLL/OK ►I I in order
switch between Auto and Mono.
Note
•This device has a default setting of Auto mode, and
so automatically switches between stereo and mono
depending on the signal strength received.
•However, reception situations may occur where
the reception quality or clarity can be improved if
automatic tuning using the above specied method is
manually overridden.
6.7 Saving and accessing presets
Both DAB and FM mode can each save up to 10 stations as
‚Presets‘. In this way you can quickly access your preferred
stations.
•Tune the radio to the station that you want to save as a
preset.
•Press and hold MEMORY until Save to P is shown on
the display and the number belonging to this empty
preset is displayed. (F8)
•If you wish to use the offered empty preset to save the
tuned station, go directly to the next step. If not, turn
SCROLL/OK ►I I in order to choose another preset
number.
•Conrm your choice with SCROLL/OK ►I I , this saves the
tuned station as this preset. As conrmation the display
shows the message ‚Preset # saved‘ (F9).
•To access a preset press MEMORY and use SCROLL/
OK ►I I to choose the desired preset number. The station
saved here previously will play automatically if you do not
use the controls for a few seconds.
6.8 Bluetooth mode
You have the option to connect your digital devices
wirelessly to the radio via Bluetooth.
Two different Bluetooth proles are supported:
•Advanced Audio Distribution Prole (A2DP)
-High-quality audio transmission
-Streaming of audio data from a PC, mobile phone, etc.
•Audio Video Remote Control Prole (AVRCP)
- Use of connected device as remote control for radio.
Note – Bluetooth
•Only one device (PC, Notebook, mobile phone, etc.)
can connect to the radio for each prole mentioned
above.
•Note that the quality of the Bluetooth connection can
vary according to the model of the device and the age
of its integrated Bluetooth driver.
•If possible, use devices with Bluetooth 2.1 and take
care that the most up-to-date rmware from your
device manufacturer has been installed.
•It is not possible to guarantee compatibility with all
devices and media types on the market.
•Take care that no other Bluetooth devices and
connections within a radius of approx 10m are active.
•Take care that there are no walls, bookcases, groups
of people or similar between the radio and your
Bluetooth device. The range and transmission quality
can be sharply reduced due to such obstacles.

7
6.9 Connecting and playing music files in Bluetooth
mode
Note – Bluetooth connection
•Also follow all instructions and notes regarding
Bluetooth in the operating instructions for the
device you wish to connect. The exact process for
establishing a Bluetooth connection between the radio
and your device can vary.
•Ensure that your device supports the A2DP Bluetooth
prole.
•Take care that Bluetooth is activated on your device.
•Ensure that the radio and your device are not more than
1m apart from each other.
•Press MODE repeatedly until Switch to BT appears on
the display. The radio switches a few seconds later into
the Bluetooth Pairing mode.
•Start the search for Bluetooth devices on your device in
the Bluetooth settings. If the radio is found it will display
on your device as BT speakerN. If you are asked for a
key for pairing, enter 0000.
•Select BT speakerN on your device and run the pairing
process. This may take several seconds. The radio signals
successful pairing by means of a signal tone and by
displaying - Icons on the display.
•After successfully pairing, press SCROLL/OK ►I I or begin
playback on your device.
•To pause playback press SCROLL/OK ►I I again or the
corresponding pause or stop buttons on your device.
•In order to rewind or forward through music les during
playback press ►►I or I◄◄ , or the corresponding
buttons on your device.
Note – Mobile phones
•Some mobile phones interrupt the Bluetooth
connection when receiving calls. This is not a problem
with your radio, but rather your mobile phone‘s
specic way of behaving during Bluetooth operation,
which can vary by manufacturer.
7. Additional functions
7.1 Display light
This radio has a display light that can be dimmed to three
different levels.
•Press BACKLIGHT repeatedly until the desired level of
brightness is reached.
7.2 Displaying firmware version of radio
Press and hold INFO longer than 2 seconds in order to
display the current rmware version of your radio.
7.3 Reverting to factory settings
•Connect the enclosed power cable to the 220V input of
your DAB/FM radio.
•Connect the power cable to a properly installed 220V
power socket.
•Press STANDBY to switch on the radio.
•Press and hold MENU until the display shows the
message ‚Press SELECT to conrm reset‘.
•Press SCROLL/OK ►I I . The display shows the message
‚Restarting…‘ and then goes into standby mode.
•Switch on the radio as described in section 4.1 and
perform the subsequent steps for setup and station
search.
Warning
•All saved DAB and FM presets are wiped when
reverting to factory settings.
7.4 Headphone connection
On the rear of the radio is a headphone connection (14),
which is suitable for headphones with a 3.5mm stereo jack.
When headphones are being used the built-in speakers are
deactivated automatically.
Warning - high volume
•Always keep the volume at a reasonable level. Loud
volumes, even over short periods, can cause hearing
loss.

8
7.5 AUX input
There is an AUX input (15) on the rear of the radio. This
enables you to play external sources (MP3 player, iPods,
etc.) over the radio.
•Press MODE repeatedly until ‚Switch to AUX‘ is shown
on the display. Playback is then automatically switched to
the source connected to the AUX input.
Note – Energy saving mode
•If the radio remains in AUX mode for longer than 3
hours without activity, it switches automatically to
standby mode.
•To switch energy saving mode on or off press MODE
for at least 2 seconds until the display shows either
ECO off or ECO on.
7.6 USB connection
On the rear of the radio there is a USB connection (16),
which offers the standard USB voltage of 5V with 500mA.
Note
•The USB connection is for charging external USB
devices and does not support any data transfer.
8. Care and Maintenance
•Only clean this product with a slightly damp, lint-free
cloth and do not use aggressive cleaning agents.
9. Warranty Disclaimer
Hama GmbH & Co. KG assumes no liability and provides no
warranty for damage resulting from improper installation/
mounting, improper use of the product or from failure to
observe the operating instructions and/or safety notes.
10. Service and Support
Please contact Hama Product Consulting if you have any
questions about this product.
Hotline: +49 9091 502-115 (German/English)
Further support information can be found here:
www.hama.com
11. Technical Data
Voltage AC: 100-240V~60/50Hz
Output power 5 W x 2
Frequency range DAB 174 - 240MHz /
FM 87.5 - 108MHz
Dimensions 345 (L) x215 (W) x 155 (H) mm
Weight 2.2 kg
12. Recycling Information
Note on environmental protection:
After the implementation of the European Directive
2002/96/EU and 2006/66/EU in the national legal
system, the following applies: Electric and
electronic devices as well as batteries must not be
disposed of with household waste. Consumers are obliged
by law to return electrical and electronic devices as well as
batteries at the end of their service lives to the public
collecting points set up for this purpose or point of sale.
Details to this are dened by the national law of the
respective country. This symbol on the product, the
instruction manual or the package indicates that a product
is subject to these regulations. By recycling, reusing the
materials or other forms of utilising old devices/Batteries,
you are making an important contribution to protecting our
environment.

9
DBedienungsanleitung
Bedienungselemente und Anzeigen (Pic.1)
1. SCROLL/OK ►I I
2. MENU/ I◄◄ Taste
3. LCD Display
4. INFO/ ►►I Taste
5. Lautstärkeregler
6. Lautsprecher
7. MEMORY TASTE
8. GTASTE
9. MODE TASTE
10. Displaybeleuchtung
11. ALARM/SNOOZE Taste
12. SLEEP Taste
13. Teleskopantenne
14. Kopfhörerbuchse
15. AUX Eingangsbuchse
16. USB Anschluss
17. Buchse für Netzanschluss
Vielen Dank, dass Sie sich für ein Hama Produkt
entschieden haben!
Nehmen Sie sich Zeit und lesen Sie die folgenden
Anweisungen und Hinweise zunächst ganz durch.
Bewahren Sie diese Bedienungsanleitung anschließend an
einem sicheren Ort auf, um bei Bedarf darin nachschlagen
zu können.
1. Erklärung von Warnsymbolen und Hinweisen
Warnung
Wird verwendet, um Sicherheitshinweise zu
kennzeichnen oder um Aufmerksamkeit auf besondere
Gefahren und Risiken zu lenken.
Hinweis
Wird verwendet, um zusätzlich Informationen oder
wichtige Hinweise zu kennzeichnen.
Gefahr eines elektrischen Schlages
Dieses Symbol weist auf eine Berührungsgefahr
mit nicht isolierten Teilen des Produktes hin, die
möglicherweise eine gefährliche Spannung von solcher
Höhe führen, dass die Gefahr eines elektrischen Schlags
besteht.
2. Packungsinhalt
•DAB+/FM Radio
•Netzanschlußkabel
•diese Bedienungsanleitung
3. Sicherheitshinweise
•Das Produkt ist für den privaten, nicht-gewerblichen
Haushaltsgebrauch vorgesehen.
•Schützen Sie das Produkt vor Schmutz, Feuchtigkeit und
Überhitzung und verwenden Sie es nur in trockenen
Räumen.
•Dieses Produkt gehört, wie alle elektrischen Produkte,
nicht in Kinderhände!
•Lassen Sie das Produkt nicht fallen und setzen Sie es
keinen heftigen Erschütterungen aus.
•Betreiben Sie das Produkt nicht außerhalb seiner in den
technischen Daten angegebenen Leistungsgrenzen.
•Halten Sie Kinder unbedingt von dem
Verpackungsmaterial fern, es besteht Erstickungsgefahr.
•Entsorgen Sie das Verpackungsmaterial sofort gemäß
den örtlich gültigen Entsorgungsvorschriften.
•Nehmen Sie keine Veränderungen am Gerät vor. Dadurch
verlieren sie jegliche Gewährleistungsansprüche.
Gefahr eines elektrischen Schlages
•Öffnen Sie das Produkt nicht und betreiben Sie es bei
Beschädigungen nicht weiter.
•Verwenden Sie das Produkt nicht, wenn der
AC-Adapter, das Adapterkabel oder die Netzleitung
beschädigt sind.
•Versuchen Sie nicht, das Produkt selbst zu warten
oder zu reparieren. Überlassen Sie jegliche Wartungs-
arbeit dem zuständigen Fachpersonal.
4. Inbetriebnahme
Hinweis - optimaler Empfang
Dieses Produkt verfügt über eine eingebaute DAB+/FM
Teleskopantenne, die für einen optimalen Empfang über
das Gelenk an der Antennenbasis ausgerichtet werden
kann. Beachten Sie:
•Ziehen Sie die Antenne immer vollständig aus.
•Für einen optimalen Empfang empfehlen wir die
Antenne vertikal auszurichten.
4.1 Einschalten mit Netzanschluss
•Verbinden Sie das beiliegende Netzanschlußkabel mit
dem Netzeingang Ihres Radios.
•Verbinden Sie das Netzkabel mit einer ordnungsgemäß
installierten Steckdose
•Drücken Sie G, um das Radio einzuschalten.

10
Warnung
•Betreiben Sie das Produkt nur an einer dafür
zugelassenen Steckdose. Die Netzsteckdose muss
jederzeit leicht erreichbar sein.
•Trennen Sie das Produkt mittels des Ein-/Ausschalters
vom Netz – wenn dieser nicht vorhanden ist, ziehen
Sie die Netzleitung aus der Steckdose.
Hinweis - beim ersten Einschalten
•Das Radio schaltet sich automatisch mit der
Begrüßung (F1) im DAB Modus ein und stellt zunächst
automatisch die Uhrzeit ein. Dies kann einige
Sekunden dauern.
•Das Radio führt dann die Auto Scan Funktion aus.
•Während des Auto Scans erscheinen Scanning…, ein
Fortschrittsbalken und die Anzahl der z.Zt. gefundenen
Sender im Display. (F2)
•Drehen Sie nach abgeschlossenem Auto Scan Vorgang
SCROLL/OK ►I I , um aus den gefundenen Sendern
denjenigen auszuwählen, den Sie hören möchten.
•Drücken Sie die Taste SCROLL/OK ►I I , um den
ausgewählten anzuhören.
Hinweis - Auto Scan
•Wenn der Auto Scan keine Sender nden kann,
wechselt das Radio in das Tune Select Menü.
•Drehen Sie SCROLL/OK ►I I , um zwischen Manual
Tune oder Auto Scan auszuwählen.
•Drücken Sie SCROLL/OK ►I I , um die Auswahl zu
bestätigen.
5. Uhren- ,Weck- und Timerfunktion
Ein Einstellen der Uhrzeit des Radios ist nicht nötig und
auch nicht möglich, da das Radio die lokale Zeiteinstellung
über das DAB Signal bezieht und sich automatisch einstellt.
Im FM-Modus ist dies jedoch nicht immer möglich, da dort
nicht von allen Sendern eine Zeitinformation übertragen
wird.
Hinweis - Eigenschaften Weckfunktion
•Das DAB Radio ermöglich zwei individuell einstellbare
Weckzeiten.
•Der Alarm kann durch einen Klingelton oder einen
vorher eingestellten Radiosender (DAB/FM) erfolgen.
5.1 Einstellen der Weckzeit und des Alarmtyps
•Drücken Sie ALARM, um das Alarm Menü zu öffnen.
•Wählen Sie mit SCROLL/OK ►I I Alarm 1 oder 2 aus.
•Drücken Sie SCROLL/OK ►I I , um die Auswahl zu
bestätigen.
•Drücken Sie nochmals SCROLL/OK ►I I und wählen Sie
mit SCROLL/OK ►I I den Menüpunkt Alarm Setting aus.
•Drücken Sie SCROLL/OK ►I I , um die Auswahl zu
bestätigen. Die im Display dargestellte Stundenanzeige
blickt und kann eingestellt werden (F10).
•Drehen Sie SCROLL/OK ►I I , um die Stunde der
gewünschten Alarmzeit einzustellen.
•Drücken Sie SCROLL/OK ►I I , um die Einstellung zu
speichern.
•Drehen Sie anschließend SCROLL/OK ►I I , um die
Minuten der gewünschten Alarmzeit einzustellen.
•Drücken Sie SCROLL/OK ►I I , um die Einstellung zu
speichern. Nach dem Abspeichern der Minuten ist die
Alarmzeit gespeichert und Sie gelangen automatisch zu
den Einstellungen des Alarmtyps.
•Drehen Sie SCROLL/OK ►I I , um das Preset (siehe dazu
Punkt 6.7) des DAB oder FM Senders auszuwählen, mit
dem Sie geweckt werden möchten (F11).
•Drücken Sie SCROLL/OK ►I I , um die Einstellung zu
speichern.
•Drehen Sie SCROLL/OK ►I I , um den Klingelton (1 oder
2) des Alarms auszuwählen.
•Drücken Sie SCROLL/OK ►I I , um die Einstellung zu
speichern.
•Drehen Sie SCROLL/OK ►I I , um die Lautstärke des
Alarms auszuwählen (1 - 20), mit dem Sie geweckt
werden möchten (F10).
•Drücken Sie SCROLL/OK ►I I , um die Einstellung zu
speichern.

11
Hinweis
•Wiederholen Sie den kompletten Vorgang für den
zweiten Alarm (1 oder 2), wenn gewünscht.
5.2 Aktivieren der Weckfunktion
•Drücken Sie ALARM, um das Alarm Menü zu öffnen.
•Wählen Sie mit SCROLL/OK ►I I Alarm 1 oder 2 aus.
•Drücken Sie SCROLL/OK ►I I , um die Auswahl zu
bestätigen.
•Wählen Sie anschließend mit SCROLL/OK ►I I den
Menüpunkt Alarm Source aus.
•Drücken Sie SCROLL/OK ►I I , um die Auswahl zu
bestätigen.
•Wählen Sie mit SCROLL/OK ►I I den gewünschten
Alarmtyp aus. Durch drehen von SCROLL/OK ►I I
durchlaufen Sie folgende Sequenz:
•Drücken Sie SCROLL/OK ►I I , um die Auswahl zu
bestätigen, wenn das Display den gewünschten Alarmtyp
anzeigt. Der Alarm ist hiermit aktiviert und im Display
sehen Sie ein Glockensymbol mit der Ziffer 1 oder 2 für
den ausgewählten Alarm.
•Der Alarm ertönt zur eingestellten Zeit.
•Drücken Sie G, wenn Sie den Alarm abstellen möchten.
Hinweis
•Achten Sie darauf, dass die Lautstärke auf ein
ausreichendes Niveau eingestellt ist, wenn Sie sich
durch einen DAB oder FM Sender wecken lassen
möchten.
•Der eingestellte Sender wird ca. 1 Stunde
wiedergegeben, ebenso ein alternativ eingestellter
Klingelton.
5.3 Automatische Wiederholung des Alarms und
Ausschalten der Weckfunktion
Der Alarm wird automatisch jeden Tag zur eingestellten Zeit
wiederholt, solange die Weckfunktion eingeschaltet ist.
Drücken Sie ALARM, wählen Sie Alarm 1 oder 2 aus und
wählen Sie dann Alarm # off im Menüpunkt Alarm
Source, um die entsprechende Weckfunktion (1 oder 2)
auszuschalten.
5.4 Schlummerfunktion
Hinweis
•Die Schlummerfunktion wirkt sich jeweils nur auf
den aktuell aktiven Alarm aus – ertönt innerhalb der
Aktivität eines Alarms der zweite, muss dieser separat
mit der Schlummerfunktion unterbrochen werden.
•Drücken Sie SNOOZE, wenn Sie den Alarm unterbrechen,
aber nicht vollständig abschalten möchten. Der Alarm
ertönt nach ca. 5 Minuten Ruhe erneut. Die aktive
Schlummerfunktion wird durch ein “Zz” im Display
angezeigt.
5.5 Timerfunktion
Hinweis
•Bei eingeschalteter Timerfunktion schaltet sich das
Radio nach der ausgewählten Zeit automatisch ab.
•Das Display zeigt die aktivierte Timerfunktion durch
den Buchstaben S und eine Ziffer an, wobei die Ziffer
die ausgewählte Zeit repräsentiert (z.B. S6 = Timer
aktiv, automatisches Abschalten nach 60min).
•Zum Überprüfen des Timerstatus, drücken
Sie wiederholt INFO, um die entsprechenden
Information im Display angezeigt zu bekommen.
•Drücken Sie SLEEP, um die Timerfunktion einzuschalten.
Das Display zeigt Sleep Timer und schaltet sich mit der
Standardzeit von 90 Minuten ein.
•Drücken Sie wiederholt auf SLEEP, um eine andere
Zeit auszuwählen, nach der sich das Radio automatisch
ausschalten soll.
•Sie können aus folgender Sequenz auswählen, wobei
die Zahlen die möglichen Ausschaltzeiten in Minuten
repräsentieren:
•Wählen Sie die gewünschte Ausschaltzeit aus, indem
Sie SLEEP mind. 2 Sek. lang nicht mehr betätigen.
Die aktuell angezeigte Ausschaltzeit wird automatisch
übernommen.
6. Betrieb des DAB/FM Radios
6.1 Automatischer DAB Sendersuchlauf
Der automatische DAB Sendersuchlauf durchsucht das DAB
III Band nach empfangbaren Sendern. Nach dem Suchlauf
werden alle gefundenen und störungsfrei empfangbaren
Sender in alphabetischer Reihenfolge gespeichert.

12
•Drücken Sie MENU, um in das Tune Select Menu zu
gelangen.
•Drehen Sie SCROLL/OK ►I I , um Autoscan
auszuwählen und drücken Sie SCROLL/OK ►I I , um die
Auswahl zu bestätigen.
Der automatische DAB Sendersuchlauf startet
automatisch, anzeigt im Display durch Scanning… und
einen Fortschrittsbalken. (F2)
•Drehen Sie SCROLL/OK ►I I , um alle gefundenen Sender
in alphabetischer Reihenfolge anzusehen.
•Drücken Sie SCROLL/OK ►I I , um einen Sender zur
Wiedergabe auszuwählen.
6.2 Manuelle DAB Sendersuche
•Drücken Sie MENU, um in das Tune Select Menu zu
gelangen.
•Drehen Sie SCROLL/OK ►I I , um Manual tune
auszuwählen und drücken Sie SCROLL/OK ►I I , um die
Auswahl zu bestätigen (F4).
•Drehen Sie SCROLL/OK ►I I , um die DABKanäle zu
durchsuchen.
Das Display hat einen Einstellbereich von 5A bis 13F und
zeigt die dazugehörigen Frequenzen an. (F5)
•Drehen Sie SCROLL/OK ►I I , um eine Frequenz
auszuwählen. Es werden der Sendername und die
Sendergruppe (Ensemble/Multiplex) angezeigt.
•Drücken Sie SCROLL/OK ►I I , um den Sender zur
Wiedergabe auszuwählen.
6.3 Zusätzliche DAB Informationen
Ein > hinter dem angezeigten Sendernamen zeigt an, dass
dieser Sender zusätzliche Informationen anbietet.
•Drücken Sie INFO wiederholt, um zusätzliche
Informationen in folgender Reihenfolge anzuzeigen:
Time/Date:
Uhrzeit und Datum werden automatisch durch mit
gesendete Informationen aktualisiert. Ist keine Information
zu Uhrzeit und Datum verfügbar, zeigt das Display
lediglich <TIME/DATE>.
Frequency:
Die Frequenz des empfangenen Senders wird angezeigt.
Audio Bit Rate:
Die aktuell empfangene digitale Bitrate des empfangenen
Senders wird angezeigt.
Signal strength:
Die Signalstärke des empfangenen Senders wird durch
einen Balken und seine Länge angezeigt.
DLS:
Dynamic Label Segment zeigt zusätzliche Informationen
des Senders zum Programm als Laufband-Text an.
Programme Type:
Der Stil des empfangenen Programms wird angezeigt. Ist
keine Information zu Uhrzeit und Datum verfügbar, zeigt
das Display lediglich <Programme Type>.
Ensemble/Multiplex (Group name):
Ensemble/Multiplex ist eine Zusammenstellung
verschiedener Sender, die auf einer gemeinsamen
Frequenz senden. Meist haben diese Sender eine
Gemeinsamkeit in ihrer lokalen Herkunft, ihrem Musik-
oder Informationsstil.
6.4 Automatischer FM Sendersuchlauf
•Drücken Sie wiederholt MODE, bis Switch to FM im
Display angezeigt wird. Das Display zeigt dann FM und
die aktuelle Frequenz an.
•Drücken Sie und halten Sie SCROLL/OK ►I I , bis der
automatische Sendersuchlauf startet.
Das Display zeigt während des Suchens Searching…
(F6). Wird ein Sender gefunden, stoppt der Suchlauf und
der Sender wird wiedergegeben.

13
•Starten Sie den Suchlauf erneut wie oben beschrieben,
um weitere Sender zu suchen.
6.5 Manueller FM Sendersuchlauf
•Drücken Sie JOG MODE/SELECT.
•Drehen Sie VOLUME/SELECT, um eine bestimmte
Frequenz einzustellen, sobald das Display <Tuning>
anzeigt.
6.6 Mono/Stereo Modus
Drücken Sie während der Wiedergabe SCROLL/OK ►I I , um
zwischen Auto und Mono umzuschalten.
Hinweis
•Dieses Gerät bendet sich als Standardeinstellung
im Auto Modus schaltet so automatisch je nach
empfangener Signalstärke zwischen Stereo und Mono
um.
•Es können jedoch Empfangssituationen eintreten, in
denen die Empfangsqualität oder Verständlichkeit
verbessert werden kann, wenn Sie die automatische
Einstellung mit o.g. Methode manuell überschreiben.
6.7 Speichern und Aufrufen von Presets
Sowohl im DAB, als auch im FM Modus können bis zu
jeweils 10 Sender auf Speicherplätzen, sogenannten
Presets, abgespeichert werden. So können bevorzugte
Sender direkt abgerufen werden.
•Stellen Sie den Sender ein, den Sie als Preset speichern
möchten.
•Drücken und halten Sie MEMORY, bis im Display Save
to P und die zu diesem leeren Preset gehörige Nummer
angezeigt werden (F8).
•Möchten Sie das angebotene leere Preset als Speicherort
für den eingestellten Sender verwenden, gehen Sie direkt
zum nächsten Schritt. Wenn nicht, drehen Sie SCROLL/
OK ►I I , um eine andere Presetnummer auszuwählen.
•Bestätigen Sie die Auswahl mit SCROLL/OK ►I I -
damit wird der eingestellte Sender auf diesem Preset
gespeichert. Das Display zeigt zur Bestätigung Preset #
saved (F9).
•Zum Aufrufen eines Presets drücken Sie MEMORY
und wählen Sie mit SCROLL/OK ►I I die gewünschte
Presetnummer an. Der vorher hier gespeicherte Sender
wird automatisch wiedergegeben, sobald einige
Sekunden keine weitere Aktion stattndet.
6.8 Bluetooth Modus
Sie haben die Möglichkeit, mittels Bluetooth ihre digitalen
Endgeräte drahtlos mit dem Radio zu verbinden.
Zwei verschiedene Bluetooth Prole werden unterstützt:
•Advanced Audio Distribution Prole (A2DP)
- Qualitativ hochwertige Audio Übertragung
-Streaming von Audiodaten von einem PC, Handy…etc.
•Audio Video Remote Control Prole (AVRCP)
- Nutzung des verbundenen Endgerätes als
Fernbedienung für das Radio.

14
Hinweis – Bluetooth
•Es kann pro oben genanntem Prol nur ein Endgerät
(PC, Notebook, Mobiltelefon…etc.) mit dem Radio
verbunden werden.
•Beachten Sie, dass die Qualität der Bluetooth
Verbindung je nach Modell des Endgerätes und Alter
des darin integrierten Bluetooth-Treibers variieren
kann.
•Verwenden Sie nach Möglichkeit Endgeräte mit
Bluetooth 2.1 und achten Sie darauf, dass die
aktuellste von Ihrem Gerätehersteller angebotene
Firmware installiert ist.
•Eine Kompatibilität mit allen auf dem Markt
bendlichen Endgeräten und allen Medientypen kann
nicht garantiert werden.
•Achten Sie darauf, dass keine anderen Bluetooth
Endgeräte und Verbindungen im Umkreis von ca. 10
Metern aktiv sind.
•Achten Sie darauf, dass sich zwischen dem Radio
und Ihrem Bluetooth Endgerät keine Wände,
Bücherregale, Personengruppen o.ä. benden.
Durch diese Hindernisse wird die Reichweite und
Übertragungsqualität stark reduziert.
6.9 Verbinden und Wiedergabe von Musikdaten im
Bluetooth Modus
Hinweis
•Beachten Sie auch alle Anweisungen und
Hinweise zu Bluetooth in der Bedienungsanleitung
ihres zu verbindenden Endgerätes. Die genaue
Vorgehensweise, um eine Bluetooth Verbindung
zwischen dem Radio und ihrem Endgerät herzustellen,
kann variieren.
•Achten Sie darauf, daß Ihr Endgerät das A2DP Bluetooth
Prol unterstützt.
•Achten Sie darauf, daß auf Ihrem Endgerät Bluetooth
eingeschaltet ist.
•Achten Sie darauf, daß das Radio und Ihr Endgerät nicht
weiter als 1 Meter voneinander entfernt sind.
•Drücken Sie wiederholt MODE, bis im Display Switch
to BT erscheint und das Radio einige Sekunden später in
den Bluetooth Pairing Modus wechselt.
•Aktivieren Sie auf Ihrem Endgerät in den Bluetooth-
Einstellungen die Suche nach Bluetooth Geräten. Wird
das Radio gefunden, wird es auf Ihrem Endgerät als BT
speakerN angezeigt. Wenn Sie nach einem Key für das
Pairing gefragt werden, geben Sie 0000 ein.
•Wählen Sie auf Ihrem Endgerät BT speakerN aus und führen
Sie das Pairing durch. Dies kann einige Sekunden dauern.
Ein erfolgreiches Pairing signalisiert das Radio mit einem
Signalton und der Anzeige eines -Symbols im Display.
•Drücken Sie nach dem erfolgreichen Pairing SCROLL/OK
►I I oder starten Sie die Wiedergabe aufihrem Endgerät.
•Um die Wiedergabe anzuhalten, drücken Sie erneut
SCROLL/OK ►I I oder die entsprechenden Pause, bzw. Stop
Tasten oder Schaltächen auf Ihrem Endgerät.
•Um während der Wiedergabe durch die Musikdateien vor
oder zurück zu springen, drücken Sie ►►I oder I◄◄ ,bzw.
die entsprechenden Tasten oder Schaltächen auf Ihrem
Endgerät.
Hinweis – Mobiltelefone
•Manche Mobiltelefone unterbrechen die Bluetooth
Verbindung bei eingehenden Anrufen. Dies ist kein
Problem Ihres Radios, sondern ein spezielles Verhalten
Ihres Mobiltelefons im Bluetooth Betrieb, welches je
nach Hersteller variiert.
7. Weitere Funktionen
7.1 Displaybeleuchtung
Dieses Radio verfügt über eine in drei Stufen dimmbare
Displaybeleuchtung.
•Drücken Sie wiederholt BACKLIGHT, bis die gewünschte
Helligkeitsstufe erreicht ist.
7.2 Anzeige der Firmwareversion des Radios
Drücken und halten Sie INFO länger als 2 Sekunden, um
die aktuelle Firmware-Version ihres Radios anzuzeigen.
7.3 Zurücksetzen auf Werkseinstellungen
•Verbinden Sie das beiliegende Netzanschlußkabel mit
dem 220V Eingang Ihres DAB/FM Radios.
•Verbinden Sie das Netzkabel mit einer ordnungsgemäß
installierten 220V Steckdose.
•Drücken Sie STANDBY, um das Radio einzuschalten.
•Drücken und halten Sie MENU, bis das Display „Press
SELECT to conrm reset” anzeigt.
•Drücken Sie SCROLL/OK ►I I . Das Display zeigt
Restarting… und geht anschließend in den Standby-
Modus.
•Starten Sie das Radio wie unter 4.1 beschrieben und
führen Sie die nachfolgenden Schritte zur Einstellung und
Sendersuche durch.
Warnung
•Alle gespeicherten DAB und FM Presets gehen
durch das Zurücksetzen auf die Werkseinstellungen
verloren!

15
7.4 Kopfhöreranschluss
Auf der Rückseite des Radios bendet sich ein
Kopfhöreranschluß (14), der für Kopfhörer mit einem
3.5mm Stereoklinkenstecker geeignet ist.
Bei Verwendung eines Kopfhörers deaktivieren sich die
eingebauten Lautsprecher automatisch.
Warnung
•Halten Sie die Lautstärke immer auf einem
vernünftigen Niveau. Hohe Lautstärken können –
selbst bei kurzer Dauer – zu Hörschäden führen.
7.5 AUX Buchse
Auf der Rückseite des Radios bendet sich eine AUX
Buchse(15). Diese ermöglicht Ihnen, externe Quellen (MP3
Player, iPods etc.) über das Radio wiederzugeben.
•Drücken Sie wiederholt MODE, bis im Display Switch
to AUX angezeigt wird. Die Wiedergabe wird dann
automatisch auf die an der AUX Buchse angeschlossene
Quelle umgeschaltet.
Hinweis - Energiesparmodus
•Wenn das Radio länger als 3 Stunden ohne Aktivität
im AUX Modus verbleibt, wechselt es automatisch in
den Standby Modus.
•Um den Energiesparmodus an- oder auszuschalten,
drücken Sie MODE mind. 2 Sek., bis das Display ECO
off oder ECO on anzeigt.
7.6 USB Anschluss
Auf der Rückseite des Radios bendet sich ein USB
Anschluss (16), der die Standard USB-Spannung von 5Volt
mit max. 500mA zur Verfügung stellt.
Hinweis
•Der USB Anschluss dient zum Laden von externen USB
Geräten und unterstützt keine Datenübertragung.
8. Wartung und Pflege
•Reinigen Sie dieses Produkt nur mit einem fusselfreien,
leicht feuchten Tuch und verwenden Sie keine aggressiven
Reiniger.
9. Gewährleistungsausschluß
Die Hama GmbH & Co. KG übernimmt keinerlei Haftung
oder Gewährleistung für Schäden, die aus unsachgemäßer
Installation, Montage und unsachgemäßem Gebrauch
des Produktes oder einer Nichtbeachtung der
Bedienungsanleitung und/oder der Sicherheitshinweise
resultieren.
10. Service und Support
Bitte wenden Sie sich bei Fragen zum Produkt gerne an die
Hama-Produktberatung.
Hotline: +49 9091 502-115 (Deu/Eng)
Weitere Supportinformationen nden sie hier:
www.hama.com
11. Technische Daten
Spannung AC: 100-240V~60/50Hz
Ausgangsleistung: 5 W x 2
Frequenzbereich DAB 174 - 240MHz /
FM 87.5 - 108MHz
Abmessungen 345 (L) x215 (W) x 155 (H) mm
Gewicht 2.2 kg
12. Entsorgungshinweise
Hinweis zum Umweltschutz:
Ab dem Zeitpunkt der Umsetzung der europäischen
Richtlinien 2002/96/EG und 2006/66/EG in
nationales Recht gilt folgendes: Elektrische und
elektronische Geräte sowie Batterien dürfen nicht
mit dem Hausmüll entsorgt werden. Der Verbraucher ist
gesetzlich verpichtet, elektrische und elektronische Geräte
sowie Batterien am Ende ihrer Lebensdauer an den dafür
eingerichteten, öffentlichen Sammelstellen oder an die
Verkaufsstelle zurückzugeben. Einzelheiten dazu regelt das
jeweilige Landesrecht. Das Symbol auf dem Produkt, der
Gebrauchsanleitung oder der Verpackung weist auf diese
Bestimmungen hin. Mit der Wiederverwertung, der
stoichen Verwertung oder anderen Formen der
Verwertung von Altgeräten/Batterien leisten Sie einen
wichtigen Beitrag zum Schutz unserer Umwelt.

16
FMode d‘emploi
Éléments de commande et d'affichage (Pic.1)
1. SCROLL/OK ►I I
2. Touche MENU/ I◄◄
3. Écran LCD
4. Touche INFO/ ►►I
5. Réglage du volume
6. Haut-parleur
7. Touche MEMORY
8. Touche G
9. Touche MODE
10. Éclairage de l‘écran
11. Touche ALARM/SNOOZE (alarme/répétition de
l‘alarme)
12. Touche SLEEP (sommeil)
13. Antenne télescopique
14. Prise de casque
15. Prise de l‘entrée AUX
16. Connexion USB
17. Prise de raccordement secteur
Nous vous remercions d’avoir choisi un produit Hama.
Veuillez prendre le temps de lire l‘ensemble des remarques
et consignes suivantes. Veuillez conserver ce mode
d‘emploi à portée de main an de pouvoir le consulter
en cas de besoin. Transmettez-le au nouveau propriétaire
avec l’appareil le cas échéant.
1. Explication des symboles d‘avertissement et des
remarques
Avertissement
Ce symbole est utilisé pour indiquer des consignes de
sécurité ou pour attirer votre attention sur des dangers et
risques particuliers.
Remarque
Ce symbole est utilisé pour indiquer des informations
supplémentaires ou des remarques importantes.
Risque d’électrocution
Ce symbole indique un risque de contact avec des
parties non isolées du produit susceptibles de conduire
un courant électrique capable de provoquer un risque
d‘électrocution.
2. Contenu de l‘emballage
•Radio Bluetooth/DAB/FM
•Câble secteur
•Mode d‘emploi
3. Consignes de sécurité
•Ce produit est destiné à une installation domestique non
commerciale.
•Protégez le produit de toute saleté, humidité, surchauffe
et utilisez-le uniquement dans des locaux secs.
•Cet appareil, comme tout appareil électrique, doit être
gardé hors de portée des enfants !
•Protégez le produit des secousses violentes et évitez tout
choc ou toute chute.
•N‘utilisez pas le produit en dehors des limites
de puissance indiquées dans les caractéristiques
techniques.
•Tenez les emballages d‘appareils hors de portée des
enfants, risque d‘étouffement.
•Recyclez les matériaux d’emballage conformément aux
prescriptions locales en vigueur.
•N’apportez aucune modication à l’appareil. Des
modications vous feraient perdre vos droits de garantie.
Risque d’électrocution
•Ne tentez pas d‘ouvrir le produit en cas de
détérioration et cessez de l’utiliser.
•Cessez d‘utiliser le produit si l‘adaptateur CA, le
câble adaptateur ou le câble d‘alimentation est
endommagé.
•N‘ouvrez pas l‘appareil et cessez de l’utiliser en
cas de détérioration, de dégagement de fumée, de
formation d‘odeurs ou de niveau de bruit élevé.
Adressez-vous dans les plus brefs délais à votre
revendeur ou à notre service clientèle (voir point
Service et assistance).
4. Mise en service
Remarque - Réception optimale
Ce produit dispose d‘une antenne télescopique DAB/
FM intégrée garantissant une réception optimale grâce
à l‘articulation située dans la base de l‘antenne et
permettant d‘orienter cette dernière. Autres consignes:
•Extrayez l’antenne entièrement.
•Nous conseillons de placer l‘antenne à la verticale an
de garantir une réception optimale.
4.1 Mise sous tension
•Insérez la prise du câble secteur dans l‘entrée secteur
de la radio.
•Branchez le câble secteur de la radio internet à une prise
de courant.
•Appuyez sur la touche G an de mettre la radio sous
tension.

17
Avertissement
•Branchez l‘appareil à une prise de courant appropriée.
La prise de courant doit être facilement accessible à
tout moment.
•Coupez le produit du secteur à l‘aide de l‘interrupteur
- débranchez la prise de courant en cas d‘absence
d‘interrupteur.
Remarque - Première mise sous tension
•Le message de bienvenue (F1) apparaît à l‘écran,
la radio sélectionne le mode DAB, puis règle
automatiquement l‘heure. Cette opération peut durer
plusieurs secondes.
•La radio exécute ensuite la fonction auto-scan.
•Scanning… ainsi qu‘une barre de progression et le
nombre des stations captées apparaissent à l‘écran
pendant l‘auto-scan (F2).
•À la n de l‘auto-scan, tournez la molette SCROLL/
OK ►I I an de sélectionner la station que vous désirez
écouter parmi les stations captées.
•Appuyez sur la molette SCROLL/OK ►I I an de lancer
la lecture.
Remarque - Auto-scan
•Le menu « Tune Select » s‘ouvre automatiquement
sur la radio dans le cas aucune station n‘est captée
pendant l‘auto-scan.
•Tournez la molette SCROLL/OK ►I I an de
sélectionner « Manual Tune » ou « Auto Scan ».
•Appuyez sur la molette SCROLL/OK ►I I an de
conrmer votre sélection.
5. Fonctions horaire, réveil et minuterie
Il n‘est pas nécessaire (ni possible) de régler l‘heure sur la
radio ; l‘unité détecte l‘heure locale via le signal DAB et
effectue automatiquement le réglage horaire. Ce réglage
n‘est toutefois pas toujours possible en mode FM, car les
informations horaires ne sont pas forcément transmises
pour la totalité des stations.
Remarque - Fonction de réveil
•La radio DAB permet de sélectionner deux heures de
réveil différentes.
•Vous pouvez sélectionner une sonnerie ou la lecture
d‘un programme radio présélectionné au préalable
pour l‘alarme.
5.1 Réglage de l'heure et du type d'alarme
•Appuyez sur la touche ALARM an d‘ouvrir le menu
« Alarm ».
•Utilisez la molette SCROLL/OK ►I I an de sélectionner
l‘alarme 1 ou 2.
•Appuyez sur la molette SCROLL/OK ►I I an de conrmer
votre sélection.
•Appuyez une nouvelle fois sur la molette SCROLL/OK
►I I , puis sélectionnez l‘option de menu « Alarm Setting
» à l‘aide de la molette SCROLL/OK ►I I .
•Appuyez sur la molette SCROLL/OK ►I I an de conrmer
votre sélection. Les chiffres des heures clignotent à
l‘écran et peuvent être réglés (F10).
•Tournez la molette SCROLL/OK ►I I an de sélectionner
l‘heure d‘alarme.
•Appuyez sur la molette SCROLL/OK ►I I an de conrmer
votre sélection.
•Tournez ensuite la molette SCROLL/OK ►I I an de
sélectionner les minutes de l‘heure d‘alarme.
•Appuyez sur la molette SCROLL/OK ►I I an de conrmer
votre sélection. L‘heure d‘alarme est sélectionnée après
avoir conrmé les minutes ; l‘option de réglage du type
d‘alarme s‘ouvre alors automatiquement.
•Tournez la molette SCROLL/OK ►I I an de choisir la
station présélectionnée (voir le point 6.7) DAB ou FM que
vous désirez entendre à votre réveil (F11).

18
•Appuyez sur la molette SCROLL/OK ►I I an de conrmer
votre sélection.
•Tournez la molette SCROLL/OK ►I I an de sélectionner
le type de sonnerie de l‘alarme (1 ou 2).
•Appuyez sur la molette SCROLL/OK ►I I an de conrmer
votre sélection.
•Tournez la molette SCROLL/OK ►I I an de sélectionner
le volume de l‘alarme (1 - 20).
•Appuyez sur la molette SCROLL/OK ►I I an de conrmer
votre sélection.
Remarque
•Veuillez répétez toute la procédure si vous désirez
utiliser l‘alarme 2.
5.2 Activation de la fonction de réveil
•Appuyez sur la touche ALARM an d‘ouvrir le menu «
Alarm ».
•Utilisez la molette SCROLL/OK ►I I an de sélectionner
l‘alarme 1 ou 2.
•Appuyez sur la molette SCROLL/OK ►I I an de conrmer
votre sélection.
•Utilisez la molette SCROLL/OK ►I Ian de sélectionner
l‘option de menu « Alarm Source ».
•Appuyez sur la molette SCROLL/OK ►I I an de conrmer
votre sélection.
•Utilisez la molette SCROLL/OK ►I I an de sélectionner
le type d‘alarme. Tournez la molette SCROLL/OK ►I I an
de parcourir la séquence suivante :
•Appuyez sur la molette SCROLL/OK ►I I an de conrmer
votre sélection dès que le type d‘alarme souhaité apparaît
à l‘écran. L‘alarme est ainsi activée et l‘icône de cloche
apparaît à l‘écran accompagné du chiffre 1 ou 2 (pour
l‘alarme concernée).
•L‘alarme retentit à l‘heure sélectionnée.
•Appuyez sur la touche G pour éteindre l‘alarme.
Remarque
•Veuillez contrôler le niveau du volume lorsque vous
utilisez une station DAB ou FM pour vous réveiller.
•La station sélectionnée, ou le type de sonnerie
sélectionné, retentira pendant une heure.
5.3 Répétition automatique de l'alarme et mise hors
service de la fonction de réveil
L‘alarme est automatiquement activée chaque jour à l‘heure
sélectionnée aussi longtemps que la fonction de réveil est
activée.
Appuyez sur la touche ALARM, sélectionnez l‘alarme 1 ou
2, puis sélectionnez « Alarm # off » dans l‘option de menu
«Alarm Source » an de mettre la fonction de réveil (1 ou
2) hors service.
5.4 Fonction de répétition de l'alarme
Remarque
•La fonction de répétition de l‘alarme est opérationnelle
uniquement en fonction de l‘alarme activée ; si la
deuxième alarme retentit pendant la période d‘activité
de la première alarme, vous devrez interrompre la
deuxième alarme à l‘aide de la fonction de répétition
de l‘alarme.
•Appuyez sur la touche SNOOZE, pour interrompre
momentanément l‘alarme. L‘alarme retentit à nouveau
au bout d‘environ cinq minutes. La fonction de répétition
d‘alarme est signalée à l‘écran par « Zz ».
5.5 Minuterie
Remarque
•La minuterie permet de mettre la radio hors service au
bout d‘un délai prédéni.
•La minuterie est signalée à l‘écran par un « S » et le
chiffre correspondant au délai sélectionné (exemple : «
S6 » = minuterie activé, mise hors service automatique
au bout de 60 min).
•Appuyez plusieurs fois sur la touche INFO, an de
contrôler l‘état de la minuterie et les informations
concernées.
•Appuyez sur la touche SLEEP an de mettre la fonction
de minuterie sous tension. « Sleep Timer » apparaît à
l‘écran et la minuterie est activée avec une durée par
défait de 90 minutes.
Table of contents
Languages:
Other Hama Radio manuals