manuals.online logo
Brands
  1. Home
  2. •
  3. Brands
  4. •
  5. Hama
  6. •
  7. Switch
  8. •
  9. Hama 00062898 User manual

Hama 00062898 User manual

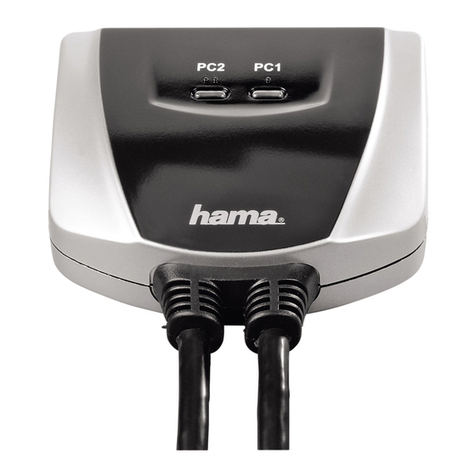
Mit dem Hama DVI KVM (Keyboard/VGA/Maus) Switch2 Desktop können 2 PCs mit nur einer Tas-
tatur, einem TFT-Monitor und einer Maus einfach und kostengünstig gesteuert werden. Es muss
keine Karte konfiguriert oder Software installiert werden, so dass die Installation denkbar einfach
ist. Die PS/2 Tastatur und die PS/2 Maus werden als Peripheriegeräte unterstützt. Beim
Einschalten der PCs startet der DVI-KVM-Switch die PCs unterbrechungsfrei durch Übertragung
des geeigneten Signals, so dass keine Fehlermeldungen über Tastatur oder Maus entstehen.
Nach dem Startvorgang wird automatisch der erste verfügbare Kanal ausgewählt. Zum Umschal-
ten der PCs gibt es zwei Möglichkeiten: Über die Taste am KVM Switch oder über ein Tastatur-
kommando (Hotkey).
Anschließen der Peripheriegeräte
Der TFT-Monitor, die Tastatur und die Maus werden auf der Rückseite des DVI-KVM-Switch im
weißen Anschlussbereich angeschlossen. Verbinden Sie das PS/2-Tastaturkabel mit der Buchse
„Keyboard“, die PS/2 Maus mit der Buchse „Mouse“ und das DVI-Monitorkabel mit der Buchse
„Monitor“
Anschließen der PCs
Die PCs werden unter der Bezeichnung „1“ und „2“ angeschlossen.
Schalten Sie vorher alle PCs aus, die an den DVI-KVM-Switch angeschlossen werden sollen.
Verbinden Sie jeweils die PS/2 Tastatur- und Maus-Schnittstellen von den PC's mit dem DVI-
KVM-Switch mittels des beiliegenden PS/2 Verbindungskabels (Tastatur an Buchse mit Tastatur-
abbildung , Maus an Buchse mit Mausabbildung)
Verbinden Sie ebenso die VGA-Schnittstelle von PC und DVI-KVM-Switch mittels eines geeigne-
ten DVI-Verbindungskabels (Anschluss an Buchse mit Monitorabbildung)
Bedienung
Schalten Sie zuerst den TFT-Monitor ein, danach die PC's Der DVI-KVM-Switch sucht dann auto-
matisch nach dem ersten verfügbaren PC.
Achtung: Schalten Sie erst von einem PC zum anderen um, nachdem beide PC's vollständig
hochgefahren sind!
Umschaltung
Die Umschaltung erfolgt entweder über die Taste am DVI-KVM-Switch oder über die Tastatur
(Hotkey)
Umschaltung per Tastatur ( Hotkey)
Manuelles Umschalten PC -> PC
· Betätigen Sie zweimal nacheinander die Scroll Lock (Rollen) - Taste, danach die „1“ für PC 1
(bzw. „2“ für PC 2).
Automatisches Umschalten (Auto scan) PC -> PC
· Betätigen Sie zweimal nacheinander die Scroll Lock (Rollen) - Taste, danach „s“.
Zum Deaktivieren des Auto-scan-Modus betätigen Sie eine beliebige Taste auf der Tastatur.
Während des Auto-Scan-Modus sind keine Tastatureingaben möglich.
Umschaltung am KVM-Switch
· Betätigen Sie die Taste am KVM-Switch zum manuellen Umschalten von einem PC zum
anderen
Neustart des DVI-KVM-Switches
· Betätigen Sie zweimal nacheinander die Scroll Lock (Rollen) - Taste, danach „End“ (bzw
„Ende“), um die Maus- und Tastatursimulation neu zu starten, ohne den PC neu zu booten.
Weitere Tastaturkommandos:
Wechseln zum vorhergehenden angeschlossenen PC in der Reihenfolge:
· Betätigen Sie zweimal nacheinander die Scroll Lock (Rollen) - Taste, danach Pfeiltaste oben.
Wechseln zum nächsthöheren angeschlossenen PC in der Reihenfolge:
· Betätigen Sie zweimal nacheinander die Scroll Lock (Rollen) - Taste, danach Pfeiltaste unten.
Ein-/Ausschalten des akustischen Signals beim Autoscan:
· Betätigen Sie zweimal nacheinander die Scroll Lock (Rollen) - Taste, danach „b“.
Technische Daten:
Maximale Auflösung Analog: 1920X1440
Maximale Auflösung digital: 1600X1200
Video Bandbreite. 140 MHz
Maximale Kabellänge zwischen PC und KVM Switch: ca 5 Meter
The Hama DVI KVM (keyboard/VGA/mouse) Switch2 Desktop allows you to control 2 PCs easily
and economically with just one keyboard, one TFT monitor and one mouse. Simple installation
process-no need to configure a card or install software. Device supports PS/2 keyboard and
PS/2 mouse as peripherals. When PCs are switched on, the DVI KVM switch transmits a constant
signal through both KVM ensuring keyboard or mouse error messages do not occur. After start-
up, the first available channel is selected automatically. There are two ways of switching PCs -
via the button on the KVM switch or a keyboard command (hotkey).
Connecting the peripherals
The TFT monitor, keyboard and mouse are connected to the rear of the DVI KVM switch in the
white connection area. Connect the PS/2 keyboard cable to the “Keyboard” socket, the PS/2
mouse to the “Mouse” socket and the DVI monitor cable to the “Monitor” socket.
Connecting the PCs
PCs are connected at the “1” and “2” labels.
Switch off all PCs for connection to DVI KVM switch beforehand.
Connect the PC PS/2 keyboard and mouse ports to the KVM switch using its enclosed PS/2 con-
nection cable (keyboard to socket with keyboard symbol, mouse to socket with mouse symbol).
Connect the PC and DVI KVM switch VGA interface using a suitable DVI connection cable (con-
nect to socket with monitor symbol).
Operation
Switch on TFT monitor first, then the PCs. The DVI KVM switch automatically finds the first avai-
lable PC.
Attention: Wait until both PCs have finished booting completely before switching from one PC to
the other.
Switching
Use either the button on the DVI KVM switch or the keyboard (hotkey) to switch.
Switching using the keyboard (hotkey)
Manual switching PC -> PC
First press the Scroll Lock key twice, then the "1” for PC 1 (or “2” for PC 2).
Automatic switching (autoscan) PC -> PC
First press the Scroll Lock key twice, then “s”.
Press any key on the keyboard to deactivate the autoscan mode.
No entries can be made using the keyboard during the autoscan.
llBedienungsanleitung
00062898
DVI KVM-Switch 2 Desktop
PS/2 Keyboard
DVI
PS/2 Mouse
PS/2 Keyboard
DVI
PS/2 Mouse
PC1
PS/2
DVI
PS/2
PC2
LLOperating Instruction
llBedienungsanleitung
00062898bda 15.02.2006 10:12 Uhr Seite 1
Switching using the KVM switch
Press the button on the KVM switch to switch from one PC to another manually.
Restarting the DVI KVM switch
Press the Scroll Lock key twice to confirm, then press “End” to restart the mouse and keyboard
simulation without rebooting the PC.
Other keyboard commands:
Switch to the previous connected PC in the series:
First press the Scroll Lock key twice, then the up arrow.
Switch to the next connected PC in the series:
First press the Scroll Lock key twice, then the down arrow.
Switch the audible signal during autoscan on/off:
First press the Scroll Lock key twice, then “b”.
Specifications:
Maximum analogue resolution: 1920X1440
Maximum digital resolution: 1600X1200
Video bandwidth: 140MHz
Maximum cable length between the PC and KVM switch: approx. 5m
Le commutateur DVI KVM (clavier/vidéo/souris) Switch2 Desktop vous permet de brancher et
commander deux ordinateurs avec un seul clavier, un seul moniteur TFT et une seule souris de
façon simple et avantageuse. Aucune carte ne doit être configurée et aucun logiciel ne doit être
installé, ce qui simplifie l’installation au maximum. Le clavier PS/2 et la souris PS/2 sont suppor-
tés. Dès que vous mettez vos ordinateurs sous tension, le commutateur DVI KVM démarre sans
provoquer d’interruption en transmettant le signal correspondant, évitant ainsi d’envoyer un
message d’erreur concernant le clavier ou la souris. A la fin du processus de démarrage, le pre-
mier canal disponible est sélectionné automatiquement. Deux possibilités sont disponibles afin
de commuter d’un ordinateur à l’autre : Soit par la touche située sur le commutateur, soit par
commande clavier (touche raccourci).
Raccordement des périphériques
Le moniteur TFT, le clavier et la souris sont raccordés sur la face arrière du commutateur DVI
KVM au panneau de connexion blanc. Raccordez le câble du clavier PS/2 à la prise „Keyboard“,
le câble de la souris PS/2 à la prise „Mouse“ et le câble du moniteur DVI à la prise „Monitor“.
Connexion des ordinateurs
Les ordinateurs sont branchés aux connexions „1“ et „2“.
Les deux ordinateurs doivent être hors tension avant d’effectuer la connexion au commutateur
DVI KVM. Connectez les interfaces PS/2 du clavier et de la souris des ordinateurs au commuta-
teur DVI KVM à l’aide du câble PS/2 fourni (le clavier à la connexion portant l’icône clavier, la
souris à la connexion portant l’icône souris).
Connectez également l’interface VGA de l’ordinateur au commutateur DVI KVM à l’aide d’un
câble DVI approprié (connexion à la prise portant l’icône moniteur).
Commande
Mettez le moniteur TFT sous tension en premier, puis les ordinateurs. Le commutateur DVI KVM
recherchera automatiquement le premier ordinateur disponible.
Attention : Ne commutez pas d’un ordinateur à l’autre avant que l’initialisation du SE des deux
ordinateurs ne soit entièrement terminée.
Commutation
La commutation peut être effectuée soit par la touche située sur le commutateur DVI KVM, soit
par commande clavier (touche raccourci).
Commutation par touche du clavier (touche raccourci)
Commutation manuelle ordinateur -> ordinateur
• Appuyez deux fois consécutivement sur la touche Scroll Lock (Arrêt défil.), puis sur „1“ pour
l’ordinateur 1 (ou „2“ pour l’ordinateur 2).
Commutation automatique (auto-scan) ordinateur -> ordinateur
• Appuyez deux fois consécutivement sur la touche Scroll Lock (Arrêt défil.), puis sur „s“.
Appuyez sur n’importe quelle touche du clavier afin de désactiver le mode auto-scan.
Il n’est pas possible d’utiliser les touches du clavier pendant le mode auto-scan.
Commutation au commutateur KVM
• Appuyez sur la touche du commutateur KVM afin de commuter manuellement d’un ordinateur
à l’autre.
Redémarrage du commutateur DVI KVM
• Appuyez deux fois consécutivement sur la touche Scroll Lock (Arrêt défil.), puis sur „End“
(ou „Fin“), pour réinitialiser la simulation de la souris ou du clavier sans redémarrer
l’ordinateur.
Autres commandes du clavier :
Pour commuter vers l’ordinateur connecté en amont :
• Appuyez deux fois consécutivement sur la touche Scroll Lock (Arrêt défil.), puis sur la touche
de direction vers le haut.
Pour commuter vers l’ordinateur connecté en aval :
• Appuyez deux fois consécutivement sur la touche Scroll Lock (Arrêt défil.), puis sur la touche
de direction vers le bas.
Pour activer/désactiver le signal acoustique lors de auto-scan :
• Appuyez deux fois consécutivement sur la touche Scroll Lock (Arrêt défil.), puis sur „b“.
Caractéristiques techniques :
Résolution analogique maximale : 1920 x 1440
Résolution numérique maximale : 1600 X 1200
Bande passante vidéo : 140 MHz
Longueur maximale du câble entre l’ordinateur et le commutateur KVM : env. 5 m.
¬¬Mode d’emploi
00062898/02.06
PS/2 Keyboard
DVI
PS/2 Mouse
PS/2 Keyboard
DVI
PS/2 Mouse
PC1
PS/2
DVI
PS/2
PC2
PS/2 Keyboard
DVI
PS/2 Mouse
PS/2 Keyboard
DVI
PS/2 Mouse
PC1
PS/2
DVI
PS/2
PC2
LLOperating Instruction
00062898bda 15.02.2006 10:12 Uhr Seite 2

Other Hama Switch manuals

Hama 11800 User manual

Hama

Hama 11800 User manual

Hama Standby off switch User manual

Hama

Hama Standby off switch User manual

Hama USB 2.0 / Fire Wire Combo User manual

Hama

Hama USB 2.0 / Fire Wire Combo User manual

Hama USB 2.0 4-Port-Hub User manual

Hama

Hama USB 2.0 4-Port-Hub User manual

Hama 00176551 User manual

Hama

Hama 00176551 User manual

Hama USB 2.0 / Fire Wire Combo User manual

Hama

Hama USB 2.0 / Fire Wire Combo User manual

Hama 00053180 User manual

Hama

Hama 00053180 User manual

Hama 102193 User manual

Hama

Hama 102193 User manual

Hama 00042542 User manual

Hama

Hama 00042542 User manual

Hama USB 2.0 / Fire Wire Combo User manual

Hama

Hama USB 2.0 / Fire Wire Combo User manual

Hama 179567 User manual

Hama

Hama 179567 User manual

Hama 74011488 User manual

Hama

Hama 74011488 User manual

Hama Bluetooth USB-Hub User manual

Hama

Hama Bluetooth USB-Hub User manual

Hama 12177 User manual

Hama

Hama 12177 User manual

Hama 054544 User manual

Hama

Hama 054544 User manual

Hama 00011576 User manual

Hama

Hama 00011576 User manual

Hama HA-2710 User manual

Hama

Hama HA-2710 User manual

Hama 00176551 User manual

Hama

Hama 00176551 User manual

Hama EASY User manual

Hama

Hama EASY User manual

Hama 78496 User manual

Hama

Hama 78496 User manual

Hama Standby off switch User manual

Hama

Hama Standby off switch User manual

Hama Bluetooth/Cardreader USB-Hub User manual

Hama

Hama Bluetooth/Cardreader USB-Hub User manual

Hama Premium Silver USB 2.0 Hub 1:4 User manual

Hama

Hama Premium Silver USB 2.0 Hub 1:4 User manual

Hama S2100 User manual

Hama

Hama S2100 User manual

Popular Switch manuals by other brands

PRYME PrymeBLU BT-PTT2-ZD user guide

PRYME

PRYME PrymeBLU BT-PTT2-ZD user guide

OEZ PS-LT Instructions for use

OEZ

OEZ PS-LT Instructions for use

Lenovo B6505 Product guide

Lenovo

Lenovo B6505 Product guide

Cisco PIX 520 - PIX Firewall 520 user guide

Cisco

Cisco PIX 520 - PIX Firewall 520 user guide

Network Technologies SM-nXm-C5AV-LCD Installation and operation manual

Network Technologies

Network Technologies SM-nXm-C5AV-LCD Installation and operation manual

TitanNetworx TNDS-9000P install guide

TitanNetworx

TitanNetworx TNDS-9000P install guide

HP ProCurve 6120G/XG manual

HP

HP ProCurve 6120G/XG manual

Titan HUB-1600I-RM user manual

Titan

Titan HUB-1600I-RM user manual

Hewlett Packard Enterprise B Series Quick start instructions

Hewlett Packard Enterprise

Hewlett Packard Enterprise B Series Quick start instructions

Enterasys Enterasys Gold Distributed Forwarding Engine... Hardware installation guide

Enterasys

Enterasys Enterasys Gold Distributed Forwarding Engine... Hardware installation guide

Altusen Altusen KL3116M user manual

Altusen

Altusen Altusen KL3116M user manual

LevelOne FEP-0812v4 Quick installation guide

LevelOne

LevelOne FEP-0812v4 Quick installation guide

Allied Telesis AT-9028 user guide

Allied Telesis

Allied Telesis AT-9028 user guide

SignaMax 065-7905A user manual

SignaMax

SignaMax 065-7905A user manual

Edimax ES-3305P V3 Quick installation guide

Edimax

Edimax ES-3305P V3 Quick installation guide

Raritan Exprezo EZ-108 Brochure & specs

Raritan

Raritan Exprezo EZ-108 Brochure & specs

Di-soric KDCT 08 V 03 G3-T3 quick guide

Di-soric

Di-soric KDCT 08 V 03 G3-T3 quick guide

KVMSwitchTech HDSWTH3D-4 Instruction manuals

KVMSwitchTech

KVMSwitchTech HDSWTH3D-4 Instruction manuals

manuals.online logo
manuals.online logoBrands
  • About & Mission
  • Contact us
  • Privacy Policy
  • Terms and Conditions

Copyright 2025 Manuals.Online. All Rights Reserved.