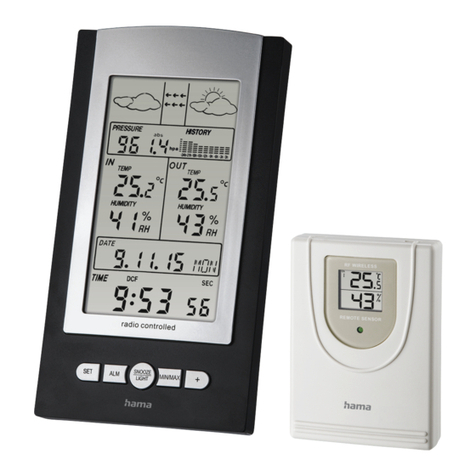
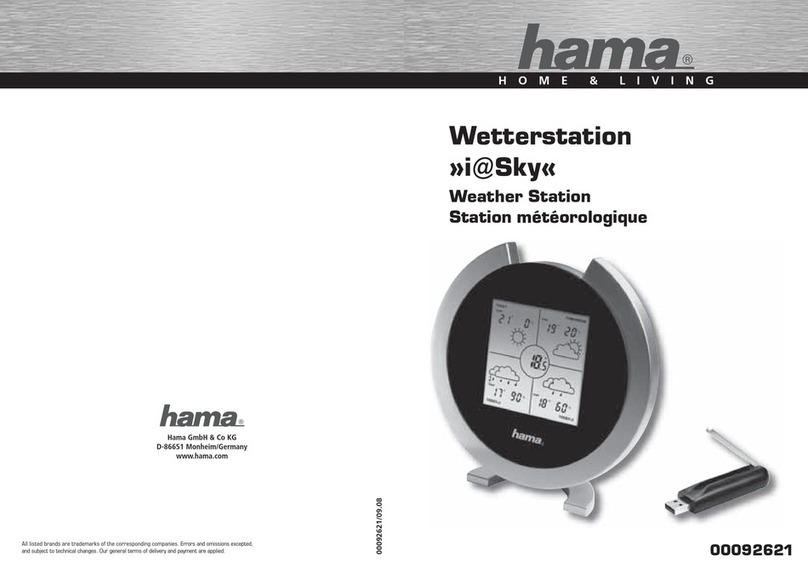
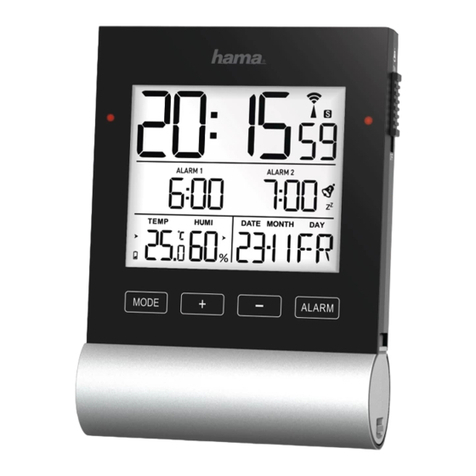
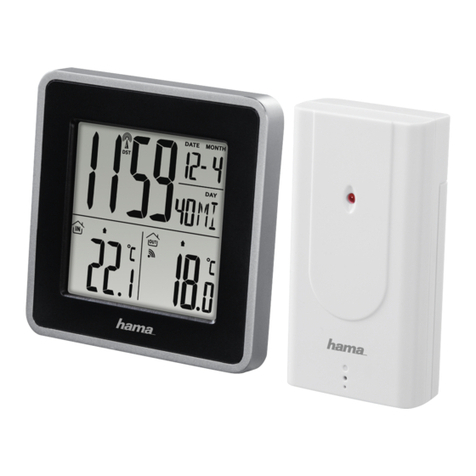
Hama EWS-860 User manual

00
123125
EWS-860
Weather Station
Wetterstation
E
F
D
GB
I
PL
RUS
Operating Instructions
Bedienungsanleitung
Mode d‘emploi
Instrucciones de uso
Руководство по эксплуатации
Istruzioni per l‘uso
Instrukcja obsługi

A
B
C
1
18
19
20 23
21
22
24
17
16
15
14 13
10
12
11
4
5
7
8
6
9
3
2
25
27
28
29
26

2
GOperating instruction
Controls and Displays
ABase station
1. Atmospheric pressuretrend
2. Weather forecast symbol
3. Measuring station wireless symbol
4. Channel display
5. Outdoor temperaturetrend
6. Outdoor temperature
7. Room temperaturetrend
8. Room temperature
9. Time/date
10. Alarm symbol
11. Weekday /seconds
12. Wireless symbol
13. Time zone
14. Room humidity
15. Room humidity trend
16. Outdoor humidity
17. Outdoor humidity trend
18. button =increasing the current setting /activating/ deactivating manual radio signal
reception /Switches between TIME and temperaturemode
19. button =reducingthe current setting /manually searching for the signal from the
measuring station /Switches between TIME and temperaturemode
20. mode button =settings /conrming the setting /toggling between seconds, weekday
and time zone display /Switches between °C and °F
21. alarm button =display /setting alarm modes
22. channel button =channel selection
23. mem.button =accessing/ resetting the stored maximum/minimum values
24. Battery compartment
BMeasuring station
25. Battery compartment
26. Mounting plate
27. Cut-out for vertical mounting
28. Cut-out for horizontal mounting
29. Clips

3
Thank you for choosing aHama product.
Take your time and read the following instructions and information completely.Please keep
these instructions in asafe place for futurereference. If you sell the device, please pass these
operating instructions on to the new owner.
1. Explanation of Warning Symbols and Notes
Warning
This symbol is used to indicate safety instructions or to draw your attention to specic
hazards and risks.
Note
This symbol is used to indicate additional information or important notes.
2. Package Contents
•Weather station EWS-860
(base station for indoor/outdoor measuring station)
•Base
•4xAAA batteries
•These operating instructions
3. Safety Instructions
•The product is intended for private, non-commercial use only.
•Do not operate the product outside the power limits given in the specications.
•Do not use the product in moist environments and avoid splashes.
•Do not use the product in the immediate vicinity of heaters or other heat sources or in
direct sunlight.
•Do not use the product in areas wherethe use of electronic devices is not permitted.
•Do not place the product near interference elds, metal frames, computers, TVs, etc.
Electronic devices and window frames can negatively affect the product’sfunctionality.
•Do not drop the product and do not expose it to any major shocks.
•Do not open the device or continue to operate it if it becomes damaged.
•Do not attempt to service or repair the product yourself.Leave any and allservice work to
qualied experts.
•Keep the packaging material out of the reach of children due to the risk of suffocation.

4
•Dispose of packaging material immediately according to locally applicable regulations.
•Do not modify the product in any way.Doing so voids the warranty.
Warning –Batteries
•Immediately remove and dispose of dead batteries from the product.
•Only use batteries (or rechargeable batteries) that match the specied type.
•Do not mix old and new batteries or batteries of adifferent type or make.
•When inserting batteries, note the correct polarity (+ and -markings) and insert
the batteries accordingly.Failure to do so could result in the batteries leaking or
exploding.
•Do not charge batteries.
•Keep batteries out of the reach of children.
•Do not short circuit the batteries/rechargeable batteries and keep them away from
uncoated metal objects.
4. Getting Started
4.1. Measuring station
•Open the battery compartment (25) and insert two AAA batteries with the correct polarity.
Close the battery compartment.
Note
Beforeuse, ensureyou insert the batteries in the measuring station rst and then in the
base station.
4.2. Base station
•Open the battery compartment (24) and insert two AAA batteries with the correct polarity.
Close the battery compartment.

5
5. Installation
Note –Installation
•We recommend initially placing the base and measuring stations in the intended
locations without installing them and making all the settings described in
6. Operation –todo.
•Only install the stations once the appropriate settings have been made and astable
wireless connection is established.
Note
•The wireless transmission range between the measuring and base stations is up to 30
minopen spaces.
•Beforeinstallation, ensurethat wireless transmission will not be disrupted by
interference or obstacles like buildings, trees, vehicles, high-voltage lines, etc.
•Beforethe nal installation, ensurethat thereissucient reception between the
intended installation locations.
•When installing the measuring station, ensurethat it is protected from direct sunlight
and rain.
•The international standardheight for measuring air temperatureis1.25 m(4ft) above
ground.
Warning
•Buy special or suitable installation material from aspecialised dealer for wall-mounting.
•Ensurethat no faulty or damaged parts areinstalled.
•Never apply force during installation. This could damage the product.
•Beforeinstallation, ensurethat the chosen wall is suitable for the weight to be
mounted, and make surethat thereare no electrical wires, water,gas or other lines at
the installation site on the wall.

6
5.1. Base station
•Use the base to position the base station on alevel surface. (C)
5.2. Measuring station
•Youcan fasten the measuring station horizontally or vertically to an outer wall using a
mounting plate (26).
•If you want to mount the measuring station horizontally,use rawl plugs, screws, etc. to
fasten the mounting plate (26) using the central cut-out (28) to the wall intended for
installation.
•If you want to mount the measuring station vertically,use rawl plugs, screws, etc. in the
wall intended for installation and hang the mounting plate (26) using cut-out (27).
•Gently push the measuring station until you hear alatching sound (“click”) as it engages
with the clips (29).
6. Operation
Note –Input
Hold down the -button (18) or the -button (19) to select the values faster.
6.1. Connection to the measuring station
•After you insert the batteries, the base station automatically searches for aconnection to
the measuring station and performs initial setup.
Note
•Initial setup takes approx. 3minutes.
•During connection, the wireless symbol on the measuring station will ash (3).
•Do not press any buttons during setup. Otherwise, values may not be transmitted
correctly and thereisarisk of value errors and inaccuracies.
•The setup process is completed when the indoor (18, 14) and outdoor (6, 16)
measurement data is displayed.
•If the base station still does not receive asignal from the measuring station, press and hold
the -button (19) for approx. 3seconds to start the manual search for the signal.

7
Display Search for asignal from the measuring station
Display ashing Active
Displayed continuously Successful –signal is being received
Displayed continuously Inactive –nosignal reception for >1hour
6.2. Selecting the channel/other measuring stations
Note
•Youcan install two moremeasuring stations in addition to the included measuring
station. Ensurethat the base and measuring stations areset to the same channel.
Visit www.hama.com for suitable measuring stations.
•The transmission channel on the supplied measuring station cannot be changed/set
(CH1).
•Press the channel button (22) repeatedly to set the channel to that set on the respective
measuring station. CH1,CH2 or CH3 (4) is displayed.
•Select CH1 if you areonly using the measuring station supplied.
•The base station now shows the data measured (16, 6) on the selected measuring station
(4).
•Press and hold the channel button (22) to select the channel scan. The symbol and
measurement values of the individual measuring stations/channels (4) aredisplayed
consecutively for 5seconds each.
6.3. Basic and manual settings
Automatic setting using the DCF signal
After the rst time the base station is switched on and successful transmission is established
between the base station and the measuring station, the clock will automatically search for a
DCF signal. During the search, the wireless symbol (12) will ash.

8
Display Searching for the DCF signal
/
Display ashing
Active
Displayed continuously
Inactive –nosignal reception in the last 24
hours
Displayed continuously Successful –signal is being received
Displayedcontinuously
Successful –strong signal
•If the station still does not receive asignal, press and hold the –button (18) for approx.
3seconds to start the manual search for the DCF signal. The wireless symbol (12) will start
to ash.
Note –Time settings
•The search process takes about 3-10 minutes. If the search fails, it ends and is repeated
at the next clock hour.
•In the meantime you can, however,set the time and the date manually.
•The clock automatically continues to search for the DCF signal on adaily basis (00:00
a.m., 03:00 a.m., 06:00 a.m., 12:00 p.m.). If the signal is received successfully,the
manually-set time and date areoverwritten.
•Press and hold the –button (18) again for approx. 3seconds to stop the manual search.

9
Manually setting the date/time
Note –TIME mode
•Press the button (18) or the button (19) repeatedly until the symbol starts
ashing in the display.
Note –Time and time zone
•In TIME mode, press the mode button (20) repeatedly to toggle between the following
different displays:
•Time with seconds display,time with weekday display,time adjusted according to time
zone with weekday display,time adjusted according to time zone with seconds display,
date
•The time zone symbol (13) is displayed when the time has been adjusted according to
the time zone.
•Press and hold the -button (18) for approx. 3seconds to stop the search for the DCF
signal. The wireless symbol (12) goes out and you can set the time manually.
•In TIME mode, repeatedly press the mode button (20) until the time zone symbol (13) is
no longer displayed.
•Press and hold the mode button (20) for approx. 3seconds to make the following settings
one after the other:
•Weekday (11)
•Year (9)
•Month (9)
•Day (9)
•D/M –M/D (9) display
•12/24 hour format (9)
•Hours (9)
•Minutes (9)
•To select the individual values, press the -button (18) or the -button (19) and conrm
each selection by pressing the mode button (20).
•If you do not make an entry for 2minutes, you automatically exit the setup mode.

10
Note –Weekday
Youcan choose from German (DE), English (En), Swedish (SW), Dutch (Du), Italian (IT),
Spanish (SP) or French (Fr) for the weekday display.
Setting the time zone
Note –Time zone
•The DCF signal can be received over long distances, but always transmits the current
Central European Time in Germany.Make sureyou account for the time difference in
countries with another time zone.
•If you areinMoscow,the time is 3hours later than in Germany.This means that you
should set +3 for the time zone. The clock then automatically sets the time to 3hours
after the DCF signal received or relative to the manually set time.
•In TIME mode, repeatedly press the mode button (20) until the time zone symbol (13) is
displayed.
•Press and hold the mode button (20) for approx. 3seconds to set the required time shift.
•To select individual values, press the button (18) or the button (19) and conrm each
selection by pressing the mode button (20).
•If you do not make an entry for 2minutes, you automatically exit the setup mode.
Alarm
•In TIME mode, repeatedly press the alarm button (21) to display the different alarms.
The respective alarm symbols (10) / / and the corresponding alarm time/
time interval and/or OFF aredisplayed.
•Press and hold the alarm button (21) for approx. 3seconds to set the alarm time of the
alarm displayed. The hours display/time interval starts to ash.
•Press the -button (18) or the -button (19) to select the hour for the alarm time/time
interval and conrm your selection by pressing the alarm button (21).
The minutes display begins to ash.
The early alarm is already activated after conrming the time interval.
•Repeat the process to set the minutes for the alarm time.

11
•Press the alarm button (21) repeatedly to also set the other alarm mode or return to the
time display (9).
•If you do not make an entry for 2minutes, you automatically exit the setup mode.
Note –Alarm
•When activated, the weekday alarm only triggers an alarm on weekdays (Monday to
Friday). The alarm symbol (10) is displayed if this alarm is activated.
•When activated, the once-only alarm only triggers an alarm once. The alarm symbol
(10) is displayed if this alarm is activated. This alarm is automatically deactivated
after the alarm has sounded.
•When activated and when the outside temperatureis<0°C/ 32°F,the early alarm
triggers an alarm 15, 30, 45, 60 or 90 minutes beforethe actual alarm ( and/or
). The alarm symbol (10) is displayed if this alarm is activated.
•In the corresponding display,press the -button (18) or the -button (19) to activate/
deactivate the corresponding alarm.
The alarm symbol (10) will appear/not appear.
Note –Early alarm
The early alarm can only be activated if at least one of the two alarm functions ( / )
has already been activated.
•If the alarm is triggered, the alarm symbol (10) will begin to ash and an alarm willsound.
•Press the alarm button (21) to stop the alarm. Otherwise, it will stop automatically after
2minutes.
6.4. Weather
Note –Temperaturemode
•Press the button (18) or the button (19) repeatedly until the symbol starts
ashing in the display.
Celsius/Fahrenheit
•In temperaturemode, press and hold the mode button (20) for approx. 3seconds to
switch the temperaturedisplay between °C and °F.

12
Weather forecast
•Based on changes in the atmospheric pressureand the data saved, the base station is able
to make weather forecasts for the next 12 to 24 hours.
Note –Weather forecast
•The weather forecast function is not available during the rst few hours of operation
because it requires data that is collected during operation.
•The weather forecast and the current weather areindicated by different symbols (2):
Symbol (2) Weather
Sun
Slightly cloudy
Cloudy
Rain
Heavy rain
Snow
Heavy snow
•The weather station indicates atrend as to how the values for the outdoor temperature/
humidity (5/17), room temperature/humidity (7/15) and atmospheric pressure(1) arelikely
to develop over the next few hours.

13
Display Trend
Increasing
Constant
Decreasing
6.5. Maximum and minimum temperature values
The base station automatically stores the maximum and minimum indoor/outdoor
temperatureand humidity values.
•In temperaturemode, repeatedly press the mem. button (23) to switch between the
current temperature, minimum temperature(MIN) and maximum temperature(MAX).
•Press and hold the mem.button (23) for approx. 3seconds to reset the stored maximum
and minimum values.
6.6. Outdoor temperature alarm
•Repeatedly press the channel button (22) to select the measuring station channel (4) for
which you would like to set an alarm.
•In temperaturemode, repeatedly press the alarm button (21) to display the outdoor
temperaturealarms / .
•Press and hold the alarm button (21) for approx. 3seconds until the outdoor temperature
display (6) begins to ash.
•Press the button (18) or the button (19) to set the displayed limit value and conrm
your selection by pressing the alarm button (21).
•While the upper or lower limit values aredisplayed, press the button (18) or the
button (19) to select the temperaturevalue or OFF and then press the alarm button to
conrm the selection (21).
Select the temperaturevalue/OFF to activate/deactivate the outdoor temperaturealarm.
•The alarm is triggered accordingly if the outdoor temperaturereachesone of these limit
values.
The symbol and the outdoor temperaturestart to ash and an alarm signal sounds.
Press the alarm button (21) to stop the alarm. Otherwise, it will stop automatically after
2minutes.

14
Note –Outdoor temperaturealarm
•Youcan dene alower and an upper limit value and activate an alarm for each channel
and/or connected measuring station.
•Note that the lower limit value must be at least 1°C/1°F below the upper limit value.
6.7. Comfort range
The base station displays the following comfort ranges based on the ration between the
current room temperatureand room humidity:
Display temperaturerange Humidity range Comfort range
COMFORT
20°C –25°C
68°F –77°F 40% –70% –Pleasant –
Ideal temperature
and humidity
WET -5°C –50°C
23°F –122°F >70% –Moist –
Humidity too high
DRY -5°C –50°C
23°F –122°F <40% –Dry –
Ambient air too dry
-<20°C />25°C
<68°F />77°C 40% -70% -Noindicator -

15
6.8 Low battery capacity
As soon as the battery symbol appears on the display of the base station, the capacity of
the batteries in the base/measuring station is very low.Replace the batteries immediately.
Note –Replacing the batteries
•Note that the stations have to be resynchronised each time after you change the
batteries in the measuring or base station.
•To do this, remove the batteries from the other station and then reinsert them, or
change them as required.
7. Care and Maintenance
Only clean this product with aslightly damp, lint-free cloth and do not use aggressive
cleaning agents.
8. Warranty Disclaimer
Hama GmbH &CoKGassumes no liability and provides no warranty for damage resulting
from improper installation/mounting, improper use of the product or from failuretoobserve
the operating instructions and/or safety notes.
9. Service and Support
Please contact Hama Product Consulting if you have any questions about this product.
Hotline: +49 9091 502-115 (German/English)
Further support information can be found here:
www.hama.com

16
10. Technical Data
Base station Measuring station
Power supply 3.0 V
2xAAA batteries 3.0 V
2xAAA batteries
Power consumption <2,5 mA <1,0 mA
Measuring range
Temperature 0°C –+50°C/
32°F –122°F -20°C –+60°C/
-4°F –140°F
Measuring increments
Temperature 0,1°C /0,2°F 0,1°C /0,2°F
Temperatureand
humidity measuring
cycle ~45s ~45s
Humidity 25%–95%30% –80%
Radio-controlled DCF
clock YesNo
Frequency 433 MHz
Range ≤30m

17
11. Recycling Information
Note on environmental protection:
After the implementation of the European Directive 2012/19/EU and 2006/66/EU
in the national legal system, the following applies: Electric and electronic devices
as well as batteries must not be disposed of with household waste. Consumers are
obliged by law to return electrical and electronic devices as well as batteries at the
end of their service lives to the public collecting points set up for this purpose or
point of sale. Details to this aredened by the national law of the respective country.This
symbol on the product, the instruction manual or the package indicates that aproduct is
subject to these regulations. By recycling, reusing the materials or other forms of utilising old
devices/batteries, you aremaking an important contribution to protecting our environment.
12. Declaration of Conformity
Hereby,Hama GmbH &CoKGdeclares that the radio equipment type [00123125]
is in compliance with Directive 2014/53/EU.The fulltext of the EU declaration of
conformity is available at the following internet address:
www.hama.com->00123125->Downloads.
Frequency band(s) 433 MHz
Maximum radio-frequency
power transmitted 0,021 mW

18
DBedienungsanleitung
Bedienungselemente und Anzeigen
ABasisstation
1. Luftdrucktendenz
2. Wettervorhersagesymbol
3. Funksymbol Messstation
4. Kanalanzeige
5. Außentemperaturtendenz
6. Außentemperatur
7. Raumtemperaturtendenz
8. Raumtemperatur
9. Uhrzeit /Datum
10. Alarmsymbol
11. Wochentag /Sekunde
12. Funksymbol
13. Zeitzone
14. Raumluftfeuchtigkeit
15. Raumluftfeuchtigkeitstendenz
16. Außenluftfeuchtigkeit
17. Außenluftfeuchtigkeitstendenz
18. -Taste =Erhöhung des aktuellen Einstellungswertes /Aktivierung/ Deaktivierung
manueller Funksignal-Empfang /Wechsel zwischen TIME- und Temperatur-Modus
19. -Taste =Verringerung des aktuellen Einstellungswertes /Manuelle Suche nach Signal
von der Messstation /Wechsel zwischen TIME- und Temperatur-Modus
20. mode-Taste =Einstellungen /Bestätigung des Einstellungswerts /Wechsel zwischen
Sekunden-, Wochentag- und Zeitzonenanzeige /Wechsel zwischen °C und °F
21. alarm-Taste =Anzeige /Einstellung Alarm-Modi
22. channel-Taste =Kanalauswahl
23. mem-Taste =Abruf/ Reset der gespeicherten Höchst-/ Tiefstwerte
24. Batteriefach
BMessstation
25. Batteriefach
26. Montageplatte
27. Aussparung für senkrechte Befestigung
28. Aussparung für waagerechte Befestigung
29. Clips

19
Vielen Dank, dass Sie sich für ein Hama Produkt entschieden haben!
Nehmen Sie sich Zeit und lesen Sie die folgenden Anweisungen und Hinweise zunächst ganz
durch. Bewahren Sie diese Bedienungsanleitung anschließend an einem sicheren Ort auf,um
bei Bedarf darin nachschlagen zu können. Sollten Sie das Gerät veräußern, geben Sie diese
Bedienungsanleitung an den neuen Eigentümer weiter.
1. Erklärung von Warnsymbolen und Hinweisen
Warnung
Wirdverwendet, um Sicherheitshinweise zu kennzeichnen oder um Aufmerksamkeit
auf besondereGefahren und Risiken zu lenken.
Hinweis
Wirdverwendet, um zusätzlich Informationen oder wichtige Hinweise zu
kennzeichnen.
2. Packungsinhalt
•Wetterstation EWS-860
(Basisstation für den Innenbereich /Messstation für den Außenbereich)
•Standfuß
•4AAA Batterien
•diese Bedienungsanleitung
3. Sicherheitshinweise
•Das Produkt ist für den privaten, nicht-gewerblichen Haushaltsgebrauch vorgesehen.
•Betreiben Sie das Produkt nicht außerhalbseiner in den technischen Daten angegebenen
Leistungsgrenzen.
•Verwenden Sie das Produkt nicht in einer feuchten Umgebung und vermeiden Sie
Spritzwasser.
•Betreiben Sie das Produkt nicht in unmittelbarer Nähe der Heizung, anderer Hitzequellen
oder in direkter Sonneneinstrahlung.
•Benutzen Sie das Produkt nicht in Bereichen, in denen elektronische Produkte nicht erlaubt
sind.
This manual suits for next models
1
Table of contents
Languages:
Other Hama Weather Station manuals
Popular Weather Station manuals by other brands

VEVOR
VEVOR YT60234 manual

La Crosse Technology
La Crosse Technology S77925 Setup guide

TZS First AUSTRIA
TZS First AUSTRIA FA-2461-7 instruction manual

Flytec
Flytec Windwatch PRO operating manual

Oregon Scientific
Oregon Scientific BHB613 user manual

Bresser
Bresser National Geographic 90-66000 operating instructions