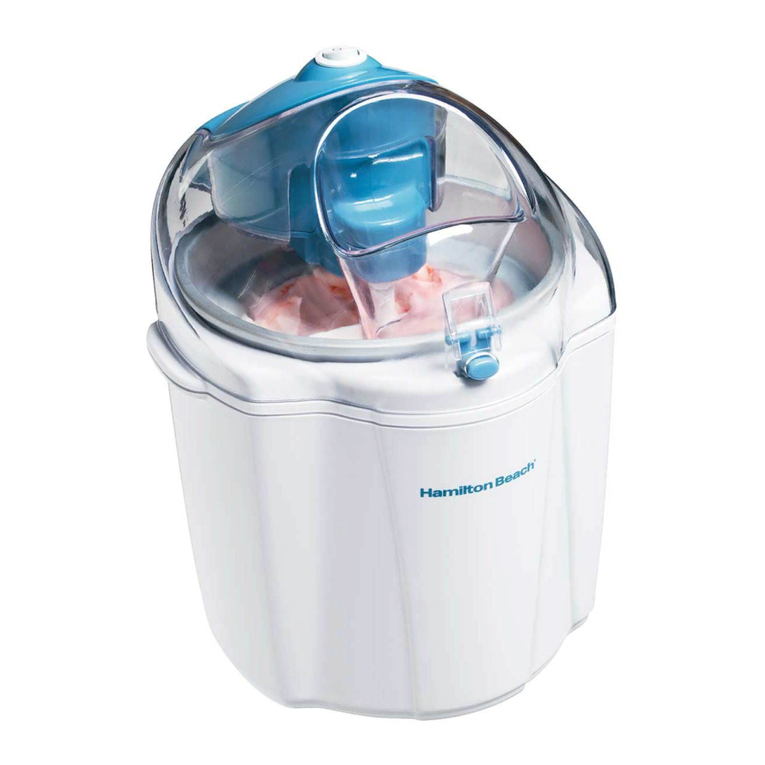
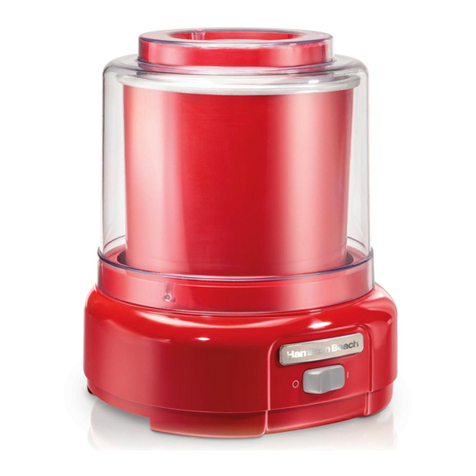
Hamilton Beach 68120 User manual

Ice Cream and Frozen Yogurt Maker
840112400
Important Safeguards ...................... 2
Parts and Features .......................... 3
Freezing the Cylinder Bowl.............. 3
Making Ice Cream and
Frozen Yogurt .................................. 4
Usage Tips ........................................ 5
Storing Ice Cream
and Frozen Yogurt............................ 6
Troubleshooting ................................7
How to Clean .................................... 7
Recipes.............................................. 8
Customer Service .......................... 14
In USA: 1-800-851-8900
In Canada: 1-800-267-2826
840112400 ENv03.qxd 1/30/03 3:48 PM Page 1

2
IMPORTANT SAFEGUARDS
SAVE THESE INSTRUCTIONS!
1. Read all instructions.
2. To protect against risk of electrical
shock, do not put motor assembly of
appliance in water or other liquid.
3. Close supervision is necessary when any
appliance is used by or near children.
4. Unplug from outlet when not in use,
before putting on or taking off parts,
and before cleaning.
5. Avoid contacting moving parts.
6. Do not operate any appliance with a
damaged cord or plug or after the appli-
ance malfunctions, or is dropped or
damaged in any manner. Call our toll
free customer service number for infor-
mation on examination, repair or
electrical or mechanical adjustment.
7. The use of attachments not recom-
mended or sold by Hamilton
Beach/Proctor-Silex may cause fire,
electric shock or injury.
8. Do not use outdoors.
9. Do not let cord hand over edge of table
or counter or touch hot surfaces.
10. Do not let cord contact hot surfaces,
including the stove.
11. Keep hands and utensils out of cylinder
bowl while in use to reduce the risk of
unjury to persons or to the appliance
itself.
12. Do not place on or near a hot gas or
electric burner, or in a heated oven.
Do not use this unit near oven, heater
or fireplace.
13. To disconnect, turn any control to “OFF”
or “0” then remove plug from wall outlet.
14. Do not use appliance for other than
intended purpose.
This appliance intended for household
use only.
This appliance is equipped with a polarized
plug. This type of plug has one blade wider
than the other. The plug will fit into an elec-
trical outlet only one way. This is a safety
feature intended to help reduce the risk of
electrical shock. If you are unable to insert
the plug into the outlet, try reversing the
plug. If the plug should still fail to fit, con-
tact a qualified electrician to replace the
obsolete outlet. Do not attempt to defeat
the safety purpose of the polarized plug by
modifying the plug in any way.
CAUTION:
This appliance is for household use. An
authorized service representative should
perform any servicing other than cleaning
and user maintenance. Authorized service
personnel only should do repair.
• Check voltage to be sure that the voltage
indicated on the nameplate agrees with
your voltage.
• Keep your hands and the cord away from
hot parts of the appliance during operation.
• Never clean with scouring powders or
hard implements.
• Do not place or use the appliance on hot
surfaces, such as stoves, hotplates, or
near open gas flames.
• Do not expose the freezing cylinder to
temperatures above 105ºF/41ºC.
• Do not clean freezing cylinder in dishwasher.
• Do not unplug the unit by pulling on cord.
• Do not use if freezing cylinder is broken or
any liquid has leaked out.
BEFORE FIRST USE:
Remove all literature and packing material
from inside the ice cream maker. Separate
the lid from the motor by pulling apart.
Wash the freezing cylinder, lid, drive shaft
and churn blade in warm soapy water.
Thoroughly rinse and dry all parts. DO NOT
immerse electric motor assembly in water.
To clean, wipe with a moist cloth.
Consumer Safety Information
When using electric appliances, basic safety precautions should always be followed
including the following:
This is not a toy. Adult supervision is necessary when any appliance is used by
or near children.
840112400 ENv03.qxd 1/30/03 3:48 PM Page 2

3
Parts and Features
1. Electrical Motor Assembly
2. ON/OFF Switch
3. Lid Opening
4. Drive Shaft
5. Churn Blade
6. Cylinder Bowl
7. Lid
8. Lid Locks
Freezing the Cylinder Bowl
The most important step in making ice cream and frozen dessert is to make sure
that the cylinder bowl is thoroughly frozen.
1. Wash and thoroughly dry cylinder bowl.
2. Place cylinder bowl in an upright
position in the back of your freezer
where the temperature is coldest.
The temperature should be at least
0ºF/-18ºC. Keep the cylinder
opening clear.
NOTE: The length of time necessary to properly freeze the cylinder bowl will
depend upon how cold the freezer temperature is:
Freezer Temperature
-22ºF/-30ºC 8 to 9 hours
-13ºF/-25ºC
12 to 13 hours
0ºF/-18ºC 20 to 22 hours
5ºF/-15ºC
24 hours or more
Minimum time for cylinder to properly freeze
Shake cylinder bowl to ensure the liquid between the cylinder bowl walls is
thoroughly frozen.
840112400 ENv03.qxd 1/30/03 3:48 PM Page 3

4
1. Prepare one of the suggested
recipes or one of your own favorites.
You can use any recipe for ice
cream, frozen yogurt, or frozen
dessert, as long as the recipe does
not contain more than one quart of
ingredients.
NOTE: Always chill your mixture in
the refrigerator before attempting to
freeze-churn. Ice cream mixtures will
stay fresh in the refrigerator for a few
days. Shake well before pouring the
mixture.
2. Assemble the lid, motor, and drive
shaft. To
insert the
drive shaft
into the
motor unit,
slide motor
onto lid until
the “keyhole”
part of lid is
over hole
into which the driveshaft fits. Push
the drive shaft into the hole.
NOTE: Make sure that the non-key-
hole part of
the lid fits
between the
top and bot-
tom collars
of the drive
shaft.
3. When the mixture is ready, remove
the cylinder bowl from the freezer
and place on a firm, level surface
near a convenient power outlet. It is
extremely important that the bowl be
used immediately after it is removed
from the freezer, as it begins to thaw
once removed.
Making Ice Cream and Frozen Yogurt
4. Insert churn blade onto the drive
shaft. Lower
assembled
lid/motor/
churn blade
onto the
cylinder bowl
positioning
lid locks over
tabs located
on the ring
inside of bowl. Lock in place by
sliding the lid locks outward.
5. Plug cord into outlet. Turn switch to
ON position to start operating churn
blade.
6. Immediately pour chilled mixture into
cylinder bowl
through lid
opening.
Maximum
capacity of
chilled mix-
ture is one
quart. This
allows for the
volume to
increase during churning to 11⁄2quarts.
NOTES:
• During the freezing process, you
can add finely chopped or pureed
ingredients such as chocolate,
raisins, nuts, etc., through the
opening in the lid. Alcohol should
not be added until near the end of
the process as it significantly slows
down the freezing process.
• The machine will run for 20 to 40
minutes. Do not turn ice cream
maker off during this time. The
mixture may freeze to the walls
and prevent the churn from turning.
• If the churn becomes blocked, it will
reverse and continue to turn in the
opposite direction. When the motor
repeatedly stalls and reverses, the
mixture has reached maximum
freezing.
840112400 ENv03.qxd 1/30/03 3:48 PM Page 4

5
Making Ice Cream and Frozen Yogurt
(cont.)
7. Turn off, unplug and remove motor
assembly
from the
bowl. You
may “sea-
son” the ice
cream by
wrapping
cylinder bowl
with a clean
towel until
desired consistency is reached (up
to 30 minutes) Transfer to an airtight
container and store in freezer.
NOTES:
• Bowl has nonstick surface for easy
cleanup. Do not use sharp utensils,
such as metal spoons, inside the
cyclinder bowl. Sharp objects will
scratch and damage the inside of the
cylinder bowl.
• The finished result is a soft, spoonable
ice cream. Homemade ice cream will
not be the same consistency of hard
store-bought ice cream.
IMPORTANT: Do not operate the unit
for longer than required. If after 40 min-
utes the mixture is not yet solid or has
thawed again, do not continue.
Refreeze the cylinder bowl and chill ice
cream in another bowl before continu-
ing process.
Usage Tips
• The frozen cylinder maintains a tem-
perature of about 14ºF (-10ºC) for
over 2 hours.
• We recommend you always keep
your ice cream bowl in your freezer
so that you can make ice cream, chill
wine or serve ice cubes at any time.
• For best results, the ice cream bowl
must be frozen thoroughly. Make sure
to set your freezer at the coldest set-
ting (temperature should not be more
than º0F or -18ºC.)
• Firmness of ice cream depends on
variables such as the recipe used,
room temperature and temperature of
ingredients before churn-freezing.
• Some recipes require the mixture to
be pre-cooked. Make the recipe at
least one day ahead. This will allow
the mixture to cool completely and
increase volume. Pre-chilling the base
mixture is strongly recommended.
Never try to shortcut.
• Remember that artificial sweetener
can be used as a substitute for sugar.
Only add artificial sweeteners to mix-
tures that are cold or have completely
cooled. When a recipe calls for heat-
ing liquid to dilute sugar, omit the
heating process and simply stir in the
sweetener until it is well dissolved.
1 packet sweetner = 2 teaspoons sugar
6 packets = 1⁄4cup
8 packets = 1⁄3cup
12 packets = 1⁄2cup
• Do not attempt to make more than
1 quart (4 cups) at a time.
• Do not remove ice cream bowl from
the freezer until ready to use.
• Do not puncture or heat the freezing
cylinder.
840112400 ENv03.qxd 1/30/03 3:48 PM Page 5

6
Storing Ice Cream and
Frozen Yogurt
In the ice cream maker
When the ice cream is ready it can be
left covered in the ice cream maker for
approximately 30 to 40 minutes. If
placed covered into the refrigerator it
can also be left in the ice cream maker
for 30 to 40 minutes.
In the freezer
Although ice cream can be stored in
the freezer for a short period, a lengthy
period of storage is not beneficial for
either the taste or the quality of the ice
cream. After one or two weeks, the
texture starts to deteriorate and the
fresh taste is lost. Ice cream tastes
best when it is fresh. Should you wish
to store ice cream in the freezer, follow
these tips:
• Store the ice cream in a clean, well-
sealed container that is suitable for
freezing.
• Storage temperature must be 0ºF
(-18ºC) or lower.
• Attach a label to the container with
the date when it was made and the
kind of ice cream it is.
• Defrosted or semi-defrosted ice cream
must never be put back in the freezer.
Remove ice cream from freezer about
thirty minutes before serving and place
it in the refrigerator. Or bring it up to
serving temperature by allowing it to
stand for ten or fifteen minutes at room
temperature.
Ice cream from non-boiled ingredients up to 1 week
Sorbets
1 to 2 weeks
Ice cream from half-boiled ingredients
up to 2 weeks
Storage chart
840112400 ENv03.qxd 1/30/03 3:48 PM Page 6

7
Troubleshooting
PROBLEM
Ice cream is
not firm enough
Things TO CHECK
• The cylinder bowl was not in the freezer long enough
(preferably overnight).
• The freezer is not cold enough. Ice cream sets at 10 to
14ºF (-10 to -12ºC). If the freezer is not at 0ºF (-18ºC) the
ice cream will not set.
• Too much mixture was put in cylinder bowl.
Maximum fill is 1 quart.
• Ingredients are warm or at room temperature.
• The cylinder bowl was left at room temperature for more
than 5 minutes before use.
• The freezer door was opened and closed too many times
during the freezing process.
• The freezer has a thick coating of ice on the walls.
After washing, dry completely prior to placing back in
freezer.
How To Clean
1. Turn motor assembly upside down.
Grip motor
with one hand
while holding
lid with the
other. Slide lid
free. Holding
the unit
upside down
will prevent
the drive shaft
from falling out. Then remove the drive
shaft and lid.
2. Wash the lid, churn blade, drive
shaft and cylinder bowl in hot,
soapy water.
NOTE: Do not clean freezing cylinder
in dishwasher.
2. Wipe the motor assembly with a
damp cloth. Never immerse the
unit in water.
3. Make sure all parts are clean and
thoroughly dried. Never replace
cylinder in freezer if it is still wet.
NOTE: After cleaning, reassemble
the entire motor assembly to avoid
losing parts. The drive shaft is small
and easily lost.
840112400 ENv03.qxd 1/30/03 3:48 PM Page 7

8
Recipes
Old Fashioned Vanilla Ice Cream
This recipe takes a little longer, but it is worth the effort.
3⁄4cups sugar
1⁄8teaspoon salt
13⁄4cups whole milk
In heavy saucepan, combine sugar, salt, and milk. Cook over medium heat stirring
occasionally until mixture is steaming. Reduce heat to low.
In medium bowl, slightly beat eggs. Slowly whisk half of the hot mixture into the
eggs and pour back into saucepan. Cook over medium-low heat until slightly thick,
about 3 minutes. Remove from heat and refrigerate until chilled or overnight.
When ready to freeze, stir in heavy cream and vanilla into the chilled custard
mixture. Start ice cream maker and pour mixture through hole in lid. Freeze until
desired consistency or the unit stops.
Easy Vanilla Ice Cream
1 cup sugar
2 teaspoons lemon juice
2 cups heavy whipping cream
1 cup milk
1 teaspoon vanilla extract
Combine all ingredients, mixing well. Start the freezer and pour mixture through
hole in lid. Freeze until desired consistency or unit stops.
The following variations can be used with either of the Vanilla Ice
Cream recipes above.
Black Forest Variation
Stir 1⁄2cup chocolate syrup and 1 can (161⁄2-ounce) pitted Bing cherries, drained
and halved, into ice cream after the machine has been churning 15 minutes.
Chocolate-Covered Peanut Variation
Stir 1⁄2cup chocolate syrup and 1 cup (7 ounces) chocolate-covered peanuts into
ice cream after the machine has been churning 15 minutes.
Cookies and Cream Variation
Reduce sugar to 1⁄2cup. Break 15 cream-filled chocolate sandwich cookies into
small pieces; stir into ice cream after the machine has been churning 15 minutes.
Orange-ade Ice Cream Variation
Add 1 (6-ounce) can frozen orange juice concentrate, thawed and undiluted, into
ice cream after the machine has been churning 15 minutes.
2 large eggs, beaten
11⁄2cups heavy whipping cream
1 teaspoon vanilla extract
840112400 ENv03.qxd 1/30/03 3:48 PM Page 8

9
Rocky Road Ice Cream
1⁄4cup unsweetened cocoa powder
3⁄4cup sugar
1 cup milk
1 teaspoon vanilla extract
Dash of salt
1 cup whipping cream
1 ounce semisweet chocolate square
1⁄2cup miniature marshmallows
1⁄4cup pecans (optional)
In heavy saucepan, combine cocoa powder and sugar. Gradually stir in milk.
Cook over low heat, stirring constantly, until chocolate is melted. Remove from
heat and refrigerate at least 2 hours.
When ready to freeze, mix whipping cream, salt, and vanilla extract into the chilled
mixture. Start ice cream maker and pour mixture through hole in lid.
After 15 minutes, add coarsely chopped semisweet chocolate and pecans.
Continue to freeze until desired consistency or the unit stops. Stir in marshmallows.
Mint-Chocolate Chip Variation
Stir 1 teaspoon of mint extract in place of vanilla. Finely chop 1 cup (6 ounces)
semisweet chocolate chips into ice cream after the machine has been churning 15
minutes. Add 4 drops of green food color (optional).
Peanut Butter Variation
Stir 3⁄4cup chunky peanut butter into ice cream mixture.
Strawberry-Banana Variation
Stir 3 bananas, mashed; 1 pint strawberries, coarsely chopped; and 3⁄4cup
chopped toasted pecans into ice cream after the machine has been churning
15 minutes.
Double Almond Chocolate Variation
Finely chop 2 ounces semisweet chocolate squares. Replace vanilla extract with
almond extract. Chop 1 cup of almonds and add into ice cream after the machine
has been churning 15 minutes.
Cookie Dough Variation
Cut up 1 cup refrigerated cookie dough (raw) into small pieces and drop into mix-
ture through the food chute after the machine has been churning 15 minutes.
Banana Pudding Variation
Add 1⁄2cup mashed bananas (about 3) into ice cream after the machine has been
churning 15 minutes. Stir in 10 crushed vanilla wafers into ice cream when ice
cream has finished making.
840112400 ENv03.qxd 1/30/03 3:48 PM Page 9

10
Chocolate Ice Cream
4 ounces unsweetened chocolate,
chopped
1 cup half ’n half or evaporated milk
1 cup sugar
2 tablespoons flour
In heavy saucepan, combine chocolate and half ’n half or evaporated milk. Cook
over medium to low heat until chocolate is melted and mixture is smooth (about
5 minutes).
In small bowl, combine sugar, flour, and salt. Gradually whisk dry ingredients into
the melted chocolate mixture and bring to boil. Reduce heat to medium-low and
cook, stirring occasionally. In medium bowl, slightly beat eggs. Slowly whisk in
half of the hot chocolate mixture then transfer this mixture to the remaining choco-
late in saucepan. Cook about 5 minutes, until thick, smooth, and steaming. Let
cool to room temperature.
When ready to freeze, mix in whipping cream and vanilla into the chilled mixture.
Start ice cream maker and pour mixture through hole in lid freeze until desired
consistency or the unit stops.
Raspberry Ice Cream
1 cup sugar
11⁄2cup frozen raspberries, slightly thawed
2 teaspoons lemon juice
1 cup heavy cream
1 cup milk
Remove raspberries from freezer and allow to become slightly soft. Then mash or
puree, (strain the seeds if desired). Combine sugar, lemon juice, and fruit. Stir until
well mixed. Stir in cream and milk.
Start ice cream maker and pour mixture through hole in lid. Freeze until desired
consistency or the unit stops.
Chocolate-Raspberry Variation
After about 15 minutes or until milkshake consistency, add 10 crushed chocolate
sandwich cookies; (place in plastic sandwich bag and mash). Continue to freeze.
Strawberry Variation
Replace raspberries with strawberries.
Chocolate Chip Ice Cream
1 cup semi-sweet chocolate chips (divided)
1 can sweetened condensed milk
21⁄2cups half ’n half or evaporated milk
2 teaspoons vanilla extract
In heavy saucepan, combine 1⁄2cup chocolate chips and sweetened condensed
milk. Cook over medium heat, stirring constantly just until chocolate is melted and
mixture is smooth. Remove from heat and refrigerate at least 2 hours.
When ready to freeze, mix half ’n half and vanilla extract into the chilled mixture.
Start ice cream maker and pour mixture through hole in lid.
After 15 minutes, add remaining 1⁄2cup of chocolate chips, coarsely chopped.
Continue to freeze until desired consistency or the unit stops.
1⁄4teaspoon salt
2 eggs
11⁄2cups heavy whipping cream
1 teaspoons vanilla extract
1⁄2cup chopped nuts, optional
840112400 ENv03.qxd 1/30/03 3:48 PM Page 10

11
Frozen Custard
4 eggs
1 cup milk
1⁄2cup sugar
2 tablespoons honey
1/8 teaspoon salt
2 cups whipping cream
2 teaspoons vanilla extract
In medium saucepan, beat together eggs, milk, sugar, honey, and salt. Cook over
low heat, stirring constantly, until mixture is thick and reaches at least 160ºF. Cool
quickly by placing pan in ice or cold water and stirring for few minutes.
Cover and refrigerate until thoroughly chilled, at least 1 hour. When ready to
freeze, mix whipping cream and vanilla into the chilled custard mixture. Start ice
cream maker and pour mixture through hole in lid. Mixture will be thick; using a
mixing bowl with a pour spout would be ideal when using this recipe. Freeze until
desired consistency or the unit stops.
Fruit Sherbet
1 (12-ounce) bag frozen fruit, unsweetened
(strawberry, peach, pineapple or combination)
3 cups half ’n half
1⁄2cup sugar
1 tablespoons lime juice
In a blender or food processor, combine all ingredients and process until well
blended and smooth.
Start ice cream maker and pour mixture through hole in lid. Freeze until desired
consistency or the unit stops.
Strawberry Cheesecake Ice Cream
3 ounces cream cheese (softened)
1 (17-ounce) can sweetened condensed milk
1 cup heavy whipping cream
1 teaspoon vanilla extract
1 cup frozen strawberries (slightly thawed)
1⁄2cup graham cracker crumbs
Remove cream cheese and strawberries from the refrigerator. Allow cream cheese
to soften and the strawberries to become slightly thawed.
In a medium bowl, beat cream cheese until fluffy. Gradually add sweetened con-
densed milk until smooth, (you may use a hand mixer). Mix in heavy whipping
cream and vanilla. Chop strawberries into small pieces and stir into mixture.
Start ice cream maker and pour mixture through hole in lid. Freeze until desired
consistency or the unit stops. Stir in graham cracker crumbs.
840112400 ENv03.qxd 1/30/03 3:48 PM Page 11

12
Peach Ice Cream
1 cup chopped fresh or frozen peaches
3⁄4cup sugar (divided)
2 cups heavy whipping cream
1⁄2cup milk
2 teaspoons vanilla extract
Combine the peaches with 1⁄4cup of sugar and stir/mash together. Let stand 1 hour.
Add the remaining 1⁄2cup sugar, cream, milk, and vanilla extract into the peaches.
Start ice cream maker and pour mixture through hole in lid. Freeze until desired
consistency or the unit stops.
Strawberry Sorbet
1⁄2cup sugar
1 cup water
4 cups fresh or thawed frozen strawberries
1 tablespoon lemon juice
Combine sugar and water in heavy saucepan. Bring to a boil. Reduce heat to low
and simmer until all sugar is dissolved. Remove from heat, place in refrigerator and
cool completely. Puree strawberries; add lemon juice and sugar water.
Start ice cream maker and pour mixture through hole in lid. Freeze until desired
consistency or the unit stops.
Frozen Blueberry Yogurt
11⁄4cups blueberries, fresh or frozen (slightly thawed)
11⁄4cups plain yogurt
1⁄2cup half ’n half
1⁄2cup sugar
Mash berries. (When using frozen berries, remove from freezer and allow to
become slightly soft.) Combine remaining ingredients. Cover and refrigerate.
Start ice cream maker and pour mixture through hole in lid. Freeze until desired
consistency or the unit stops.
Frozen Strawberry Yogurt Variation
Replace blueberries with 11⁄2cups frozen strawberries (processed with juice).
840112400 ENv03.qxd 1/30/03 3:48 PM Page 12

13
Hot Fudge Sauce
3 (1-ounce) squares unsweetened chocolate
1⁄2cup half ’n half
3⁄4cup sugar
Dash of salt
1⁄4cup butter or margarine
1 teaspoon vanilla extract
In medium saucepan combine chocolate, half ’n half, sugar, and salt. Cook over
medium heat, stirring continuously until chocolate is melted.
Remove from heat and whisk in vanilla extract and butter. Continue to whisk until
smooth. Serve warm over ice cream.
Lemon Sauce
3⁄4cup sugar
1 tablespoon cornstarch
Dash of salt
3⁄4cup water
1 large egg, beaten
3 tablespoons lemon juice
1 tablespoon butter or margarine
In medium saucepan combine sugar, cornstarch, and salt. Mix until all ingredients
are combined. Add water and cook over medium heat, stirring continuously until
steaming.
In medium bowl, slightly beat eggs. Slowly whisk in half of the hot mixture then
pour back into saucepan. Cook over medium-low heat until slightly thick, about 5
minutes.
Remove from heat and whisk in lemon juice and butter. Continue to whisk until
smooth. Serve warm or cold over vanilla ice cream.
Peanut Butter Sauce
1 cup sugar
1 tablespoon white corn syrup
1⁄4teaspoon salt
3⁄4cup milk
6 tablespoons peanut butter
1 teaspoon vanilla extract
In medium saucepan combine sugar, syrup, salt, and milk. Cook over medium-
low heat, stirring continuously until thickened. Stir in peanut butter and vanilla until
smooth. Remove from heat and cool.
840112400 ENv03.qxd 1/30/03 3:48 PM Page 13

14
If you have a claim under this warranty, please call our Customer Service Number.
For faster service please have model, series, and type numbers ready for operator
to assist you. These numbers can be found on the bottom of your appliance.
MODEL: _______________ TYPE: ________________ SERIES: _________________
Customer Service
LIMITED WARRANTY
This product is warranted to be free from defects in material and workmanship for a period
of two (2) years for Hamilton Beach Portfolio products or one (1) year for Hamilton Beach
products from the date of original purchase, except as noted below. During this period, we
will repair or replace this product, at our option, at no cost. THE FOREGOING WARRANTY
IS IN LIEU OF ANY OTHER WARRANTY, WHETHER EXPRESS OR IMPLIED, WRITTEN
OR ORAL INCLUDING ANY WARRANTY OF MERCHANTABILITY OR FITNESS FOR A
PARTICULAR PURPOSE. ANY LIABILITY IS EXPRESSLY LIMITED TO AN AMOUNT
EQUAL TO THE PURCHASE PRICE PAID, AND ALL CLAIMS FOR SPECIAL, INCIDENTAL
AND CONSEQUENTIAL DAMAGES ARE HEREBY EXCLUDED. There is no warranty with
respect to the following, which may be supplied with this product: glass parts, glass
containers, cutter/strainer, blades, and/or agitators. This warranty extends only to the
original consumer purchaser and does not cover a defect resulting from abuse, misuse,
neglect, use for commercial purposes, or any use not in conformity with the printed
directions. This warranty gives you specific legal rights, and you may also have other legal
rights which vary from state to state, or province to province. Some states or provinces do
not allow limitations on implied warranties or special, incidental or consequential damages,
so the foregoing limitations may not apply to you.
If you have a claim under this warranty, DO NOT RETURN THE APPLIANCE TO THE
STORE! Please call our CUSTOMER SERVICE NUMBER. (For faster service please have
model, series, and type numbers ready for operator to assist you.)
CUSTOMER SERVICE NUMBERS
In the U.S. 1-800-851-8900
In Canada 1-800-267-2826
Web site address: www.hamiltonbeach.com
KEEP THESE NUMBERS FOR FUTURE REFERENCE!
www.hamiltonbeach.com
HAMILTON BEACH PROCTOR-SILEX,INC.PROCTOR-SILEX CANADA,INC.
263 Yadkin Road
Southern Pines, North Carolina 28387
Picton, Ontario K0K 2T0
1/03
840112400
840112400 ENv03.qxd 1/30/03 3:48 PM Page 14

Sorbetière/yaourtière
840112400
Précautions importantes ................ 2
Pièces et caractéristiques .............. 3
Congélation du bol cylindrique ...... 3
Fabrication de crème
et yaourt glacés ................................ 4
Conseils d’utilisation ........................ 5
Conservation de crème
et yaourt glacés ................................ 6
Dépannage ........................................7
Nettoyage .......................................... 7
Recettes ............................................ 8
Service à la clientèle .................... 14
Aux É.-U. : 1-800-851-8900
Au Canada : 1-800-267-2826
840112400 FRv03.qxd 1/30/03 3:48 PM Page 1

2
PRÉCAUTIONS IMPORTANTES
CONSERVEZ CES INSTRUCTIONS!
1. Lire toutes les instructions.
2. Afin de vous prémunir contre le risque de
choc électrique, ne pas plonger le bloc
moteur de l’appareil dans l’eau ou tout autre
liquide.
3. Surveiller attentivement les enfants lorsque
ceux-ci utilisent l’appareil ou se trouvent à
proximité de celui-ci.
4. Débrancher l’appareil de la prise de courant
lorsque vous ne l’utilisez pas, avant d’enlever
ou de remettre des pièces en place ou de le
nettoyer.
5. Éviter de toucher les pièces mobiles.
6. Ne pas faire fonctionner un appareil avec un
cordon ou une fiche endommagée ou lorsque
l’appareil ne fonctionne pas bien, est tombé
ou a été endommagé d’une manière quel-
conque. Composer notre numéro sans frais
d’assistance à la clientèle pour des renseigne-
ments concernant l’examen, la réparation ou
le réglage électrique ou mécanique.
7. L’utilisation d’accessoires non recommandés
ou vendus par Hamilton Beach/Proctor-Silex
peut causer un incendie, un choc électrique
ou une blessure.
8. Ne pas utiliser à l’extérieur.
9. Ne pas laisser le cordon pendre au bord
d’une table ou d’un comptoir ou entrer en
contact avec une surface chaude.
10. Ne pas laisser le cordon entrer en contact
avec une surface chaude, y compris la
cuisinière.
11. Afin de réduire le risque de blessures cor-
porelles ou d’endommager l’appareil, ne pas
introduire les mains ou des ustensiles dans
le bol cylindrique au cours du fonction-
nement.
12. Ne pas placer l’appareil sur ou près d’un
brûleur électrique ou à gaz chaud ou dans
un four chauffé. Ne pas utiliser cet appareil
près du four, d’un radiateur ou d’une chem-
inée.
13. Pour débrancher l’appareil, tourner une
commande quelconque à OFF (Arrêt) ou 0 et
ensuite retirer la fiche de la prise murale.
14. N’utiliser cet appareil qu’aux fins auxquelles
il a été conçu.
Cet appareil est conçu uniquement pour
l’usage domestique.
Cet appareil est muni d’une fiche polarisée. Ce
type de fiche a une lame plus large que l’autre.
La fiche pourra être insérée dans une prise
électrique dans un sens seulement. Il s’agit
d’une caractéristique de sécurité visant à
réduire le risque de choc électrique. Si la fiche
ne peut pas être insérée dans la prise, essayer
d’inverser la fiche. Si cela ne fonctionne tou-
jours pas, contacter un électricien qualifié pour
qu’il remplace la prise désuète. Ne pas essayer
de contourner l’objectif de sécurité de la fiche
polarisée en la modifiant de quelque manière
que ce soit.
AVERTISSEMENT : Cet appareil est conçu
pour l’usage domestique. Tout réglage, à l’ex-
ception du nettoyage et de l’entretien ordinaire,
doit être exécuté par un représentant de ser-
vice autorisé. Toute réparation doit être
effectuée uniquement par du personnel de ser-
vice autorisé.
• Vérifier la tension pour s’assurer que la ten-
sion indiquée sur la plaque signalétique
correspond à la tension de votre domicile.
• Ne laisser ni vos mains ni le cordon électrique
entrer en contact avec les pièces chaudes de
l’appareil durant le fonctionnement.
• Ne jamais nettoyer l’appareil avec des
poudres à récurer ou des objets durs.
• Ne pas placer ou utiliser l’appareil sur une
surface chaude telle que cuisinière, plaque
chauffante, ou près d’une flamme de gaz nue.
• Ne pas exposer le cylindre de congélation à des
températures au-dessus de 105ºF/41ºC.
• Ne pas laver le cylindre de congélation au
lave-vaisselle.
• Ne pas débrancher l’appareil en tirant sur le
cordon électrique.
• Ne pas utiliser le cylindre de congélation si
celui-ci est brisé ou si un liquide en a coulé.
AVANT L’UTILISATION INITIALE :
Retirer toute documentation et matériau d’em-
ballage à l’intérieur de la sorbetière. Tirer le
couvercle du moteur pour l’en séparer. Laver
le cylindre de congélation, le couvercle, l’arbre
de transmission et la pale de baratte dans de
l’eau chaude savonneuse. Rincer et sécher à
fond toutes les pièces. NE PAS plonger le
bloc moteur dans l’eau. Pour le nettoyer,
essuyer avec un chiffon humide.
Renseignements de sécurité aux consommateurs
Lors de l’utilisation d’appareils électriques, des précautions de sécurité de base devraient tou-
jours être observées, y compris ce qui suit :
Ceci n’est pas un jouet. La surveillance d’un adulte est nécessaire lorsque tout
appareil ménager est utilisé par ou près des enfants.
840112400 FRv03.qxd 1/30/03 3:48 PM Page 2

3
Pièces et caractéristiques
1. Ensemble bloc moteur
2. Interrupteur marche/arrêt (ON/OFF)
3. Ouverture du couvercle
4. Arbre de transmission
5. Pale de baratte
6. Bol cylindrique
7. Couvercle
8. Verrous du couvercle
Congélation du bol cylindrique
L’étape la plus importante dans la fabrication de crème et dessert glacés est d’as-
surer que le bol cylindrique est parfaitement congelé.
1. Laver et sécher à fond le bol cylindrique.
2. Placer le bol cylindrique en position verticale
à l’arrière de votre congélateur là où la
température est la plus froide. La température
doit être d’environ 0ºF/-18ºC.Ne pas bloquer
l’ouverture du cylindre.
REMARQUE : La durée nécessaire pour congeler le cylindre convenablement
dépendra de la température du congélateur :
Température du congélateur
-22ºF/-30ºC 8 à 9 heures
-13ºF/-25ºC
12 à 13 heures
0ºF/-18ºC 20 à 22 heures
5ºF/-15ºC
24 heures ou plus
Temps minimum requis pour congeler
convenablement le cylindre
Secouer le bol cylindrique pour assurer que le liquide se trouvant entre les parois
du cylindre est parfaitement congelé.
840112400 FRv03.qxd 1/30/03 3:48 PM Page 3

4
1. Préparer une des recettes suggérées ou
bien une de vos propres recettes
favorites. Vous pouvez utiliser une
recette quelconque pour crème glacée,
yaourt ou dessert glacé, à condition que
la quantité d’ingrédients dans la recette
ne dépasse pas une pinte (0,93 litre).
REMARQUE : Laisser toujours votre
mélange au frais dans le réfrigérateur
avant de procéder au barattage. Les
mélanges de crème glacée resteront
frais au réfrigérateur pendant quelques
jours. Secouer le mélange comme il faut
avant de le verser.
2. Assembler le couvercle, le bloc moteur
et l’arbre de
transmission.
Pour insérer
l’arbre de
transmission
dans le bloc
moteur, glisser
le moteur sur
le couvercle
jusqu’à ce que
le « guichet »
du couvercle
recouvre le trou dans lequel l’arbre de
transmission doit pénétrer. Pousser l’ar-
bre dans le trou.
REMARQUE : S’assurer que la partie du
couvercle non
comprise dans
le guichet
s’engage entre
les collets
supérieur et
inférieur de
l’arbre de
transmission.
3. Lorsque le mélange est prêt, retirer le bol
cylindrique du congélateur et le placer
sur une surface ferme et nivelée près
d’une prise de courant dont l’emplace-
ment est convenable. Il est extrêmement
important d’utiliser le bol immédiatement
après sa sortie du congélateur car la
décongélation commence aussitôt.
Fabrication de crème et yaourt glacés
4. Insérer la pale de baratte dans l’arbre de
transmission.
Faire descen-
dre l’ensemble
couvercle/ bloc
moteur/pale
dans le bol
cylindrique en
positionnant
les verrous du
couvercle sur
les onglets
situés sur l’an-
neau à l’intérieur du bol. Verrouiller en
place en faisant glisser les verrous du
couvercle à l’extérieure.
5. Brancher le cordon dans la prise de
courant. Mettre l’interrupteur à la position
de mise en marche (ON) pour activer la
pale de baratte.
6. Verser immédiatement le mélange froid
dans le bol
cylindrique à
travers
l’ouverture du
couvercle.
La quantité
maximum de
mélange froid
ne doit pas
dépasser une
pinte (0,93 litre)
afin de tenir
compte de l’augmentation du volume à
11⁄2pinte (1,40 litre) durant le barattage.
REMARQUES :
• Durant le processus de congélation, des
ingrédients finement hachés ou écrasés
tels que chocolat, raisins secs, noix,
etc., peuvent être ajoutés à travers
l’ouverture dans le couvercle. L’alcool
ne devrait être ajouté qu’à la fin du
processus car celui-ci ralentit consid-
érablement le processus de
congélation.
• L’appareil fonctionnera pendant environ
20 à 40 minutes. Ne pas désactiver la
sorbetière au cours de cette période. Le
mélange congelé pourrait adhérer aux
parois empêchant ainsi la baratte de
tourner.
• Si la baratte se bloque, elle s’inversera
et tournera dans le sens opposé.
Lorsque le moteur s’arrête et s’inverse à
plusieurs reprises, le mélange a atteint
la congélation maximum.
840112400 FRv03.qxd 1/30/03 3:48 PM Page 4

5
Fabrication de crème et yaourt glacés
(cont.)
7. Éteindre, débrancher et retirer le bloc
moteur du bol.
Vous pouvez
« stabiliser » la
crème glacée
en enveloppant
le bol cylin-
drique dans
une serviette
propre jusqu’à
ce que la con-
sistance
désirée soit
atteinte (jusqu’à 30 minutes). Transvaser
le mélange dans un contenant hermé-
tique et ranger au congélateur.
REMARQUES :
• La surface antiadhésive du bol permet un
nettoyage facile. Ne pas utiliser des
ustensiles acérés tels que cuillères en
métal à l’intérieur du bol. Les objets
pointus égratigneront et endommageront
l’intérieur du bol cylindrique.
• Le résultat final consiste en une crème
glacée molle pouvant être ramassée avec
une cuillère. La crème glacée faite maison
n’aura pas la même consistance que la
crème glacée solide du commerce.
IMPORTANT : Ne pas faire fonctionner
l’appareil plus longtemps que requis. Si
après 40 minutes, le mélange ne s’est tou-
jours pas solidifié ou s’est décongelé à
nouveau, cesser le processus. Mettre le
mélange de crème glacée au frais dans un
autre bol et remettre le cylindre dans le
congélateur avant de reprendre le proces-
sus.
Conseils d’utilisation
• Le cylindre congelé maintient une tem-
pérature d’environ 14ºF (-10ºC)
pendant plus de 2 heures.
• Nous recommandons de toujours
ranger le bol cylindrique dans le con-
gélateur de façon à pouvoir faire de la
crème glacée, refroidir du vin, ou servir
des glaçons en tout temps.
• Pour les meilleurs résultats, le bol doit
être parfaitement congelé. S’assurer de
régler le congélateur au réglage le plus
froid (la température ne devrait pas être
de plus de º0F ou -18ºC.)
• La fermeté de la crème glacée dépend
de facteurs variables tels que la recette
utilisée, la température ambiante ainsi
que la température des ingrédients
avant le barattage.
• Certaines recettes nécessitent que le
mélange soit précuit. Préparer la
recette au moins un jour à l’avance.
Ceci permettra au mélange de refroidir
complètement et d’augmenter de vol-
ume. Il est fortement conseillé de
laisser refroidir à l’avance le mélange
de base. Ne jamais essayer d’omettre
une étape.
• Souvenez-vous que l’édulcorant artifi-
ciel peut être utilisé comme succédané
de sucre. N’ajouter d’édulcorants artifi-
ciels qu’aux mélanges qui sont froids
ou complètement refroidis. Lorsqu’une
recette exige qu’un liquide soit réchauf-
fé pour diluer le sucre, omettre de
chauffer le liquide et mélanger simple-
ment l’édulcorant jusqu’à ce qu’il soit
bien dissout.
1 sachet d’édulcorant = 2 cuillères à
thé de sucre
6 sachets = 1⁄4tasse
8 sachets = 1⁄3tasse
12 sachets = 1⁄2tasse
• Ne pas essayer de faire plus d’une
pinte (4 tasses) à la fois.
• Ne pas retirer le bol cylindrique du con-
gélateur jusqu’à ce que vous soyez
prêt à l’utiliser.
• Ne pas perforer ni réchauffer le bol
cylindrique de congélation.
840112400 FRv03.qxd 1/30/03 3:48 PM Page 5

6
Conservation de crème et
yaourt glacés
Dans la sorbetière
Lorsque la crème glacée est prête, elle
peut être laissée dans la sorbetière
couverte pendant environ 30 à 40 min-
utes. Elle peut également être laissée
dans la sorbetière couverte dans le
réfrigérateur pendant 30 à 40 minutes.
Dans le congélateur
Bien que la crème glacée puisse être
rangée dans le congélateur pendant
une courte période, une conservation
plus longue pourrait en altérer le goût
et la qualité. Après une ou deux
semaines, une détérioration de la tex-
ture et une perte de goût se
manifestent. La crème glacée est
meilleure lorsqu’elle est fraîche. Si vous
désirez conserver la crème glacée
dans le congélateur, suivre les conseils
suivants :
• Conserver la crème glacée dans un
contenant hermétique propre con-
venable pour la congélation.
• La température du congélateur doit
être de 0ºF (-18ºC) ou en-dessous.
• Apposer sur le contenant une
étiquette qui indique la date de fabri-
cation et le genre de crème glacée.
• La crème glacée décongelée à moitié
ou complètement ne doit jamais être
remise au congélateur.
Sortir la crème glacée du congélateur
environ trente minutes avant de la
servir et la placer dans le réfrigérateur.
Ou atteindre la bonne température
pour la servir en la laissant reposer
pendant dix à quinze minutes à la tem-
pérature ambiante.
Crème glacée à partir d’ingrédients non bouillis Jusqu’à 1 semaine
Sorbets
1 à 2 semaines
Crème glacée à partir d’ingrédients à moitié bouillis
Jusqu’à 2 semaines
Tableau de conservation
840112400 FRv03.qxd 1/30/03 3:48 PM Page 6
Table of contents
Languages:
Other Hamilton Beach Ice Cream Maker manuals

Hamilton Beach
Hamilton Beach 68330N User manual

Hamilton Beach
Hamilton Beach 68550E User manual

Hamilton Beach
Hamilton Beach 68328 Owner's manual

Hamilton Beach
Hamilton Beach 68550-CN User manual

Hamilton Beach
Hamilton Beach 68330 User manual

Hamilton Beach
Hamilton Beach 68880 User manual

Hamilton Beach
Hamilton Beach 68550-SAU User manual

Hamilton Beach
Hamilton Beach 68320 - Gel Ice Cream Maker User manual

Hamilton Beach
Hamilton Beach 68220 - 1.5 Qt Capacity Ice Cream Maker User manual

Hamilton Beach
Hamilton Beach Soft Serve Ice Cream Maker User manual