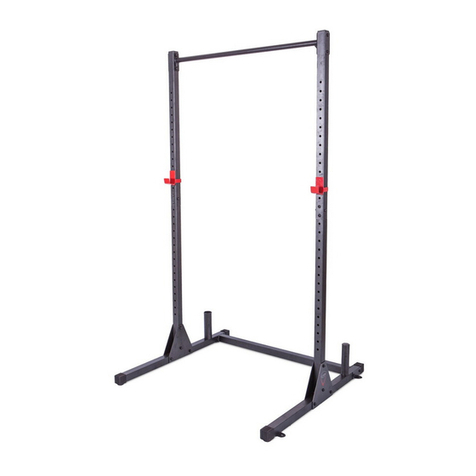
Hang ups Teeter EZ-Up Inversion Racck User manual

Items for Assembly: Item #
Large diameter ‘L’ Bar E1-1040
Smalldiameter‘L’Bar E1-1047
Small Straight Bar w/ Warning Label E1-1050
Large Straight Bar w/ Blue Foam E1-1043
Large diameter ‘Elbow’ Bar E1-1052
Small diameter ‘Elbow’ Bar E1-1054
Two (2) Locking Brackets E1-1059
Four (4) 2” (5 cm) Bolts H1-1905
Two (2) Bolts: 1 - 1¾” (4.4 cm); 1 - 1½” (3.8 cm) H1-1904
w/ Lock Nuts H1-3011
Six (6) 2” (5 cm) Wood Screws H1-5005
Not included: Medium Phillips Head screwdriver,
Adjustable Wrench, Drill motor w/ 5/32” drill bit.
1. It is your responsibility to familiarize yourself with the proper use of the equipment and the inherent risks of inversion, such as falling on your head
or neck, pinching, entrapment or equipment failure.
2. This product is not designed for persons over 250 lbs (113.6 kg) Structural failure could occur or head/neck may impact floor during inversion.
Serious injury or death could result.
3. DO NOT use with the EZ-Up Inversion Rack in doorways wider than 36” (91 cm).
4. ONLY use in solid wood doorways built according to national building codes. DO NOT use in faux or metal doorways.
5. You must use the screws provided. DO NOT substitute with other length screws.
6. DO NOT use the equipment without a licensed physician’s approval and a review of the medical containdications, as noted in the Owner’s Manual.
7. Failure to assemble and/or use the equipment as directed may void the manufacturer’s warranty on this product and could result in injury or death.
8. DO NOT use the EZ-Up Inversion Rack until you have thoroughly and carefully read the Owner’s Manual, viewed the Instructional Video, reviewed
product labeling and all other accompanying documents, and inspected the equipment.
9. The steps in the video directly coincide with the steps detailed in these Assembly Instructions.
10. Make sure that all fasteners are secure.
11. Follow each step in sequence. Do not skip ahead.
12. ONLY one person at a time should use the EZ-UpTM Inversion Rack.
13. Prior to use, test and inspect the EZ-Up Inversion Rack to ensure secure installation.
14. Replace defective parts immediately and/or keep the equipment out of use until repair.
Carefully remove the individual parts from the carton. You should have all of the items
listed below. If any items are missing or damaged, contact your retailer or customer
service directly (See Pg. 2 of the Owner’s Manual).
STEP 1.
Assemble the three larger diameter tubes (E1-1040, E1-1043, E1-1052)
which are marked by a 1, 2 and 3 at each joint:
• Separate the three larger diameter tubes from the three smaller diameter tubes.
The larger diameter tubes use joint numbers 1, 2, and 3.
• Lay out the three larger tubes in relationship to each other. See Figure 1. Be
sure that the parts are assembled so that 1mates to 1, 2mates to 2, and 3
mates to 3.
• Loosely assemble joints 1and joints 3using the 2” (5 cm) bolts (H1-1905). See
Figure 2. DO NOT TIGHTEN THE BOLTS YET.
• Loosely assemble joint 2with the 1¾” (4.4 cm) bolt (H1-1904) and lock nut (H1-
3011). Insert the bolt so that its head fits in the countersink. See Figure 2A.
STEP 2.
Assemble the three smaller diameter tubes (E1-1047, E1-1050, E1-1054)
which are marked by a 4, 5 and 6 at each joint:
• Lay out the three smaller diameter tubes in relationship to each other . See
Figure 3. Be sure that the parts are assembled so that 4mates to 4, 5mates to
5, and 6mates to 6.
• Loosely assemble joints 5and joints 6using the 2” (5 cm) bolts (H1-1905). DO
NOT TIGHTENTHE BOLTS YET.
• Loosely assemble joint 4with the 1½” (3.8 cm) bolt (H1-1904) and lock nut
(H1-3011). Insert the bolt so that its head fits in the countersink. See Figure 2A.
Before you begin: These instructions will guide you in properly assembling the unit. Please review all the steps before beginning assembly.
Carefully adhere to the Assembly Instructions and User Instructions to help ensure user safety and product integrity.
Figure 3
(smaller diameter
tubes)
DONOT DISCARD- KEEPFOR FUTUREREFERENCE.
E1-1040
E1-1047
E1-1050
E1-1043
E1-1052
E1-1054
E1-1059 H1-1905 H1-1904
H1-3011 H1-5005
ASSEMBLYINSTRUCTIONS
3
2
1
Figure 1
(largerdiameter
tubes)
ASSEMBLY
WARNING
!
2”
2”
1¾”
Figure 2A
3
1
2
Figure 2
countersink
PRE-ASSEMBLY
4
56

STEP 5.
Weight Test EZ-Up Inversion Rack for Proper Installation:
After installing the Locking Brackets and securing the EZ-UpTM Inversion Rack in
place:
• Two people should hang by their hands from one end of the rack (one person
on the upper bar and one on the lower bar).
• While hanging, bounce up and down several times. Next, both people should
hang from the other end and repeat the test. IMPORTANT: If the door frame is
unstable or weak, DO NOT continue use of the rack in that door frame.
STEP 3.
FinalAssembly:
• Slide the smaller half into the larger half. See Figure 4. Tighten all bolts
using a screwdriver and wrench. The width of the EZ-UpTM Inversion Rack
may be adjusted to fit doorways 28 to 36” (71 to 91 cm) wide by sliding the
smaller half in or out, depending upon the size of your door frame.
STEP 4.
Installation of Locking Brackets:
•Important: There are two sizes of Locking Brackets, one to fit the Large
Straight Bar (with blue hand grips) and one to fit the Small Straight Bar (with
red warning label). The Locking Brackets should mount on the door frame
opposite from the hinged door, to allow use of the equipment without interfer-
ing with operation of the door. See Figure 5. With your back to the door, the
large Locking Bracket will mount on your left and the small Locking Bracket
on your right.
• Install the first Locking Bracket as shown in Figure 6. Place the Locking
Bracket against the doorstop edge, and 2” (5 cm) or more down from the top
of the door frame.
• Mark and then drill three 5/32” (3.9 mm) diameter holes and drill at least 2”
(5cm) deep into the door frame.
• Mount the Locking Bracket using the three wood screws provided (H1-5005).
Screws must fully engage the door frame.
• Install the second Locking Bracket on the opposite side of the door frame at
the same height as the first Locking Bracket. After both Locking Brackets are
installed, extend your EZ-UpTM Inversion Rack out to the width of the door
frame and hook the flared tube ends into the u-shaped receiver in each
Locking Bracket.
• Lock the EZ-UpTM Inversion Rack into the Locking Brackets by snapping the
plastic, rotating lock over the top of the bar. See Figure 7. IMPORTANT:
Always check to make sure the tubes are securely locked in place before
hanging on the rack.
Figure 4
Figure 6
Figure 7
2
1
3
5
4
6
u-shaped
receiver
plastic
rotating
lock
Figure 5
Assembly Instructions LE-1017 Pg. 2
ASSEMBLY
3. Failure to test installation as outlined in these instructions could lead
to equipment failure, resulting in serious injury or death!
!WARNING
1. Failure to properly install Locking Brackets could result in equipment failure.
2. Always check to make sure the Inversion Rack is securely locked in place.
WARNING
!

USING THE EZ-UpTM INVERSION RACK
Mounting (See Figure 8):
• Grasp the foam hand grips on the lower bar. Swing one leg up and place your foot on the
upper bar.
• Raise your other foot up and hook the boot on the upper bar.
• Shift your weight to the hooked boot and hook the second boot.
• Grasp the EZ-Reach handles to lower your body. See Figure 9.
Dismounting (See Figure 9):
• Grasp the EZ-Reach handles (as shown) to raise your body.
• Bring hands up and grasp the blue foam grips on the lower horizontal bar. To reduce the
chance of dizziness while getting down, pause for 30 seconds with both hands on the lower
bar while the boots are still hooked up. Relax in this position to stretch the upper back.
• Unhook one boot and place that foot against the bottom of the upper bar. See Figure 8.
Shift your weight to the unhooked foot and unhook the second boot.
Figure 8
Figure 9
Weight Capacity: Max 250 lbs. / 113.6 kg
PRIOR TO USE
Make sure to weight test the EZ-UpTM Inversion Rack for proper installation. After installing the Locking Brackets and securing
the EZ-UpTM Inversion Rack in place, two people should hang by their hands from one end of the rack (one person on the upper
bar and one on the lower bar). While hanging, bounce up and down several times. Next, both people should hang from the
other end and repeat the test. If the door frame is unstable or weak, DO NOT continue use of the rack in that door frame.
EZ-
Reach
handle
TRY THE ULTIMATE ABDOMINAL EXERCISE– THE INVERTED SIT–UP! (See Figure 10)
Other EZ-UpTM Rack exercises include: Crunches, Reverse Squats, Twisting and Stretching,
Relaxation Breathing, and Chin-ups.
Figure 10
OWNER’SMANUAL
WARNING
!
Until you are fully confident in your ability to get down from an
inverted position always work with a spotting partner.
Important Safety Instructions:
It is your responsibility to familiarize yourself with the proper use of the equipment and the inherent risks of inversion, such as falling on your head or neck,
pinching,entrapmentor equipmentfailure. FAILURETOFOLLOW INSTRUCTIONSORHEED WARNINGSCOULD RESULTINSERIOUS INJURYOR DEATH.
Restrictions on Use
•DO NOT use the equipment without a licensed physician’s approval. Carefully review the following list of medical contraindications for inversion
with your licensed physician: (This is not an exhaustive list, it is intended only for reference)
· Middle ear infection · Conjunctivitis · Recent stroke or transient ischemic attack
· Extreme obesity · High blood pressure · Bone weakness (osteoporosis)
· Pregnancy · Hypertension · Recent or unhealed fractures
· Hiatal hernia · Heart or circulatory disorders · Medullary pins
· Ventral hernia · Spinal injury · Surgically implanted orthopedic supports
· Glaucoma · Cerebral sclerosis · Use of anticoagulants (including high doses of aspirin)
· Retinal detachment · Acutely swollen joints
•DO NOT use with the EZ-Up Inversion Rack if you are over 250 lbs (113.6 kg). Structural failure could occur during inversion.
•DO NOT modify the equipment or use accessory attachments that are not recommended by the manufacturer. Utilize the equipment for its intended
purpose only.
• This product is not intended for use in public facilities.
Precautions Before Using
•DO NOT use until you have thoroughly and carefully read all the instructions, reviewed product labeling, viewed the instructional video, and
inspected the equipment.
•NEVER allow children to use the equipment unsupervised.
•DO NOT operate equipment while under the influence of drugs, alcohol, or medication that may cause drowsiness or disorientation.
•ALWAYS inspect the equipment prior to use. Make sure that all fasteners are secure.
•ALWAYS replace defective components immediately and/or keep the equipment out of use until repair.
Precautions During Use
•ALWAYS use EZ-Up Inversion Rack with properly worn Gravity Boots. Failure to heed this warning may result in serious injury or death.
•ALWAYS work with a spotting partner until you are fully confident in you ability to get down from an inverted position.
•DO NOT use aggressive movements, or use weights, elastic bands or any other stretching device while inverting.
WARNING
!
DONOTDISCARD-KEEPFOR FUTUREREFERENCE.

© Copyright 2006, STL International, Inc. Item LE-1017/LE-1018 10/06-9
Also available from Teeter Hang Ups®:Gravity Boots
·Durable, Lightweight Construction
Lightest boots on the market, without compromised durability. DuPont
Hytrel plastic liners, nylon-glass alloy hooks and supersoft foam liners
ensurestrengthand comfort.
·Self-locking Ratchet Buckles
Double-lock system ensures a secure
fit.
·Adaptable for Multiple Users
Boot straps adjust to ankles varying
severalinchesindiameter.
·Available in XL
Diameteris1” larger than the standard
Gravity Boots; height is 1½” taller.
Providesgreatersupportand comfort for
awiderrangeofusers.
For information about the 5-year warranty, or if you
have any problems assembling the equipment or
questions about its use, please contact Customer
Service at the appropriate location below:
USA & Canada:
STLInternational,Inc.
9902162nd St. Ct. E., Puyallup, WA98375
Toll Free (Phone)800-847-0143 (Fax)800-847-0188
Local(Phone)253-840-5252 (Fax) 253-840-5757
International:
InversionInternational,Ltd.
POBox:AP59245, New Providence Island, Bahamas
(Phone) +1-242-362-1001
(Fax) +1-242-362-1002
(email) [email protected]
(web) www.InversionInternational.com
Europe:
Teeter Ltd.
CygnetHouse,SydenhamRoad
Croydon,SurreyCR0 2EE,UnitedKingdom
(Phone) +44-(0)20-8667-0060
(Fax) +44-(0)20-8680-3999
(email) mail@TeeterLtd.com
(web) www.TeeterLtd.com
For additional languages in Spanish, French, Dutch, German, Italian or Portuguese, please contact customer service.
HELPFUL SUGGESTIONS FOR INVERTING
EZ-UpTM INVERSION RACK AND GRAVITY BOOTS
1. Begin Slowly:
• At full 90º inversion, begin with only 1-2 minutes per session.
• Stay inverted only as long as you are comfortable, even if only for a few seconds at first.
• We suggest you always have someone with you when you invert.
• Come up slowly to allow your body to readjust. Bring hands up and grasp the blue foam grips on the lower
horizontal bar. To reduce the chance of dizziness while getting down, pause for 30 seconds with both
hands on the lower bar while the boots are still hooked up. Dizziness after a session is a sign that you
have come up too fast.
2. Make Changes Gradually:
• Increase the time only if it is comfortable; stay at 1-2 minutes for a week or more.
• You may want to increase your routine from 1-2 minutes to 5 or more over time - just listen to your body.
Remember, this is not a no pain, no gain situation!
• Add stretching and light exercises only after you are comfortable with inversion.
3. Pay Attention to What Your Body Tells You:
• Remind yourself that your body is unique and it will tell you what is good for it.
• If other people invert longer, it has nothing to do with your body.
• Wait for a while after you have eaten before you invert.
• If inversion makes you nauseous, don’t fight it. Come up as soon as you feel queasy, even if after only a
few seconds. Give it time – it may take weeks or months before your inner ear gets used to inverting.
4. Keep Moving While Inverted:
• Movement while inverted may help make inversion a more comfortable experience and may help joints to
realign and muscles to stretch and relax.
5. Do It Regularly:
• We suggest two or three short sessions of inversion each day.
Owner’s Manual LE-1018 Pg. 2
OWNER’S MANUAL
Do not use if you are over 250 lbs. / 113.6 kg.
WARNING!
Other Hang ups Teeter Fitness Equipment manuals
Hang ups Teeter
Hang ups Teeter FitSpine R.E.D. User manual
Hang ups Teeter
Hang ups Teeter Power II Inversion Table User manual
Hang ups Teeter
Hang ups Teeter Inversion Table User manual
Hang ups Teeter
Hang ups Teeter Contour L3 User manual
Hang ups Teeter
Hang ups Teeter SR-250 User manual
Hang ups Teeter
Hang ups Teeter GL9500 Series User manual
Hang ups Teeter
Hang ups Teeter EP-850 User manual
Hang ups Teeter
Hang ups Teeter EP-550 User manual
Hang ups Teeter
Hang ups Teeter EP-950 User manual
Hang ups Teeter
Hang ups Teeter Fit-50 User manual
