manuals.online logo
Brands
  1. Home
  2. •
  3. Brands
  4. •
  5. Hannlomax
  6. •
  7. Clock Radio
  8. •
  9. Hannlomax HX-108CR User manual

Hannlomax HX-108CR User manual

PLL ALARM CLOCK RADIOWITH BLUETOOTH,
PROJECTOR AND USB CHARGING
Model : HX-108CR
(Bluetooth pairing code: HX-108CR HANNLOMAX
IMPORTANT SAFETY INSTRUCTIONS
1. Read these i structio s.
2. Keep these i structio s.
3. Heed all war i gs.
4. Follow all i structio s.
5. Do ot use this apparatus ear water.
6. Clea o ly with dry cloth.
7. Do ot block a y ve tilatio ope i gs. I stall i accorda ce with the ma ufacturer’s i structio s.
8. Do ot i stall ear a y heat sources such as radiators, heat registers, stoves, or other apparatus (i cludi g amplifiers)
that produce heat.
9. Do ot defeat the safety purpose of the polarized or grou di g-type plug. A polarized plug has two blades with o e wider
tha the other. A grou di g type plug has two blades a d a third grou di g pro g. The wide blade or the third pro g are
provided for your safety. If the provided plug does ot fit i to your outlet, co sult a electricia for replaceme t of the
obsolete outlet.
10. Do ot defeat the safety purpose of the polarized or grou di g-type plug. A polarized plug has two blades with o e wider
tha the other. A grou di g type plug has two blades a d a third grou di g pro g. The wide blade or the third pro g are
provided for your safety. If the provided plug does ot fit i to your outlet, co sult a electricia for replaceme t of the
obsolete outlet.
11. Protect the power cord from bei g walked o or pi ched particularly at plugs, co ve ie ce receptacles, a d the poi t
where they exit from the apparatus.
12. O ly use attachme ts/accessories specified by the ma ufacturer.
13. Use o ly with the cart, sta d, tripod, bracket, or table specified by the ma ufacturer, or sold with the
apparatus. Whe a cart is used, use cautio whe movi g the cart/apparatus combi atio to avoid i jury
from tip-over.
14. U plug this apparatus duri g light i g storms or whe u used for lo g periods of time.
15. Refer all servici g to qualified service perso el. Servici g is required whe the apparatus has bee damaged i a y way,
such as power-supply cord or plug is damaged, liquid has bee spilled or objects have falle i to the apparatus, the
apparatus has bee exposed to rai or moisture, does ot operate ormally, or has bee dropped.
FCC NOTICE
This device complies with part 15 of the FCC Rules. Operatio is subject to the followi g two co ditio s :
(1) This device may ot cause harmful i terfere ce, a d (2) this device must accept a y i terfere ce received, i cludi g
i terfere ce that may cause u desired operatio .
SPECIFICATIONS
Freque cy Ra ge: FM 87.5 – 108 MHz
Power Supply: AC 100V-240 ~ 60/50 Hz
Rated Output DC5V 1.5A
Backup Battery: CR2032 X 1 pc
Specificatio s are subject to cha ge without prior otice.
-1-
LOCATION OF CONTROL
1
CLOCK BUTTON
2
ALARM BUTTON
3
TIME+ BUTTON
4
TIME− BUTTON
5
PRESET/PLAY BUTTON
6
DIMMER BUTTON
7
TUN+/SKIP+ BUTTON
8
TUN−/SKIP− BUTTON
9
POWER BUTTON
10
FUNCCTION BUTTON
11
PROJECTION ON/OFF BUTTON
12
PROJECTION ROTATE 180° BUTTON
13
SNOOZE/SLEEP BUTTON
14
VOL+ BUTTON
15
VOL− BUTTON
16
PROJECTOR LENS
17
PROJECTION FOCUS KNOB
18
PROJECTOR WHEEL
19
DISPLAY
20
DC JACK
21
AUX-IN JACK
22
USB CHARGING PORT (1A
23
FM WIRE ANTENNA
24
25
SPEAKER
BACKUP BATTERY COMPARTMENT
CONNECTING THE UNIT TO POWER
Plug o e e d of the AC adaptor i to the DC power I put, a d the plug the other e d i to AC wall outlet.
Before switchi g o the u it, make sure that the voltage of your electricity supply is the same as that i dicated
o the rati g plate.
BATTERY BACKUP
There is a built-i CR-2032 battery i side the battery compartme t.
I case of power failure or i terrupted AC power, the curre t time a d alarm time setti gs, the stored radio
statio s are preserved i the memory of the u it by mea s of battery back-up fu ctio .
DIMMER CONTROL
Press the DIMMER butto to select the bright ess of the display
CHARGE YOUR DEVICES
Co ect the sta dard size e d of a USB cable ( ot i cluded) to the USB port o the u it a d co ect the other
e d to the chargi g port of your device.
The u it co tai s o e USB port with 5V ~ 1A chargi g.
Remarks: Some devices may ot support USB chargi g or may require a higher power rati g tha this
product provides. Observe the chargi g status o your device. E sure your device is worki g properly before
attempti g to charge. Chargi g fu ctio may ot be supported for all pho es or electro ic devices
-2-
SETTING THE CLOCK
1. Whe the u it is OFF, press a d hold the CLOCK butto for about 1 seco d, the ‘HOUR” digit will begi to
flash o the display.
2. Press the TIME+ butto or TIME− butto to adjust the hour, whe the correct hour is selected, press the
CLOCK butto agai . The “MINUTE” mi ute digit will begi to flash.
3. Press the TIME+ butto or TIME− butto to adjust the mi ute. Whe the correct mi ute is selected, press
the CLOCK butto to co firm.
Note : Whe “A” is show i the top left color of the display, i dicate the time displayed is AM.
Whe “P” is show i the top left color of the display, i dicate the time displayed is PM.
SETTING THE ALARMS
1. Whe the u it is OFF, press a d hold the ALARM butto for 1 seco d, the “ALARM ON” a d the “HOUR”
digit of the alarm time will begi to flash o the display.
2. Press the TIME+ butto or TIME− butto to adjust the alarm hour, whe the desired alarm hour is selected,
press the ALARM butto agai . The alarm mi ute will begi to flash.
3. Press the TIME+ butto or TIME− butto to adjust the alarm mi ute. Whe the desired alarm mi ute is
selected, press the ALARM butto to co firm.
4. The alarm wake up source “rA” (radio or “bU” (buzzer will begi to flash. Use the TIME+ or TIME− to
select the alarm wake up source, whe selected, press the ALARM butto to co firm.
Note : Please make sure the ALARM ON with the alarm time is display o the display.
TURN OFF THE ALARM
Whe ever the alarm activate, press the ALARM butto to tur off the alarm. The display will the show
“ALARM OFF”.
SNOOZE FUNCTION
1. Whe ever the alarm (radio or buzzer) activates, it ca be temporarily suspe ded for a short period of 9
mi utes by pressi g the SNOOZE/SLEEP butto o ce. (The “ALARM ON” i the display will keep flashi g
duri g this 9 mi utes SNOOZE period).
2. The buzzer or radio will the automatically activate agai after the 9 mi utes SNOOZE period has e ded.
3. This procedure ca be repeated for up to approximately o e hour.
PROJECTION
1. Press the PROJECTION ON/OFF butto to tur o the PROJECTION fu ctio .
2. The projector displays the time via a bright red projectio light o to a wall, ceili g or a y surface for
viewi g i a darke ed room.
3. Rotate the PROJECTOR WHEEL to poi t the Projector le s to the desired directio . The projector le s
ca vertically swivel 180° so that you may view the TIME from differe t positio . .
4. If the projected image is out of focus, use the PROJECTION FOCUS knob to adjust the image u til the
projectio is i focus.
5. Press the PROJECTION ROTATE 180°FLIP butto to flip the projected image for 180°.
6. To tur off the PROJECTION fu ctio , press the PROJECTION ON/OFF butto agai .
Notes
1. Do ot stare i to the le s directly.
2. The projector fu ctio ca ot be used u less the clock has bee set.
3. Certai walls a d ceili gs may ot display the projectio properly.
4. Do ’t rotate the projector wheel beyo d its limits, it may be damaged.
LISTENING TO THE FM RADIO
1. Press the POWER butto to tur o the u it.
2. Press the FUNCTION butto to select FM radio (curre t radio freque cy will be show o the display)
3. Press VOL + or VOL – Butto for the desired volume level;
MANUAL STATION SELECTION
Press the TUN+/SKIP+ butto or TUN-/SKIP- butto step by step to tu e to the desired radio statio s.
-3-
SEARCH STATION OPERATION
Press a d hold the TUN+/SKIP+ butto or TUN-/SKIP- butto for approx. 1 seco d, it will start to search the
ext radio statio i the directio of the search. The search operatio simply fi ds statio s with stro g sig als.
Statio s with weak receptio ca o ly be tu ed i ma ually.
ANTENNA
For best receptio , fully exte d the FM wire a te a to receive FM statio s.
SAVING A RADIO STATION TO THE MEMORY
1. Tu e the radio to the desired statio .
2. Press a d hold the PRESET/PLAY butto for approx. 1 seco d, the display will show PXX a d flashi g,
where ‘XX’ is the ext memory statio umber. Press the TUN+/SKIP+ butto or TUN-/SKIP- butto to
select the memory statio umber.
3. Press the PRESET/PLAY butto to store the radio statio i the memory..
4. Repeat step 1 to 3 to store more radio statio s i the memory.
5. Up to 10 FM radio statio s ca be stored i the memory.
TO LISTEN TO A SAVED RADIO STATION
Press the PRESET/PLAY butto to select the stored radio statio . Press the PRESET/PLAY butto skip up to the
ext memory statio .
SLEEP TO MUSIC FUNCTION
1. This fu ctio allows you to liste to the radio while you fall asleep.
2. Press the SNOOZE/SLEEP butto , the display will show the default sleep time of 90 mi utes
3. Press the SNOOZE/SLEEP butto agai to adjust the desired sleep time.
4. The optio s are 90-80-70-60-50-40-30-20-10- 00(OFF)
5. Now you ca e joy liste i g to the radio for the pre-set period of sleep time.
6. After this pre-set time has elapsed, the u it will switch off automatically.
AUX IN CONNECTION
1. Press the POWER butto to tur o the u it.
2. I sert o e side of the audio cable (requires 3.5mm stereo plug, ot supplied) i to the li e-out jack or
pho es jack o your MP3 player or audio device a d the other side to the aux-i jack o the u it.
3. Press the FUNCTION butto to select AUX mode, “AUX” will display i the display.
4. Tur o your MP3 player a d follow the playback i structio .
5. To stop this fu ctio , simply tur ed off your MP3 player or select other modes.
BLUETOOTH OPERATION
Connecting BLUETOOTH
1. Press the POWER butto to tur o the u it.
2. Press the FUNCTION butto to select BLUETOOTH mode, ‘ bT ‘ will show a d flash i the display.
3. Tur o the Bluetooth of your device a d search the u it for co ectio . Your Bluetooth device should fi d
“HX-108CR HANNLOMAX”. Select this for co ectio .
4. If co ectio is successful, your Bluetooth device may show Bluetooth is co ected. ‘ bT ‘ remai o i
the display.
5. Select a d play the audio file though your Bluetooth device.
6. You ca use the TUN+/SKIP+ butto to go to the ext track or press the TUN-/SKIP- butto to go back to
the previous track.
7. Press the PRESET/PLAY butto to temporarily pause playi g. To resume, press the PRESET/PLAY
butto agai .
8. Press VOL + or VOL – Butto for the desired volume level;
Turn Off the Bluetooth Operation
To tur off the BLUETOOTH operatio , press the FUNCTION butto or select other modes.
-4-

Other Hannlomax Clock Radio manuals

Hannlomax HX-100 User manual

Hannlomax

Hannlomax HX-100 User manual

Hannlomax HX-200 User manual

Hannlomax

Hannlomax HX-200 User manual

Hannlomax HX-101 User manual

Hannlomax

Hannlomax HX-101 User manual

Hannlomax HX-129CR User manual

Hannlomax

Hannlomax HX-129CR User manual

Hannlomax HX-505CR User manual

Hannlomax

Hannlomax HX-505CR User manual

Hannlomax HX-113CR User manual

Hannlomax

Hannlomax HX-113CR User manual

Hannlomax HX-134CR User manual

Hannlomax

Hannlomax HX-134CR User manual

Hannlomax HX-109CR User manual

Hannlomax

Hannlomax HX-109CR User manual

Hannlomax HX-200 User manual

Hannlomax

Hannlomax HX-200 User manual

Hannlomax HX-508R User manual

Hannlomax

Hannlomax HX-508R User manual

Hannlomax HX-123CR User manual

Hannlomax

Hannlomax HX-123CR User manual

Hannlomax HX-130CR User manual

Hannlomax

Hannlomax HX-130CR User manual

Hannlomax HX-135C User manual

Hannlomax

Hannlomax HX-135C User manual

Hannlomax HX-116CR User manual

Hannlomax

Hannlomax HX-116CR User manual

Hannlomax HX-200 User manual

Hannlomax

Hannlomax HX-200 User manual

Hannlomax HX-128CR User manual

Hannlomax

Hannlomax HX-128CR User manual

Hannlomax HX-202Qi User manual

Hannlomax

Hannlomax HX-202Qi User manual

Hannlomax HX-122CR User manual

Hannlomax

Hannlomax HX-122CR User manual

Hannlomax HX-107CR User manual

Hannlomax

Hannlomax HX-107CR User manual

Popular Clock Radio manuals by other brands

Naxa NRC-176 instruction manual

Naxa

Naxa NRC-176 instruction manual

Nero 7433305 operating instructions

Nero

Nero 7433305 operating instructions

Bush BCR40DABT WD user manual

Bush

Bush BCR40DABT WD user manual

Philips AJ3225/04 Specifications

Philips

Philips AJ3225/04 Specifications

Kitsound XDOCK2 user manual

Kitsound

Kitsound XDOCK2 user manual

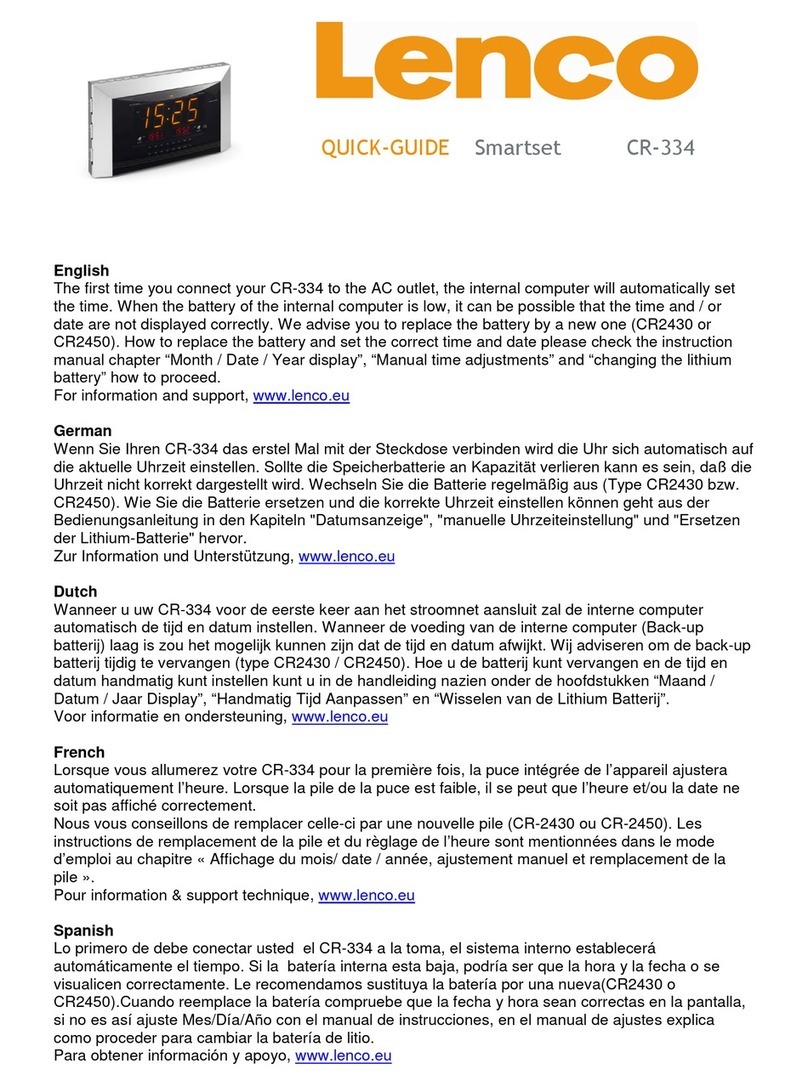
Sangean Sangean- RCR-3 Specifications
Sangean

Sangean Sangean- RCR-3 Specifications

Philips AJ4000B user manual

Philips

Philips AJ4000B user manual

Sony Dream Machine ICF-C218 Specifications

Sony

Sony Dream Machine ICF-C218 Specifications

HAEGER Snoozer RA-06B.005B instruction manual

HAEGER

HAEGER Snoozer RA-06B.005B instruction manual

Silvercrest KH 2420 operating instructions

Silvercrest

Silvercrest KH 2420 operating instructions

iHome iBT234 user guide

iHome

iHome iBT234 user guide

Philips AJ4200 user manual

Philips

Philips AJ4200 user manual

RCA RC140 Quick setup guide

RCA

RCA RC140 Quick setup guide

Sony Dream Machine ICF-C773 operating instructions

Sony

Sony Dream Machine ICF-C773 operating instructions

Philips AJ3977 Brochure & specs

Philips

Philips AJ3977 Brochure & specs

Philips AJ3180 user manual

Philips

Philips AJ3180 user manual

Magnasonic CRD1180M instruction manual

Magnasonic

Magnasonic CRD1180M instruction manual

Emerson CKD9905 owner's manual

Emerson

Emerson CKD9905 owner's manual

manuals.online logo
manuals.online logoBrands
  • About & Mission
  • Contact us
  • Privacy Policy
  • Terms and Conditions

Copyright 2025 Manuals.Online. All Rights Reserved.