manuals.online logo
Brands
  1. Home
  2. •
  3. Brands
  4. •
  5. Hannlomax
  6. •
  7. Clock Radio
  8. •
  9. Hannlomax HX-505CR User manual

Hannlomax HX-505CR User manual

CLOCK RADIO WITH USB PORT FOR MP3 PLAYBACK
And BLUETOOTH STREAMING
Model : HX-505CR
(Bluetooth pairing code: HX-505CR HANNLOMAX)
INSTRUCTION MANUAL
Note: Please read and f ll w these instructi ns bef re using y ur unit.
1. Read these instructi ns. Keep these instructi ns. Heed all warnings. F ll w all instructi ns.
2. D n t use this apparatus near water.
3. Clean nly with dry cl th.
4. D n t bl ck any ventilati n penings. Install in acc rdance with the manufacturer’s instructi ns.
5. D n t install near any heat s urces such as radiat rs, heat registers, st ves, r ther apparatus (including amplifiers)
that pr duce heat.
6. D n t defeat the safety purp se f the p larized r gr unding-type plug. A p larized plug has tw blades with ne
wider than the ther. A gr unding type plug has tw blades and a third gr unding pr ng. The wide blade r the third
pr ng are pr vided f r y ur safety. If the pr vided plug d es n t fit int y ur utlet, c nsult an electrician f r
replacement f the bs lete utlet.
7. Pr tect the p wer c rd fr m being walked n r pinched particularly at plugs, c nvenience receptacles, and the p int
where they exit fr m the apparatus.
8. Only use attachments/access ries specified by the manufacturer.
9. Use nly with the cart, stand, trip d, bracket, r table specified by the manufacturer, r s ld
with the apparatus. When a cart is used, use cauti n when m ving the cart/apparatus
c mbinati n t av id injury fr m tip- ver.
10. Unplug this apparatus during lightning st rms r when unused f r l ng peri ds f time.
11. Refer all servicing t qualified service pers nnel. Servicing is required when the apparatus
has been damaged in any way, such as p wer-supply c rd r plug is damaged, liquid has been spilled r bjects have
fallen int the apparatus, the apparatus has been exp sed t rain r m isture, d es n t perate n rmally, r has been
dr pped.
12. Gr unding r P larizati n – This pr duct may be equipped with a p larized alternating-current line plug (a plug having
ne blade wider than the ther). This plug will fit int the p wer utlet nly ne way. This is a safety feature. If y u are
unable t insert the plug fully int the utlet, try reversing the plug. If the plug sh uld still fail t fit, c ntact y ur
electrician t replace y ur bs lete utlet. D n t defeat the safety purp se f the p larized plug.
13. Alternate Warnings – This pr duct is equipped with a three-wire gr und-type plug, a plug having a third (gr unding)
pin. This plug will nly int a gr unding-type p wer utlet. This is a safety feature. If y u are unable t insert the plug
int the utlet, c ntact y ur electrician t replace y ur bs lete utlet. D n t defeat the safety purp se f the
gr unding-type plug.
14. Ventilati n – Sl ts and penings in the cabinet are pr vided f r ventilati n and t ensure reliable perati n f the
pr duct and t pr tect it fr m verheating, and these penings must n t be bl cked r c vered. The penings sh uld
never be bl cked by placing the pr duct n a bed, s fa, rug, r ther similar surface. This pr duct sh uld n t be
placed in a built-in installati n such as a b kcase r rack unless pr per ventilati n is pr vided r the manufacturer’s
instructi ns have been adhered t .
15. The MAINS plug r an appliance c upler is used as the disc nnect device, the disc nnect device shall remain readily
perable.
16. 回: CLASS II apparatus with d uble insulati n, and n pr tective earth pr vided.
17. Cauti n Marking and rating plate was l cated at b tt m encl sure f the apparatus.
18. WARNING : T reduce the risk f fire r electric sh ck, d n t exp se this apparatus t rain r m isture.
19. The apparatus shall n t be exp sed t dripping r splashing and that n bjects filled with liquids, such as vases, shall
be placed n apparatus.
-1-
20. The mains plug is used as disc nnect device. The mains plug f apparatus sh uld n t be bstructed OR sh uld be
easily accessed during intended use. T be c mpletely disc nnect the p wer input, the mains plug r apparatus shall
be disc nnected fr m the mains.
21. Battery shall n t be exp sed t excessive heat such as sunshine, fire r the like.
22. Excessive s und pressure fr m earph nes and headph ne can cause hearing l ss.
CC NOTICE
This equipment has been tested and f und t c mply with the limits f r a Class B digital device, pursuant t Part 15 f the FCC Rules. These
limits are designed t pr vide reas nable pr tecti n against harmful interference in a residential installati n. This equipment generates, uses
and can radiate radi frequency energy and, if n t installed and used in acc rdance with the instructi ns, may cause harmful interference t
radi c mmunicati ns.
H wever, there is n guarantee that interference will n t ccur in a particular installati n. If this equipment d es cause harmful interference t
radi r televisi n recepti n, which can be determined by turning the equipment ff and n, the user is enc uraged t try t c rrect the
interference by ne r m re f the f ll wing measures:
– Re rient r rel cate the receiving antenna.
– Increase the separati n between the equipment and receiver.
– C nnect the equipment int an utlet n a circuit different fr m that t which the receiver is needed.
– C nsult the dealer r an experienced radi /TV technician f r help.
This device c mplies with part 15 f the FCC Rules. Operati n is subject t the f ll wing tw c nditi ns :
(1) This device may n t cause harmful interference, and (2) this device must accept any interference received, including interference that may
cause undesired perati n.
LOCATION O CONTROLS
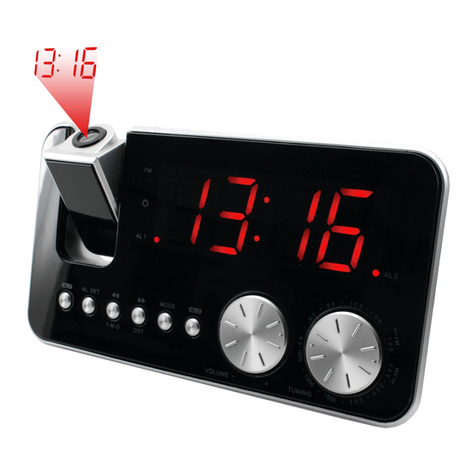
1 Speaker 8 
/ TIME SET button
2 AUX-IN jack 9 STOP button
3 VOLUME control 10 MODE/ M SCAN button
4 TUNING control 11 MENU button
5 USB port 12 SLEEP / DIMMER button
6 LCD Display 13 Antenna
7 POWER/ UNC. button 14 AC Socket
SPECI ICATIONS
Frequency Range: FM : 87.5 – 108 MHz
P wer Supply: AC: 120V ~ 60Hz
Specificati ns are subject t change with ut pri r n tice.
-2-
CONNECTING THE UNIT TO POWER
AC OPERATION
Bef re perati n, please make sure that the VOLTAGE menti ned n the unit is same as the
v ltage f y ur l cal area. Unravel the AC p wer c rd, insert ne end int the AC s cket n the
set, and the ther end int a standard AC utlet.
ATTENTION
1. D n t plug r unplug the p wer cable while y u have wet hands.
2. When planning n t t use this unit f r a l ng time, disc nnect the p wer cable fr m the wall
utlet.
3. When disc nnecting the p wer c rd fr m the wall utlet, d n t pull n the c rd in rder t
av id sh ck risks caused by damaged cable.
SETTING THE CLOCK
1. Once the unit is c nnected t AC supply, the display will sh w “12:00” as the default time.
2. Press and h ld TIME SET butt n f r ab ut 1 sec nd, the time will begin t flash n the
display.
3. R tate the TUNNING CONTROL t adjust the H ur. Press TIME SET butt n t c nfirm.
4. R tate the TUNNING CONTROL t adjust the Minute. Press TIME SET butt n t c nfirm.
DIMMER UNCTION
When it is in CLOCK m de, press DIMMER butt n adjust the brightness f the display.
UNCTION MODE
The sequence f the functi n m de: M radio -> Bluetooth -> USB -> AUX-in
RADIO OPERATION
1. Press the POWER/ UNC butt n t select M radi m de.
2. Aut Tuning: H ld SCAN butt n. It will scan radi stati n and st re the 20 str ngest rati
stati ns. Press MENU t select next desired radi stati n.
3. Manual Tuning: R tate the TUNING c ntr l t y ur desired radi stati n.
N te: F r best recepti n, fully extend the FM Antenna t receive FM stati ns.
4. Adjust the s und level by r tating the VOLUME c ntr l.
5. T turn ff the radi , press and h ld the POWER/ UNC butt n until display sh w “O ”.
SAVING A RADIO STATION TO THE MEMORY
1. Tune the radi t the desired stati n.
2. Press and h ld the MENU butt n t st re this radi stati n in the next mem ry stati n
number. The display will sh w PXX (XX is the mem ry stati n number fr m 01 t 20)
3. R tate TUNNING c ntr l t select the number f mem ry stati n number. Press MENU
butt n t c nfirm.
4. Up t 20 FM radi stati ns can be st red in the mem ry.
TO LISTEN TO A SAVED RADIO STATION
Press the MENU butt n t select next desired radi stati n.
-3-
BLUETOOTH OPERATION
1. Press the POWER/ UNC butt n t select BLUETOOTH m de
2. ‘bt’ and the bluet th l g start blinking c ntinu usly in the LCD display.
3. Turn n the Bluet th f y ur Bluet th device and search the unit f r c nnecti n. Y ur
Bluet th device sh uld find “HX-505CR HANNLOMAX” (If passw rd is needed f r
c nnecti n, please enter “0000”.)
4. When the c nnecti n is successful, the Bluet th l g will st p blinking.
5. Select and play the audi file th ugh y ur Bluet th device.
6. R tate the TUNNING c ntr l cl ckwise t skip t the next track.
7. R tate the TUNNING c ntr l anticl ckwise t skip t the previ us track.
8. T turn ff the Bluet th, press and h ld the POWER/ UNC butt n until display sh w
“O ”.
AUTO PAIRING
Once the unit paired with the Bluet th device, it will aut matically pair with that device next
time when y u turn n the unit and that Bluet th device.
PLAYING MP3 ILES THROUGH USB PORT
1. Press the POWER/ UNC butt n t select USB m de.
2. Plug y ur USB device int the USB p rt n the unit, the unit will start reading the MP3 files
in the USB device and start playing the first MP3 files after reading.
3. R tate the TUNNING c ntr l cl ckwise t skip t the next track.
4. R tate the TUNNING c ntr l anticl ckwise t skip t the previ us track.
5. Press the 
butt n t temp rarily st p playing and press the 
butt n again t
resume playing.
6. Press the MODE butt n t select the PLAY m de. (The pti ns are :REPEAT ONE,
REPEAT ALL, NORMAL)
AUX-IN CONNECTION
1. Press the POWER/ UNC butt n t select AUX m de.
2. Insert ne side f the audi cable (requires 3.5mm stere plug, n t supplied) int the
line- ut jack r ph nes jack n y ur MP3 player r audi device and the ther side t the
aux-in jack n the unit.
3. Turn n y ur audi MP3 player r audi device and f ll w its playback instructi ns.
4. T turn ff this functi n, simply turned ff y ur MP3 player r press and h ld the
POWER/ UNC butt n until display sh w “O ”.
SLEEP TO MUSIC UNCTION
1. This functi n all ws y u t listen t the different functi n m des while y u fall asleep.
2. In M radio / Bluetooth / USB/ Aux-in m de, press the SLEEP butt n and the display will
sh w the default sleep time f 120 minutes.
3. Press the SLEEP butt n repeatedly t set the desired sleep time. (120-90-60-30-15-10-5
mins. or O )
4. After the pre-set time has elapsed, the unit will turn ff aut matically and stay in CLOCK
m de.
- 4 -

Other Hannlomax Clock Radio manuals

Hannlomax HX-108CR User manual

Hannlomax

Hannlomax HX-108CR User manual

Hannlomax HX-135C User manual

Hannlomax

Hannlomax HX-135C User manual

Hannlomax HX-130CR User manual

Hannlomax

Hannlomax HX-130CR User manual

Hannlomax HX-116CR User manual

Hannlomax

Hannlomax HX-116CR User manual

Hannlomax HX-508R User manual

Hannlomax

Hannlomax HX-508R User manual

Hannlomax HX-202Qi User manual

Hannlomax

Hannlomax HX-202Qi User manual

Hannlomax HX-123CR User manual

Hannlomax

Hannlomax HX-123CR User manual

Hannlomax HX-200 User manual

Hannlomax

Hannlomax HX-200 User manual

Hannlomax HX-109CR User manual

Hannlomax

Hannlomax HX-109CR User manual

Hannlomax HX-101 User manual

Hannlomax

Hannlomax HX-101 User manual

Hannlomax HX-113CR User manual

Hannlomax

Hannlomax HX-113CR User manual

Hannlomax HX-128CR User manual

Hannlomax

Hannlomax HX-128CR User manual

Hannlomax HX-129CR User manual

Hannlomax

Hannlomax HX-129CR User manual

Hannlomax HX-100 User manual

Hannlomax

Hannlomax HX-100 User manual

Hannlomax HX-200 User manual

Hannlomax

Hannlomax HX-200 User manual

Hannlomax HX-200 User manual

Hannlomax

Hannlomax HX-200 User manual

Hannlomax HX-107CR User manual

Hannlomax

Hannlomax HX-107CR User manual

Hannlomax HX-134CR User manual

Hannlomax

Hannlomax HX-134CR User manual

Hannlomax HX-122CR User manual

Hannlomax

Hannlomax HX-122CR User manual

Popular Clock Radio manuals by other brands

TechniSat DIGITRADIO 52 user manual

TechniSat

TechniSat DIGITRADIO 52 user manual

RCA RP-3721 user guide

RCA

RCA RP-3721 user guide

Philips AJ-3950 Quick reference guide

Philips

Philips AJ-3950 Quick reference guide

Tivoli Audio MODEL THREE owner's manual

Tivoli Audio

Tivoli Audio MODEL THREE owner's manual

Memorex MC7100 - CD Clock Radio Specifications

Memorex

Memorex MC7100 - CD Clock Radio Specifications

RCA RC250BK user manual

RCA

RCA RC250BK user manual

Philips AJ3260/00C user manual

Philips

Philips AJ3260/00C user manual

Oregon Scientific JM888 user manual

Oregon Scientific

Oregon Scientific JM888 user manual

Teac SR-L230I Service manual

Teac

Teac SR-L230I Service manual

Roberts CR9926 manual 

Roberts

Roberts CR9926 manual 

Curtis KCR2610 owner's manual

Curtis

Curtis KCR2610 owner's manual

Magnavox MCR 230SL user guide

Magnavox

Magnavox MCR 230SL user guide

GE 7-4825 user guide

GE

GE 7-4825 user guide

SOUNDMASTER UR122SW manual

SOUNDMASTER

SOUNDMASTER UR122SW manual

Nero 743221 instruction manual

Nero

Nero 743221 instruction manual

Goodmans GCR01 user manual

Goodmans

Goodmans GCR01 user manual

RCA RP4806 user manual

RCA

RCA RP4806 user manual

Electrohome CR35W user manual

Electrohome

Electrohome CR35W user manual

manuals.online logo
manuals.online logoBrands
  • About & Mission
  • Contact us
  • Privacy Policy
  • Terms and Conditions

Copyright 2025 Manuals.Online. All Rights Reserved.