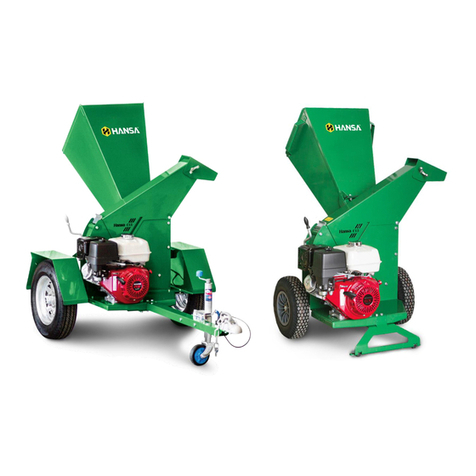
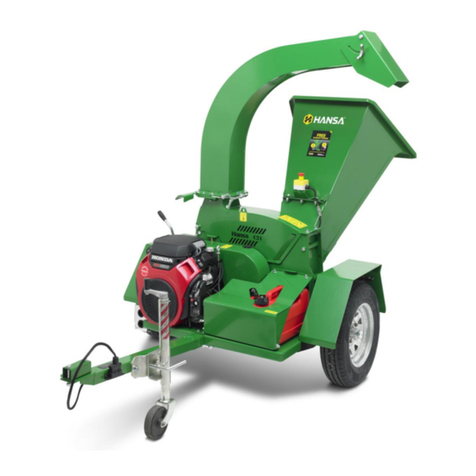
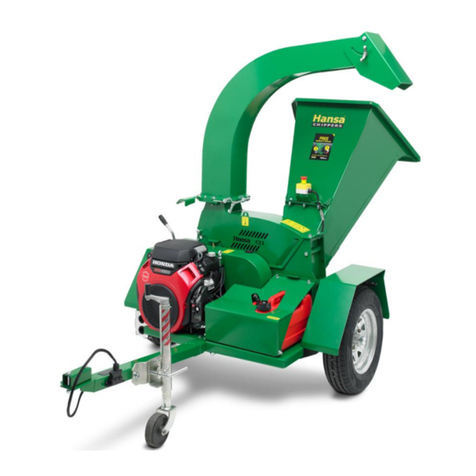
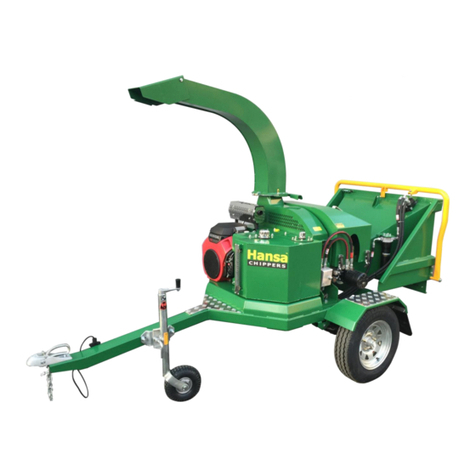
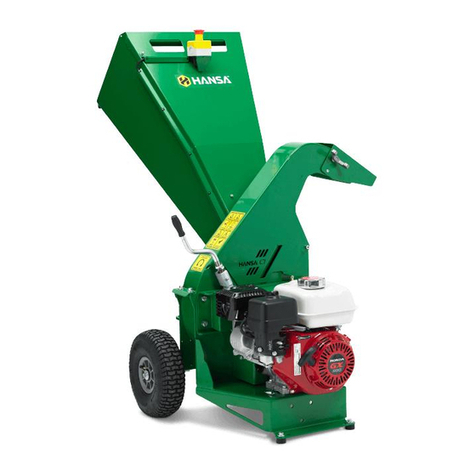
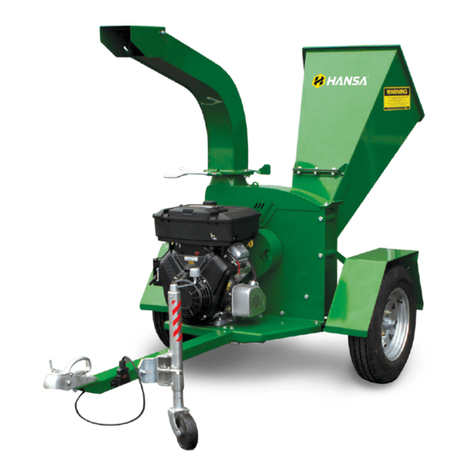
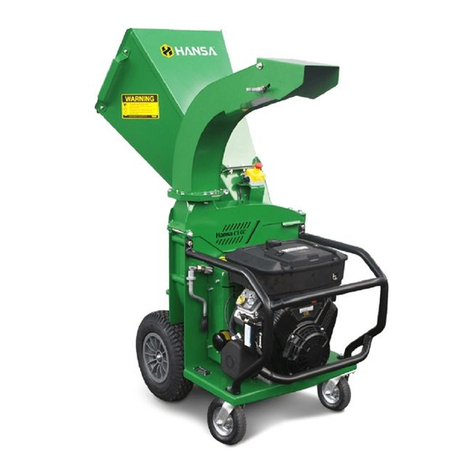
Hansa C3e User guide

HANSA NEW ZEALAND
+64 7 849 4749 info@hansaproducts.co.nz
www.hansaproducts.co.nz
HANSA AUSTRALIA
1800 426 722 info@hansaproducts.com.au
www.hansaproducts.com.au
Operation, maintenance and safety manual
All operators must fully read and understand
this operator’s manual before using the chipper.
Keep this manual for future reference.

Hansa C3e O&M Manual - OM-004 Revision H 09/07/2019
© Hansa Chippers 2019
TABLE OF CONTENTS
SAFETY .........................................................................................................................................................................................1
OPERATOR COMPETENCY.........................................................................................................................................................................1
AMBIENT CONDITIONS............................................................................................................................................................................ 1
WORK AREA SAFETY ...............................................................................................................................................................................1
ELECTRICAL SAFETY.................................................................................................................................................................................1
PERSONAL SAFETY..................................................................................................................................................................................1
MACHINE USE AND CARE.........................................................................................................................................................................2
SERVICE ...............................................................................................................................................................................................2
IDENTIFYING HAZARDS AND RISKS ..............................................................................................................................................................2
WHAT CAN MY HANSA CHIPPER PROCESS?..................................................................................................................................3
INTENDED USES OF THE CHIPPER ...............................................................................................................................................................3
RECEIVING YOUR HANSA CHIPPER ...............................................................................................................................................4
CHIPPER COMPONENTS...........................................................................................................................................................................4
ASSEMBLING YOUR CHIPPER........................................................................................................................................................5
ATTACH THE WHEELS ..............................................................................................................................................................................6
FIT THE INLET CHUTE............................................................................................................................................................................... 7
ATTACH THE (OPTIONAL)CHIP CATCHER BAG ...............................................................................................................................................8
OPERATION..................................................................................................................................................................................8
SAFE SETUP PROCEDURE..........................................................................................................................................................................9
SAFE OPERATING PROCEDURE...................................................................................................................................................................9
POWER SUPPLY ...................................................................................................................................................................................10
START/STOP.......................................................................................................................................................................................11
TRANSPORTATION ..................................................................................................................................................................... 12
STORAGE.................................................................................................................................................................................... 12
TROUBLESHOOTING................................................................................................................................................................... 12
WHAT TO DO IF:.................................................................................................................................................................................. 12
MAINTENANCE........................................................................................................................................................................... 13
KNIFE RE-SHARPENING AND KNIFE REPLACEMENT .......................................................................................................................................13
REMOVE THE KNIFE FOR SHARPENING ......................................................................................................................................................14
SHARPEN THE KNIVES............................................................................................................................................................................ 15
REINSTALL THE KNIVES .......................................................................................................................................................................... 15
BOLT TORQUE .....................................................................................................................................................................................18
SPECIFICATIONS ......................................................................................................................................................................... 18
DECALS....................................................................................................................................................................................... 19
HANSA CHIPPER INDUSTRIAL LIMITED WARRANTY.................................................................................................................... 20
COMMISSIONING CHECKLIST AND REGISTRATION ..................................................................................................................... 20

Hansa C3e O&M Manual - OM-004 Revision H 09/07/2019
© Hansa Chippers 2019
1
Safety
Preventing accidents is the responsibility of every equipment operator. The operator is responsible for any accidents or hazards
occurring to people or their property. Ensure every operator is familiar with the safe operation procedures and controls of the
machine, how to identify hazards, and the steps required to avoid injury while handling and operating the chipper. Relevant
information is contained in this manual.
Do NOT modify the design of the chipper.
Operator competency
Ensure that every person operating the chipper understands and follows the safe operating and maintenance procedures
as detailed in this manual.
Do NOT allow persons below the age of 18 to operate the chipper. Additionally, local regulations may restrict the age of
the operator.
Do NOT allow persons with reduced physical, sensory or mental capabilities, or lack of experience and knowledge to
operate the machine.
Ambient Conditions
Only use the C3e in an environment that is between -5°C and 40°C. Do not use the C3e in the rain or in wet environments.
Work area safety
a) Keep work area clean and well lit. Cluttered or dark areas invite accidents.
b) Do not operate machines in explosive atmospheres, such as in the presence of flammable liquids, gases or dust. Machines
create sparks which may ignite the dust or fumes.
c) Keep children and bystanders away while operating a machine. Distractions can cause you to lose control.
Electrical safety
a) Machine plugs must match the outlet. Never modify the plug in any way. Do not use any adapter plugs with earthed (grounded)
machines. Unmodified plugs and matching outlets will reduce risk of electric shock.
b) Avoid body contact with earthed or grounded surfaces, such as pipes, radiators, ranges and refrigerators. There is an increased
risk of electric shock if your body is earthed or grounded.
c) Do not expose machines to rain or wet conditions. Water entering a machine will increase the risk of electric shock.
d) Do not abuse the cord. Never use the cord for carrying, pulling or unplugging the machine. Keep cord away from heat, oil,
sharp edges or moving parts. Damaged or entangled cords increase the risk of electric shock.
e) When operating a machine outdoors, use an extension cord suitable for outdoor use. Use of a cord suitable for outdoor use
reduces the risk of electric shock.
f) If operating a machine in a damp location is unavoidable, use a residual current device (RCD) protected supply. Use of an RCD
reduces the risk of electric shock.
Personal safety
a) Stay alert, watch what you are doing and use common sense when operating a machine. Do not use a machine while you are
tired or under the influence of drugs, alcohol or medication. A moment of inattention while operating machines may result in
serious personal injury.
b) Use personal protective equipment. Always wear eye protection. Protective equipment such as a dust mask, non-skid safety
shoes, hard hat or hearing protection used for appropriate conditions will reduce personal injuries.
c) Prevent unintentional starting. Ensure the switch is in the off-position before connecting to power source and/or battery pack,
picking up or carrying the machine. Carrying machines with your finger on the switch or energising machines that have the switch
on invites accidents.
d) Remove any adjusting key or wrench before turning the machine on. A wrench or a key left attached to a rotating part of the
machine may result in personal injury.
e) Do not overreach. Keep proper footing and balance at all times. This enables better control of the machine in unexpected
situations.
f) Dress properly. Do not wear loose clothing or jewelry. Keep your hair and clothing away from moving parts. Loose clothes,
jewelry or long hair can be caught in moving parts.
g) If devices are provided for the connection of dust extraction and collection facilities, ensure these are connected and properly
used. Use of dust collection can reduce dust-related hazards.

Hansa C3e O&M Manual - OM-004 Revision H 09/07/2019
© Hansa Chippers 2019
2
h) Do not let familiarity gained from frequent use of machines allow you to become complacent and ignore machine safety
principles. A careless action can cause severe injury within a fraction of a second.
Machine use and care
a) Do not force the machine. Use the correct machine for your application. The correct machine will do the job better and safer at
the rate for which it was designed.
b) Do not use the machine if the switch does not turn it on and off. Any machine that cannot be controlled with the switch is
dangerous and must be repaired.
c) Disconnect the plug from the power source and/or remove the battery pack, if detachable, from the machine before making
any adjustments, changing accessories, or storing machines. Such preventive safety measures reduce the risk of starting the
machine accidentally.
d) Store idle machines out of the reach of children and do not allow persons unfamiliar with the machine or these instructions
to operate the machine. Machines are dangerous in the hands of untrained users.
e) Maintain machines and accessories. Check for misalignment or binding of moving parts, breakage of parts and any other
condition that may affect the machine’s operation. If damaged, have the machine repaired before use. Many accidents are
caused by poorly maintained machines.
f) Keep cutting machines sharp and clean. Properly maintained cutting machines with sharp cutting edges are less likely to bind
and are easier to control.
g) Use the machine, accessories and machine bits etc. in accordance with these instructions, taking into account the working
conditions and the work to be performed. Use of the machine for operations different from those intended could result in a
hazardous situation.
h) Keep handles and grasping surfaces dry, clean and free from oil and grease. Slippery handles and grasping surfaces do not allow
for safe handling and control of the machine in unexpected situations.
Service
a) Have your machine serviced by a qualified repair person using only genuine replacement parts and accessories. This will ensure
that the safety of the machine is maintained.
Identifying hazards and risks
Identify hazards and risks, and take preventative steps to avoid accidents and minimise risk. Possible hazards include, but are not
limited to, moving parts, thrown objects, weight of chipper and components, and the operating environment.
Below is a list of hazards and actions required to prevent injury.
Hazard
Risk
Corrective action
Dust
Injury or irritation of the
eyes
Respiratory irritation
Wear safety glasses
Process freshly cut materials and/or wear a dust mask
Electric cable
Electric shock
Ensure you use a residual current device (RCD). Ensure power
supply cords are in good condition
Cutting rotor and knives
Pinching, crushing,
cutting, severing
Keep your face and body out of the inlet chute
Do not extend hands/arms past the rubber flap
Use a stick to push materials into the inlet chute
Do NOT push the stick beyond the rubber flap
Sound
Damage to hearing
Always wear hearing protection when operating the machinery
Discharge material
Eye injury, minor cuts
Always wear safety glasses when operating the machinery
Do NOT put body parts in front of the outlet chute
Do NOT put the machinery in a place where the outlet
chute is directed on a hard surface
Feeding material
Cuts and scrapes
Wear safety gloves
Wear tight fitting long sleeves and pants to cover bare skin when

Hansa C3e O&M Manual - OM-004 Revision H 09/07/2019
© Hansa Chippers 2019
3
operating the machinery
Weight of the chipper
Straining, crushing
Place the machinery on firm level ground
What can my Hansa chipper process?
Intended uses of the chipper
The Hansa C3e chipper is built to process organic material including wooden branches not exceeding 40 mm in diameter. It is
designed for intermittent use by the suburban gardener. Do NOT use the chipper for any other purpose.
Organic wastes include:
Prunings, stalks, roots, vegetable matter, hay, grass, bark
Dry manure
Branches
Palm fronds
Dead and hard timbers (Note: these will dull the knives faster)
Paper or cardboard
Do NOT process:
Bones
Soil, root balls, sand, grit, stones, metal
If you have any questions, contact your authorised dealer.
Do NOT exceed 40 mm branch diameter

Hansa C3e O&M Manual - OM-004 Revision H 09/07/2019
© Hansa Chippers 2019
4
Receiving your Hansa chipper
You may receive your chipper assembled from your dealer or it may be packaged in two boxes. Assembly takes approximately 30
minutes, two people working together will make the assembly easier.
Chipper components
Note: Your Hansa C3e may not come with the chip catcher bag. The chip catcher bag must be purchased separately.
Tools required for assembly (not supplied)
•A knife to cut open the box
•Two 13 mm spanners - to tighten the inlet chute and wheels
•18 mm spanner to attach the wheels
Box 1 contains:
✓The chipper body
✓Two wheels
✓A cardboard block for support of the chipper body for wheel attachment
CAUTION: The chipper body weighs 42 kg; it is recommended to cut the box open rather than lifting the body out.
Box 1
Box 2
All the C3e parts in two separate boxes

Hansa C3e O&M Manual - OM-004 Revision H 09/07/2019
© Hansa Chippers 2019
5
Box 2 contains:
✓The inlet chute
✓A fastener pack containing parts required for assembly
✓Documentation (Hansa operations manual, warranty card and Honda motor manual)
Item no.
Fastener pack contents (in box 2)
1
Two bolts to attach the inlet chute.
2
Two heavy washers to attach the inlet chute.
3
Two spring washers to attach the inlet chute.
4
Two nuts to attach the inlet chute.
Wheels and cardboard block
Chipper body
Contents in box 2
Inlet chute
Documentation
Fastener pack

Hansa C3e O&M Manual - OM-004 Revision H 09/07/2019
© Hansa Chippers 2019
6
Assembly
Attach the wheels
It is recommended but not required to place a cardboard block (or suitable alternative) underneath the chipper
body - this makes it easier to attach the wheels.
Insert the axle shaft through the wheel, then slide the
washer on.
Slide the axle shaft through the holes in the base of
the chipper body.
Screw the nyloc nut onto the end of the axle shaft.
Tighten the axle shaft using an 18 mm and 13 mm
spanner.
111
2
3
4
Axle shaft
Washer

Hansa C3e O&M Manual - OM-004 Revision H 09/07/2019
© Hansa Chippers 2019
7
Fit the inlet chute
Fix the inlet chute –Slide the tab at the base
of the inlet chute over the tab at the top of
the rotor housing. Adjust the inlet chute
until the holes at the back of the rotor
housing line up with the holes on the back of
the inlet chute.
Line up the holes and insert the bolts (item no. 1),
heavy washers (item no. 2), spring washers (item no.
3), and nuts (item no. 4). Ensure that the heavy
washer is touching the chipper body (top) and the
spring washer is touching the nut (bottom).
5
6

Hansa C3e O&M Manual - OM-004 Revision H 09/07/2019
© Hansa Chippers 2019
8
Attach the (optional) chip catcher bag
Hook the lower bar of the chip catcher bag into the
slot underneath the outlet chute.
Slide the top bar of the chip catcher bag up and over
the hooks on the top of the outlet chute.
This is how it should look when properly attached. To
remove the chip catcher bag, repeat steps 7 and 8 in
reverse order.
Operation
The chipper is self-feeding and has a large inlet opening. It can process:
•Prunings, stalks, vines, leaves, roots and vegetable matter, paper and cardboard
•Freshly cut material is better to process than dry material
•Maximum capacity is 40 mm diameter branches
It is helpful (but not required) to keep a wooden stick handy, approx. 50 mm diameter x 600 mm long for:
•Pushing in short, brushy and very leafy materials
•Keeping the inlet chute clear
7
8
9

Hansa C3e O&M Manual - OM-004 Revision H 09/07/2019
© Hansa Chippers 2019
9
Safe setup procedure
Before you start:
Ensure the chipper is positioned in an open area and on firm level ground.
Ensure the outlet chute is discharged onto soft ground (e.g. grass)
Do NOT allow the outlet chute to discharge chip onto hard surfaces (such as paved or gravel surfaces)
Ejected material can rebound and cause injury
Keep children, pets, and spectators clear of the work area at all times
Do NOT operate the chipper where there is a hazard to onlookers
Do NOT allow any person under the age of 18 to operate the chipper
Check:
That all screws, nuts, bolts, and other fasteners are properly secured
That the power source has an RCD
That the supply and extension cord are in good condition with no nicks or abrasions
That the inlet chute and housing are clear of any leftover material
That all chipper components are in place and in good condition
If any parts are worn or damaged, contact Hansa for replacements
That all labels are in good condition and easily legible
Replace damaged or unreadable warning labels
View photos of labels in the ‘Decals’ section
Safe operating procedure
Wear safety equipment: Safety glasses and hearing protection must be
worn at all times
Wear work gloves: Wearing work gloves is optional but highly
recommended - ensure that the gloves fit tightly
Tie long hair up
Long hair could be pulled into the chipper
Wear clothes that sit tightly
Avoid wearing scarves or any item that can get caught in the chipper
Wear substantial footwear and long trousers while operating the machine
Do NOT operate the machine when barefoot or wearing open footwear
Keep your face and body away from the inlet chute
Stand clear of the discharge zone, even when no material is being fed into the machine
Keep proper balance and footing at all times and stand at the same level as the chipper
Do NOT overreach
Do NOT run near the machine
Feed only freshly cut material into the chipper
Do NOT feed in materials covered in gravel, stones and dirt as this can rebound, injure the operator and damage
the machinery
Prune to a size that suits the chipper’s capabilities
Pre-cut side branches
Branches will ‘self-feed’ more efficiently
Keep the motor clean of debris and other accumulations
Doing so reduces the risk of fire and prevents damage to the motor
Feed limbs and branches through butt end first, leaving the foliage on
This helps guide the limb down the inlet chute
It reduces spinning and the occurrence of ejection of small pieces back up the inlet chute
Hold larger branches back and feed the chipper with care until you are familiar with its capacity
The motor will slow down or stall if the branch is too large
Feed longer pieces together with short stubby pieces
Feed soft materials intermittently with branches
The wood chips tend to clean out any soft residue left in the chipper
The chipper can clog up with soft, wet or fibrous materials
Keep the outlet free of blockage
DO:

Hansa C3e O&M Manual - OM-004 Revision H 09/07/2019
© Hansa Chippers 2019
10
If a blockage occurs, turn the motor off, disconnect the power supply and wait for rotor to stop spinning. Attempt
to free any blocked material via the outlet opening
Be mindful of the sharp knife inside the housing while doing so
As the discharge material piles up
Move the chipper to direct the outlet chute away from the pile, or move the processed material
to avoid blocking. Ensure the chipper is turned off before moving
Turn the motor off and disconnect the power supply before removing/attaching the optional bag attachment
Turn the motor off and disconnect the power supply whenever you leave the work area
Operate the chipper wearing loose clothing and untied long hair
Operate the chipper with the motor electrical enclosure open
Stand at a higher level than the base of the chipper when feeding material into it
Use the chipper in wet weather conditions
Process old materials such as dried wooden branches
They get very hard and springy when dried out
They are more awkward to handle
The knives dull much quicker
Feed short, stubby pieces of wood into the chipper
They bounce and spin in the inlet chute
Feed short stubby pieces together with longer pieces
Put soil, sand, grit, stones, glass, pieces of metal or other foreign objects into the chipper
This will damage the sharp edge of the cutting knives and can rebound and injure the operator
Put root balls and dead wood into the chipper
This dulls the knives quickly
Overload the chipper by feeding too much material
The motor operates optimally at high RPM. Overloading the chipper can result in damage to the motor. Never
overload the chipper
If you can hear the motor starting to slow down, wait for the motor speed to recover and feed the material in
slower
If the speed of the motor is dropping more so than usual when feeding material, check if there are any blockages
in the housing, and check the condition of the blade.
Allow processed material to build up in the discharge area as this can:
Prevent proper discharge
Result in kickback of material through the feed opening
Transport the chipper while the motor is running
Remove the catcher bag while the motor is running
Operate the chipper with blunt knives
This causes excessive vibration which may result in damage to the chipper
Move or tilt the chipper while it is running
Touch any guards or stick hands between guards while the machine is on or connected to a power supply
Put hands or any other part of the body or clothing:
Inside the feed chute past the rubber flap
Inside or near the opening of the discharge chute
Leave the chipper on while it is unattended
Power supply
The C3e requires a 220-240V AC 50Hz earthed power connection. The C3e is rated at 8.4 A. It is recommended that the C3e is only
connected to a power socket which is protected by a circuit-breaker that would activate with a residual current not more than 30
mA. It is also recommended that the C3e is always used with an RCD (residual current device) having a rated residual current of 30
mA or less. Always check and test your RCD every time you use it.
DO NOT:

Hansa C3e O&M Manual - OM-004 Revision H 09/07/2019
© Hansa Chippers 2019
11
If extension cords are used, they must meet these requirements:
Rated at 10 A minimum
Minimum conductor cross section is 1.0 mm2
Maximum length of all cords connected must be less than 40 m
Comply with H05VV-F or H07VV-F
Be in good condition
Used away from sharp edges and water
Ensure the power supply cable is kept away from moving hazardous parts
Ensure the power supply cable is kept away from any sources of water
If the power supply cable becomes damaged, do NOT attempt to operate the chipper
If the power supply cable becomes damaged, do NOT touch the damaged cable unless it has been disconnected from its
power source
Do NOT attempt to repair any damaged cables unless you are competent to do so
Start/Stop
Before proceeding, ensure the ‘safe setup procedure’ has been followed on page 7 of this manual.
Plug the power supply cable into a suitable power socket and press the green power button to start the chipper. To stop the
chipper, press the red stop button. Note that the cutting rotor will take approximately to 30 seconds to fully stop.
Be sure to stop the machine, remove the plug from the socket, and check that all moving parts have come to a complete stop:
-Whenever you leave the machine
-Before clearing blockages or unclogging the chute
-Before checking, cleaning or working on the machine
Processing fibrous material
The C3e can process palm fronds, flax, cabbage tree leaves and other similar fibrous material. The machines cutting disk is
cantilevered (supported on the engine side with two bearings), therefore there is no risk of anything fibrous wrapping around the
shaft and working its way into the bearings. The resulting output is not as consistent as that of branch material due to the fibrous
nature. When processing fibrous material, take note of the following points:
Blades must be sharp to process fibrous material
Fibrous material is best introduced to the machine as a bundle
Fibrous material should be introduced slowly into the machine. Tease the material in and out while feeding it into the
cutting mechanism, ensuring it is not drawn through the machine without being cut properly
Do NOT extend hands past the rubber flap while doing so
Fibrous material is processed more effectively when it is green rather than when dried

Hansa C3e O&M Manual - OM-004 Revision H 09/07/2019
© Hansa Chippers 2019
12
Transportation
The C3e is designed to be moved by one person using both handles at the top of the inlet
chute to lean the chipper backwards and transfer its weight onto the wheels. The chipper
can then be wheeled to and from the work location. The chip catcher bag should be
removed from the chipper when transporting or moving to avoid damage to the bag.
Take care when moving the C3e up and down stairs or kerbs
The wheels can be damaged by the shock loading caused by uncontrolled
ascent/descent
The chipper is heavy and the operator can lose control of the machine
Do NOT move the chipper while it is running
Storage
Always allow the chipper to cool before storing
Store the chipper out of the reach of children
Store the chipper out of the rain
Water can rust the steel body of the chipper
Troubleshooting
What to do if:
The chipper won’t start
•The power source might be switched off
Check that the power supply cable is plugged in and switched on
Check that the power supply cable is undamaged
Do NOT attempt to use the chipper if the cable is damaged.
The chipper slows down and stalls
•The chipper is clogged up
Turn the motor off, disconnect the power supply, ensure that the cutting rotor has completely stopped,
then remove debris/empty chip catcher bag
Discharge slows down
•The chipper is clogged up
Turn the motor off, disconnect the power supply, ensure that the cutting rotor has completely stopped,
then remove debris/empty chip catcher bag
The chipper is slowing down
•The chipper can’t process the amount of material fed into it
Feed the material in slower
Reduce material volume
The chipper will not self-feed
The knife and/or anvil might be blunt
Inspect and sharpen or replace the knife and/or anvil as required. Ensure correct clearances between
the knife and anvil
The material is ejected in long strips
•The knife and/or anvil might be blunt
Inspect and sharpen or replace the knife and/or anvil as required. Ensure correct clearances between
the knife and anvil
The chipper is clogged
Turn the motor off, disconnect the power supply, ensure rotor has completely stopped and remove
debris. You may need to disassemble the housing in order to remove the debris. See step 10 of ‘Remove
Handles

Hansa C3e O&M Manual - OM-004 Revision H 09/07/2019
© Hansa Chippers 2019
13
the knife for sharpening’ on page 15 for more details on this process
The chipper starts making unusual noise, the cutting rotor strikes a foreign object or the chipper starts to vibrate
Turn the motor off, disconnect the power supply, ensure that the cutting rotor has completely stopped,
then inspect for damage
Replace or repair any damaged parts
Check for and tighten any loose parts
Do NOT attempt to repair the chipper unless you are competent to do so
Maintenance
Maintain the chipper with care and keep it clean at all times.
To service or inspect the equipment, or to change an accessory, you must:
✓Switch the motor off and unplug the power supply cable
✓Allow the chipper to cool before any inspections or adjustments are made
✓Wait until the cutting rotor and motor are at a complete standstill before opening the cutting rotor housing
Initially after 2 working hours:
✓Check for any loose nuts and bolts
Every 20 working hours:
✓Check for any loose nuts and bolts
✓Check the sharpness of the knife
Knife re-sharpening and knife replacement
How do I know that the knives need re-sharpening?
Chipper loses its self-feeding action with blunt knives
Material has to be pushed in
Material comes out in long strips
How to re-sharpen the knives:
If you don’t have a surface grinder or are unsure how to re-sharpen the knives, contact a professional saw doctor or Hansa to
arrange re-sharpening.
Tools and materials required for re-sharpening (approx. 40 mins):
•2 x 13 mm spanners
•2 x 16 mm spanners
•6 mm hexagonal Allen key
•Nylon hammer (recommended)
•Surface grinder
•Coolant
WARNING! Do NOT operate your chipper with blunt knives.
Blunt knives will cause excessive vibration
Blunt knives result in damage to the chipper
WARNING! Be careful when working around the sharp knives. Be aware that even though the power source is
unplugged, the cutting means can still move.

Hansa C3e O&M Manual - OM-004 Revision H 09/07/2019
© Hansa Chippers 2019
14
Remove the knife for sharpening
Remove the inlet chute - use two 13 mm spanners to
remove the nuts and bolts holding the inlet chute on.
Tilt the chipper body so that the motor is resting on the
floor. Using a 13 mm spanner, remove the two smaller
bolts which hold the base onto the chipper body.
Open the cutting rotor housing by removing the four
housing bolts using two 16 mm spanners.
Using a nylon hammer (or suitable alternative), gently
dislodge the housing from its grooves and remove it.
1
2
3
4

Hansa C3e O&M Manual - OM-004 Revision H 09/07/2019
© Hansa Chippers 2019
15
Use a 13 mm spanner to remove the knives from the
rotor. There are three nuts you must remove to do so.
If the bolt head turns, hold it with a 6 mm
hexagonal Allen key
Note: Do NOT try to loosen the bolt with the
hexagonal Allen key
Measure the width of the knife and check that it will be
at least 35 mm after sharpening.
If the knife will be shorter than 35 mm, then the knife
should be replaced. Please contact your nearest Hansa
dealer.
Sharpen the knives
Sharpen the knives on a surface grinder. A cutting
angle of 40° is critical for the performance of the
chipper. Make sure plenty of coolant is used when
grinding to avoid softening of the steel knives.
Reinstall the knives
Clean all mounting surfaces and remount the knife in the reverse procedure. Tighten all three nuts as tight as
possible by hand using a 13 mm spanner and 6 mm hexagonal Allen key. Do NOT tighten the bolts with the
hexagonal Allen key.
Note: When the knives are sharpened, material is removed from the knives, affecting the distribution of weight in
the rotor. The rotor must be balanced appropriately after knife sharpening, as per the method outlined below:
5
6
MIN 35 mm
7
8
40 °

Hansa C3e O&M Manual - OM-004 Revision H 09/07/2019
© Hansa Chippers 2019
16

Hansa C3e O&M Manual - OM-004 Revision H 09/07/2019
© Hansa Chippers 2019
17
Adjust the anvil at this stage as the
location of knife edge will change after
sharpening or replacement.
The anvil is reversible. Normally the edge
will last for over 200 operating hours.
When the edge is dull, it can be reversed.
When both edges are worn, the anvil
should be replaced (contact Hansa for a
replacement).
The clearance between the knife and
anvil should be approx. 1 mm on the
inside closest to the bearing and 3 mm on
the outside closest to the edge of the
rotor (refer to diagram for more detail).
Ensure you are using the outer blade for
calibrating these distances.
The gap between the knives and the anvil
is tapered out slightly to allow for a small
amount of movement in the rotor as it
bites into the wood.
The anvil position can be adjusted by
loosening the anvil mounting bolts. Once
adjusted correctly, tighten the anvil
mounting nuts using a torque wrench to
22 Nm.
If there is not enough clearance, the knife
edge may touch the anvil through
deflection when cutting heavy branches
and damage the sharp edge. Too much
clearance will allow small twigs and
fibrous materials to be dragged through
without being cut.
Turn the cutting rotor by hand to check
that it turns freely.
Reassemble the housing and inlet chute
by repeating steps 1-3 in reverse.
Note: When reassembling the housing,
first align the hooks on the curved wall
with the tabs near the outlet on the
housing front. Once these are aligned
use a nylon hammer (or other suitable
alternative) to hammer the back of the
housing to locate the remaining four
tabs. Do not attempt to do up the
housing bolts until these tabs have been
aligned.
WARNING! Every time the knife clamping bolts are torqued up to 22 Nm and loosened off again, the life of the bolts is
reduced. The knife clamping bolts must be replaced at most after every six sharpens. Contact Hansa for replacement
bolts (m8x25 countersunk bolts of grade 12.9 or higher). Use only genuine Hansa bolts.
9
Bearing
Edge of
rotor
Anvil
Cutting
rotor
Knife
1 mm
clearance
3 mm
clearance
10
Align the
‘hooks’ on
the housing
wall with the
tabs in the
housing back
Align the four
remaining tabs

Hansa C3e O&M Manual - OM-004 Revision H 09/07/2019
© Hansa Chippers 2019
18
Bolt torque
Relative Strength Bolt Marking
4.6
8.8
Recommended Tightening Torque
Recommended Tightening Torque
Bolt size
Spanner size
lb ft
Nm
lb ft
Nm
M8
13 mm
6
8.5
16
22
M10
16 mm
12.5
17
32
44
M12
18 mm
22
30
57
77
M16
24 mm
54
73
140
190
M20
30 mm
105
143
274
372
Specifications
C3e
General
Length
1040 mm
Width
520 mm
Height
1040 mm
Weight
55 kg
Motor
Type
Electric 2.2kW
Power source
Single phase 230-240V AC
50-60 Hz
8.4 A (S1)
Cutting System
Disc speed
2820 RPM
Disc dimensions
260 x 6 mm
Shaft diameter
24 mm
Knives
1
Feed System
Chipping capacity
40 mm
Feed type
Gravity fed, self-feeding
Inlet chute opening
100 x 130 mm
Discharge System
Discharge height
450 mm
Outlet chute type
Fixed
Table of contents
Other Hansa Chipper manuals
Popular Chipper manuals by other brands

TMG
TMG TMG-WC62S product manual

Northern Tool and Equipment
Northern Tool and Equipment Powerhorse 63388 owner's manual

GXi Outdoor Power
GXi Outdoor Power Brush Master owner's manual
Timberwolf
Timberwolf TW 150VTR manual

TruYard
TruYard CM90 Series Safety, operation & maintenance instructions

EarthQuake
EarthQuake 14267 Operator's manual

