HARTMANN TRESORE HS 420 Series User manual
OPERATING INSTRUCTIONS
for HS 420 / HS 470 / HS 720 series hotel safes
GB

HARTMANN TRESORE
2
Please read the operating instructions first.
TABLE OF CONTENTS
1. Instructions
2. Technical specifications
3. Putting into operation
4. Opening/closing the safe
5. Emergency opening
6. Checking battery power
7. Displays
8. Functions of the reader (CEU)
9. Advanced programming functions
10. Reading out operations
11. Tips and help
12. Cleaning and care
13. Disposal
14. Guarantee
Dear Customer,
Thank you very much for choosing this product. Please read the operating instructions
carefully before you put the product into operation – the manual will help you to operate
the safe correctly.
This high-quality product has been manufactured on modern machinery taking environ-
mental aspects into account, and tested by a detailed quality check. Please follow all
instructions for long and optimum function.
Keep the operating instructions for later reference. Please also read the other
documents delivered with the product.
IMPORTANT NOTE:
The manufacturing company reserves the right to make changes to the product!
HARTMANN TRESORE AG is not liable for damage caused by improper use.
HARTMANN TRESORE
3
Please follow the following instructions:
• Fix the safe on a flat and solid surface using the fixing material supplied.
• Erect the safe in a cool, dry location.
• Avoid direct sunlight.
• Please do not use the safe to step on.
• Please do not mix battery types or old and new batteries.
• Please make sure that the batteries are inserted correctly.
• Any user-inflicted damage is not covered by the guarantee provided by the contract.
PLEASE NOTE! Please follow the following safety instructions.
• Some safes tend to be top-heavy; please note this when carrying them.
• Watch out for your hands when opening and closing the safe – danger of crushing!
1 | INSTRUCTIONS
!
!
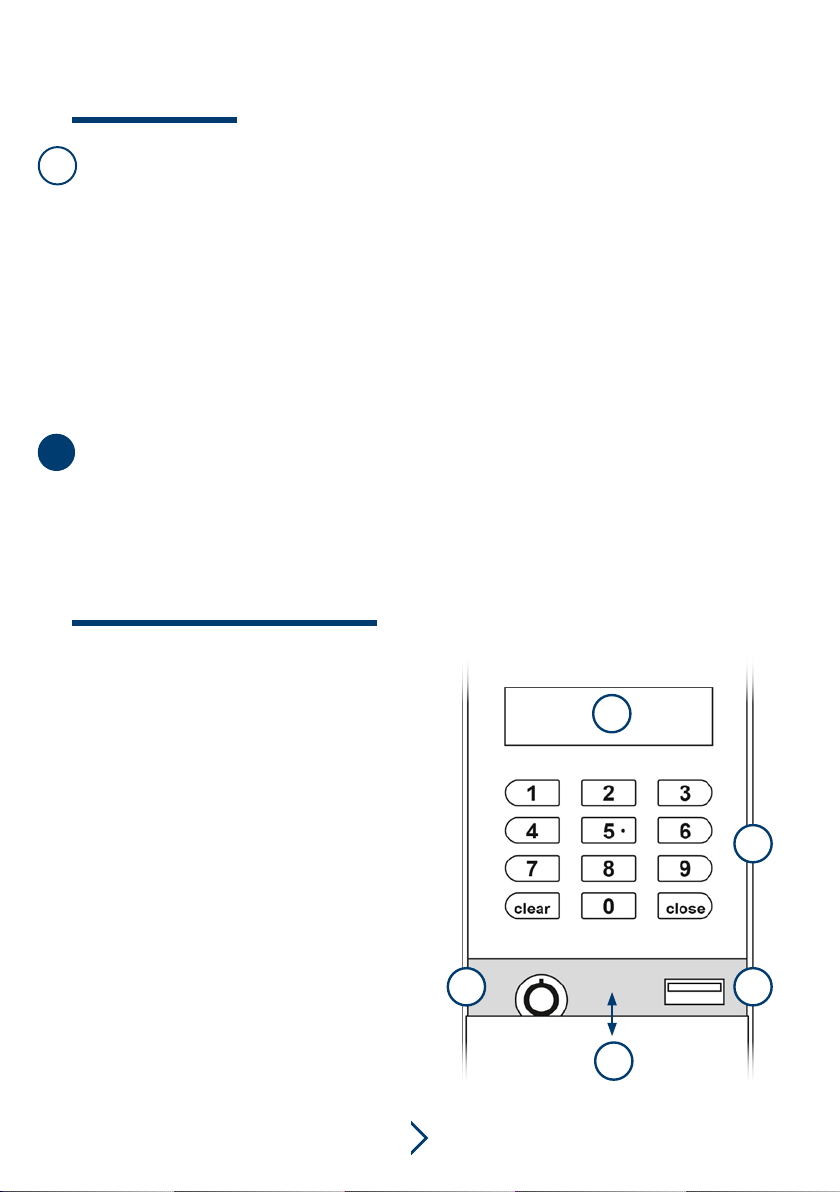
2 | TECHNICAL SPECIFICATIONS
1. Display
2. Control panel
3. Cover
4. USB connection
5. Emergency lock (mechanical)
Control panel 1.
2.
3.
4.5.
The sketch may differ
from the actual product.

HARTMANN TRESORE
4
• Check the safe for any defects and make sure all the accessories included are
complete before putting it into operation.
• The safe must be screwed securely to a surface. The fixing material is included
with the delivery.
• Insert the batteries supplied into the battery compartment. The battery compartment
is on the rear of the door.
• Either “Secure” appears in the display, meaning that the system is in start mode,
or “Error”, meaning that there is an error.
• Once “Okay” appears, the safe is ready to use.
• If no further action is performed after a key operation, all previously performed
actions are deleted after a few seconds/minutes and the initial state is restored.
• Incorrect inputs can be corrected using the “clear” key.
PLEASE NOTE!
For your own security, please change the factory code to your own
personal master code without delay (see chapter 8).
Please obtain the factory setting for the master code directly from
HARTMANN TRESORE.
For various additional functions, you need a reader, which can be purchased
as an option (see chapter 8).
To purchase one, please contact HARTMANN TRESORE.
3 | PUTTING INTO OPERATION
!

HARTMANN TRESORE
5
1. Locking the safe (with a 3–6-digit code; see chapter 9)
• Close the door.
• Enter a 3–6-digit code of your choice.
(Code can be reassigned as required each time the safe is locked).
• Press “close”.
2. Opening the safe
• Enter the code that was used to lock the safe.
The safe now opens automatically. “OPEN’’ appears in the display.
In case of emergency, for example if you forget the user code or in the event of a technical mal-
function, you have the option of opening the safe by means of a master code, with the emergen-
cy opening key or with the reader.
1. Emergency opening with master code
• Enter the 6-digit master code. (To obtain it, please contact our
HARMANN TRESORE Service Department).
• The safe opens automatically. “OPEN’’ appears in the display.
PLEASE NOTE!
For your own security, please change the factory code to your own
personal master code without delay (see chapter 8).
2. Emergency opening with emergency-opening key
• The emergency-opening lock is located on the control panel (see chapter 2).
• Insert the emergency-opening key into the lock and turn it anti-clockwise.
• The safe now opens automatically. “OPEN’’ appears in the display.
3. Emergency opening with reader (CEU)
• Connect the reader to the safe’s USB port.
• Select “Emer Open” and press “OK” to confirm.
• “Mgr Code____’’ appears in the display. Please enter the manager code “3333” here
and press “OK” to confirm.
• “Sec Code____” appears in the display. Please enter the security code “4444”
and press “OK” to confirm.
• “Open” appears in the display and the safe is opened.
PLEASE NOTE:
During this operation, the date and time stored in the reader are automatically trans-
mitted to the safe and are stored there.
4 | OPENING/CLOSING THE SAFE
5 | EMERGENCY OPENING
!
!

HARTMANN TRESORE
6
• While the door is closed, press the “close” key.
• The display shows “BA_LOW” -> battery low. Please replace.
• The display shows “BA_HI” -> battery OK.
6 | CHECKING BATTERY POWER
1. Normal messages
“AGAIN” -> Repeat the last input.
“BA-HI” -> battery status normal.
“BA-LO” -> battery status low. Batteries should be replaced.
“CLOSE” -> Locking mechanism extended.
“OPEN” -> Locking mechanism retracted.
“DONE” -> Input complete.
“NEW” -> Enter a new code.
2. Error messages
An error message on the display means that an operating error has occurred. In this case, please
follow the steps below:
ERROR
An incorrect code has been entered. Please enter the correct code.
ERROR 1
This message means that the door cannot be opened as the locking pins are tilted. In this
case, please first try to remedy the tilt by shaking the door slightly. Otherwise, carry out
emergency opening
ERROR 2
The locking pins are being held back and cannot be extended (the door cannot be completely
closed at this time). To solve the problem, press the door firmly into its frame before continu-
ing with the locking process.
HOLDxx
This error message appears after 4 consecutive incorrect entries of the code. The safe is
currently on hold. The two digits (xx) after “HOLD” indicate the duration of the hold time
in minutes. During this time, opening is only possible with the emergency opening key or,
optionally, with the reader.
SECURE
If the safe displays “Secure”, the batteries are very low and should be replaced as soon as
possible.
7 | DISPLAYS

HARTMANN TRESORE
7
You need the reader to make the following settings.
Setting a room number
• Connect the reader to the safe’s USB port.
• Select “Setting” and press “OK” to confirm.
• “Mgr Code____ ’’ appears in the display. Please enter the manager code “3333”
here and press “OK” to confirm.
• Select “Room NO.” and press “OK” to confirm.
• Enter a 4-digit room number and press “OK” to confirm.
• “DONE’’ appears in the display. The room number has been successfully stored.
Setting date and time
• Connect the reader to the safe’s USB port.
• Select “Setting” and press “OK” to confirm.
• “Mgr Code____’’ appears in the display. Please enter the manager code “3333”
here and press “OK” to confirm.
• Select “Date And Time”.
• Enter the current date and time. Press “OK” to confirm your input.
“Done’’ appears in the display.
PLEASE NOTE:
The date and time should be set immediately once the safe has been installed
Changing the manager code
• Connect the reader to the safe’s USB port.
• Select “Setting” and press “OK” to confirm.
• “Mgr Code____ ’’ appears in the display. Please enter the manager code “3333”
here and press “OK” to confirm.
• Select “Change Mgr Code” and press “OK” to confirm.
• “Current Mgr Code____ ’’ appears in the display. Enter the current manager code
“3333” and press “OK” to confirm.
• “New Mgr Code: ____ ’’ appears in the display.
Enter a new 4–6-digit code and press “OK” to confirm.
• “Confirm Mgr Code____ ’’ appears in the display.
Enter the new 4–6-digit code again and press “OK” to confirm.
• “DONE’’ appears in the display. The manager code has been successfully changed.
8 | FUNCTIONS OF THE READER (CEU)
!

HARTMANN TRESORE
8
Changing the security code
• Connect the reader to the safe’s USB port.
• Select “Setting” and press “OK” to confirm.
• “Mgr Code____ ’’ appears in the display. Please enter the manager code “3333”
here and press “OK” to confirm.
• Select “Change Sec Code” and press “OK” to confirm.
• “Current Sec Code____ ’’ appears in the display.
Enter the current security code “4444” and press “OK” to confirm.
• “New Sec Code: ____ ’’ appears in the display.
Enter a new 4–6-digit code and press “OK” to confirm.
• “Confirm Sec Code____ ’’ appears in the display.
Enter the new 4–6-digit code again and press “OK” to confirm.
• “DONE” appears in the display. The security code has been successfully changed.
Reading out audit
• Connect the reader to the safe’s USB port.
• Select “Audit” and press “OK” to confirm.
• Select “Read Audit” and press “OK” to confirm.
• “Sec Code____ ’’ appears in the display.
Enter the security code “4444” and press “OK” to confirm.
• The reader starts reading out the last operations (audit).
Displaying audit
• Select “Audit” and press “OK” to confirm.
• Select “View Audit” and press “OK” to confirm.
• “Sec Code____ ’’ appears in the display. Enter the security code “4444”
and press “OK” to confirm.
The display shows a selection of room numbers for which audits have already been read out.
Select the desired room number and press “OK” to confirm. The last 100 operations are
displayed.

HARTMANN TRESORE
9
Beispiel-Anzeige im Display
• 0012-OPEN: The 12th The operation was opening
(note that 0001 represents the most recent operation and 0100 represents the oldest)
• User Code: opened with user code (opening method)
• 21-01-2000: Day-month-year
•00:53:58: Hour: Minute: Second
Meaning of other displays
• Close-User Code: Closed with user code
• Open-CEU: Emergency-opened with reader
• Open-Master Code: Emergency-opened with master code
• Open-Key: Emergency-opened with emergency-opening key
Connecting reader to PC
• Install the USB drivers for the reader and the audit software on your desktop PC or laptop.
• The software is designed for Windows 7, Windows 8, Windows 10 and for 32-bit and 64-bit
systems.
• Connect the reader to the desktop PC or laptop with a USB cable.
• In the reader, select “Connect to PC” and press “OK” to confirm.
• ”√” appears in the reader display as soon as the connection has been established.
• Follow the software instructions.
9 | ADVANCED PROGRAMMING FUNCTIONS
!PLEASE NOTE:
Changes can only be made when the safe is open (pins are retracted).
• The various programming functions are carried out by changing individual digits
in the display; these digits are in turn arranged into several number groups.
• The number currently flashing can be changed. When a new digit is entered,
setting for that digit is completed; the next digit starts flashing and can be changed.
• To complete programming, all number groups must first be run through,
even if no changes have been made to one or more number groups.

HARTMANN TRESORE
10
Activating the first number group
Enter “clear clear”. “PROG” appears in the display. As soon as the display goes out, enter
the function code 7-5-1-0-1-9.
The first number group appears and can be changed. The preset is:
(A) Displaying or hiding code
Digit “0” means that the code is replaced with dashes.
Digit “1” means that the code entered is shown as normal in the display.
(B) How many digits should a guest code comprise
Digit “3” means that the guest code must have 3 digits.
Digit “4” means that the guest code must have 4 digits.
Digit “5” means that the guest code must have 5 digits.
Digit “6” means that the guest code must have 6 digits.
Digit “7” means that the guest can choose any code with 3 to 6 digits.
(C) Duration of hold time after 4 consecutive failed attempts to open
Digit “0” means there is no hold time.
Digit “1” means there is a hold time of 15 minutes.
Digit “2” means there is a hold time of 30 minutes.
(D) Using the master code (emergency opening with master card when guest code is
unknown)
Digit “0” Master code deactivated – external power supply via CEU only.
Digit “1” Master code input activated – power supply is external and via CEU.
Digit “2” Master code deactivated – external power supply deactivated.
Digit “3” Master code activated – external power supply deactivated.
(E) Saving the last 100 operations
Digit “0” – only the openings are tracked.
Digit “1” – openings and closures are tracked.
(F) Private use / hotel use
Digit “0” – private use:
The user code is stored once. To lock, you only need to press “close”.
The user code can be changed as follows:
While the door is open, enter “clear clear 68 close”.“NEW” appears in the display.
Enter a new user code and press “close” to confirm.
Digit “1”, hotel usage:
Every time the safe is closed, a personal code must be entered and “close”
must be pressed to confirm.
Digit “2” – advanced private use:
Use is as in the case of private use. In this mode, however, the user code is automatically
deleted once the door is open for at least 5 minutes.
1
A
7
B
1
C
3
D
0
E
1
F
HARTMANN TRESORE
11
Confirm the second number group with “close”.
The third number group (date) appears and can be changed.
:
Confirm the third number group with “close”.
The fourth number group (time) appears and can be changed:
Here again, confirm with “close” to finish and exit programming.
Reprogramming the master code
• While the door is open, enter “clear clear”. “PROG’’ is shown in the display. As soon as the
display goes out, the current master code (see chapter 3) must be entered. “NEW” appears
in the display.
• Enter a new 6-digit master code within 15 seconds. “AGAIN” appears in the display.
• Repeat the new 6-digit code within 15 seconds. “DONE’’ appears in the display.
The master code has been successfully changed.
PLEASE NOTE:
The master code cannot be reprogrammed if the current master code is not known.
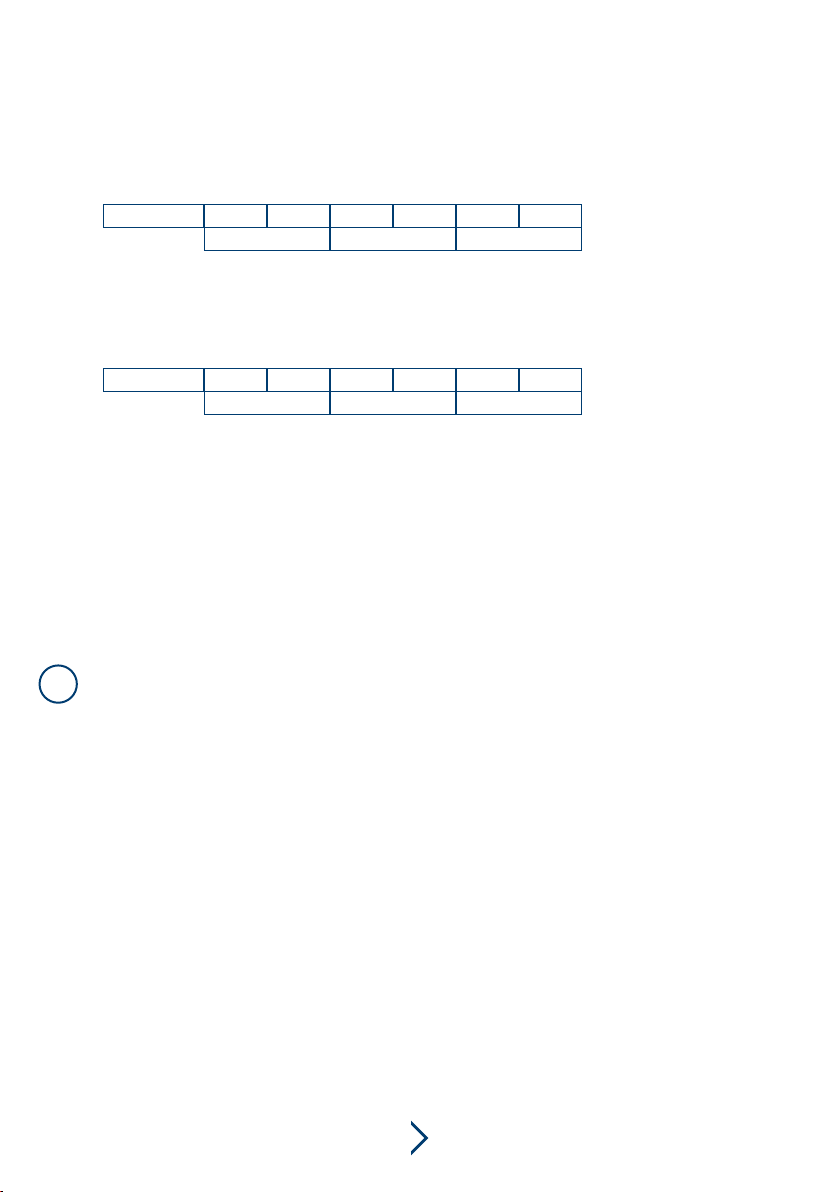
Display 0
A B C
6 0 2 0 4
Display 1
A B C
4 2 5 3 6
A/B/C stands for day/month/year. Here, the example is “6 February 2004”.
A/B/C stands for hour/minute/second. Here, the example is “14:25:36”.
!

HARTMANN TRESORE
12
10 | READING OUT OPERATIONS
You can read out the last 200 operations. Proceed as follows:
• Press “clear clear”. “PROG” appears in the display.
• As soon as the display goes out, enter the function code 770626.
• 3 different groups of numbers now appear one after the other on the display
and their individual digits encode the various operations.
• Press “close” to move from one number group to the next.
• Once you have pressed “close” three times, you move to the next operation.
• You can also directly enter the number of the operation you would like to read out.
Enter the number and press “close”.
You will find an example below:
1. Number group:
Explanation:
A, B, C: show the operation number.
Position D: no function
Positions E, F: “01“ means that the door was opened with the user code.
“02” means that the door was opened with the master code.
“03” means that the door was opened with the reader.
“09” means that the door was opened with the emergency-opening key.
If there has been no opening or closing operation, the position is free.
2. Number group:
Positions G, H: Show the day of the month the operation was carried out.
Positions I, J: Show the month the operation was carried out.
Positions K, L: Show the year the operation was carried out.
Here, the example is “23.05.2001”.
3. Number group:
Positions M, N: Show the hours of the time the operation was carried out.
Positions O, P: Show the minutes of the time the operation was carried out.
Positions Q, R: Show the seconds of the time the operation was carried out.
Here, the example is “10:05:38”.
0
A
0
B
5
C
-
D
0
E
3
F
2
G
3
H
0
I
5
J
0
K
1
L
1
M
0
N
0
O
5
P
3
Q
8
R

HARTMANN TRESORE
13
11 | TIPS AND HELP
PROBLEM POSSIBLE CAUSE SUGGESTED SOLUTION
Keyboard and/or display
do not respond.
Battery power is too low. Change the batteries.
Batteries have been
inserted incorrectly. Insert the batteries as intended.
Fault in the electronics. Contact a service employee at
Hartmann Tresore AG*.
Connection between
reader and safe is not
working.
Connection cable is faulty. Use a different cable.
Connections are defective. Contact a service employee at
Hartmann Tresore AG*.
Software malfunction.
Safe does not open
although correct code was
entered.
Locking pins are tilted.
Try to remedy the tilt by gently
shaking and tapping; optionally, you
can use the emergency opening
key to manually retract the locking
mechanism.
Malfunction of the drive for
retracting/extending the
locking pins.
Contact a service employee at
Hartmann Tresore AG*.
The door does not close
properly.
The locking pins cannot be
extended, or can only be partially
extended.
Make sure that the door is fully en-
gaged in the door frame at all times
and check the locking mechanism
for tilting.
Malfunction of the drive for
retracting/extending the locking
pins.
Contact a service employee at
Hartmann Tresore AG*.
Reader is not working.
The battery power in the reader
is too low. Change the batteries.
Batteries have been inserted
incorrectly. Insert the batteries as intended.
Fault in the electronics. Contact a service employee at‘
Hartmann Tresore AG*.
*Tel. +49 (0)5251 1744-179 | Fax +49 (0)5251 1744-999 | E-mail: support@hartmann-tresore.de

HARTMANN TRESORE
14
12 | CLEANING AND CARE
13 | DISPOSAL
!PLEASE NOTE!
Do not use any strong detergents or hard objects for cleaning.
• To clean the safe, please use a soft cloth and a mild, commercially available cleaning agent.
Do not use aggressive cleaning agents.
• Lubricate the door hinge regularly with a little commercial machine oil to maintain mobility.
PLEASE NOTE!
This appliance is marked in accordance with the European Directive 2002/96/EC
on waste electrical and electronic equipment!
The appliance packaging is made of reusable materials
• The correct separate collection of these appliances and its eco-friendly treatment and
disposal contribute to preventing potential negative impact on the environment and
health.
• The packaging materials can be hazardous for children. For this reason, keep these
materials out of the reach of children and dispose of them in accordance with the waste
instructions.
• Do not dispose of the packaging materials together with normal waste.
• If necessary, contact your authorised sales agent or the waste collection centre in your
region for information on disposal.
• Remove the mains plug and any locks before disposal to protect children from possible
hazards
This symbol, which you can see on the product itself and in the
product documents, means that the safe must not be disposed of
with normal household waste. The product must be taken to a special
waste collection centre to guarantee the regulation-compliant disposal
required for electronic appliances. If necessary, contact the waste
collection centre or your sales agent for further information.
!

HARTMANN TRESORE
15
The guarantee period begins with product purchase and lasts 12 months.
Please note! The guarantee is rendered invalid if
• the installation and operating instructions are not followed correctly and lead to
malfunctions.
• the appliance is modified in any way.
• no original spare parts are used.
The guarantee is not applicable for any personal injury or property damage caused by non-
observance of the operating manual or incorrect use of the appliance.
IMPORTANT: Product characteristics may be changed without advance notice.
!
14 | GUARANTEE

16
HARTMANN TRESORE AG
Pamplonastraße 2
33106
Paderborn,
Germany
+49 (0)5251 1744-179
support@hartmann-tresore.de
© HARTMANN TRESORE AG Operating Instructions for HS 480/481/482 (1120). Errors and misprints
www.hartmann-tresore.de
This manual suits for next models
2
Table of contents
Other HARTMANN TRESORE Safe manuals

HARTMANN TRESORE
HARTMANN TRESORE HES 15 User manual

HARTMANN TRESORE
HARTMANN TRESORE Bjork User manual

HARTMANN TRESORE
HARTMANN TRESORE HS 460 Series User manual

HARTMANN TRESORE
HARTMANN TRESORE HS 480 Series User manual

HARTMANN TRESORE
HARTMANN TRESORE HES User manual

HARTMANN TRESORE
HARTMANN TRESORE Signature Safe Experience User manual


