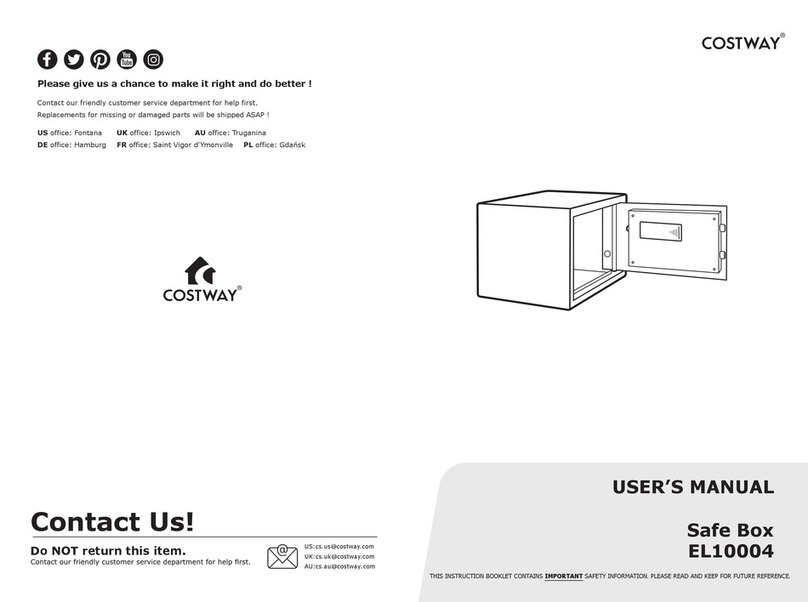
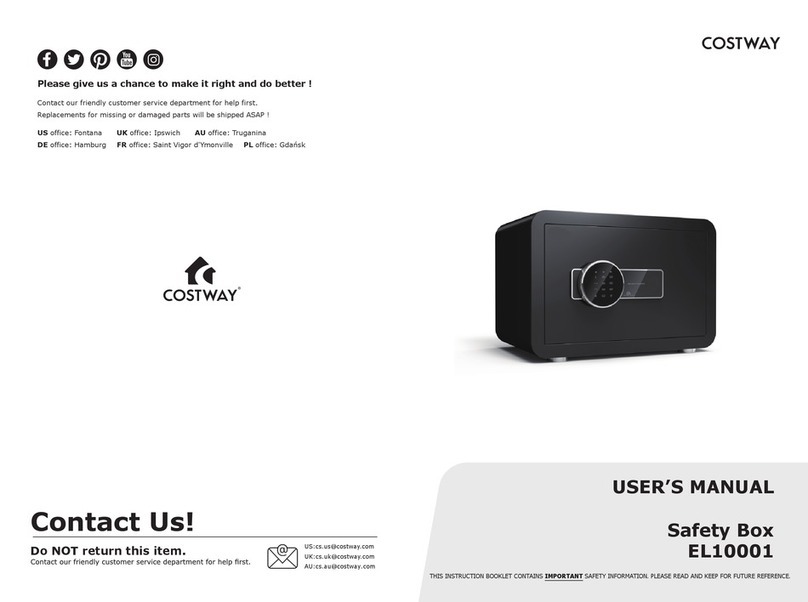
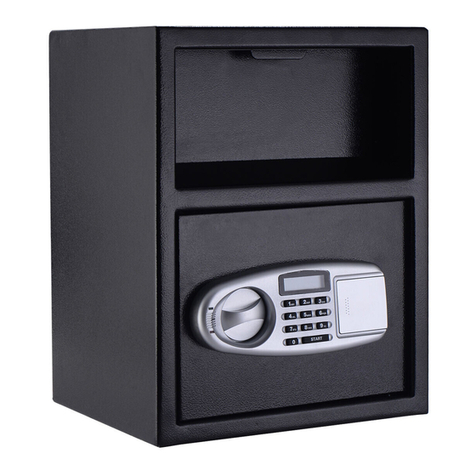
Costway JZ10001 User manual

EN DE FR ES IT PL
Safe Box
JZ10001 JZ10002
THIS INSTRUCTION BOOKLET CONTAINS IMPORTANT SAFETY INFORMATION. PLEASE READ AND KEEP FOR FUTURE REFERENCE.
Follow Costway
Please give us a chance to make it right and do better!
Contact our friendly customer service department for help first.
Replacements for missing or damaged parts will be shipped ASAP!
USER’S MANUAL

Contact Us!
Do NOT return this item.
Contact our friendly customer service department for help first.
E-mail
US: cs.us@costway.com
UK: cs.uk@costway.com
Before You StartBefore You Start
Please read all instructions carefully.
Retain instructions for future reference.
Separate and count all parts and hardware.
Read through each step carefully and follow the proper order.
We recommend that, where possible, all items are assembled near to the
area in which they will be placed in use, to avoid moving the product
unnecessarily once assembled.
Always place the product on a flat, steady and stable surface.
Keep all small parts and packaging materials for this product away from
babies and children as they potentially pose a serious choking hazard.
02

WRONG
RIGHT!
Never store in upright position
with lock (& handle) facing up
To ensure fire & water protection,
always store flat with lid up
PACKAGE CONTENTS
IMPORTANT!
Fire and water proof chest x 1
Operation manual x1
Entry keys x2
Silica gel pack x1
UNLOCK CHEST
1. Insert key in the locked position Fig.l
2.Turn the key to the right 4 turn (90 degrees clockwise) Fig.2
3. Remove the key, chest is now unlocked Fig.3
Fig.1 Fig.2 Fig.3
03

OPEN CHEST
1. Turn the knob to the right 4 turn (90 degrees clockwise) to the open
position. Fig.4
2. Chest is now unlatched and you may open the lid. Fig.5
CLOSE CHEST
1. With lid closed, press down on lid and turn the knob to the left 4 turn (90
degrees anti-clockwise) to the closed position until markings align Fig.6
2. Chest is now latched Fig.7
Fig.4 Fig.5
Fig.6 Fig.7
LOCK CHEST
1. Insert key in the unlocked position Fig.8
2. Turn the key to the left 4 turn (90 degrees anti-clockwise) Fig.9
3. Remove the key, chest is now locked Fig.10
NOTE: Knob cannot be turned while key is in the locked position
Fig.8 Fig.9 Fig.10
04

PROPER USE
The Fire & Water proof chest is designed to protect paper records and other
valuable documents from heat and water damage due to exposure to fire and
water.
FIRE PROTECTION: UL certified the interior temperature remains below
177 C for 30 minutes during a fire from room temperature up to 843℃.
WATER PROTECTION: Testing verifies that the interior remains dry when
completely submerged for 8 hours, but it must be based on the premise of
operating specifications. After the product is taken out, it must be opened and
left for 30 minutes, wait for the sealing ring to rebound, and then perform a
waterproof test. When testing, put it horizontally and take it out horizontally,
10cm away from the bottom of the water and not sink to the bottom. After
taking it out, blow dry and wipe off the surface water stains before opening
the box.
This safe is NOT designed to store data cartridges, audio/video cassettes,
floppy discs, film, photos or photo negatives. This safe is NOT designed to
store medication, items with combustible content guns or other weapon
systems. This safe box can protect paper, certificates and digital media from
fire or water damage. However, do not place high-temperature, flammable
and explosive materials in the box.
The safe box is designed with a sealed structure. In order to avoid the
increase of humidity in the box, it is recommended to put important
documents and valuables in a sealed bag, and occasionally open the lid of the
box to ventilate for 30 minutes.
05

Welcome to visit our website and purchase our quality products!
We would like to extend our hearelt thanks to
all of our customers for taking me to assemble
this product and giving us valuable feedbacks.
With your inspiring rating, COSTWAY will be more consistent to offer you
EASY SHOPPING EXPERIENCE, GOOD PRODUCTS and EFFICIENT SERVICE!
US office: Fontana, California
UK office: Ipswich
Reward Points
Exclusive Customer Service
Personalized Recommendaons
Permanent Shopping Cart
Order History
06

Bitte geben Sie uns eine Chance,
es zu korrigieren und besser zu machen!
Wenden Sie sich zunächst an unseren freundlichen Kundendienst.
Ersatz für fehlende oder beschädigte Teile wird so schnell wie möglich versendet!
DAS HANDBUCH ENTHÄLT WICHTIGE SICHERHEITSHINWEISE. BITTE LESEN UND BEWAHREN SIE FÜR DIE ZUKÜNFTIGE VERWENDUNG AUF.
Folgen Costway
EN DE FR ES IT PL
HANDBUCH
Sicherheitskoffer
JZ10001 JZ10002
07

Kontakeren Sie uns!
E-mail
DE:cs.de@costway.com
Vor dem Beginnen
Bitte lesen Sie alle Anweisungen sorgfältig durch.
Bewahren Sie die Anweisungen zum zukünftigen Verwendung auf.
Separieren und zählen Sie alle Teile und Hardware.
Lesen Sie jeden Schritt sorgfältig durch und befolgen Sie die richtige
Reihenfolge.
Wir empfehlen, wenn möglich, alle Artikel in der Nähe des Einsatzortes zu
montieren, um ein unnötiges Bewegung des Artikels zu vermeiden.
Stellen Sie den Artikel immer auf eine glatte, flache und stabile Oberfläche.
Halten Sie alle kleinen Teile und Verpackungsmaterialien dieses Artikels von
Babys und Kindern fern, da sie zur ernsthaften Erstickungsgefahr führen
können.
08

FALSCH
RICHTIG!
Niemals in aufrechter Position
mit dem Schloss (& Griff) nach
oben lagern
Um Feuer- und Wasserschutz zu
gewährleisten, immer flach mit
geschlossenem Deckel lagern.
PACKUNGSINHALT
WICHTIG!
Feuer- und wasserdichte Truhe x1
Bedienungsanleitung × 1
Schlüssel × 2
Kieselgelpackung × 1
KOFFER ENTSPERREN
1. Stecken Sie den Schlüssel in die verriegelte Position. Abb. 1
2. Drehen Sie den Schlüssel um eine Vierteldrehung nach rechts (90 Grad im
Uhrzeigersinn). Abb. 2
3. Entfernen Sie den Schlüssel, Koffer ist jetzt entsperrt. Abb. 3
Abb.1 Abb.2 Abb.3
09

KOFFER ÖFFNEN
1. Drehen Sie den Knopf um 1/4 Umdrehung (90 Grad im Uhrzeigersinn)
nach rechts in die geöffnete Position. Abb. 4
2. Koffer ist jetzt entriegelt und Sie können den Deckel öffnen. Abb. 5
KOFFER ABSCHLIESSEN
1. Drücken Sie bei geschlossenem Deckel auf den Deckel und drehen Sie den
Knopf um 1/4 Umdrehung nach links (90 Grad gegen den Uhrzeigersinn) in
die geschlossene Position, bis die Markierungen ausgerichtet sind. Abb. 6
2. Koffer ist jetzt verriegelt. Abb. 7
Abb.4Abb.5
Abb.6Abb.7
KOFFER SCHLIESSEN
1. Stecken Sie den Schlüssel in die entriegelte Position. Abb. 8
2. Drehen Sie den Schlüssel um eine Vierteldrehung nach links (90 Grad
gegen den Uhrzeigersinn). Abb. 9
3. Ziehen Sie den Schlüssel ab, Koffer ist jetzt verriegelt. Abb. 10
HINWEIS: Der Knopf kann nicht gedreht werden, während sich der
Schlüssel in der verriegelten Position befindet.
Abb.8Abb.9Abb.10
10

KORREKTE NUTZUNG
Das Sicherheitskoffer soll Papierunterlagen und andere wertvolle Dokumente
vor Hitze- und Wasserschäden durch Feuer und Wasser schützen.
BRANDSCHUTZ: UL-zertifiziert bleibt die Innentemperatur 30 Minuten
lang während eines Brandes von Raumtemperatur bis 843 ° C unter 177 ° C.
WASSERSCHUTZ: Durch Tests wird bestätigt, dass der Innenraum trocken
bleibt, wenn er 8 Stunden lang vollständig eingetaucht ist. Er muss jedoch auf
der Grundlage der Betriebsspezifikationen erfolgen. Nachdem das Produkt
herausgenommen wurde, muss es geöffnet und 30 Minuten lang stehen
gelassen werden. Warten Sie, bis der Dichtring zurückprallt, und führen Sie
dann einen wasserdichten Test durch. Stellen Sie es beim Testen horizontal
auf und nehmen Sie es horizontal heraus, 10 cm vom Grund des Wassers
entfernt, und sinken Sie nicht auf den Boden. Föhnen Sie die
Oberflächenwasserflecken nach dem Herausnehmen trocken und wischen Sie
sie ab, bevor Sie den Koffer öffnen.
Dieser Sicherheitskoffer dient NICHT zum Speichern von Datenkassetten,
Audio- / Videokassetten, Disketten, Filmen, Fotos oder Fotonegativen. Dieser
Safe dient nicht zur Aufbewahrung von Medikamenten, Gegenständen mit
brennbaren Waffen oder anderen Waffensystemen. Dieser Safe kann Papier,
Zertifikate und digitale Medien vor Feuer- oder Wasserschäden schützen.
Stellen Sie jedoch keine brennbaren und explosiven Materialien mit hohen
Temperaturen in den Koffer.
Der Sicherheitskoffer ist mit einer versiegelten Struktur versehen. Um den
Anstieg der Luftfeuchtigkeit in der Box zu vermeiden, wird empfohlen,
wichtige Dokumente und Wertsachen in einen versiegelten Beutel zu legen
und gelegentlich den Deckel des Koffers zu öffnen, um 30 Minuten lang zu
lüften.
11

VIELEN
DANK
Ihre Vorschläge und Kommentare für COSTWAY sind wirklich wichg für uns!
Wir möchten uns bei allen Kunden herzlich bedanken,
dass sie sich die Zeit genommen haben, dieses Produkt
zusammenzubauen und uns wertvolle Bewertung
zukommen zu lassen.
Mit Ihrer inspirierenden Bewertung wird COSTWAY konsistenter sein, um Ihnen
EIN SCHÖNES EINKAUFSERLEBNIS, GUTE PRODUKTE und EFFIZIENTEN SERVICE zu bieten!
DE office:FDS GmbH,Neuer Höltigbaum 36,22143 Hamburg,Deutschland
Belohnungspunkte
Exklusiver Kundendienst
Personalisierte Empfehlungen
Permanenter Einkaufswagen
Bestellverlauf
5 Sterne Bewertung
12

Coffre-fort Ignifugé
JZ10001 JZ10002
CE MANUEL D’INSTRUCTIONS CONTIENT DES INFORMATIONS IMPORTANTES SUR LASÉCURITÉ. VEUILLEZ LIRE ET CONSERVER POUR LA RÉFÉRENCE FUTURE.
MANUEL DE L’UTILISATEUR
VEUILLEZ NOUS DONNER UNE
OCCASION DE L’AMELIORER ET FAIRE MIEUX!
Contactez d’abord notre service à la clientèle amical pour l’aide.
Les replacements pour les pièces manquantes ou endommagées
seront envoyés le plus vite possible!
Suivez Costway
EN DE FR ES IT PL
13

Contactez-nous !
Ne retournez pas cet article.
Contactez d’abord notre service à la clientèle amical pour l’aide.
E-mail
FR : cs.fr@costway.com
Avant de Commencer
Veuillez lire attentivement toutes les instructions.
Conservez les instructions pour la référence future.
Séparez et comptez toutes les pièces et les outils de matériel.
Lisez attentivement chaque étape et suivez le bon ordre.
Nous recommandons que, si possible, tous les éléments soient
assemblés à proximité de la zone dans laquelle ils seront utilisés, afin
d'éviter de déplacer inutilement le produit une fois assemblé.
Placez toujours le produit sur une surface plane, solide et stable.
Gardez toutes les petites pièces et le matériel d'emballage de ce produit
hors de portée des bébés et des enfants car ils pourraient provoquer un
risque grave d’étouffement.
14

INCORRECT
CORRECT
Ne jamais placer en position
avec le verrou (et la poignée)
vers le haut.
Pour assurer la protection contre le feu
et l’eau, toujours placer ce produit à
plat avec le couvercle fermé.
CONTENU DU PAQUET
IMPORTANT !
Coffre-fort Ignifugé x1
Manuel d’utilisation x 1
Clé x2
Sachet déshydratant x 1
Déverrouillage
1. Insérez la clé en position verrouillée. (Fig.1)
2. Tournez la clé vers la droite d’un quart de tour (90 degrés dans le sens des
aiguilles d4une montre). (Fig.2)
3. Retirez la clé, le coffre est maintenant déverrouillé. (Fig.3)
Fig.1 Fig.2 Fig.3
15

1. Le couvercle étant fermé, appuyez sur le couvercle et tournez le bouton
vers la gauche d’un quart de tour (90 degrés dans le sens inverse des aiguilles
d’une montre) jusqu’à la marque fermée. (Fig.6)
2. Le coffre est maintenant verrouillé. (Fig.7)
Ouverture
1. Tournez le bouton vers la droite d’un quart de tour (90 degrés dans le sens
des aiguilles d’une montre) jusqu’à la marque ouverte. (Fig.4)
2. Le coffre est maintenant déverrouillé et vous pouvez ouvrir le couvercle.
(Fig.5)
Fermeture
Fig.4Fig.5
Fig.6Fig.7
Verrouillage
1. Insérez la clé en position déverrouillée. (Fig.8)
2. Tournez la clé vers la gauche d’un quart de tour (90 degrés dans le sens
inverse des aiguilles d’une montre). (Fig.9)
3. Retirez la clé, le coffre est maintenant verrouillé. (Fig.10)
NOTE : Le bouton ne peut pas être tourné lorsque la clé est en position
verrouillée.
Fig.8Fig.9Fig.10
16

UTILISATION APPROPRIÉE
Le produit est conçu pour protéger les dossiers papier et autres documents
précieux contre les dommages causés par la chaleur et l’eau en cas
d’exposition au feu et à l’eau.
PROTECTION CONTRE LE FEU : UL certifie que la température intérieure
reste inférieure à 177°C pendant 30 minutes lors d’un incendie dont la
température ambiante peut atteindre 843°C.
PROTECTION CONTRE L’EAU : Les tests vérifient que l’intérieur reste sec
lorsqu’il est complètement immergé pendant 8 heures, mais ils doivent être
basés sur l’opération correcte. Après avoir sorti le produit de l’emballage, il
faut l’ouvrir et le laisser pendant 30 minutes, attendre que l’anneau
d’étanchéité rebondisse, puis effectuer un test d’étanchéité. Lors du test,
mettez-le dans l’eau horizontalement et retirez-le de l’eau horizontalement, à
10 cm du fond de l’eau et sans toucher au fond. Après l’avoir sorti de l’eau,
séchez-le et essuyez l’eau restante en surface avant d’ouvrir le produit.
Ce produit n’est pas conçu pour stocker des cartouches de données, des
cassettes audio/vidéo, des disquettes, des films, des photos ou des négatifs.
Ce produit n’est pas conçu pour stocker des médicaments, des articles à
contenu combustible, des armes à feu ou autres systèmes d’armes. Ce
coffre-fort peut protéger le papier, les certificats et les supports informatiques
contre les dommages causés par le feu ou l’eau. Cependant, ne placez pas de
matériaux à haute température, inflammables ou explosifs dans le coffre.
Le coffre-fort est conçu avec une structure étanche. Afin d’éviter
l’augmentation de l’humidité dans le coffre, il est recommandé de placer les
documents importants et les objets de valeur dans un sac scellé et d’ouvrir
occasionnellement le couvercle du coffre pour l’aérer pendant 30 minutes.
17

Bienvenue pour visiter notre site et acheter nos produits de qualité!
Nous tenons à vous présenter nos remerciements
sincères à tous nos clients qui prennent beaucoup
de temps pour assembler ce produit et nous donner
des commentaires précieux.
Avec votre évaluation inspirante, COSTWAY sera plus professionnel pour vous offrir une
BONNE EXPÉRIENCE D’ACHATS, de BONS PRODUITS et un SERCIVE EFFICACE !
FR office : 26 RUE DU VERTUQUET, 59960 NEUVILLE EN FERRAIN, FRANCE
Points de Récompense
Service à la Clientèle Exclusif
Recommandaons Personnalisées
Panier Permanent
Historique des Commandes
merci
18

Caja de Seguridad
JZ10001 JZ10002
MANUAL DEL USUARIO
ESTE MANUAL DE INSTRUCCIONES CONTIENE IMPORTANTES INFORMACIONES DE SEGURIDAD, POR FAVOR LO LEAY GUARDE PARA REFERENCIAS FUTURAS.
¡Por favor dénos la oportunidad de hacerlo bien y mejorar!
Primero póngase en contacto con nuestro amable departamento de
servicio al cliente para obtener ayuda. ¡Los reemplazos de piezas
faltas o dañadas se enviarán lo antes posible!
Siga Costway
EN DE FR ES IT PL
19

¡Contáctenos!
NO devuelva este artículo.
Primero póngase en contacto con nuestro amable departamento de servicio al cliente para obtener ayuda.
Antes de Empezar
Por favor lea todas instrucciones con mucha atención.
Retenga instrucciones para referencias futuras.
Separe y cuente todas las piezas y accesorios.
Lea cada paso cuidadosamente y siga el orden correcto.
Recomendamos que, cuando sea posible, todos los artículos se armen cerca
del área en la que se utilizarán, para evitar mover innecesariamente el
producto cuando emsamble.
Siempre coloque el producto sobre una superficie plana, estable y firme.
Mantenga todas las piezas pequeñas y los materiales de embalaje de este
producto lejos de los bebés y los niños, ya que representan un grave riesgo
de asfixia potencialmente.
ES
20
This manual suits for next models
3
Table of contents
Languages:
Other Costway Safe manuals

Costway
Costway HW50956 User manual

Costway
Costway HW51993 User manual

Costway
Costway HW67542 User manual

Costway
Costway EL10004 User manual

Costway
Costway HW51993 User manual

Costway
Costway HW67044 User manual

Costway
Costway EL10001 User manual

Costway
Costway HW66549 User manual

Costway
Costway HW66548 User manual

Costway
Costway HW50957 User manual