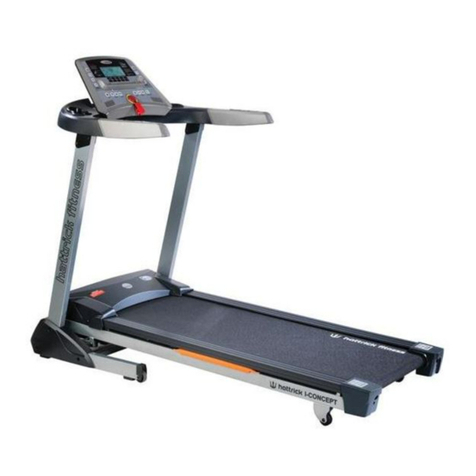
hattrick ARENA User manual

ARENA MOTORIZED TREADMILL OWNER MANUAL
TABLE OF CONTENTS
MTH 6.0 L

TABLE OF CONTENTS
*SAFETY PRECAUTIONS
1-2
*BEFORE BEGINNING
3-4
*FEATURES
5
*EXERCISE GUIDELINES
5-7
*WARM-UP & COOL-DOWN
8-9
*ASSEMBLY PART LIST
10
*HARDWARE PACK
10
*ASSEMBLY STEPS
11
*FOLDING,UNFOLDING & MOVING INSTRUCTION
12-13
*COMPUTER INSTRUCTION
13-14
*GENERAL OPERATION
14-17
*TREADMILL FUNCTION
18
*MAINTENANCE CLAUSE
18
*REGULAR FAILURE AND FAILURE ELIMINATION
19
*EXPLODED DRAWING
20
*PARTS LIST
21-22
*CIRCUIT DIAGRAM
23

SAFETY PRECAUTIONS
Thank you for purchasing our products. Even though we got great efforts to ensure the quality
of each product, occasional errors, and/or omissions do occur. In any event should you find
this product to be defective or missing a part please contact the shop of purchase.
Be sure to read the entire manual before assembly and operation. Also, please note the
following safety precautions:
Before beginning any exercise program consult your physician.
Keep children and pets away from this equipment at all times, this is not a toy.
Only one person at a time should use this equipment. If dizziness, nausea, chest pains, or
any other abnormal symptoms are experienced whilst using this treadmill, stop the
workout at once and consult a physician immediately.
Never allow more than one person at a time on the treadmill.
Inspect your machine prior to exercise to ensure that all nuts and bolts are fully tightened.
Keep hands and feet away from all moving parts.
Always use this treadmill on a clear and level surface. Do not use it outdoors or near
water.
Do not insert any object into any openings.
Before using this equipment to exercise, always do stretching exercises to properly warm
up by slow walking for 5 minutes on the treadmill.
Always wear proper clothing and walking or jogging shoes when exercising. Do not wear
loose fitting clothing that could get caught in the equipment.
Turn off the power after usage.
Pregnant women should consult with their physician before beginning an exercise
program.
Drink hydrating fluids (water) before, during and after any exercise.
This treadmill is designed for home use only. Do not use for light institutional or
commercial applications.
Assemble and operate the treadmill on a level, solid surface.
Please make sure that there must be a safety area of 2000 mm × 1000 mm behind the
treadmill while exercising.
The high level of security of equipment can only be kept, if regularly checked for damages
and abrasion. Please pay special attention to the rear roller cover, Antiskid pad,
handlebars, side rail and running belt. Please read this manual carefully and observe the
instructions.
Damage parts need to be replaced instantly and please only exercise again once properly
repaired.
Please make sure, that for set-up and use enough space is available around the item.
Please pay attention that levers or other adjusting mechanisms do not interfere with the
moving area during exercise.
1

Any of the adjustment devices that could interfere with the user’s movement should not
be left projecting.
Turn the switch off and unplug the power cord when the treadmill is out of use.
Incorrect and excessive exercise can harm your health.
Before starting any exercise program consults your physician. This is especially important for
individuals over the age of 35 or persons with preexisting health problems. Please read all
instructions carefully.
The treadmill is tested according to EN 957-1/ -6, class HB for home-use with a maximum user
weight of 110 kg and is not suitable for therapeutical use. This item may only be used in the
way described in this manual.
Maximum overall dimension: 1730mmx780mmx1230mm
Maximum noise level around the treadmill is 68dB(A)
The weight of the treadmill is about 74 kg.
Attention: This treadmill is not intended for use by persons (including children) with reduced
physical, sensory or mental capabilities, or lack of experience and knowledge.
If the supply cord is damaged, it must be replaced by the manufacturer, its service agent or
similarly qualified persons in order to avoid a hazard.
2

BEFORE BEGINNING
CLEAN YOUR AREA:
1. Remove the treadmill from box and place on a level ground. It is recommended that you
place a protective covering under the treadmill.
2. Place in an area that will meet minimum clearance requirements.
Front & Side: 1ft /30cm
Back: 6ft /180cm
3. Whenever moving or setting up the treadmill, the deck must be in the upright position with
the deck safety lock securely engaged.
4. To place the TREADMILL in operating position, release the deck safety lock then lower the
deck with the end caps until it rests completely on the ground.
5. Make sure safety cord is engaged or unit will not operate.
6. Plug unit into outlet following the grounding guidelines below.
GROUNDING:
This unit must be properly grounded to ensure safe operation. Should this equipment fail to
perform properly, grounding reduces the chance of electrical shock. The unit must be plugged
into a suitable AC grounded outlet that is correctly installed and grounded in conformance
with local codes and ordinances.
GATHER YOUR TOOL:
Make sure all the necessary tools gathered before the installation. Having the right tools at
hand will save time and make less assembly mistake.
HELPFUL TIPS:
Straddle the running belt and allow it to start moving at a safe speed before stepping on.
Hold the handlebar while adjusting the controls.
Focus your eyesight ahead to help maintain your balance.
Wear comfortable, good-quality walking or running shoes.
Warm-up and cool–down before and after your workout period
3

IMPORTANT TREADMILL WARNINGS AND CAUTIONS:
In order to reduce the risk of fire, electric shock, burns or injury, please read and understand
the following precautions before operating.
DANGER: To reduce the risk of electric shock, always unplug this appliance from the
electrical outlet immediately after use and before cleaning.
WARNING: To reduce the risk of burns, fire, electric shock or injury to persons, an appliance
should NEVER be left unattached when plugged in. Unplug from outlet when
not in use, and before putting on or taking off parts. Do not operate under
blankets or pillow. Excessive heating can occur and cause fire, electric shock or
injury to persons.
CAUTION:
Before operating the treadmill you have to pull out the slip safety key in the
direction of the arrows, ( the treadmill will enter
into a protection program if you switch on the treadmill without pulling out the safety key)
The safety key stops the treadmill at any point in your workout .
In case of emergency, seize the handlebar and lift your body, then stand on the ground.
HELPFUL INSTRUCTIONS:
Straddle the tread belt and allow it to start moving at a safe speed before stepping onto it.
Hold the handlebar while adjusting the controls.
Focus your eyes straight ahead to help maintain your balance.
Wear comfortable, good-quality walking or running shoes.
Warm-up and cool–down before and after your workout period
Slip safe key
4

FEATURES
EXERCISE GUIDELINES
Anyone over the age of 35, as well as younger people who are overweight, should check with
their physician before beginning any type of exercise program. People who have diabetes or
high blood pressure, a family history of heart disease, high cholesterol or have led a sedentary
lifestyle should protect themselves with a medical check up and a stress test, preferably
administered by a healthcare professional.
Medical research has shown us that there is an amount of exercise which is enough to
condition the cardio respiratory system and the muscles of the body. The amount of exercise is
between 60% and 85% of your maximum heart rate measured during a training session. This
range allows enough exercise to achieve fitness, but not an exercise amount to cause injury.
If at anytime during exercise you experience dizziness or chest pain stop immediately and seek
medical advice.
5

TARGET HEART RATE ZONE
220-your age=maximum heart rate
Do not workout at your maximum heart rate. The recommended heart rate zone is between
60% and 85% of your maximum heart rate.
6

EXERCISE IN YOUR TARGET HEART RATE ZONE
BEGINNER TREADMILL PROGRAM
Exertion level
Duration
Exertion level
Duration
WEEK 1
Easy
6~12minutes
WEEK 5
Moderate
22~28minutes
WEEK 2
Easy
10~16minutes
WEEK 6
Slightly higher or
20minutes
slightly lower
WEEK 3
Moderate
14~20minutes
WEEK 7
Add interval
training
3 minutes at
moderate
exertion with
3 minutes at
higher
exertion for
24 minutes
WEEK 4
Moderate
18~24minutes
7

WARM-UP & COOL-DOWN
A successful exercise program consists of a warm up, aerobic exercise and a cool down.
Warming up is an important part of your workout, and should begin every session. It prepares
your body for more strenuous exercise by heating up and stretching out your muscles. At the
end of your workout, repeat these exercises to reduce sore muscle problems. We suggest the
following warm-up and cool-down exercises:
HEAD ROLLS
Rotate your head to the right for one count, feeling the stretch up
the left side of your neck. Next rotate your head to the left for one
count,. Rotate your head back for one count. Stretching your chin
to the ceiling and letting your mouth open , And finally, drop your
head to your chest for one count.
SHOULDER LIFTS
Lift your left shoulder up toward your ear for one count. Then lift
your right shoulder up for one count as you lower your right shoulder.
SIDE STRETCHES
Open your arms to the side and continue lifting them until they are
over your head. Reach your right arm as far upward toward the ceiling
as you can for one count. Feel the stretch up your right side. Repeat
this action with your left arm.
8

QUADRICEPS STRETCH
With one hand against a wall for balance, reach behind you and pull your
right foot up. Bring your heel as close to your buttocks as possible. Hold
for 15 counts and repeat with left foot up.
INNER THIGH STRETCH
Sit with the soles of your feel together with your knees pointing
outward. Pull your feet as close into your groin as possible. Gently
push your knees toward the floor. Hold for 15 counts.
HAMSTRING STRETCH
Sit with one leg extended. Bring the sole of the opposite foot toward
you and rest it against the inner thigh of your extended leg.
Reach toward your toes as far as possible. Hold for 15 counts,
then relax. Repeat 3 times for each leg. Stretches: Hamstrings,
lower back and groin.
CALF STRETCHES
Lean against a wall with your left leg in front of the right and your arms
forward. Keep your right leg straight and the left foot on the floor; then
bend the left leg and lean forward by moving your hips toward the wall.
Hold, and then repeat on the other side for 15 seconds
9

ASSEMBLY PART LIST
HARDWARE PACK
10

ASSEMBLY STEPS
STEP 1: Remove the treadmill from box and place on a level ground.
STEP 2 : Hands holds the A/B handlebar and then raise at the same time until unit closes
completely.
Important: You will hear a “clock” sound when it has been colsed completely
STEP 3 : To rotate the console according to directon of arrow. To make sure the console
position, and press left&right handlebar console lock device, to make sure the console was
fixed completely.
Console lock device
11

FOLDING , UNFOLDING & MOVING INSTRUCTION
FOLDING THE TREADMILL
1. Turn off the power switch
2. Raise the rear deck to the up-right position,The folded pedal locked the deck
automatically,When you heared the sound “click”.
3. Store the treadmill and move it.
UNFOLDING THE TREADMILL
1. Put your right hand on the rear corner of the treadmill
2. Using your foot step on the pedal
3. Then lay down the treadmill deck slowly.
12

MOVING THE TREADMILL
1. Make sure the following points before moving it.
A: Be sure that the power switch is on the OFF position
B: The unit is unplugged
C: Deck is on the upright position,
D: The folded penal is locked completely after folding.
2. Two ways of moving:
A: The left hand hold the end of the deck,the right hand hold the right handlebar,incline
30-40 angle to your chest,then moving it slowly in a long dsitance indoor.
B: For a short distance, we can hold the handlebar and push it in a horizontal level,no
incline.
COMPUTER INSTRUCTION
13

GENERAL OPERATION
Display type: LCD Display Feedback as follow:
[TIME]: Display exercised time or target time, display range:0:00—99:59;
[SPEED]:Display exercise speed,display range:1—16.0 Km/h;
[INCLINE]:Display exercise incline, display range:0%—15%;
[DISTANCE]:Display has exercised distance or target distance, display range:0.0—99.9Km;
[CALORIES]:Display has consumed calories or target consume calories, display range:
0—999Kcal;
[PULSE]:Display the heart rate or target heart rate, display range:40—199BPM;
[PROG]:Display 6 pre-prgram, it is respectively ①Warm-UP ②Fat Burn ③Heart Exercise
④Rolling Hills ⑤Lose Weight ⑥Long Distance Run,and 2 user program
Safety lock: At any time,the machine will stop,when unplug the cord-switch.Pls be sure to plug the
safety lock before start.
MANUAL MODE/QUICK START
[START ]:Press the [start] button,the machine will run.
[ STOP ]: Press the [stop] button,the motor will stop.
[PAUSE]: Press the [pause] button,the motor will stop.
[PROG]: Press the [prog] button,there is 6 pre program,when the machine is stopped.
SPEED KNOB: The speed will be increased when it is clockwise rotation.the maximum speed is
16km/h;the speed will be reduced,the minimum speed is 1km/h
SPEED SHORTCUT KEY【3/6/9/12/14/16】:At any time,press any speed shortcut key,it will adjust
to matching speed at the same time.
INCLINE SHORTCUT KEY [0/3/6/9/12/15]: At any time,press any incline shortcut key,it will adjust
to matching incline at the same time.
MP3 SPEAKER:
Insert the MP3 terminal wire to the display,The media will play.
14

OPERATIONAL APPROACH:
1. GENERAL APPROACH:
a) Turn on the power switch,insert the safty key to the right position,LCD display show 2
minutes.After a sound of “sing” from buzzer,Manual normal mode is running.
b) Press[START],the machine is running.
2. MANUAL MODE:
a)Insert the safty key to the right position.Press [MODE] button and enter in into the manual
normal mode,when out of power.
b)Manual normal mode has three of setting mode:Time mode,distance mode,calorie mode.
TIME MODE:
Press “MODE” enter into time countdown mode, LCD window displays time zone flashing,
the start time is 30 miniutes, turn the speed knob can change the time setting, setting range
is 10:00-99:00. Turn around speed knob in clock-wise, time will increase by 1 minutes
increase. Turn the speed knob continuously in clock-wise the time will increase to 99
minutes. Turn the knob continuously in counter- clock-wise, the time begin to countdown by
1 minutes until to 10 minutes.
DISTANCE MODE:
Double-click “MODE” enter into DISTANCE countdown mode, LCD window displays distance
zone flashing, the start distance is 1.0km
,to turn the speed knob can change the distance setting, setting range is 1.0-99.0km. Turn
around knob in clock-wise, distance will increase by 0.1 km increase, Turn round speed knob
continuous and the distance will increase rapidly to what you want until 99.9km. Turn the
knob continuously in counter-clock-wise, the distance begin to countdown until 1km.
CALORIES MODE:
Consecutive triple-click “MODE” enter into CALORIES countdown mode, LCD window
displays calories zone flashing, the start calories is 50cal.
,to turn the speed knob can change the calories setting, setting range is 50-999cal. Turn
around knob in clock-wise, the calories will increase by 1 Kcal , turn on the knob continuous
and the calories will increase rapidly to what you want until 990 CALORIES . Turn the knob in
counter clock-wise, the calories will countdown by 1 Kcal .
PROGRAM MODE:
Press the program button or program shortcut to select between aim program P1~P6, Each
program to set 30 minutes as a default time, and press[START] to start treadmill, program
start automatically, time start to countdown; If you want to correct the program which has
set 30 minutes before wasn’t running. You can turn the speed knob to correct time. Range
15

from 10-99 minutes, and press [START], program start automatically. To press [SPEED]
shortcut or speed knob can change the speed during running.; To press [INCLINE] shortcut or
incline knob can change the incline.
c)To finish set, press[START],treadmill start running,the value start countdown.When the
value decrease to 0 progressively,treadmill will stop running.
Preset program 1
Preset program 2
level
1
2
3
4
5
6
7
8
9
10
11
12
13
14
15
16
speed
2
4
4
6
6
8
8
10
10
10
8
8
6
4
3
2
incline
1
2
3
3
4
4
4
4
3
3
3
4
4
3
2
2
Preset program 3
level
1
2
3
4
5
6
7
8
9
10
11
12
13
14
15
16
speed
6
10
10
8
6
6
8
10
10
11
11
10
8
8
6
2
incline
1
3
3
4
5
5
4
3
5
5
2
5
5
2
3
2
Preset program 4
level
1
2
3
4
5
6
7
8
9
10
11
12
13
14
15
16
speed
6
6
6
8
10
10
10
10
12
12
12
10
10
6
6
6
incline
0
1
1
0
3
2
1
2
3
2
1
0
1
1
2
4
level
1
2
3
4
5
6
7
8
9
10
11
12
13
14
15
16
speed
4
4
6
6
8
8
8
6
6
8
8
8
6
8
8
6
incline
2
2
2
3
3
3
3
3
3
2
3
3
3
2
2
2
16
6

Preset program 5
level
1
2
3
4
5
6
7
8
9
10
11
12
13
14
15
16
speed
6
6
6
8
12
12
12
12
12
12
10
8
8
6
6
6
incline
1
1
1
2
1
0
0
1
1
1
3
3
4
5
6
4
Preset program 6
level
1
2
3
4
5
6
7
8
9
10
11
12
13
14
15
16
speed
4
10
12
14
10
6
12
14
14
10
6
10
14
10
6
4
incline
0
2
1
1
2
3
1
1
2
2
1
1
3
1
3
1
3.CUSTOMER PROGRAM
a)When machine stops,press[USER PROG] enter into customer program.Firstly set
speed,then incline,the last is time.
b)Speed and incline programs are divided into 16 sections.Each section
scope:1-16.0km.Revolve the speed will change the speed setting.Press the [INCLINE] will
change the incline setting. Press [SPEED] to confirm the mode and enter the next setting
after finish.
c)After setting,press[START] ,the machine will run according to the new mode.
d)Without change,The machine will remember and run according to the last setting.
e)When the setting time is counting down to 0,the machine will stop.
4. HEART RATE TEST
Grasp the heart rate test handlebar for 5-10 seconds,your heart rate result will show on the
[PULSE]window.
5. AUTO POWER-OFF
The machine will be power off,if not press any key for 10 minutes.When it stops.
The machine will start to run,if press any key,when it stops.
17

6. STOP
a) Press [stop], the machine will stop
b) Press[pause],the machine will suspend
c) “key cord” Plug Key-cord,the machine stops ;”tap button”press the button,the machine
stops.
d) Turn off the button,the machine will stop.
TREADMILL FUNCTION:
RUN:
1.Strengthen your body,lose weight,strengthen vital capacity.
2.Recure the one whose leg injuired.
OPERATIONAL APPROACH:
1. Hold the handlebar,press the [START] key ,then press speed knob and adjust the speed
to 2.5-3.5km/H(This is a safe speed for start).Step on the belt,and run with belt at the
same time quickly.
2. After a few minutes,press[speed] and increase the speed in a slowly way.
EXERCISE GUIDELINES:
NOTICE BEFORE EXERCISE:
This series is for home use.The maximum time is 4 hours for each day use.
Set your foot on the treadle,grasp the handlebar to keep body balance,
MAINTENANCE
1.unplug the unit before maintenance
2.check and fix the looseness of parts
3.using the moist cloth to clean the surface and operation panel, be out of alkane to clean
any parts of machine.
4.using clean and smooth cloth to clean the running deck.
18
Table of contents
Other hattrick Treadmill manuals

hattrick
hattrick OLYMPIC User manual

hattrick
hattrick TRENDY M User manual

hattrick
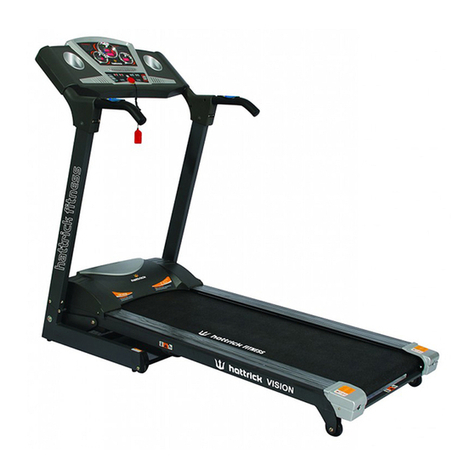
hattrick VISION Instruction Manual

hattrick
hattrick STYLE M Instruction Manual

hattrick
hattrick EVOLUTION User manual

hattrick
hattrick MATRIX Instruction Manual

hattrick
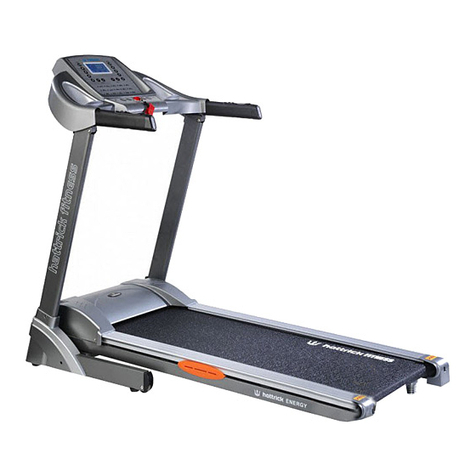
hattrick Energy User manual

hattrick
hattrick RB-4000 M Instruction Manual

hattrick
hattrick GORDION Instruction Manual

hattrick
hattrick Synergy User manual