Haussmann 59595064 User manual

Our Customer service staff is available to help you. For help with product assembly, to report damaged or missing parts, or for any other
information, please call our toll-free number: 1-866-206-0888.
Register your product
We invite you to register your product online to make future communications easier. To do so, simply visit our website www.haussmanntools.
com.
SAVE THIS MANUAL
You will need this manual for safety instructions, operating procedures, and warranty. Put it and the original sales invoice in a safe, dry place
for future reference.
Notre personnel du service à la clientèle est disponible pour vous aider. Pour obtenir de l’aide pour le montage de votre produit, pour signaler
des pièces endommagées ou manquantes, ou pour toute autre information, veuillez composer notre numéro sans frais: 1-866-206-0888.
Enregistrez votre produit
Nous vous invitons à enregistrer votre produit en ligne afin de faciliter les communications; pour ce faire, veuillez visiter le www.
outilshaussmann.com
CONSERVEZ CE GUIDE
Vous aurez besoin de ce guide pour les règles de sécurité, le fonctionnement et la garantie. Conservez-le avec votre facture d'origine dans
un endroit sûr au sec pour référence future.

ENGLISH
1

ENGLISH
• Safety symbols................................................................................
• Safety instructions............................................................................
• Additional safety warnings................................................................
• Application........................................................................................
• Technical specications....................................................................
• Assembly..........................................................................................
• Operation..........................................................................................
• Maintenance.....................................................................................
• Warranty...........................................................................................
• Parts list...........................................................................................
• Schematic drawing...........................................................................
Please read all of the safety and operating instructions
carefully before using this tool. Please pay particular attention to all
sections of this User Guide that carry warning symbols and notices.
Observe caution and safety notes.
n0 No-load speed
V~ Voltage
Protect electrical power tool from moisture.
Check that the tool, power cord and plug are in
good condition.
Safety class II
Please discard or recycle your product and its
packaging according to your municipal bylaws.
p.3
p.4
p.6
p.7
p.8
p.8
p.9
p.12
p.12
p.13
p.14
2

ENGLISH
Read all safety warnings and all instructions. Failure to
follow the warnings and instructions may result in electric shock, re
and/or serious injury.
Cluttered or dark areas invite
accidents.
Power
tools create sparks which may ignite the dust or fumes.
Distractions can cause you to lose control.
Double insulation eliminates the need for the three-
wired grounded power cord and grounded power supply system.
Water
entering a power tool will increase the risk of electric shock.
Keep cord away from
heat, oil, sharp edges and moving parts.Damaged or entangled
cords increase the risk of electric shock.
Use of a GFCI device reduces the risk of electric shock.
These cords are rated for
outdoor use and reduce the risk of electric shock.
Do not use a power tool while you
are tired or under the inuence of drugs, alcohol or medication. A
moment of inattention while operating power tools may result in
serious personal injury.
Protective equipment such as dust mask, non-skid
safety shoes, hard hat, or hearing protection used for appropriate
conditions will reduce the risk of personal injuries.
Ensure the switch is in the off-
3

ENGLISH
position before connecting to power source, picking up or carrying
the tool. Carrying power tools with your nger on the switch or
energizing power tools that have the switch on invites accidents.
A wrench or a key left attached to a rotating part of the
power tool may result in personal injury.
This enables better control of the power tool in unexpected
situations.
Keep
your hair, clothing and gloves away from moving parts. Loose
clothes, jewelry or long hair can be caught in moving parts.
The correct use will do the job better and safer at
the rate for which the tool was designed.
Any power tool that cannot be controlled with the switch is
dangerous and must be repaired.
Such preventive safety measures reduce the
risk of starting the power tool accidentally.
Power tools are
dangerous in the hands of untrained users.
If damaged, have
the power tool repaired before use. Many accidents are caused by
poorly maintained power tools.
Use of the power tool for operations
different from those intended could result in a hazardous situation.
The use of
any attachment or accessory other than those included could result
in damage to the power tool and injury to the operator.
Failure to do so may
result in considerable danger to the user, including electric shock or
injury.
It is
recommended that you have an appropriate re extinguisher
available at all times while working.
4

ENGLISH
Contact with a "live" wire will make exposed metal parts of
the tool "live" and shock the operator.
Holding the work by hand or against
your body is unstable and may lead to loss of control.
If this situation is
unavoidable, disconnect all fuses or circuit breakers feeding this
worksite.
Before plugging the tool in,
check that the trigger lock is "OFF". Accidental start-ups could cause
injury.
If the switch is locked "ON" during the use, be ready for
emergency situations to switch it "OFF", by rst pulling the trigger then
immediately releasing it without pressing the "Lock-ON" button
The proximity of the blade to your hand is hidden
from your sight.
The reciprocating blade holder can pinch your ngers.
Bent blade can break easily or
cause kickback.
Tool can chatter or vibrate if blade speed is too slow
at beginning of cut; a kickback may also occur.
Use a dust mask or respirator for applications which generate dust
Small or thin material may ex or vibrate with the
blade, causing loss of control.
Loose adjusting screws and holders can cause
the tool or blade to slip and loss of control may result.
5

ENGLISH
Some dust created by power sanding, sawing, grinding,
drilling and other construction activities contains chemicals known to the
state of California to cause many serious diseases such as cancer.
Some examples of these chemicals are:
• lead from lead-based paints
• crystalline silica from bricks and cement and other masonry products,
and arsenic and chromium from chemically-treated lumber (CCA).
Your risk from these exposures varies, depending on how often you do
this type of work. To reduce your exposure to these chemicals: work
in a well ventilated area, and work with approved safety equipment,
such as dust masks that are specially designed to lter out microscopic
particles.
6

ENGLISH
Failure to follow the
warnings and instructions may result in electric shock, re and/or
serious injury.
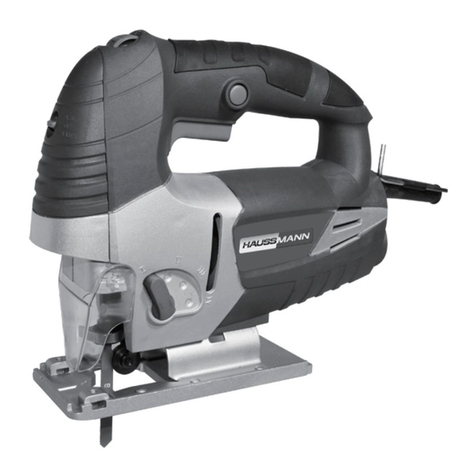
The HAUSSMANN jigsaw is intended for versatile wood cutting
applications.
Carefully remove the tool from its packaging and check that the
following parts are present:
Jig saw
-- Allen wrench
-- 1pc blade for wood
-- 1pc blade for steel
If any parts are missing or damaged, please contact Customer Service
at the number indicated on the front page of this manual
The numbering of the tool features refers to the illustration of the tool on
the graphics page.(see gure 1)
1. Switch
2. Lock-on button
3. Variable speed switch
4. Saw blade
5. Footplate sleeve
6. Footplate
7. Footplate bevel scale
8. Orbital function lever
9. Fence xing bolt
10. Allen wrench
11. Dust tube adapter
12. 1pc blade for wood
13. 1pc blade for steel
7

ENGLISH
Product Code 59595064
Model number M1Q-DU12-80
Voltage rating 120V AC / 60Hz
Current rating 6.5 AMP
No-load speed 0-3000 SPM
Stroke length 23/32″ (1.8 MM)
Max. cutting capacity Steel 5/16″ (8 MM)
Wood 3 3/32″ (80 MM)
Bevel range 0º - 45º
Always ensure that the tool is switched off and the plug
is removed from the power source before making any adjustments or
performing maintenance procedures.
The depth of cut should be set according to the thickness of the
workpiece.
• Disconnect plug from power source and remove the footplate sleeve
• Loosen the depth adjustment knob located between the guard and the
jigsaw handle.
• Insert the saw blade (teeth in cutting direction) until it latches in the
plunger. When inserting the saw blade, the back of the blade must rest
in the groove of the guide roller.
• To remove blade, lift tool-less blade change cover up with index nger
and thumb and remove blade.
• Use with T shank jigsaw blades only.
Always use the correct voltage: The voltage of the power
source must match with the values on the nameplate of the power tool.
• To switch the jigsaw on, squeeze the switch trigger (1).
• For continuous cutting, squeeze the switch trigger (1) and depress the
lock-on button (2). Once lock-on button is depressed, release the switch
TOOL-LESS
BLADE CHANGE
COVER BLADE
ROLLER
GUIDE
Fig. 2 Fig. 2
8

ENGLISH
trigger.
• To switch the tool off, release the switch trigger. When in continuous
cutting, squeeze the trigger again to disengage the lock.
A speed control switch(3)is located on the top of the saw. The speed
increases as the switch is turned from a low speed setting of 1 to a high
speed setting of 7.
The footplate can be set to a left or right bevel angle of up to 45º.
• Disconnect plug from power source and remove the footplate sleeve.
• Use Allen wrench to loosen the bolt inside the footplate to unlock the
footplate.
• Pull the footplate backward and set the desired angle according to the
scale or push the footplate forward for xed stops at 0º, 15º, 30º or 45º.
Use a protractor to verify the angle accuracy.
• Tighten the bolt again with Allen wrench.
• The orbital action lever will regulate the orbital action from “0” position
for normal up and down motion to “III” position for maximum orbital
action for faster cutting in softer materials.
• When minimal splintering is desired, please use “0” position.
• Use a ne tooth blade.
• Cut from the back surface of the workpiece
• To minimize splintering, clamp a piece of scrap wood or hardboard to
both sides of the workpiece and saw through this assembly.
Fig. 4
9

ENGLISH
• Use a ne tooth blade for metal.
• Be aware that sawing metal will take much more time than sawing
wood.
• When cutting thin metal, clamp a piece of scrap wood to the back
surface of the workpiece and cut through this sandwich
• Apply a thin lm of oil along the intended line of cut for easier operation
and longer blade life. For cutting aluminum, kerosene is preferred.
• Ripping and circular cutting without a pencil line are easily done with
the rip fence/circular guide(not included).
• Insert the fence and tighten the fence xing bolt.
• When ripping, position as shown in gure 5, set the cross bar at the
desired distance. The cross bar should be down and against the straight
edge of the workpiece.
• When circular cutting, draw a circle and drive a nishing nail in the
center of circle, attach fence to saw with cross bar upside, put the fence
on the nail with selected hole and squeeze the trigger, slowly push the
saw forward, place small wedges in the cut when near the end of the
cut.
• Plunge cutting is useful and time-saving in making rough openings in
softer materials. It is not necessary to drill a hole for an inside or pocket
cut.
• Draw lines for the opening, hold the saw rmly, tilt it forward so that the
tip of the saw foot rests on the work, but with the blade well clear of the
work.
• Start the motor, and then very gradually lower the blade. When it
touches, continue pressing down on the tip of the saw foot slowly
pivoting the saw like a hinge until the blade cuts through and the foot
rests at on the work. Then saw ahead on the line of cut line. We do not
recommend plunge cutting with a scroll blade .
• To make sharp corners, cut up to the corner, then back up slightly
before rounding the corner. After the opening is complete, go back to
each corner and cut it from the opposite direction to square it off. Do not
try to plunge cut into hard materials such as steel.
Fig. 5 Fig. 6
10

ENGLISH
In order to improve dust extraction from the working surface, the saw
has a sawdust blowing system, which clears dust from the cutting line.
In addition, a vacuum cleaner adapter can be used to connect to an
ordinary household vacuum cleaner. The adapter is tted into the outlet
at the rear of the jigsaw. The vacuum extraction system will work most
effectively when the safety guard is in the down position
Fig. 7 Fig. 8
11

ENGLISH
Always ensure that the tool is switched off and the plug is
removed from the power source before making any adjustments
or performing maintenance procedures.
• Before any work on the tool, ensure it is turned off and unplugged from
the power source.
• For safe and proper working, always keep the tool and ventilation slots
clean.
• Regularly check to see if any dust or foreign material has entered the
slots near the motor and around the on/off switch.
• Use a soft brush to remove any accumulated dust.
• Wear safety glasses to protect your eyes while cleaning.
• If the body of the tool needs cleaning, wipe it with a soft damp cloth.
• A mild detergent can be used but no products containing alcohol,
petrol or other harsh cleaning agent.
• Never use caustic agents to clean plastic parts.
• Lubricate all moving parts at regular intervals.
Thank you for investing in a HAUSSMANN power tool. These products
have been made to demanding, high-quality standards and are
guaranteed for domestic use against manufacturing faults for a period of
36 months from the date of purchase.
This guarantee does not affect your statutory rights. In case of any
malfunction of your tool (failure, missing part, etc.), please contact one
of our service technicians at our toll free service line at 1-866-206-0888
from 8 AM to 6 PM, Monday to Friday, Eastern time. RONA reserves the
right to repair or replace the defective tool, at its discretion.
The product is guaranteed for 36 months if used for normal trade
purposes. Any guarantee is invalid if the product has been overloaded
or subject to neglect, improper use or an attempted repair other than by
an authorized agent.
Heavy-duty, daily professional or hire usage are not guaranteed. Due
to continuous product improvement, we reserve the right to change the
product specication without prior notice.
Register your product
We invite you to register your product online to
make future communications easier. To do so, simply visit our website
www.haussmanntools.com.
12

ENGLISH
1
2
3
4
5
6
7
8
9
10
11
12
13
14
15
16
17
18
19
20
21
22
23
24
25
26
27
28
29
30
31
32
33
34
35
36
37
38
39
40
41
42
43
Ball slideway
Plunger assembly
Scrolling block
Gear assembly
Needle bearing
Self-tapping screw ST4×25
Washer
Gasket-1
Rotor
Carbon brush
Brush support
Gasket-2
Dust tube
Stator
Block-1
Steel wire
Plunger sliding plate
Variable speed switch
Self-tapping screw ST3×8
Spring-1
Pin
Switch
Block-2
Cable xing plate
Self-tapping screw ST4×16
Allen wrench
Safety guard
Orbital function lever
Circlip
Housing
Lever shaft
Steel ball Ø4
Spring-2
Allen wrench
Orbit shaft
Torsion spring
Cable sleeve
Cable
Hex socket bolt M4X8
Footplate assembly
Footplate xing plate-1
Footplate xing plate-2
Hex socket bolt M4X10
Please refer to the schematic drawing on the next page.
13

ENGLISH
14

FRANÇAIS
1
2
3
4
5
6
7
8
9
10
11
12
13
14
15
16
17
18
19
20
21
22
23
24
25
26
27
28
29
30
31
32
33
34
35
36
37
38
39
40
41
42
43
Glissière de bille
Montage du piston
Bloc de délement
Montage d’engrenage
Roulement à aiguille
Vis autotaraudeuse ST4×25
Rondelle
Joint d’étanchéité-1
Rotor
Balai de charbon
Support de balai
Joint d’étanchéité-2
Tube à poussière
Stator
Bloc-1
Fil d’acier
Plaque coulissante de piston
Interrupteur à vitesse variable
Vis autotaraudeuse ST3×8
Ressort-1
Broche
Interrupteur
Bloc-2
Plaque de xation du câble
Vis autotaraudeuse ST4×16
Clé Allen
Protecteur de sécurité
Levier de fonction orbitale
Circlip
Carter
Arbre de levier
Bille d’acier Ø4
Ressort-2
Clé Allen
Arbre orbital
Resort de torsion
Manchon de câble
Câble
Vis à six pans creux M4X8
Montage de la semelle
Plaque de xation de la semelle -1
Plaque de xation de la semelle -2
Vis à six pans creux M4X10
Voir le schéma à la page précédente.
15

FRANÇAIS
• Schéma........................................................................................... p.15
• Liste des pièces................................................................................p.14
• Symboles d'avertissement................................................................p.16
• Consignes de sécurité......................................................................p.17
• Consignes de sécurité additionnelles...............................................p.19
• Application........................................................................................p.20
• Caractéristiques tech niques............................................................p.21
• Assemblage......................................................................................p.21
• Fonctionnement ...............................................................................p.23
• Entretien ..........................................................................................p.26
• Garantie ...........................................................................................p.26
Veuillez lire attentivement toutes les instructions de
sécurité et de fonctionnement avant d’utiliser cet outil. Veuillez accorder
une attention particulière à tous les paragraphes de ce guide d'utilisation
contenant des symboles d’avertissement et des remarques.
Respecter les avertissements et les remarques de
sécurité.
n0 Vitesse à vide
V~ Tension
Protéger l’outil électrique contre l’humidité
Vérier que l’appareil, le cordon d’alimentation et la
prise sont en bon état.
Classe de sécurité II
Veuillez jeter ou recycler votre produit et l'emballage
en fonction de la réglementation de votre
municipalité.
16

FRANÇAIS
Lisez attentivement toutes les consignes de
sécurité et toutes les instructions. Le non-respect des avertissements et
des instructions peuvent entraîner un choc électrique, un incendie et/ou
une grave blessure.
Les zones
de travail encombrées ou sombres favorisent les accidents.
Les outils électriques provoquent des
étincelles susceptibles d’enammer la poussière ou les vapeurs.
Toute distraction peut vous en
faire perdre le contrôle.
La
double isolation élimine le besoin d'un cordon d'alimentation à trois
ls mis à la terre et un système d'alimentation électrique mis à la
terre.
De l'eau pénétrant dans un outil électrique
augmentera le risque de choc électrique.
Des cordons endommagés ou
enchevêtrés augmenteront le risque de choc électrique.
.
L'utilisation d'un tel dispositif réduit le risque de choc électrique.
Ces cordons ont des caractéristiques nominales adéquates pour
une utilisation à l'extérieur et permettent de réduire le risque de
choc électrique.
17

FRANÇAIS
Un moment d’inattention lors de la manipulation
d’un outil électrique peut provoquer des blessures graves.
L’utilisation d’un équipement de protection
tel qu’un masque à poussière, des chaussures de sécurité antidérapantes, un
casque ou une protection auditive – en fonction des conditions - minimise les
blessures corporelles.
Assurez-vous que l’interrupteur
est à la position OFF avant de raccorder l’outil à l’alimentation électrique, et de le
prendre ou de le transporter. Porter des outils électriques en ayant le doigt posé
sur l’interrupteur ou brancher l'outil alors qu'il est en état de marche favorise les
accidents.
Une clé de réglage ou de serrage attachée à une partie
rotative de l’outil peut provoquer une blessure.
Ceci permet de mieux
maîtriser l’outil dans des situations imprévues.
Ne portez pas des vêtements
amples ni de bijoux. Maintenez vos cheveux, vos vêtements et vos gants éloignés
des parties en mouvement. Les vêtements amples, les bijoux ou les cheveux
longs peuvent être happés par les parties en mouvement.
Une utilisation correcte garantit un travail meilleur et plus sûr au
rythme pour lequel l'outil a été conçu.
Tout outil électrique ne pouvant pas être commandé par
l’interrupteur est dangereux et doit être réparé.
Ces mesures de sécurité préventives minimisent le risque de
démarrage accidentel de l’outil.
Les outils électriques laissés aux mains d’utilisateurs inexpérimentés
sont dangereux.
De nombreux accidents sont provoqués par
des outils mal entretenus.
L'utilisation d'accessoires non recommandés peut causer des blessures et des
dommages à l'outil électrique.
18

FRANÇAIS
Utiliser l’outil pour des travaux autres que ceux pour
lesquels il a été conçu pourrait entraîner une situation dangereuse.
Omettre de respecter cette consigne peut entraîner un grave
danger pour l'utilisateur, un risque d'électrocution et de blessures.
Il est recommandé de
disposer d'un extincteur électrique en tout temps.
Le contact avec un l
sous tension met les parties métalliques exposées de l’outil sous
tension, ce qui peut entraîner un choc électrique pour l'utilisateur.
Tenir la
pièce à la main ou contre votre corps est instable et peut causer
une perte de contrôle.
Si cette situation est inévitable, fermer tous les fusibles
ou disjoncteurs alimentant ce site de travail.
Avant de brancher l’outil, vérier que
le verrouillage de la gâchette est désactivé. Les démarrages
accidentels peuvent causer des blessures.
Ne pas placer la main sous le matériau lorsqu'une coupe est en
cours. La proximité de la lame par rapport à votre main est cachée
de la vue.
L’outil peut
trembler ou vibrer si la vitesse de la lame est trop lente au début
de la coupe; un rebond peut également survenir.
. Porter aussi un masque
antipoussières ou un respirateur pour les applications qui génèrent
de la poussière.
19
This manual suits for next models
1
Table of contents
Languages:
Other Haussmann Power Tools manuals

Haussmann
Haussmann H2T00LKIT-004 User manual

Haussmann
Haussmann HFNC1590 User manual

Haussmann
Haussmann PT102706 User manual

Haussmann
Haussmann HCN45R User manual

Haussmann
Haussmann 59595062 User manual

Haussmann
Haussmann PT100708 User manual

Haussmann
Haussmann JS192 User manual

Haussmann
Haussmann DP1000 User manual

Haussmann
Haussmann MT250 User manual

Haussmann
Haussmann CJB-HG8 User manual