manuals.online logo
Brands
  1. Home
  2. •
  3. Brands
  4. •
  5. hayneedle
  6. •
  7. Indoor Furnishing
  8. •
  9. hayneedle REDU047-1 User manual

hayneedle REDU047-1 User manual

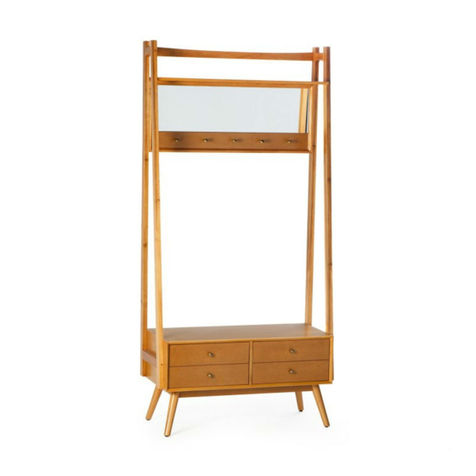
ITEM NAME:Belham Living Linen Tower
SKU: REDU047-1; REDU047-2
For assistance with assembly, please contact customer service
1-888-880-4884
1/14
PRE-ASSEMBLY PREPARATION:
PANEL AND FITTINGS IDENTIFICATION:
!
DO NOT LET CHILDREN PLAY IN OR AROUND THE UNIT DUE TO THE POSSIBLE
RISK OF FINGER ENTRAPMENT
• Please read through these instructions before beginning assembly.
• Two adults are recommended for assembly.
• Clear out the space for assembly and lay out all parts based on Parts List, extra room
will allow you to easily determine if all the pieces are present.
• Save all packing materials until assembly is complete to avoid accidentally discarding
smaller parts or hardware.
• Keep small parts and pieces away from children until fully assembled.
• Please check for any loose screws and tighten them before you use.
Top Panel(1) Qty:1 Qty:1 Qty:1Left Side (2) Right Side (3)
2/14
Door Frame (4) Qty:1 Qty:1 Qty:2Back Panel (5) Glass Shelf (6)
Shelf (7) Qty:1 Qty:1 Qty:1Bottom Panel (8) Left Side (9)
Legs (10) Qty:4 Qty:1 Qty:1Right Side (11) Front Frame (12)
Qty:2Drawer Front (15)
Back Panel (13) Qty:1 Qty:3Drawer Bottom (14)
505mm
390mm
865mm
390mm
865mm
390mm
880mm
505mm
885mm
493mm
472mm
381mm
499mm
396mm
505mm
390mm
785mm
390mm
40mm
40mm
90mm
785mm
390mm
800mm
505mm
809mm
493mm
392mm
348mm
421mm
154mm
PANEL AND FITTINGS IDENTIFICATION:
HARDWARE LIST:
3/14
Drawer Back (16) Qty:2 Qty:2 Qty:2Drawer Left (17) Drawer Right (18)
Magnet (A) Qty:2 Qty:8 Qty:1Bracket (B) Handle (C)
Drawer Right (22) Qty:1
Drawer Front (19) Qty:1 Qty:1 Qty:1Drawer Back (20) Drawer Left (21)
Handle (D) Qty:4 Qty:1 Qty:20Allen Key (E) Cam Lock (F)
Qty:44 Qty:12Cam Pin (H) Wooden Dowel (I)Cam Lock (G) Qty:24
Wooden Dowel (J) Qty:4 Qty:8 Qty:9Bolt (K) Bolt (L)
Ø8x30mm
1/4x45mm 4X18mm
382mm
130mm
350mm
130mm
350mm
130mm
343mm
277mm
382mm
300mm
350
300mm
350
300mm
Ø8x50mm
STEP-BY-STEP ASSEMBLY:
1
STEP 1:
Fix Magnets (A) to the pre-fixed block of Door Frame (04) using Screws (M) and tighten with
an across headed screwdriver (not supplied).
4/14
HARDWARE LIST:
Screw (M) Qty:4 Qty:23 Qty:2Screw (N) Screw (O)
Qty:2 Qty:4Plastic Rope (Q) Bracket (R)Wall Plug (P) Qty:2
3X15mm 4X40mm
3x12mm
A
A
M
M
04
A
M
3X15mm
Phillips Screwdriver
(not provided)
Screw (S) Qty:2
ground to avoid any scratch.
Attention: This unit can't be assembled on hard ground, it needs to be assembled on protection
STEP-BY-STEP ASSEMBLY:
2
STEP 2:
Fix Cam Pins (H) and Wooden Dowels (I) to Top Panel (01), then attach Top Panel (01) to
Sides (02 and 03) using Cam Locks (F) and tighten with an across headed screwdriver
(not supplied). See details as below.
3
STEP 3:
Fix Cam Pins (H) to the Door Frame (04), then attach Sides (02 and 03) and Top Panel (01) to
Door Frame (04) using Cam Locks (F) and tighten with an across headed screwdriver
(not supplied). See details as below.
5/14
01
03
02
I
I
I
I
F
F
F
DETAIL STEP PLEASE SEE THE BELOW PICTURE.
(1) (2) (3) (4)
HF
DETAIL STEP PLEASE SEE THE BELOW PICTURE.
(1) (2) (3) (4)
HF
H
H
H
04
H
H
H
H
H
F
F
H
F
STEP-BY-STEP ASSEMBLY:
4
STEP 4:
Attach Back Panel (05) to the assembled unit using Screws (N) and tighten with an across
headed screwdriver (not supplied).
5
STEP 5:
Stand up the unit and fix the Handle (C) to the Door Frame using Bolts (L) and tighten with
an across headed screwdriver (not supplied).
6/14
05
N
N
N
N
N
N
N
N
N
L
L
C
C
STEP-BY-STEP ASSEMBLY:
7/14
6
STEP 6:
Fix Cam Pins (H) and Wooden Dowels (I) to Bottom Panel (08), then attach Bottom Panel (08)
to Sides (09 and 11) using Cam Locks (F) and tighten with an across headed screwdriver
(not supplied). See details as below.
7
STEP 7:
Fix Legs (10) to the Bottom Panel using Wooden Dowels (I) and Bolts (K), tighten with Allen
Key (E).
DETAIL STEP PLEASE SEE THE BELOW PICTURE.
(1) (2) (3) (4)
HF
H
H
H
F
F
F
I
I
I
08
H
F
I
K
K
K
K
I
I
I
I
K
I
09
11
10
10
10
10
10
E
E
STEP-BY-STEP ASSEMBLY:
8/14
8
STEP 8:
Fix Cam Pins (H) to Front Frame (12), then attach the assembled Bottom Panel and Sides to
Front Frame (12) using Cam Locks (F) and tighten with an across headed screwdriver
(not supplied). See details as below.
9
STEP 9:
Attach Back Panel (13) to the assembled unit using Screws (N) and tighten with an across
headed screwdriver (not supplied).
DETAIL STEP PLEASE SEE THE BELOW PICTURE.
(1) (2) (3) (4)
HF
N
H
H
H
H
H
H
F
F
H
F
N
N
N
N
N
N
N
N
N
12
13
STEP-BY-STEP ASSEMBLY:
9/14
10
STEP 10:
●Insert the Wooden Dowels (J) to the assembled bottom unit, place the Shelf (07) and the
assembled top unit on aligning the pre-fixed dowels.
●Fix Bolts (K) to lock the top unit and tighten with Allen Key (E).
11
STEP 11:
Fix more Screws (N) between the back panels.
07
J
J
J
N
N
N
K
K
07
10/14
STEP-BY-STEP ASSEMBLY:
12
STEP 12:
●Fix Cam Pins (H) to Drawer Sides (17 and 18),
then attach them to Drawer Back (16) using Cam
Locks (G).
●Insert Drawer Bottom (14) to the assembled
unit aligning the grooves.
13
STEP 13:
●Fix Cam Pins (H) to Drawer Sides (21 and 22), then attach them to Drawer Back (20) using
Cam Locks (G).
●Insert Drawer Bottom (14) to the assembled unit aligning the grooves.
●Fix Cam Pins (H) to Drawer Front (19), then attach it to Drawer Sides using Cam Locks (G).
See details as below.
●Fix Handle (D) to Drawer Front (19) using Bolts (L).
DETAIL STEP PLEASE SEE THE BELOW PICTURE.
(1) (2) (3) (4)
H
DETAIL STEP PLEASE SEE THE BELOW PICTURE.
(1) (2) (3) (4)
H
G
G
G
GH
H
H
16 18
17
14
15
15
D
LL
G
G
G
G
G
H
HH
20
21
22
14
G
G
G
H
H
H
19
LL
D
D
●Fix Cam Pins (H) to Drawer Front (15), then
attach it to Drawer Sides using Cam Locks (G).
See details as below.
●Fix Handle (D) to Drawer Front (15)
using Bolts (L).
11/14
STEP-BY-STEP ASSEMBLY:
14
STEP 14:
Insert Brackets (B) into the sides of the unit and place on the Glass Shelf (06).
B
B
06
06
B
B
12/14
STEP-BY-STEP ASSEMBLY:
15
STEP 15:
Place the drawers into the assembled cabinet.
Move the ball runner to front before
put in the drawers.
13/14
STEP-BY-STEP ASSEMBLY:
16
STEP 16:
●Fix two Brackets (R) to the back top of the unit using Screws (S).
●Use electric drill to drill two small holes on the desired location of wall, insert Wall Plugs (P)
into the holes by rubber mallet, use Screws (B) to attach the Brackets (R) onto wall.
●Then use Plastic Ropes (Q) to link the product and wall together as shown.
Note: This is an option step. For safety, the tilting prevent hardware should be used
as a part of assembly.
P
Wall
S
QR
R
B
MAINTENANCE AND CARE TIPS FOR WOOD FURNITURE:
-Always dust, wipe and clean in the direction of the wood grains.
-Check and re-tighten screws/blots after the product has been used for a period of time.
-It is best to keep your furniture in a climate controlled environment. Extreme temperature and humidity changes can
-Heat creates chemical changes in the furniture finish. As a result, whitish spots may appear.
14/14

This manual suits for next models

1

Other hayneedle Indoor Furnishing manuals

hayneedle Coral Coast Indoor/outdoor Mission Slat Rocking... User manual

hayneedle

hayneedle Coral Coast Indoor/outdoor Mission Slat Rocking... User manual

hayneedle Glider and Ottoman DAS005-1 User manual

hayneedle

hayneedle Glider and Ottoman DAS005-1 User manual

hayneedle MEIE013-1 User manual

hayneedle

hayneedle MEIE013-1 User manual

hayneedle LFY110-1 User manual

hayneedle

hayneedle LFY110-1 User manual

hayneedle STIP008-1 User manual

hayneedle

hayneedle STIP008-1 User manual

hayneedle tortuga cay User manual

hayneedle

hayneedle tortuga cay User manual

hayneedle SBP001-1/2 User manual

hayneedle

hayneedle SBP001-1/2 User manual

hayneedle STIP007-1 User manual

hayneedle

hayneedle STIP007-1 User manual

hayneedle ANSE017-1 User manual

hayneedle

hayneedle ANSE017-1 User manual

hayneedle TDJ166 User manual

hayneedle

hayneedle TDJ166 User manual

hayneedle Belham Living Rowan Tub Rocking Chair... User manual

hayneedle

hayneedle Belham Living Rowan Tub Rocking Chair... User manual

hayneedle Belham Living Carter 4-Drawer File Cabinet User manual

hayneedle

hayneedle Belham Living Carter 4-Drawer File Cabinet User manual

hayneedle Belham Living Decker Mid Century Modern Bench... User manual

hayneedle

hayneedle Belham Living Decker Mid Century Modern Bench... User manual

hayneedle Belham Living Carter Mid Century Modern Coffee Table... User manual

hayneedle

hayneedle Belham Living Carter Mid Century Modern Coffee Table... User manual

hayneedle Mid Century Modern Finn Hall Tree REDU134-1 User manual

hayneedle

hayneedle Mid Century Modern Finn Hall Tree REDU134-1 User manual

hayneedle ZEST011-1 User manual

hayneedle

hayneedle ZEST011-1 User manual

hayneedle ID591-1 User manual

hayneedle

hayneedle ID591-1 User manual
hayneedle MEGG095-1 User manual

hayneedle

hayneedle MEGG095-1 User manual

hayneedle STIP033-1 User manual

hayneedle

hayneedle STIP033-1 User manual

hayneedle Richland Mini Hall Tree LFY103-1 User manual

hayneedle

hayneedle Richland Mini Hall Tree LFY103-1 User manual

hayneedle ID591-1 User manual

hayneedle

hayneedle ID591-1 User manual

Popular Indoor Furnishing manuals by other brands

Lifestyle Furniture F9556CK Assembly instructions

Lifestyle Furniture

Lifestyle Furniture F9556CK Assembly instructions
Trendway Intrinsic FSTD Open Hutch installation instructions

Trendway

Trendway Intrinsic FSTD Open Hutch installation instructions

interion 695737 Assembly instructions

interion

interion 695737 Assembly instructions
Galipette MARCEL P2A manual

Galipette

Galipette MARCEL P2A manual

ShelterLogic 90401 Assembly instructions
ShelterLogic

ShelterLogic 90401 Assembly instructions
HULALA HOME KCBSD0504 Assembly instructions
HULALA HOME

HULALA HOME KCBSD0504 Assembly instructions
Patioflare PF10030 Series Assembly instruction

Patioflare

Patioflare PF10030 Series Assembly instruction

Powell 149-534A Assembly instructions
Powell

Powell 149-534A Assembly instructions

ROOMS TO GO 86PK-41 Assembly instructions

ROOMS TO GO

ROOMS TO GO 86PK-41 Assembly instructions

Habitat Bold 804303 manual

Habitat

Habitat Bold 804303 manual

Flash Furniture NAN-TG-2046-BK-GG Assembly instructions

Flash Furniture

Flash Furniture NAN-TG-2046-BK-GG Assembly instructions

Forte SPHM01B-0006 Assembling Instruction

Forte

Forte SPHM01B-0006 Assembling Instruction

diotti BRIGHTON Assembly instruction

diotti

diotti BRIGHTON Assembly instruction

StudioDesk BEAT 2.0 Series Assembly manual

StudioDesk

StudioDesk BEAT 2.0 Series Assembly manual

NOA & NANI Järstorp Assembly instructions

NOA & NANI

NOA & NANI Järstorp Assembly instructions

Jysk CLASSIC 5213901 Assembly instructions

Jysk

Jysk CLASSIC 5213901 Assembly instructions

Suncast SS500 Assembly instructions

Suncast

Suncast SS500 Assembly instructions

VCM LUXALA instruction manual

VCM

VCM LUXALA instruction manual

manuals.online logo
manuals.online logoBrands
  • About & Mission
  • Contact us
  • Privacy Policy
  • Terms and Conditions

Copyright 2025 Manuals.Online. All Rights Reserved.