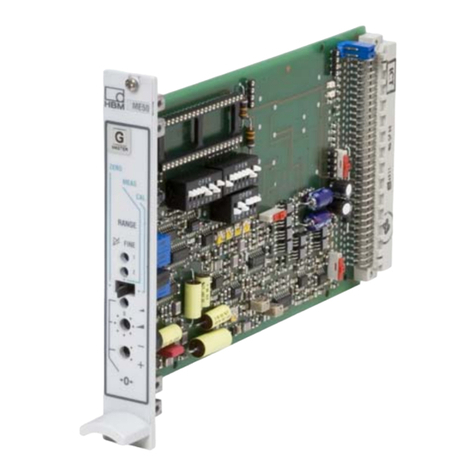
HBM AE101 User manual

A0114-6.3 en
Clip Electronic
Amplifier for installation
onto mounting rails
Clip IG
Industrial amplifier in
cast housing
Operating manual

3
Clip
HBMA0114-6.3 en
Contents Page
Safety instructions 4. . . . . . . . . . . . . . . . . . . . . . . . . . . . . . . . . . . . . . . . . . . . . . .
1 Application 7. . . . . . . . . . . . . . . . . . . . . . . . . . . . . . . . . . . . . . . . . . . . . . . . . .
2 Mounting / Dismounting 8. . . . . . . . . . . . . . . . . . . . . . . . . . . . . . . . . . . . . .
3 Connection 9. . . . . . . . . . . . . . . . . . . . . . . . . . . . . . . . . . . . . . . . . . . . . . . . . .
3.1 Measuring amplifiers AE101, AE301, AE501 10. . . . . . . . . . . . . . .
3.2 GR201, EM201, EM201K2, TS101 additional units 12. . . . . . . . . . . .
3.3 NT101A, NT102A Power supply 14. . . . . . . . . . . . . . . . . . . . . . . . . .
4 Setup 15. . . . . . . . . . . . . . . . . . . . . . . . . . . . . . . . . . . . . . . . . . . . . . . . . . . . . .
4.1 AE101 Measuring amplifiers 15. . . . . . . . . . . . . . . . . . . . . . . . . . . . .
4.2 AE301 Measuring amplifier 18. . . . . . . . . . . . . . . . . . . . . . . . . . . . . .
4.3 AE501 Measuring amplifier 22. . . . . . . . . . . . . . . . . . . . . . . . . . . . . .
4.4 GR201 Double limit-value switch 25. . . . . . . . . . . . . . . . . . . . . . . . . .
4.5 EM201 / EM201K2 Output stage 28. . . . . . . . . . . . . . . . . . . . . . . . . .
5 TS101 Automatic tare and store unit 30. . . . . . . . . . . . . . . . . . . . . . . . . .
5.1 General 30. . . . . . . . . . . . . . . . . . . . . . . . . . . . . . . . . . . . . . . . . . . . . . .
5.2 Function 30. . . . . . . . . . . . . . . . . . . . . . . . . . . . . . . . . . . . . . . . . . . . . . .
5.2.1 Taring 30. . . . . . . . . . . . . . . . . . . . . . . . . . . . . . . . . . . . . . . . .
5.2.2 Store unit 31. . . . . . . . . . . . . . . . . . . . . . . . . . . . . . . . . . . . . .
5.3 Connection 33. . . . . . . . . . . . . . . . . . . . . . . . . . . . . . . . . . . . . . . . . . . .
5.3.1 Voltage supply 34. . . . . . . . . . . . . . . . . . . . . . . . . . . . . . . . . .
5.3.2 Inputs / Outputs 34. . . . . . . . . . . . . . . . . . . . . . . . . . . . . . . . .
5.3.3 Control inputs / Control output 34. . . . . . . . . . . . . . . . . . . .
5.4 Adjustment 36. . . . . . . . . . . . . . . . . . . . . . . . . . . . . . . . . . . . . . . . . . . .
5.4.1 Factory setup 36. . . . . . . . . . . . . . . . . . . . . . . . . . . . . . . . . . .
5.4.2 Tare unit adjustment 36. . . . . . . . . . . . . . . . . . . . . . . . . . . . .
5.4.3 Store unit adjustment 38. . . . . . . . . . . . . . . . . . . . . . . . . . . .
5.5 Zero-point balance 40. . . . . . . . . . . . . . . . . . . . . . . . . . . . . . . . . . . . . .
5.6 Component position diagram 41. . . . . . . . . . . . . . . . . . . . . . . . . . . . .
6 Safety barriers 42. . . . . . . . . . . . . . . . . . . . . . . . . . . . . . . . . . . . . . . . . . . . . .
7 CLIP IG 42. . . . . . . . . . . . . . . . . . . . . . . . . . . . . . . . . . . . . . . . . . . . . . . . . . . . .
8 Dimensions 43. . . . . . . . . . . . . . . . . . . . . . . . . . . . . . . . . . . . . . . . . . . . . . . . .
9 Specifications 45. . . . . . . . . . . . . . . . . . . . . . . . . . . . . . . . . . . . . . . . . . . . . .
10 Accessories 51. . . . . . . . . . . . . . . . . . . . . . . . . . . . . . . . . . . . . . . . . . . . . . . .
11 Copy of Declaration of Conformity 52. . . . . . . . . . . . . . . . . . . . . . . . . . . .
4Clip
HBM A0114-6.3 en
Safety instructions
The NT101A and NT102A Power Supplies Conform to Protection Class I. The
other Clip components correspond to Protection Class III (Symbol III )
when they are operated with safety extra-low voltage (SELV circuits).
In order to ensure sufficient immunity from disturbance only use Greenline
screening (see HBM‘s special publication ”Greenline” Screening Concept,
electromagnetic compatibility of measuring cable, G36.35.0)
Appropriate use
The Clip Electronic with the connected transducers may be used for measure-
ment and directly related control and regulation tasks, only. Any other use is
not appropriate.
To ensure safe operation, the Clip Electronic may only be used according to
the specifications given in this manual. When using the transducer, the legal
and safety regulations for the respective application must also be observed.
The same applies if accessories are used.
General dangers in the case of non-observance of the safety
instructions
The Clip Electronic complies with the state of the art and is operationally reli-
able. If the device is used and operated inappropriately by untrained person-
nel, residual dangers might develop.
Any person charged with device installation, operation, maintenance or repair
must in any case have read and understood the operating manual and the
safety instructions, in particular.
Conditions on site
Protect the device from moisture or atmospheric influences such as rain,
snow, etc.
Maintenance and cleaning
The Clip Electronic are maintenance-free. Please note the following points
when cleaning the housing:
•Remove the mains plug from the socket before cleaning.
•Clean the housing with a soft, slightly damp (not wet!) cloth. Never use sol-
vents, since they may damage the labelling on the front panel.
•When cleaning, please ensure that no liquid finds its way into the device or
onto the contacts.

5
Clip
HBMA0114-6.3 en
Residual dangers
The Clip Electronic scope of performance and supply covers part of the mea-
suring-technology, only. The plant designer/constructor/operator must in addi-
tion design, realize and take responsibility for the measuring-system’s safety
such that potential residual dangers are minimized. The respective regulations
must in any case be observed. Residual dangers regarding the measuring
system must be specified explicitly.
If there is any risk of remaining dangers when working with the, it is pointed
out in this introduction by means of the following symbols:
Symbol: DANGER
Meaning: Maximum danger level
Warns of an imminently dangerous situation in which failure to comply with
safety requirements will result in death or serious physical injury.
Symbol: WARNING
Meaning: Dangerous situation
Warns of a potentially dangerous situation in which failure to comply with
safety requirements can result in death or serious physical injury.
Symbol: CAUTION
Meaning: Potentially dangerous situation
Warns of a potentially dangerous situation in which failure to comply with
safety requirements could result in damage to property or some form of
physical injury.

6Clip
HBM A0114-6.3 en
Symbols for using advices and helpful information:
Symbol:NOTE
Means that important information about the product or its handling is being
given.
Symbol:
Meaning: CE mark
The CE mark enables the manufacturer to guarantee that the product com-
plies with the requirements of the relevant EC directives (see Declaration of
Conformity at the end of this document).
Safe operation
Do only quit error messages if the reason for the error has been eliminated
and there is no more danger.
Reconstruction and modifications
HBM’s express consent is required for modifications regarding the Clip Elec-
tronic construction and safety. HBM does not take responsibility for damage
resulting from unauthorized modifications.
In particular, repair and soldering works on the boards are prohibited. If com-
plete componentry is replaced use original HBM components, only.
Qualified personnel
The device may be used by qualified personnel, only; the technical data and
the special safety regulations must in any case be observed. When using the
device, the legal and safety regulations for the respective application must
also be observed. The same applies if accessories are used.
Qualified personnel means: personnel familiar with the installation, mounting,
start-up and operation of the product, and trained according to their job.
Maintenance and repair work on an open device with the power on should
only be undertaken by trained personnel who are aware of the above-men-
tioned dangers.

7
Clip
HBMA0114-6.3 en
1 Application
The measuring amplifiers are suitable for the measurement of mechanical
quantities such as force, weight, torque, pressure, displacement, strain and
acceleration. Appropriate transducers complying with the international stan-
dards can be connected to the measuring amplifiers.
Transducers can be operated in potentially explosive areas, if safety barriers
are used.
The individual CLIP components can be arranged as desired and are wired by
terminals. Switches and potentiometers for adjustment have been provided on
the circuit boards. The accuracy class is 0.1.
The following units are available:
•AE101 (DC), AE301/301S6/301S7 (600 Hz CF), AE501 (4.8 kHz CF),
Measuring amplifier
•GR201 Double limit-value switch
•EM201, EM201K2 Output-stage modules with current output
•NT101A, NT102A Power supply units
•TS101 Automatic Tare and Store Unit

8Clip
HBM A0114-6.3 en
2 Mounting / Dismounting
The housings are installed onto mounting rails to DIN EN 50 022; they are
hooked onto the upper edge and snapped into the spring plate on the lower
edge.
For dismounting, use a screwdriver to push down the spring plate and unhook
the housing.
Hook in
Lock
Mounting rail
Mounting Dismounting
Fig. 2.1: Mounting / Dismounting

9
Clip
HBMA0114-6.3 en
3 Connection
Use the 12-pin terminal strip to connect the transducers, to wire the modules
with each other and to connect the voltage supply. Individual wires can be
clamped in a range of 0.13 mm2... 1.5 mm2. If two conductor lines are to be
connected to one terminal, e.g. with internal and external connections, the
conductor cross-sections must be matched accordingly. End sleeves (without
plastics hoop, length: 10 mm) should be used to connect the cores to the ter-
minals. Cores with or without end sleeves must not be tin-plated. When con-
necting the lines, measures should be taken to prevent electrostatic dis-
charge.
The subsequent figures give the respective connection diagrams that are
printed onto the housing cover.
NOTE
The Clip modules have been designed for installation in closed metallic
housings (e. g. control cabinet); they can also be operated without any
additional housings.
The transducer connection lines and the analog signal lines (inputs and
outputs) have to be screened.
At the control cabinet, the screening must lie on a screen rail.
Supply lines and lines connected to the GR201 relay contacts must be
screened if the cable length exceeds 30 m or if the cables are routed out-
side closed buildings.
NOTE
Only after tightening the clamping screws (ensure good contact) will the
output signal be available on the terminals.

10 Clip
HBM A0114-6.3 en
3.1 Measuring amplifiers AE101, AE301, AE501
11 11 11 11 11 11 11 11 11 11 11 11
122’33’4589101112
11 11 11 11 11 11 11 11 11 11 11 11
122’33’4589101112
11 11 11 11 11 11 11 11 11 11 11 11
122’33’4589101112
Fig. 3.1: Measuring-amplifier connections

11
Clip
HBMA0114-6.3 en
Type AE101, AE301, AE501
Terminal Function Color ( HBM - cable)
1Measuring signal WH (white)
2Bridge excitation voltage BK (black)
2’ Sensor line GY (grey)
3Bridge excitation voltage BU (blue)
3’ Sensor line GN (green)
4Measuring signal RD (red)
5 Screen/Ground YE (yellow)
8 Synchronization (not with AE101)
9Operating-voltage zero*)
10 Output voltage
11 Supply voltage zero*)
12 Supply voltage
Tab. 3.1: Amplifier connection
*) Operating-voltage zero and supply-voltage are internally connected.
Terminal 5 of the Clip amplifier and the transducer’s screen connection should
be grounded (e. g. connected to the screen rail). If the transducers are
installed in a metallic housing with PG glands (e. g. control cabinet or ClipIG),
a large area of the transducer screen must be in contact with the PG gland.

12 Clip
HBM A0114-6.3 en
3.2 GR201, EM201, EM201K2, TS101 additional units
11 11 11 11 11 11 11 11 11 11 11 11
123456789101112
11 11 11 11 11 11 11 11 11 11 11 11
123456789101112
11 11 11 11 11 11 11 11 11 11 11 11
123456789101112
Fig. 3.2: Connection of the additional units

13
Clip
HBMA0114-6.3 en
Type GR201 EM201, EM201K2 TS101
Terminal Function
1Relay 1; Break contact Input 1; Ground*) Input; Ground
2Relay 1; Make contact Input 1; "10 V Input ; "10 V
3Relay 1; Center Output 1; Ground*) Output; Ground
4Input 1; Ground Output 1;
"20 mA / 4 ... 20 mA
Output;
PVCS "10 V
5Input 1; "10 V Input 2; Ground*) (only with
EM201K2)
Output;
TAR "10 V
6Relay 2; Break contact Input 2; "10 V
(only with EM201K2)
Output;
TAR (24 V DC)
7Relay 2; Make contact Output 2; Ground*) (only with
EM201K2)
Control; Ground
8Relay 2; Center Output 2;
"20 mA /
4 ... 20 mA
(only with EM201K2)
Control;
Run/Hold
(24 V DC)
9Input 2; Ground Ground*) Control;
Peak/Clear
(24 V DC)
10 Input 2; "10 V Ground*) Control;
TAR (24 V DC)
11 Supply zero Supply zero*) Supply zero
12 Supply voltage Supply voltage Supply voltage
Tab. 3.2: Connection of additional units
*) Ground and supply zero are internally connected. GR201 has differential inputs.

14 Clip
HBM A0114-6.3 en
3.3 NT101A, NT102A Power supply
Fig. 3.3: Connection of the power supply
The mains voltage (230 V for NT101A, 115 V for NT102A) must be connected
to N and L (phase); the protective ground wire must be connected to .
The D.C..-voltage outputs are fed to pairs of internally connected terminals
(0 V and 15 V). The max. output current is 650 mA.

15
Clip
HBMA0114-6.3 en
4 Setup
If all cables are connected, proceed as follows:
•Connect transducer cable
•Switch on supply voltage.
•Slacken screw on upper right housing edge and hinge down housing cover.
4.1 AE101 Measuring amplifiers
Fig. 4.1: Stick-on label in housing
•Connection method
The standard transducer connection-method is the 6-wire technique (with two
sensor lines). If the transducer is to be connected using a 4-wire circuit, the
terminals 2 and 2’ and 3 and 3’ must be provided with jumper wires.

16 Clip
HBM A0114-6.3 en
•Bridge excitation voltage
Use switch S26 to select the bridge excitation voltage VEaccording to the
strain-gauge full-bridge’s resistance RB.
Bridge excitation voltage VETransducer resistance RB
10 V 340 ... 5000 Ω
5 V 170 ... 5000 Ω
2.5 V 85 ... 5000 Ω
•Measuring frequency range
Use S28 to adjust the measuring frequency range to 10 Hz or 6 kHz.
•Zero point
- Discharge the transducer or charge with preload.
- Use digital voltmeter to measure output voltage, and use rotary switch S23
to adjust minimum indication (if necessary, use S22 to switch polarity); fine
balancing with P21 to 0.000 V.
•Measuring range
To obtain the maximum measurement resolution, the max. amplifier output-
voltage ("10 V) should be used.
AE101
VE= 2.5 V VE= 5 V VE= 10 V switch position S21
mV/V mV/V mV/V 1 2 3 4 5 6 7 8
0.34-0.48 0.17-0.24 0.09-0.12 X X
0.44-0.64 0.22-0.32 0.11-0.16 X X
0.60-0.84 0.30-0.42 0.15-0.21 X X
0.78-1.1 0.39-0.55 0.20-0.28 X X
1.04-1.46 0.52-0.73 0.26-0.37 X X
1.36-1.94 0.68-0.97 0.34-0.49 X X
1.80-2.56 0.90-1.28 0.45-0.64 X X
2.36-3.38 1.18-1.69 0.59-0.85 X X
3.12-4.46 1.56-2.23 0.78-1.12 X X
4.14-5.88 2.07-2.94 1.04-1.47 X X
5.46-7.76 2.73-3.88 1.37-1.94 X X
7.22-10.26 3.61-5.13 1.81-2.57 X X
Tab. 4.1: Nominal measured value depending on the bridge excitation voltage VE.

17
Clip
HBMA0114-6.3 en
Part load
Nominal load •10 V
Measuring range in V •Sensitivity in mVńV+Nominal measurement
value (Range) in mVńV
Formula:
Example 1
Force transducer 100 N ¢2 mV/V; measuring range wanted 60N ¢10 V
60 N
100 N •10 V
10 V •2mVńV+1.2 mVńV
Load transducer with 60 N.
Use S21 to select appropriate interval as given in Tab. 4.1 (page 16) (switch
on 4 + 7), and use P22 to adjust the output voltage to 10 V exactly. The mea-
suring range can also be adjusted with no transducer connected by means of
a calibration unit (e.g. K 3607) that simulates the transducer signal.
•Additive calibration signal
The measuring range can also be adjusted using the additive calibration sig-
nal (0.2 mV/V).
Example 2
Force transducer 100 N ¢2 mV/V; measuring range wanted: 60 N ¢10 V
60 N
100 N •10 V
10 V •2mVńV+1.2 mVńV
Calculate nominal measurement value, execute zero balance (see above) and
use S21 to select the corresponding measuring-range interval. Connect addi-
tive calibration signal (set S25 to CAL) and use P22 to adjust with the trans-
ducer under no load. The amplifier has now been calibrated. Adjust S25 to
MEAS.
0.2 mVńV
1.2 mVńV•10 V +1.667 V

18 Clip
HBM A0114-6.3 en
4.2 AE301 Measuring amplifier
Fig. 4.2: Stick-on label in housing
•Connection method
The standard transducer connection-method is the 6-wire technique (with two
sensor lines). Cable lengths > 50 m require one resistor each with half the
bridge resistance value (RB/2) to be connected to the sensor line instead of
the feedback bridges. If the transducer is to be connected using a 4-wire cir-
cuit, the terminals 2 and 2’ and 3 and 3’ must be provided with jumper wires.
•Bridge excitation voltage
Use switch S26 to select the bridge excitation voltage VEaccording to the
strain-gauge full-bridge’s resistance RB.
Bridge excitation voltage VETransducer resistance RB
5 V 170 ... 5000 Ω
2.5 V 85 ... 5000 Ω

19
Clip
HBMA0114-6.3 en
•Measuring frequency range
The measuring frequency range is 10 Hz.
•Zero point
- Discharge the transducer or charge with preload.
- Use digital voltmeter to measure output voltage, and use rotary switch S23
to adjust minimum indication (if necessary, use S22 to switch polarity); fine
balancing with P21 to 0.000 V.
•Measuring range
To obtain the maximum measurement resolution, the max. amplifier output-
voltage ("10 V) should be used.
AE301
VE= 2.5 V VE= 5 V switch position S21
mV/V mV/V 1 2 3 4 5 6 7 8
0.34-0.48 0.17-0.24 X X
0.44-0.64 0.22-0.32 X X
0.60-0.84 0.30-0.42 X X
0.78-1.1 0.39-0.55 X X
1.04-1.46 0.52-0.73 X X
1.36-1.94 0.68-0.97 X X
1.80-2.56 0.90-1.28 X X
2.36-3.38 1.18-1.69 X X
3.12-4.46 1.56-2.23 X X
4.14-5.88 2.07-2.94 X X
5.46-7.76 2.73-3.88 X X
7.22-10.26 3.61-5.13 X X
Tab. 4.2: Nominal measured value depending on the bridge excitation voltage VE
Factory setting: VE= 5 V; MR= 2 mV/V

20 Clip
HBM A0114-6.3 en
AE301S6
Measuring frequency range: 2 Hz
Calibration signal: 0.1 mV/V
VE=5 V VE=2.5 V switch S21
mV/V mV/V 1 2 3 4 5 6 7 8
0.09-0.12 0.17-0.24 X X
0.11-0.16 0.22-0.32 X X
0.15-0.21 0.30-0.42 X X
0.20-0.28 0.39-0.55 X X
0.26-0.37 0.52-0.73 X X
0.34-0.49 0.68-0.97 X X
0.45-0.64 0.90-1.28 X X
0.59-0.85 1.18-1.69 X X
0.78-1.12 1.56-2.23 X X
1.04-1.47 2.07-2.94 X X
1.37-1.94 2.73-3.88 X X
1.81-2.57 3.61-5.13 X X
Factory setting: VE= 5 V; MR= 1 mV/V
AE301S7
Measuring frequency range: 60 Hz
Calibration signal: 1 mV/V
VE=5 V VE=2.5 V switch S21
mV/V mV/V 1 2 3 4 5 6 7 8
0.09-0.12 0.17-0.24 X X
0.11-0.16 0.22-0.32 X X
0.15-0.21 0.30-0.42 X X
0.20-0.28 0.39-0.55 X X
0.26-0.37 0.52-0.73 X X
0.34-0.49 0.68-0.97 X X
0.45-0.64 0.90-1.28 X X
0.59-0.85 1.18-1.69 X X
0.78-1.12 1.56-2.23 X X
1.04-1.47 2.07-2.94 X X
1.37-1.94 2.73-3.88 X X
1.81-2.57 3.61-5.13 X X
Factory setting: VE= 5 V; MR= 1 mV/V
Formula:
Part load
Nominal load •10 V
Measuring range in V •Sensitivity in mVńV+Nominal measurement
value (Range) in mVńV

21
Clip
HBMA0114-6.3 en
Example 3
Force transducer 100 N ¢2 m V/V; measuring range wanted: 60 N ¢10 V
60 N
100 N •10 V
10 V •2mVńV+1.2 mVńV
Load transducer with 60 N.
Use S21 to select appropriate interval as given in Tab. 4.2 (page 19) (switch
on 4 + 7), and use P22 to adjust the output voltage to 10 V exactly. The mea-
suring range can also be adjusted with no transducer connected by means of
a calibration unit (e.g. K 3607) that simulates the transducer signal.
•Additive calibration signal
The measuring range can also be adjusted using the additive calibration sig-
nal (0.2 mV/V).
Example 4
Force transducer 100 N ¢2mV/V; measuring range wanted: 60 N ¢10 V
60 N
100 N •10 V
10 V •2mVńV+1.2 mVńV
Calculate nominal measurement value, execute zero balance (see above) and
use S21 to select the corresponding measuring-range interval. Connect addi-
tive calibration signal (set S25 to CAL) and use P22 to adjust with the trans-
ducer under no load. The amplifier has now been calibrated. Adjust S25 to
MEAS.
0.2 mVńV
1.2 mVńV•10 V +1.667 V
•Synchronization
For synchronization of several CF amplifiers, one master device must be de-
fined by adjusting S24 to MASTER. The other devices must be set to SLAVE
using S24. Then, interconnect terminals 8. Synchronization is also possible
with AE501 measuring amplifiers.
This manual suits for next models
2
Table of contents
Other HBM Amplifier manuals