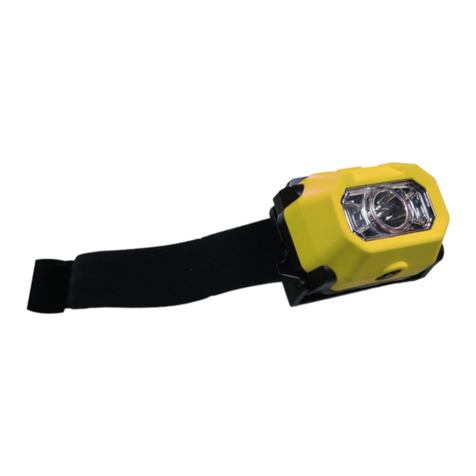
HDS Systems Action Light III User manual

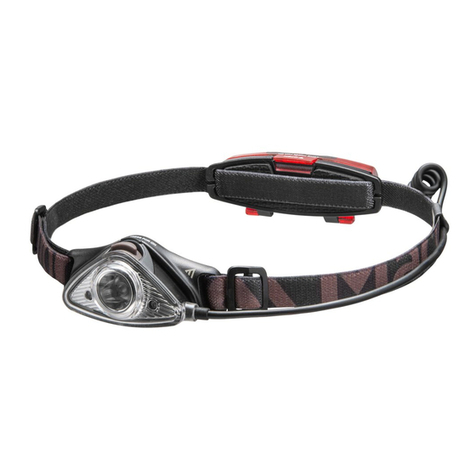
Action Light™ III Headlamp User’s Guide
Copyright 2003-2004 by HDS Systems, Inc.
All rights reserved
March 3, 2005
Introduction
The Action Light III headlamp is your best-of-class headlamp that provides a regulated
light output at a user-selected brightness. Matching the amount of light to the task will
maximize battery life - yet can still provide an intensely bright light when you need it.
A single button activates your light and easily selects the desired brightness.
The following illustration summarizes the available commands and will assist you in
quickly learning to use your flashlight. However, please read the full User’s Guide so
you will fully understand how each feature works.
Installing the Battery
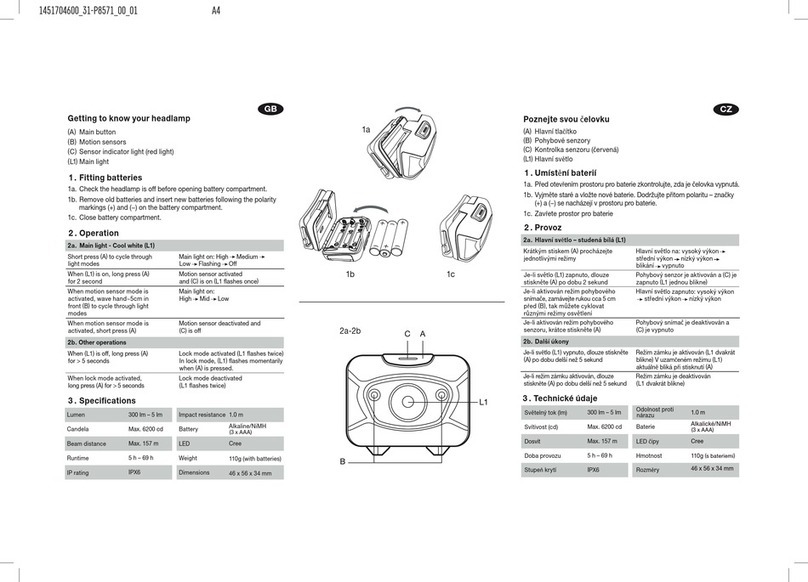
Unlock the 6 side latches, remove the back cover, remove the old batteries from the
battery compartment, insert the new batteries into the battery compartment with the
negative end toward the spring, replace the back cover and lock the 6 side latches.
Note: you will know it is time to replace the battery when your light blinks down two
brightness levels - that is, your light momentarily turns off and then turns back on two
brightness levels lower, repeating as needed until your light finds a brightness level that
the battery can handle.
Note: you should perform a soft reset when changing battery chemistries. This will
ensure the new battery configuration is properly detected.

Note: rechargeable batteries must be fully charged before installation. Never install
partially charged rechargeable batteries in your light. Once you have installed fully
charged batteries, do not open the battery compartment until a replacement set of
batteries becomes available.
Note: if you insert the batteries backwards in the battery compartment, your light will
not light. Remove the batteries and insert them into the battery compartment correctly
- with the negative end toward the spring.
Using the Single Push Button
Your light has two push buttons which are used to turn your light on and off and to
access other functions. A push button is located on either side of the reflector and either
push button may be used as they both do the same thing. The following concepts are
important to understanding the operation of your light:
Click: a quick push and release of the button. A click is any push of the button lasting
less than half a second.
Press: a long push of the button. A press is any push lasting more than half a second.
N-click: a sequence of N clicks. Double-clicks (2 clicks) and triple-clicks (3 clicks) and 10
clicks are common. The time between clicks - that is, when the button is up - must be
less than half a second.
N-click-press: a sequence of N+1 button pushes where the first N are clicks and the last
is a press. Double-click-presses (two clicks and a press) and 10-click-presses are
common. The time between clicks and between the final click and press - that is, when
the button is up - must be less than half a second.
Note: you must pause between commands to ensure the button pushes from the
second command are not interpreted as being part of the first command. The pause
between commands must be greater than half a second.
Note: if you provide an invalid input sequence, your light tries to handle the error in
the best manner possible. Depending on the context, the best (or safest) thing to do is
to ignore excess or extraneous clicks or exit from a menu without changing any
settings.

Turning Your Light On and Off
Click or press the button once to turn your light on. It stays on (latches on) until you
turn it off. Click the button again to turn your light off. You can use the Options Menu
to enable the Simple Momentary option, which will allow a press to turn your light on
in a momentary fashion - i.e., when you release the button your light will turn off.
While this option is disabled, both a click and a press will latch your light on.
When you turn your light on, it turns on to the forced setting. You can use the Options
Menu to change the Force Setting option to a different setting. You can use the Options
Menu to disable the Force Setting option, in which case your light will turn on to the
setting you were using when you turned your light off. You can use the Brightness
Menu to adjust each of the four (4) brightness settings to any brightness level.
When your light is on, you can toggle between the Primary and Secondary settings by
double-clicking the button. If the brightness was on the Minimum or Maximum setting,
the light is return to the last Primary or Secondary setting used. Your light will
momentarily turn off between the clicks but this is normal. You can use the Brightness
Menu to adjust the Primary and Secondary settings to any brightness level.
When your light is on, you can momentarily set your light to the Maximum setting by
pressing the button. Releasing the button returns your light to the previous setting.
You can latch your light to the Maximum setting by double-click-pressing the button.
Your light will momentarily turn off between the clicks but this is normal. You can
return to the previous Primary or Secondary setting by double-clicking the button.
Your light will momentarily turn off between the clicks but this is normal. You can use
the Brightness Menu to adjust the Maximum setting to any brightness level.
When your light is on, you can set your light to the Minimum setting by triple-clicking
the button. Your light will momentarily turn off between the clicks but this is normal.
You can return to the previous Primary or Secondary setting by double-clicking the
button. Your light will momentarily turn off between the clicks but this is normal. You
can use the Brightness Menu to adjust the Minimum setting to any brightness level. A
very low brightness level will help preserve night vision adaptation without using a red
filter.
Brightness Menu
The Brightness Menu is used to set the brightness level of the four (4) settings. These
settings are called Minimum, Maximum, Primary and Secondary. Any brightness level

may be assigned to any setting. Your light has 20 brightness levels and the brightness
levels are referred to as brightness level 1 through 20, with brightness level 1 being the
brightest and brightness level 20 being the dimmest.
Note: you may notice a slight flicker on the very low brightness levels. This is normal.
Your eyes respond to light in a logarithmic way. That means that a significant increase
in brightness requires a doubling in the amount of light - and power. The brightness
levels on your light are spaced to provide small, visually even changes in brightness.
As a rough approximation, every two levels brighter will halve the battery life and
every two levels dimmer will double the battery life. You can maximize battery life by
using the minimum brightness level compatible with the task you are performing. The
lowest brightness setting will help preserve your night vision adaptation without using
a red filter.
The Brightness Menu adjusts the brightness level of the turn-on setting - that is, the
setting used when the light is turned on. By default, the Force Setting option from the
Options Menu is enabled and forces your light to turn on to the Primary setting. In
order to change the other three settings, you must disable the Force Setting option.
To set the brightness level of a setting, start by setting your light to turn on to the
setting you want to change. This is done by turning your light on, selecting the desired
setting and turning your light off. You may need to turn off the Force Setting option
from the Options Menu if it is enabled. As a double-check, turn your light on, verify
your light comes on to the setting you want to change and then turn your light off.
Now enter the Brightness Menu and select the desired brightness level. Once you have
finished setting the brightness level, you may re-enable the Force Setting option if
desired.
You enter the Brightness Menu by 10-click-pressing the button while your light is
turned off. Your light toggles on and off while you are clicking but this is normal. If
you don’t want to count, just keep clicking until your light stays on prior to doing the
final press.
Your light comes on to the currently selected brightness level when you enter the
Brightness Menu. Click the button to sequence through the brightness levels. Double-
click to reverse the sequence and move to the previous brightness. Note that the
sequence automatically reverses when you come to the brightest and dimmest
brightness levels.

When you have selected the desired brightness, press and hold the button for two
seconds. Your light will come on steady while you hold the button and then turn off
when it is time for you to release the button.
If you have not pushed the button within 10 seconds, if you enter an unknown menu
command, if you do not hold the button down until the the light turns off or if there is
insufficient power to save the settings, your light exits the Brightness Menu without
changing the brightness setting and displays the error flash sequence consisting of rapid
flashing.
Options Menu
The Options Menu is used to turn on and off optional features of your light. Each
option will be covered separately, but the basics of turning on and off an option is
common to all options.
You enter the Options Menu by 10-clicking the button while your light is turned off.
Your light toggles on and off while you are clicking but this is normal. If you don’t
want to count, just keep clicking until your light stays on.
Each option has a unique flash identifier and a well known position in the menu. When
you enter the Options Menu, you always enter at the first menu item. Click the button
to sequence through the options. Double-click to reverse the sequence and move to the
previous menu item. The menu wraps around from the last item to the first item and
vice versa.
When you have selected the desired option, press and hold the button for two seconds.
Your light will come on steady while you hold the button and then turn off when it is
time for you to release the button.
If you have not pushed the button within 10 seconds, if you enter an unknown menu
command, if you do not hold the button down until the the light turns off or if there is
insufficient power to save the settings, your light exits the Options Menu without
changing the option setting and displays the error flash sequence consisting of rapid
flashing.
Option 1: Strobe
The Strobe option flashes the maximum brightness about every second. This can be
used for an emergency beacon.

To stop the strobe signal, turn your light off.
The strobe signal option is the first item in the Options Menu and is identified in the
Options Menu by the strobe signal.
Option 2: SOS
The SOS option flashes the international emergency SOS signal. The SOS signal
complies with 46CFR161.013-7 for signal timing but your light is not a Coast Guard
approved emergency signal.
To stop the SOS signal, turn your light off.
The SOS signal option is the second item in the Options Menu and is identified in the
Options Menu by the SOS signal (dot, dot, dot, dash, dash, dash, dot, dot, dot).
Option 3: Locator Flash
The Locator Flash option dimly flashes your light every 3 seconds when it is turned off.
This allows you to find your light in the dark.
The Locator Flash option is a toggle setting. Setting it once turns it on while setting it
twice turns it off. The default setting is off.
The Locator Flash option is the third item in the Options Menu and is identified in the
Options Menu by a dim flash.
Option 4: Force Setting
The Force Setting option forces your light to always turn on to the selected setting. To
select a setting to be forced, ensure the Force Setting option is disabled. Then select the
Minimum, Maximum, Primary or Secondary setting you want to force. Turn your light
off. Enter the Option Menu and enable the Force Setting option. Your light will turn on
to the selected setting.
Note: this option must be disabled in order to use the Brightness Menu to change the
other settings.

Note: if the forced setting is Maximum or Minimum, the first toggle (double-click) will
take you to the Primary setting.
When the Force Setting option is disabled, your light remembers which setting you
were using when you turned your light off and returns to that setting when you turn
your light back on.
The Force Setting option is a toggle setting. Setting it once turns it on while setting it
twice turns it off. The default setting is on with the Primary setting selected.
The Force Setting option is the fourth item in the Options Menu and is identified in the
Options Menu by a long flash.
Option 5: Automatic Button Lock
The Automatic Button Lock option locks your light in the off setting after your light has
remained turned off for 5 minutes. If the button is pressed while your light has the
button locked, your light flashes twice and then turns off. Note that when the Tactical
Momentary option is enabled your light does not flash but remains off.
When Automatic Button Lock is enabled, you can manually lock the button by triple-
clicking from Off. Note that when the Tactical Momentary option is enabled you
cannot manually lock the button from Off.
To release the Button Lock, triple-click the button. Releasing the Button Lock turns
your light on. Note that when the Tactical Momentary option is enabled the light
remains off until the next push of the button.
The Automatic Button Lock option is a toggle setting. Setting it once turns it on while
setting it twice turns it off. The default setting is off.
The Automatic Button Lock option is the fifth item in the Options Menu and is identified
in the Options Menu by two short flashes.
Option 6: Automatic Turn Off
The Automatic Turn Off option turns your light off after a 5 minute period of inactivity.
Your light provides a warning prior to turning off by sequencing down to the lowest
brightness level and then flashing for 10 seconds. Click the button once during the

warning period to restore the light to the original setting.
The Automatic Turn Off option is a toggle setting. Setting it once turns it on while
setting it twice turns it off. The default setting is off.
The Automatic Turn Off option is the sixth item in the Options Menu and is identified in
the Options Menu by a dimming sequence.
Option 7: Simple Momentary
The Simple Momentary option allows a press to be distinguished from a click when
your light is turned off. That is, when the Simple Momentary option is enabled, a press
turns your light on for the duration of the press and turns your light turns off again
when the button is released. When Simple Momentary option is disabled, a press will
latch your light on no matter how long you hold the button down.
The Simple Momentary option is a toggle setting. Setting it once turns it on while
setting it twice turns it off. The default setting is off.
The Simple Momentary option is the seventh item in the Options Menu and is identified
in the Options Menu by a long flash followed by a short flash.
Option 8: Tactical Momentary
The Tactical Momentary option provides a pure momentary mode of operation. All
button pushes (clicks and presses) are momentary. When the Tactical Momentary
option is enabled, it is not possible to latch your light on, access the menus or manually
lock the button. Therefore, you must configure any desired options before enabling
the Tactical Momentary option. If the Automatic Button Lock option is enabled, the
button locks upon enabling the Tactical Momentary option and there is no visible
Button Lock indication - your light remains completely dark when the button is pressed
until after the Button Lock is released.
You turn off the Tactical Momentary option by soft-resetting your light. The default
setting is off.
The Tactical Momentary option is the eighth item in the Options Menu and is identified
in the Options Menu by a long flash followed by two short flashes.

Resetting Your Light
The only time the design of your light requires you to reset your light is: 1) to turn off
the Tactical Momentary option or 2) when changing battery chemistries. However, if
your light ever gets into a non-responsive state, a reset can be used to regain control.
There are two kinds of resets. A soft reset retains all of your settings. A hard reset
returns your light to the factory settings.
To perform a soft reset, remove the batteries, wait for 1 minute and reinstall the
batteries. A successful soft reset is indicated by your light turning on dimly for 1 second
and then turning Off.
To perform a hard reset, start by performing a soft reset. Before your light turns off,
press and hold the button down for 10 seconds. Your light will come on steady while
you hold the button and then turn off when it is time for you to release the button.
If you do not hold the button down until the the light turns off or if there is insufficient
power to save the settings, your light will not restore the factory settings and displays
the error flash sequence consisting of rapid flashing.
Low Battery Indication
As your batteries are used up, the batteries will not be able to supply enough power to
run your light at the selected brightness. As a result, your light will blink down two
brightness levels - that is, your light will momentarily turn off and then turn back on
two brightness levels lower, repeating as needed as the batteries are used up. When
the dimmest brightness level is reached, your light will blink continuously until the
batteries can no longer power your light. You should replace your light’s batteries
before the dimmest brightness level is reached.
Your light remembers the restricted brightness level and will not allow you to use a
higher brightness level as long as your light remains on. Turning your light off and
then back on resets the restricted brightness level and allows you access to all
brightness levels if your batteries are capable of supplying the power.
The same behavior can also occur if the battery contacts become dirty. Gently wiping
the battery contacts with a clean dry cloth is normally sufficient to remove dirt. If in
doubt, please replace your batteries.

Note: if you must extend dying batteries - for whatever reason - you should
immediately select a lower brightness setting. The lower the setting selected the longer
the batteries will last.
Note: if you continue to use your light after it has dropped to the lowest brightness
level - where it blinks continuously - it is assumed you are in an emergency situation.
In an emergency situation, your life is more important than your rechargeable batteries
and your light will sacrifice the batteries to keep the light on.
Note: if your batteries have an excessively low voltage when you turn your light off,
your light will delay turning completely off until the battery voltage has recovered
sufficiently to enable it to turn back on. While waiting for your batteries to recover, the
light will glow dimly.
Note: the length of time your batteries will last depends on how you use your light, the
type and quality of battery you are using and how cold it is. Due to the LED tolerances,
you will see flashlight to flashlight runtime variations when operated under the same
conditions.
High Temperature Indication
Your light can get quite warm on the higher brightness levels. If you hold on to your
light with a bare hand during operation, your body will conduct away any excess heat
and prevent your light from getting too hot. However, if you place your light on a
table or hold it with a gloved hand, the excess heat is not easily conducted away and
your light can get hot. Before your light becomes dangerously hot, a thermal sensor
detects the increasing temperature and reduces the power and brightness. Your light’s
temperature is regulated so you can always pick it up safely and to prevent damage to
the LED.
Your light remembers the restricted brightness level and will not allow you to use a
higher brightness level as long as your light remains on. Turning your light off and
then back on resets the restricted brightness level and allows you access to all
brightness levels if your light is cool enough to allow them.
Cleaning and Maintenance
Periodically clean the threads and O-ring with a clean lint-free cloth and apply a thin
coat of silicon or petroleum-based grease to threads and O-ring. If the O-rings become
worn or damaged, they should be replaced.

The exterior can be cleaned with a mild soap and water. Rinse well and dry with a lint-
free cotton cloth. Paper towels or tissues should be avoided when cleaning plastic
lenses as scratching will result.
Warnings
Caution: LEDs on the higher brightness levels are very bright. Looking directly into
the LEDs must be avoided. Your light can be intense enough to injure your eyes.
Caution: Whereas a sudden total failure is unlikely, it is still possible.!Therefore, we
recommend you always carry a second light during critical situations (e.g., caving).!We
also recommend you carry enough spare batteries to cover your stay plus a reasonable
safety margin.!It is not necessary to start each trip with new batteries in your light as
long as you have spare batteries along.
Caution: do not use batteries containing over-discharge protection circuits because they
cause sudden darkness when the circuit activates. Use only recommended batteries
with your flashlight.
Contact Us
HDS Systems, Inc.
P.O. Box 42767
Tucson, Arizona 85733
USA
520-325-3004
www.HdsSystems.com

Factory Settings
Your light is configured at the factory with the following settings:
- Maximum setting: 1 (60 or 100 lumens)
- Primary setting: 5 or 6 (10 or 17 lumens)
- Secondary setting: 9 or 10 (2 or 4 lumens)
- Minimum setting: 15 or 16 (0.3 or 0.5 lumens)
- Force Setting: Primary setting
- Simple Momentary: off
- Tactical Momentary: off
- Automatic Button Lock: off
- Automatic Turn Off: off
- Locator Flash: off
Specifications
Voltage: 1.8V to 7.3V
Light Source: white LED
Light Output: 60 or 100 lumens maximum, 0.1 lumens minimum, visually even spacing
Regulation: constant power regulation with tint control, 20 levels
Battery Pack: 2x CR123A lithium-manganese dioxide
Runtime: 45 or 20 minutes on Maximum, 20 or 12 hours on Primary
Beam: narrow with good side spill
Housing: aerospace aluminum, military specification type III hard anodize
Lens: ultra-clear coated glass
Dimensions: 60mm by 82mm by 70mm (2.4 by 3.3 by 2.8 inches)
Weight: 170g (6 ounces) including batteries
Waterproof: 2 meters (6 feet)
Primary Features: simple single button user interface, four (4) directly accessible
brightness settings, rechargeable battery protection, reverse battery protection without
diode penalty, graceful power reduction for weak batteries, thermal regulation,
intrinsically safe design.
Settable Options: four (4) settable brightness settings, strobe emergency signal, SOS
emergency signal, locator flash, force setting, automatic button lock, automatic turn off,
simple momentary, tactical momentary.

Accessories:
• 18650 Li-ion battery and charger
• Ultra clear coated glass lens
• Polycarbonate lens
• Mild diffuser
• Lens nut tool
Battery configurations supported by the power supply:
Primary cells - non-rechargeable:
• Li-FeS2: 2 cells (3.3), 4 cells (6.6V)
• Li-SO2: 1 cell (3.0V), 2 cells (6.0V)
• Li-MnO2: 1 cell (3.2V), 2 cells (6.4V)
• Li-SOCl2: 1 cell (3.6V), 2 cells (7.2V)
•!Alkaline: 2 cells (3.3V), 4 cells (6.6V)
Secondary cells - rechargeable:
• NiCad: 2 cells (2.5V), 3 cells (3.75V), 4 cells (5.0V)
•!NiMH: 2 cells (2.6V), 3 cells (3.9V), 4 cells (5.2V)
• Li-ion/polymer: 1 cell (4.2V)
Specifications are subject to change without notice.

