HEALTH ONE HERA-8000(I) User manual

HERA-8000(I)
Before using this equipment, please read all "Safety Instructions"
Carefully to ensure safe and correct operation.
FOR BETTER LIFE
USER MANUAL
www.ehealth-one.com
For customer service, call
+82-(0)-31-949-8010

Contents
A. GENERAL
A-1. SPECIFICATIONS ...................................................03
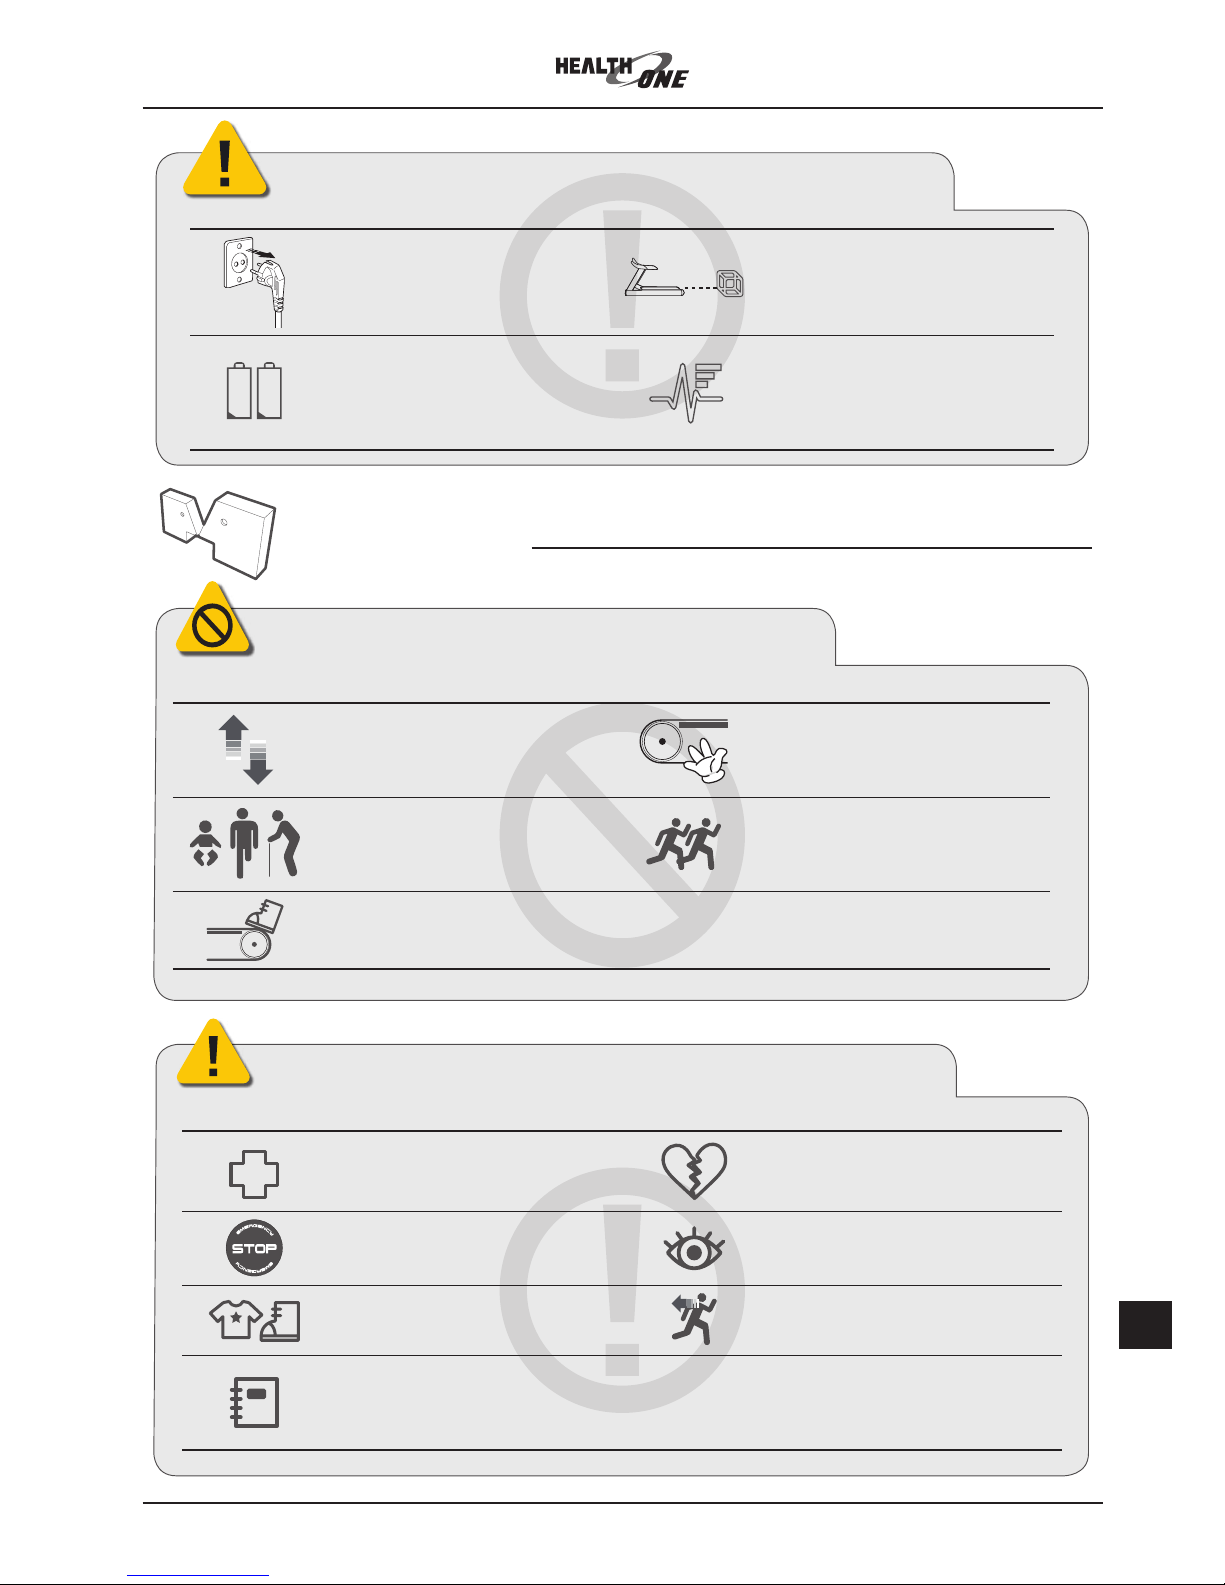
A-2.SAFETY INSTRUCTIONS ........................................04
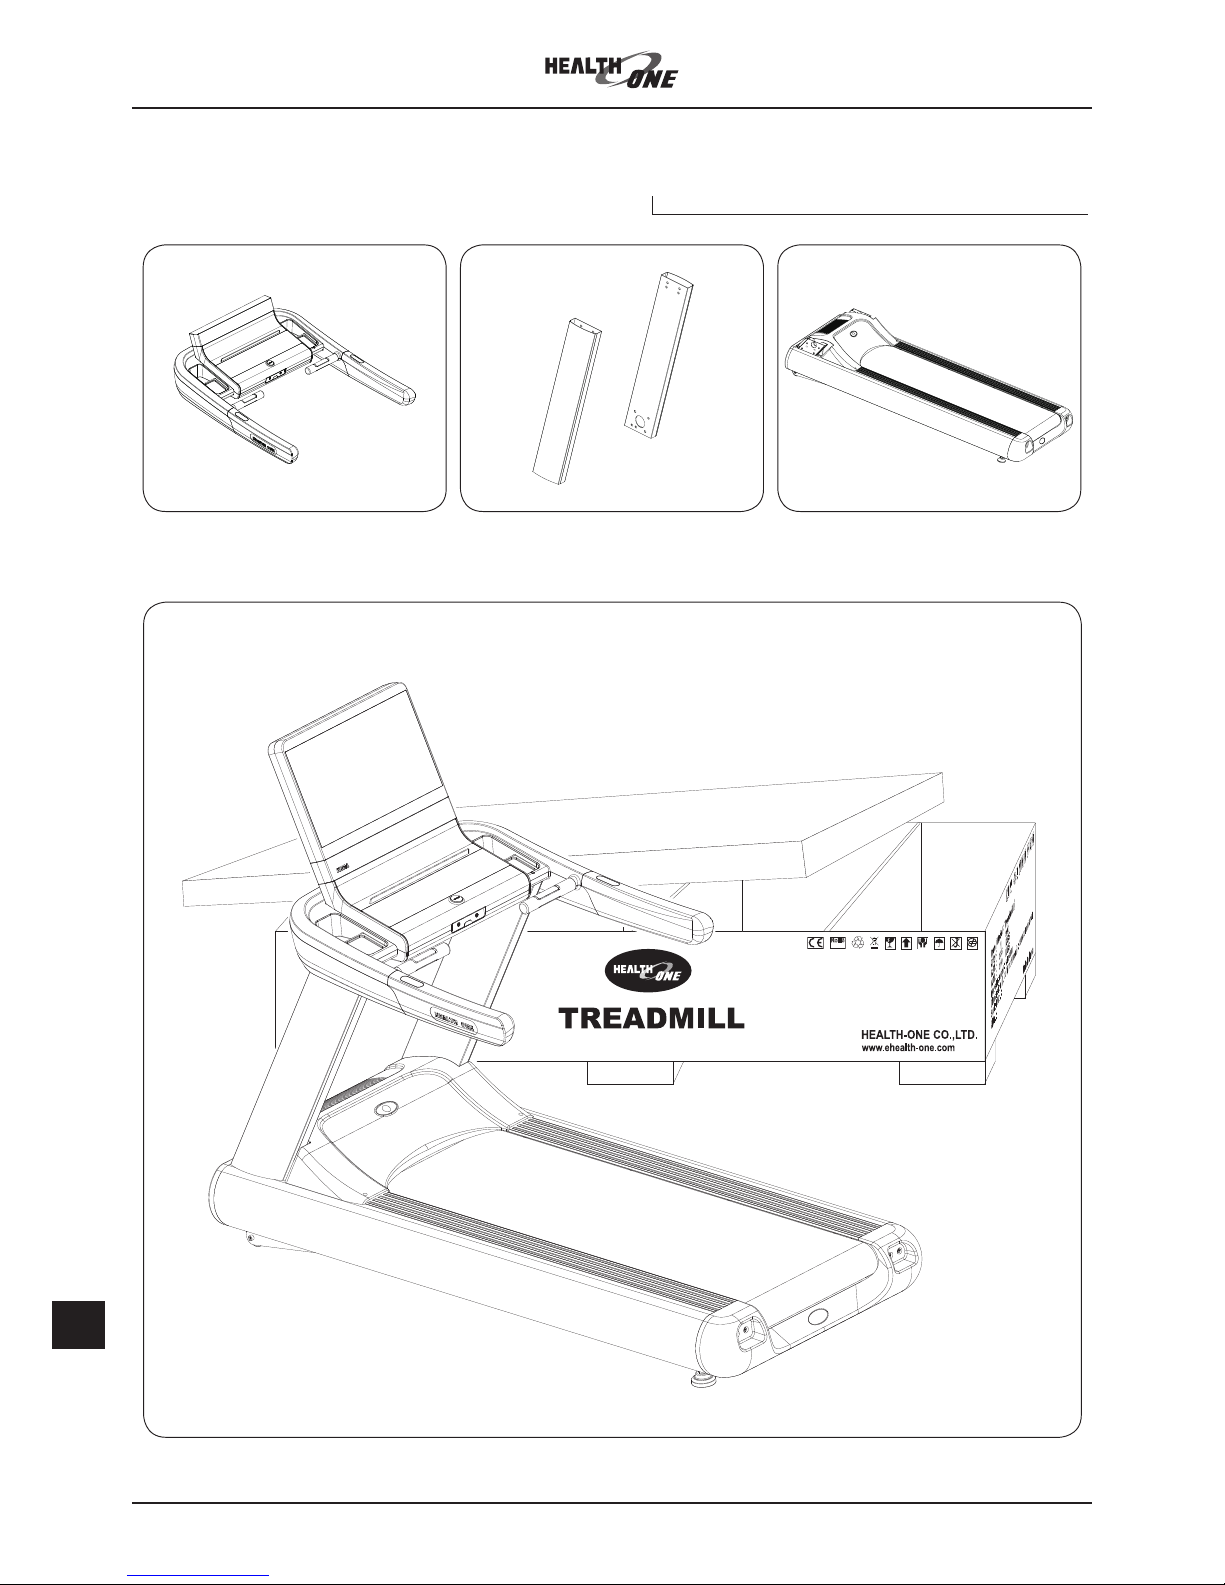
A-3 COMPONENT PARTS .............................................06
A-4. DESCRIPTION ........................................................07
A-5. INSTALLATION LOCATION ....................................07
A-6. INSTALLATION .......................................................08
A-7. INSTRUCTIONS
PARTS NAMES .......................................................14
CONSOLE – FEATURES AND FUNCTIONS ............16
HEART RATE MONITORING SYSTEM .....................19
A-8. OPERATION INSTRUCTIONS
MANUAL WORKOUT...............................................20
TARGET WORKOUT ................................................21
PROGRAM WORKOUT............................................22
B. MANAGEMENT INSTRUCTIONS
B-1. SYSTEM PARAMETER ...........................................26
B-2. TV SETTING............................................................28
B-3. External input, USB Play ........................................29
B-4. REPLACEMENT OF PARTS ....................................30
B-5. LUBRICATION ........................................................31
B-6. MAINTENANCE.......................................................32
B-7. TROUBLE-SHOOTING............................................32
B-8. SELF-CHECK..........................................................33
1. Without prior consent of health-one, using or copying the pictures
and contents in this manual are not allowed.
2. Without prior notice to customer, product could be changed for
improvement purpose.
Head Office.
132, Sannam-ro, Ilsanseo-gu, Goyang-si, Gyeonggi-do,
Korea (10201)
Tel : +82-31-949-8010 / Fax : +82-31-949-8012
Oversea Business Partners
HEALTH ONE ASIA PTE., LTD
391B Orchard Road, #23-01 Ngee Ann City Tower B, Singapore 238-874
Tel : +65 9337 8030 / Fax : +65 6736 7389
HEALTH ONE GREECE
KONTOROUCHAS MICHAEL & CO-14 TRIAS STR, AGIOI ANARGIROI,
PO 13561, ATHENS, GREECE
Tel : +30 210 5758 422 / Fax : 30 210 8313 736
HEALTH ONE(THAILAND) CO.,LTD.
1213/369 SOILADPROA 94, SRIVARA RD., KHET
WANGTHONGLANG, BANGKOK 10310, THAILAND
Tel : +662 559 2393~4 / Fax : +662 559 3717
www.health-onethai.com
HEALTH ONE(PORTUGAL) CO.,LTD.
COMPLEXO TURISTICO MINHITEL PRAIA DO CABEDELO
493-065 DARQUE PORTUGAL
Tel : + 351 258 331 274

3
A-1. SPECIFICATIONS
A. GENERAL
Specifications
Items
HERA 8000(I( HERA 8000(B(
Motor
AC 3HP (Continuous) AC 3HP (Continuous)
Speed
1.0 ~ 20.0 km/h 1.0 ~ 20.0 km/h
Incline
0-16% INCLINE -
Programs
3 Cardio Programs
6 Prole Programs
3 Target Programs
3 Cardio Programs
6 Prole Programs
3 Target Programs
Display
Speed, Distance, Calories, Incline,
Time, Program, Target, Heart Rate
Speed, Distance, Calories,
Time, Program, Target, Heart Rate
Monitor
23 inch LED FULL HD TV 23 inch LED FULL HD TV
Auto Stop
O O
Bluetooth
Option Option
USB Port : Video Clips
O O
Heart Rate
Monitoring System
Contact & Telemetry
(Wearable HR Monitoring Device : Option)
Contact & Telemetry
(Wearable HR Monitoring Device : Option)
Power
220V, 60Hz 220V, 60Hz
Weight
225kg 205kg
Max. Load
180kg 180kg
Frame
Outer Layer : Aluminium, Inner Layer : Steel Outer Layer : Aluminium, Inner Layer : Steel
Runnig Area
530 X 1600 mm 530 X 1600 mm
Dimension
(L x W x H mm)
2210 X 934 X 1793 2210 X 934 X 1793

4
A-2. SAFETY INSTRUCTIONSA. GENERAL
SAFETY INSTRUCTIONS
The following safety instructions are for correct and safe use of the Treadmill and should be followed for your safety and
to prevent accident.
There are 3types of safety marks PROHIBITION, WARNING, and CAUTION, according to the safety level.
Means possible severe or fatal injury.
Means possible damage or injury.
Always unplug the power after the use of the
treadmill or before cleaning or maintenance
to avoid electric shock.
Stepping on the handgrip, display console or
motor cover may cause damage or accident.
Check for proper assembly before rst use
and
do not attach any accessory not
recommended
by the manufacturer as it may be hazardous.
The treadmill uses power of over 10A AC200-
240V 50/60Hz. To reduce danger of accident
when it breaks down, connect the power
plug to a grounded socket as required by the
law.
Replace the worn-out running belt
immediately as it may cause excessive
friction with foot panel leading to static-
induced motor damage and electric shock.
Do not operate the treadmill in any other way
than stated in this Manual.
Do not install the treadmill near water, in very
dusty or humid areas nor on thick carpeting to
avoid damage.
Do not use the treadmill if the power cord was
damaged or the treadmill does not work
normally.
Do not operate the treadmill if it is doused with
water or other liquid. Stop the machine and
contact customer service immediately.
Do not keep the power cord and plug near the
re or excessive heat.
Do not attempt to repair or modify the Treadmill
unless by a qualied engineer.
Do not use a multisocket simultaneously with other
electrical equipment to avoid re due to overload.
Prevent foreign matter from getting into moving
parts such as in motor and rollers. Prevent
clothing or any part of your body from touching
moving parts.
This mark calls for your attention to a possible danger. Read the
accompanying instructions carefully to ensure safe use.
PROHIBITION CAUTIONWARNING
WARNING
PROHIBITION

5
A-2. SAFETY INSTRUCTIONSA. GENERAL
Power must be turned o and plugged removed
after use or when not in use for a long period of
time.
2m To avoid possible impact injury from falling of the
machine, ensure that solid objects are distance 2
meters from the back or 2 meter from the sides.
THINNERR
SOLVENT
Do not use any solvent, wax, thinner or other
petroleum product for cleaning. Use soft dry
cloth
only.
The Heart Rate monitoring system is not a
medical equipment. It’s gure could be dierent
depending on use environment
- Just take the measured gure for workout
program.
Means possible light damage on injury.
Safety Rules of Exercise
Means possible severe or fatal injury.
SPEED
Do not abruptly change the speed or incline.
Sudden reduction or increase of speed may cause
loss of balance or machine overload leading to an
accident.
Do not touch or let any part of your body
touch the rolling part of the machine while
belt is running to avoid accident.
Do not allow children under age 10, the
handicapped, the elderly or unt person or pets
use the machine to avoid accident unless
closely guided by a guardian.
Do not allow more than one person to use the
machine at the same time.
Do not step on the rearmost part near the roller
as it may cause accident.
WARNING
CAUTION
Means possible light damage on injury.
If you feel pain, diculty in breathing or other
symptoms while exercising, stop immediately
and consult your doctor.
Always select speed and incline appropriate for
you physical condition and do not overwork.
Always step down after the machine came to a
complete stop.
Keep you body straight up looking direct front
and keep the balance of your body while
exercising. Distraction may cause tripping over.
Wear proper cloths and shoes for exercise. While back walking, keep holding on the
handgrip at less than 4 km/h to avoid tripping.
Consult your doctor or a specialist (trainer)
before starting exercise, especially if you have
high blood pressure, heart disease or other
symptoms or if you are over 35.
CAUTION

6
A-3. COMPONENT PARTSA. GENERAL
Components of MainBody
HERA-8000(I)
This produt is packed and delivered as semi-assembled.
RoHS
complian
t
2002/95/ EC
RoHS
compliant
2002/95/ EC
Console Post Body

7
INSTALLATION LOCATION
· Please check if the ground surface is level and solid.
Otherwise, it may cause noise, vibration, and tripping over.
· Please check if the location is indoors with low humidity and dust level.
Humidity and dust may cause machine break-down.
· Please check if any solvent or inflammable substance is nearby.
In case electric spark occurs within the machine due to electric leakage or static,
it may lead to an explosion or fire.
· Please allow enough space from surrounding fixtures.
Please install the machine with enough space in front to allow easy access to the power switch.
To ensure safe use, allow spaces of at least 2m at the back and 1m on each side.
· Please link less than 2 sets of Treadmil with power cable comming from one 30A ELB(Earth Leakage Breaker)
Over load current could generate abnormal operation of Treadmil
· Please use standard plug and socket and make sure the power outlet has been grounded.
· When moving, lift up the bottom of rear cover so that the machine can be moved easily on front wheels.
· If the entire machine has to be hauled up, 4-5 adults should do it carefully to avoid injury or accident.
DESCRIPTION
HERA-9000I treadmill is designed for use in Gyms or fitness centers with a 23" LED Built-in TV Monitor. Using Powerful
3HP(Continuous) AC motor with the latest inverter control technology, it runs quietly, softly and safely. Its streamline design will
add elegance to your workout place.
FEATURES
1. 23" Wide LED TV Monitor(up to Full HD Resolution)
2. Solid body frame with double frame structure(Aluminium + Steel)
3. Semipermanent Capacitive Soft-Feeling Button
4. Significantly reduces treadmill's noise and vibration with World's Best
Shock-Absorbing Rubber Bed [Patented]
5. Various and optimized cardio workout programs
6. Diginified Design with round shape
7. USB Inlet(Video, Image, Music etc)
8. Contact & Telemetry Heart Rate Monitoring System
9. Auto Stop Function for Safety when not used
10. Bluetooth Wireless Headphone Set Function for User Friendly
A-4. DESCRIPTION
A-5. INSTALLATION LOCATION
A. GENERAL
A. GENERAL

8
Power connection should be at standard voltage
Treadmill should be mounted on level floor. Avoid uneven surface.
After the installation, Treadmill should be grounded.
Please remove any foreign material from around motor area before the test operation.
ASSEMBLY AND INSTALLATION
After unpacking all the components, assemble and install the machine as per the following procedure.
Body
Detaching the Motor Cover
1. Pull out 4 screws (5mm) at each corner of the motor cover with
a screwdriver
2. Lift the cover up to detach it from the frame.
Use bolts and tool
A. Phillips Screwdriver
B. M5 X 20 Pan head screw x 4pcs
A B
Use bolts and tool
A-6. INSTALLATIONA. GENERAL
1
2
CAUTION

9
POST
Attaching the Posts Assembly
1 : Insert posts (left & right) into the post guides at the front of the
main frame body
2 : Loosely tighten 12 bolt washers fasteningthe bottom
of the posts (6 each left & right)
Use bolts and tool
A. 8mm L-wrench
B. M10 X 60 Hex socket head cap screw 4pcs
C. M10/2t Washer 12pcs
D. 6mm L-wrench
E. M10 X 20 Hex socket button head cap screw 8pcs
A B C
D E C
Use bolts and tool
CAUTION : Nuts must be tightened rmly.
Otherwise, it may cause noise, vibration and breakdown.
Screw bolts into the nuts before positioning and tighten
them in turn.
A-6. INSTALLATIONA. GENERAL
1
2
3
4

10
4
A-6. INSTALLATIONA. GENERAL
Console Assembly
Attaching the Console Assembly
1. Insert the legs of Console Assembly into the left and right post
2. pushing 4 cords through the post.
3. Loosely tighten 8 bolts with nuts fastening the bottom of the
Console Assembly to the top of the posts (4 bolts each left & right)
4. After assembling the console part, tighten all bolts surely and tightly
Use bolts and tool
A : 6mm L-Wrench
B : M10 X 20 Hex Socket Head Cap Screw (right & left) 8pcs
C : M10/2t Washer (right & left) 8pcs
A B C
Use bolts and tool
1
2
3
Nuts must be tightened rmly.
Otherwise, it may cause noise, vibration and breakdown.
Screw bolts into the nuts before positioning and tighten
them in turn.
CAUTION

11
A-6. INSTALLATIONA. GENERAL
Wiring of Console
The Actuator, Motor and Input Cables on the Inverter are assembled
to the Socket in the factory in advance
1. Pull A: Audio Cable, B: HDMI, C: TV Antenna Cable from the hole
at the lower side of the left post
2. Pull D: TV Power Cable from the hole at the lower side of the right
post
3. Insert the Audio Cable into the Socket located in the PCB on the
back side of the front cover.
(Pay attention not to insert the cable in reverse.)
4. Join TV Antenna Connectors
CABLE
3
4
Use of any plug or a cord that is not grounded may
cause electric shock or malfunction of the machine.
A
1. Left Post 2. Right Post
C
B
D
WARNING

12
ON
OFF
POWER
AC IN 200~240V
/ 50~60Hz
HDMI IN
ETHERNET
AUDIO IN
R L VIDEO
IN
ANTENA
IN
ON
OFF
POWER
AC IN 220V / 60Hz
HDMI IN
AUDIO IN
R L VIDEO
IN
ANTENA
IN
AC Power connection and TV Antenna Cable
1. Insert the Antenna Cable to the Antenna Socket on the Front Cover
-For Video or DVD watching, insert Audio cable or DVD cable.
2. HERA -7000HD should use grounded socket and power cord. Insert
the power cord provided to the power inlet at the front of main body
and connect the power plug to the grounded socket.
3. Press the red lamp to turn on the main body.
Adjusting Level Foot
1. Screw/unscrew the level pads at the bottom of the frame using, if
necessary, a spanner to adjust levelness of the frame. Clockwise
frame down, Counterclockwise frame up)
2. When levelness has been achieved, turn the locking nuts upward
counterclockwise to lock the level pads rmly.
Use bolts and tool
24mm Spanner
A-6. INSTALLATIONA. GENERAL
Use bolts and tool
27mm
1
2/3
1
2
- Pull o the power plug while not in use for a long period of time.
- Only use standard power cord.
- Do not use extension of power cord.
- Do not use damaged power cord.
- Do not leave the power cord exposed on a frequented passage.
- Do not leave the power cord in damp area or near the
inammable material.
- If the Treadmill is moved or removed, pull o the power plug rst.
- If the supply cord is damaged, it must be replaced by a special
cord or assembly from the manufacturer or its service agent.
If the machine is not precisely leveled, it may
cause noise, sidedrifting of running belt and
reduce durability of the Treadmill.
CAUTION
CAUTION

13
Belt tension and side-drift adjustment.
Belt tension must be adjusted whenever the machine was rst installed or moved. Otherwise, it may cause slipping or damage of belt or
worn-down and breakage of other parts. Belt adjustment consists of belt tension adjustment and level adjustment.
Note : Turn the belt adjustment screw-heads in end-cover using 8 mm hexagon wrench to adjust the belt as shown in the above
Adjustment with T-Wrench and movement change of belt and roller
Adjustment of Tension
It is adjustment of distance between front and back rollers to obtain
optimal tension of the belt which is necessary to prevent slipping of
the belt during running..
1 : Turn the power on.
2 : Operate the machine at 4km/h.
3 : Holding the handgrip, push the belt with foot to the opposite
direction of running. If the belt momentarily stops (slips), then
adjustment is necessary.
4 : Adjust belt tension turning the adjustment screws left or right
using hexagon wrench. Repeat the process until no slippage
occurs.
Adjustment of Side-drifting
After the adjustment of belt tension, adjust side-drifting as follows
1 : Increase the belt speed to 10 km/h.
2 : Adjust belt balance using 8mm hexagon wrench while visually
checking the belt for side-drifting.
3 : If no sign of side-drifting shows after 5 minutes, then the balance
of belt has been achieved. If side-drifting occurs within 5 minutes,
repeat the process until balance is achieved.
4 : If necessary, talce out the motor and adjust belt balmce by using
8mm L-wrench as shown in the picture
belt movement
direction
belt movement direction
A-6. INSTALLATIONA. GENERAL
Belt Section Wrench movement Roller shaft movement Side-drifting
Left
(Fig. 1)
Clockwise Left side backward To the right
Counterclockwise Left side forward To the left
Right
(Fig. 2)
Clockwise Right side backward To the left
Counterclockwise Right side forward To the right
Do not turn the wrench without checking the change in belt
movement. Too much turning will push the belt to one side and
can damage it. It is recommended to turn the wrench by 1/4 or
by 1/8 revolution at a time for precise ad justment.
CAUTION

14
13
14
1516
17
18
A-7. INSTRUCTIONSA. GENERAL
Designation
Consol
1
Console Cabinet(Front)
2
Display
3
Control Board
4
HR / Body Fat Grip
5
HR / Body Fat Grip
6
Urethane Handgrip(L)
7
Urethane Handgrip(R)
8
Emergency Stop Button
9
Jack Housing(Earphone Connecter)
10
Console Cabinet(Rear)
11a / 11b
Cover for after-sales service
(11a : Under Console / 11b : Rear monitor)
Body
12 Motor Cover
13 Running Belt
14 Non-slip
15 Main Frame
16 Front Cover
17 End-Cover
1
211b
3
4 5
7
8
9
10
6
11a
PART NAMES

15
A-7. INSTRUCTIONSA. GENERAL
17
Front-cover
18
End-cover
19 Wheel
20 Oil Inlet
21
Level Foot
In side motor cover
22 Motor
23 Inverter
24 Converter
25 Actuator
26 TV Adapter
27 Dust Block Plate
28 POLY V-Belt
29 Roller Front
Name plate
A : Indicates model name
B : Indicates serial number
C : Indicates production date
NOTE :
The name plate is located on the back cover
of the console cabinet
CAUTION!
Risk of electric shock
Do not open treadmil
motorcover. In case of
problem, please contact
the service center.
Product.
Model.
Serial number.
Net weight.
Max. User Weight.
Power.
Date.
TREADMILL.
210 kg
180 kg
AC 230V-50/60Hz, 2.2kw
Date.
HEALTH-ONE.CO.,LTD.
www.ehealth-one.com
Tel.82-(0)-31-949-8010
MADE IN KOREA
A
B
C
T0912100K
17
19
18
21
20
22 23
24
26
27
28
29
25

16
A. GENERAL
MAIN CONTROL
START / STOP button
Press this button to start or gradually stop HERA-7000HD. This
button toggles between start and stop operations. Its initial starting
speed is 0.8km/h.
SPEED button
This button regulates speed of belt. It increases or decreases the
speed by 0.1km/h per touch. The maximum speed is 20km/h while
the minimum speed is 1.0km/h. This button is disabled during STOP.
INCLINE button
It regulates incline angle of the running belt. Pressing the button once
increases or decreases the incline by 1%. Minimum incline is 0% (0˚)
and maximum incline is 16% (7.2˚). The incline function can also be
operated during STOP mode.
TIME window
It shows duration of exercise in minutes from minimum 1 minute
up to maximum 59 minutes. When the treadmill is set to a workout
target mode or a program mode, its display shows remaining time.
CALORIES window
It shows user’s calorie consumption in Kcal units. The default
calculation of calorie consumption is based on body weight of
70 Kg. To see exact calorie consumption, input user’s weight.
DISTANCE window
It indicates the distance run by the user. When the treadmill is set
to a workout target mode or a program mode, its display shows
remaining distance.
HEART RATE window
It shows the user’s heart rate. This product has two types for
monitoring heart rate. One is from the hand pulse grip and another
from a chest belt, wireless heart rate monitoring system.
CALORIES button monitoring heart rate. One is from the hand pulse grip and another
TARGET button from a chest belt, wireless heart rate monitoring system.
A-7. INSTRUCTIONS
Any foreign materials or dusts on the Soft Touch Button may cause malfunction right after POWER-ON. (When you turn on/
o the power, please wait 1 minute to waste remaining power inner electronic devices).
CAUTION

17
A. GENERAL
Prole Program Select one of 6 dierent prole programs
+, - button Press +, - button to set any numbers
Enter Button Jump up to next part
Bluetooth Button Press 2~3 seconds to start pairing between wearable device and
treadmill
MESSAGE window It display messages for the user.
POWER Turn the TV on/o
SELECTION button This button is to select one of the video signals such as TV or USB
EXIT / OFF To cancel or close the menu.
TV Setting(3 sec.) Press Exit Button about 3 secs to enter TV Setting mode.
(Refer to Page 28 for details)
Select To set any menu or select USB le
Volume TV Volume Regulation
Channel TV Channel
PARAMETER Press both ‘ENTER’ and ‘V’ button at once for 5 secs to enter
PARAMETER MENU. (Refer to Page 26 for details)
A-7. INSTRUCTIONS

18
A. GENERAL A-7. INSTRUCTIONS
A
B
OTHER CONTROL COMPONENTS
EMERGENCY STOP
The emergency stop key stops the treadmill immediately in the event
of an emergency. All buttons and functions will not operate while
emergency stopkey is engaged.
For normal operation, release the locking of the emergency stop key
by turning it toward clockwise.
Bluetooth(Option) Connection
Firstly turn on the wearable device’s power and then press ‘Bluetooth’
button. If you press ‘Bluetooth’ button one more time, the name of
device will be shown on FND. If you press the ‘Bluetooth’ button
again, will be disconnected.
Health-One Treadmill is commercial purpose. So it does not support
any re-connection by previous connection as various people use
many machines.
Headphone Jack Housing
To connect wire headphone/earphone on both jacks(#1,#2).
USB, HDMI Connection
A : To receive HDMI signal
B : Connect USB device at port#1 only(#2 is not available)
User can load any photo, MP3 or video les from USB device.
AUTO STOP
The treadmill automatically stops 10 seconds after user gets
out of the machine.
When you are going to step down during workout or wish
to stop the machine immediately, you must always do so
holding both handgrips and use the non-slip footing to
avoid accident.
Bluetooth and Wireless Headphone are options
Wireless headphone and Heart Rate devices are option.
CAUTION
CAUTION
CAUTION

19
A. GENERAL
HEART RATE MONITORING SYSTEM
Health-One treadmill is equipped with POLAR Hear Rate System
using Dual Contact and Wireless heart rate monitoring board to
check the heart rate during workout.
Contact Heart Rate monitoring system
There are two heart rate sensors located on each of the side
handgrips.
User has to contact all four sensors to obtain a heart rate.
Theoretical Heart Rate by Age
According to research for health and tness, the optimal way for
monitoring the intensity of a workout and achieving maximum results
is to maintain a specic heart rate during workout. The user is
recommended to refer to the following heart rate table for better
workout.
MAXIMUM INTENSITY ZONE
AEROBIC ZONE
WEIGHT CONTROL ZONE
LOW INTENSITY ZONE
60%
70%
90%
100%
BPM
0 15 20 25 30 35 40 45 50 55 60 65
205
184.0
200
180.0
195
175.5
190
171.0
185
166.5
180
162.5
175
157.5
170
153.0
165
148.5
160
144.0
155
139.0
143.5 140.0 136.5 133.0 129.5 126.0 122.5 119.0 115.5 112.0 108.5
123.0 120.0 117.0 114.0 111.0 108.0 105.5 102.0 099.0 096.0 093.0
Age
Theoretical Heart Rate by Age
A-7. INSTRUCTIONS
Individuals more than 5 minutes, depending on
the season to exercise may be measured.
Do not use it if you wear a cardiac support devices
such as a pacemaker or similar.
Chest Belt (OPTION)
The Electrodes on the chest belt sensors user’s heart rate. The
electrode sensors better when it is humid(sweat or water/ max 30
seconds)
CAUTION
CAUTION

20
MANUAL WORKOUT
1. Turn the POWER on.
Press POWER switch located on the front cover.
A-8. OPERATION INSTRUCTIONSA. GENERAL
OPERATION INSTRUCTIONS
1
2
3
44. Press STOP button to nish the workout
When the user pushes the STOP button, the MESSAGE window
displays SUMMARY and this message remains for 30 seconds.
After showing the Workout Resume, the screen automatically
converts into the TV screen, which is a stand-by screen.
2. Press START button.
Press START button. Then the running belt will start to move at the
starting speed of 1.0km/h.
3. Adjust SPEED and/or INCLINE.
Adjust speed or incline as the user wishes by pressing the SPEED
or INCLINE button.
The START STOP button toggles between start and stop,
i.e., rst pressing starts operation and pressing it again
stops the operation, and so on.
When the treadmill stops with the EMERGENCY STOP, it
does not show the “SUMMARY”.
When you are going to step down during running of the
machine or wish to stop the machine immediately, you
must always do so holding both handgrips and use the
non-slip footing to avoid accident.
CAUTION
CAUTION
This manual suits for next models
1
Table of contents
Other HEALTH ONE Treadmill manuals