Hedson Drester Boxer Double Aqua User manual

1
16011 rev 2012-02-29
Drester Boxer Double Aqua
DB22A / DI22A
© Hedson Technologies AB 2012
16011 rev. 2012-02-29
Operation manual
Bedienungsanleitung
Mode d’emploi
ENG
DE
FR
SE
IT
ES
Bruksanvisning
Manuale d’uso
Manual de operación

216011 rev 2012-02-29
CONTENTS original language
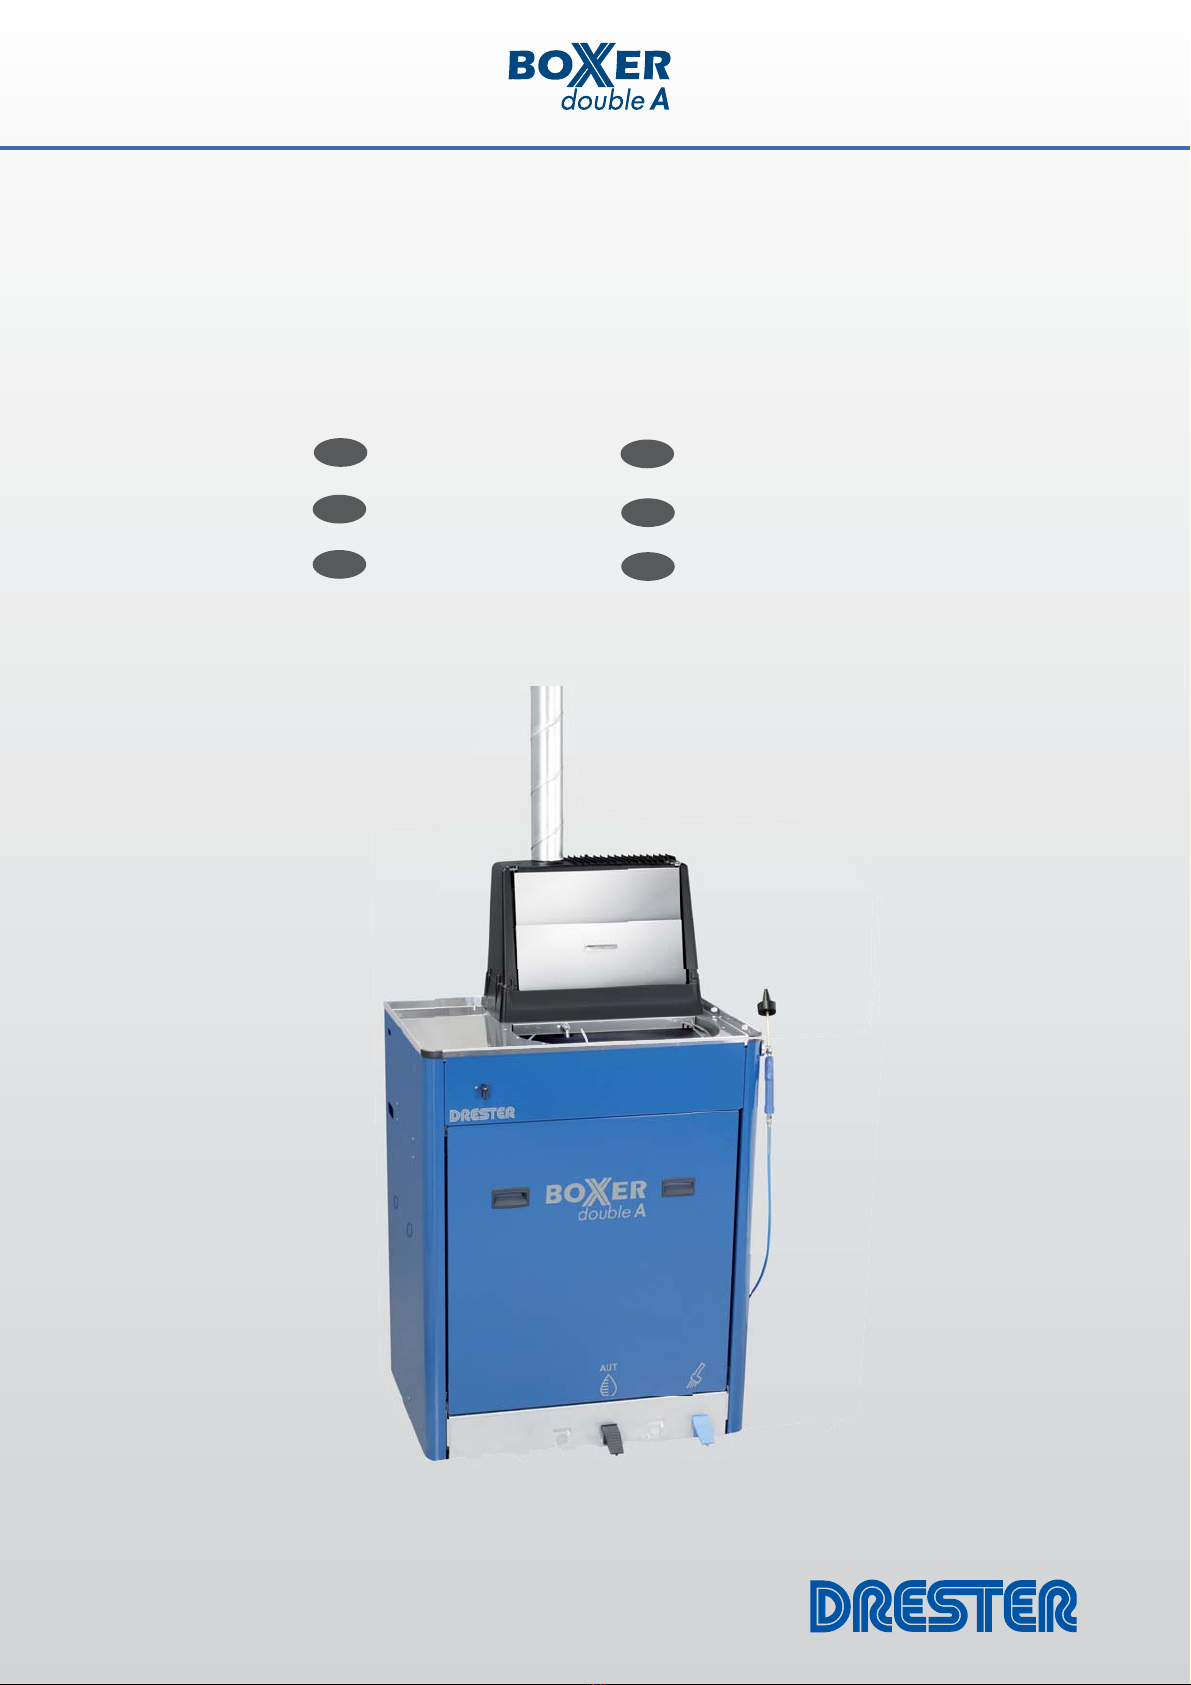
Purpose of the machine ...........................................................3
Assembly.................................................................................3
Placing the Unit.......................................................................3
Installation ..............................................................................3
Permitted solvents ...................................................................4
Permitted solvent drums ..........................................................4
Collecting tray .........................................................................4
Preparation for use..................................................................4
Operation instructions..............................................................5
Operation without tap water connection ..................................5
The coagulation process...........................................................5
Changing the filter...................................................................6
Service ....................................................................................6
Safety Information ...................................................................7
Technical data .........................................................................7
INHALTSVERZEICHNIS
Verwendungszweck.................................................................8
Montage .................................................................................8
Aufstellung des Geräts.............................................................8
Installation ..............................................................................8
Zulässige Lösemittel.................................................................9
Zulässige Lösemittelfässer........................................................9
Auffangwanne.........................................................................9
Inbetriebnahme .......................................................................9
Betriebsanleitung...................................................................10
Betrieb ohne Frischwasser-anschluss ......................................10
Der Koagulierungsprozess......................................................10
Filtertausch............................................................................11
Wartung................................................................................11
Sicherheitsinformationen........................................................12
Technische Daten...................................................................12
SOMMAIRE
Domaine D’utilisation.............................................................13
Montage ...............................................................................13
Mise en place ........................................................................13
Installation ............................................................................13
Solvants autorisés..................................................................14
Bidons de solvant autorisés....................................................14
Bac récepteur ........................................................................14
Préparations pour l’utilisation ................................................14
Instructions d’utilisation.........................................................15
Utilisation sans connexion à l’eau du robinet..........................15
Le processus de coagulation ..................................................15
Changement de filtre.............................................................16
Entretien ...............................................................................16
Informations de sécurité.........................................................17
Caractéristiques techniques....................................................17
Innehållsförteckning
Användningsområde..............................................................18
Montering .............................................................................18
Placering ...............................................................................18
Installation ............................................................................18
Tillåtna lösningsmedel ...........................................................19
Tillåtna dunkar ......................................................................19
Uppsamlingskärl....................................................................19
Förberedelse för användning..................................................19
Bruksanvisning ......................................................................20
Drift utan kranvattenanslutning..............................................20
Koaguleringsprocessen ..........................................................20
Byte av filter..........................................................................21
Service ..................................................................................21
Säkerhetsinformation.............................................................22
Tekniska data ........................................................................22
INDICE
Destinazione d’uso dell’apparecchio.......................................23
Montaggio ............................................................................23
Posizionamento .....................................................................23
Installazione..........................................................................23
Solventi consentiti .................................................................24
Fusti di solvente consentiti.....................................................24
Vaschetta di raccolta..............................................................24
Preparazioni per l’uso ............................................................24
Istruzioni per l’uso .................................................................25
Funzionamento senza alimentazione di acqua pulita...............25
Il processo di coagulazione ....................................................25
Sostituzione filtri....................................................................26
Manutenzione .......................................................................26
Avvertenze di sicurezza..........................................................27
Dati tecnici ............................................................................27
CONTENIDO
Aplicaciones de la máquina....................................................28
Montaje ................................................................................28
Ubicación de la unidad ..........................................................28
Instalación.............................................................................28
Disolventes permitidos...........................................................29
Bidones para disolventes permitidos.......................................29
Bandeja de recolección ..........................................................29
Preparaciones para el uso ......................................................29
Instrucciones de operación.....................................................30
Operación sin conexión al agua del grifo................................30
Proceso de coagulación .........................................................30
Cambio del filtro....................................................................31
Mantenimiento......................................................................31
Información de seguridad ......................................................32
Datos técnicos.......................................................................32
ENG
DE
FR
SE
IT
ES

3
16011 rev 2012-02-29
PURPOSE OF THE MACHINE
The machine is intended for cleaning of air-driven spray-guns
that have been used for painting with water-based paint
systems .
The unit has two separate areas for cleaning:
1. An automatic washer (item 1 illustration 1), intended for
cleaning of spray-guns with gravity fed paint-cups.
In this washer water or water-based solvents can be used.
2. A sink (item 2 illustration 1), intended for manual cleaning
of other tools used in connection with vehicle paint-jobs
like: spray-guns with suction fed paint-cups, filler scrapers,
paint brushes and such.
In this sink water only shall be used.
All other use of the unit are not allowed like:
– Emptying excess paint into the unit
– Cleaning of electric chargeable items
– Collecting of various waste
– Cleaning of textile materials
– Storing of items
– Cleaning of hands or other parts of the human body
– Cleaning of any items for food or drinks
The coagulation process described below (according to recommenda-
tions from the paint manufacturer) allows the cleaning water to be
re-used. CHECK CAREFULLY WITH THE APPROPRIATE AUTHORITY TO
ENSURE THAT THE FILTERED WATER OBTAINED AFTER THE COAGULA-
TION PROCESS MAY BE EMPTIED INTO THE REGULAR DRAIN-WATER
SYSTEM. YOU MAY NEED INFORMATION FROM THE PAINT MANU-
FACTURER WHEN DOING SO.
ASSEMBLY
– First of all, check if the machine has been damaged during
the transport. Remove the packaging and check again that
the machine has not been damaged during the transport. If
so, report this immediately to the transport company.
– Fit the air-driven extractor (item 3 illustration 1) over the
flange of the automatic washer, and connect it to the blue
air-hose (taped on the backside of the unit) by sticking the
hose into the connector of the extractor.
– The air-line on the left side of the unit (item 4 illustration 1)
is during transport placed inside the unit.Take it out, and
fasten it with the magnet in a convenient place on the left
side. The air-line can be routed either outside the side-wall,
or through the gap between the front lid and the side wall.
This air-line is intended to blow out the spray-gun after the
cleaning procedure.
– The air-gun on the right side of the unit (item 12 illustration
1) is during transport placed inside the unit.Take it out,
and fasten it with the magnet in a convenient place on the
right side. The air-line for the air-gun can be routed either
outside the side-wall, or through the gap between the front
lid and the side wall.
This air-gun is intended to blow the spray-gun dry after the
cleaning procedure.
PLACING THE UNIT
DRESTER BOXER DOUBLE A is equipment Category 2 (ref.
ATEX-directive 94/9 EC) and may therefore be placed in loca-
tions classified as Zone 1 (ref.ATEX-directive 1999/92 EC).
This manual is part of the unit and must be available at all
times.
INSTALLATION
Compressed air
The unit must be connected to compressed air of 7-12 bar
(110-180 psi). When in use, the unit consumes 250 litres/min
(9 cfm) of air.
The air is to be connected to the moisture trap inside the unit
(item 1 illustration 2).To access this point, remove the front
panel (item 5 illustration 1) by lifting it up-and-out.
The air-line can be led into this point via the slots on the side
of the unit, or through the open back of the unit. In either case,
make sure that the air-line do not bend the hoses or in any
other way harm the pneumatic system of the unit.
To prevent pressure drops, the air line and couplings must be
adequately dimensioned. The regulator on the unit is pre-set to
6.5 bar (100 psi). This is the optimal setting and must not be
altered.
The compressed air supplied to the unit must be clean and dry.
If it is not first led through a water trap and filter, it may cause
damage to the pneumatic components of the unit, which will
invalidate any warranty claims.
Fit a connector to the air-line on the left side of the unit (item 4
illustration 1).This air-line is intended to blow out the spray-
gun after the cleaning procedure.
Grounding the unit
Make sure that the unit is properly grounded by using the
grounding cable (item 6 illustration 2).
Tap-water connection
Connect a hose for tap water to the water inlet connector (item
13 illustration 2).
The hose can be led into this connector via the slots on the side
of the unit, or through the open back of the unit. In either case,
make sure that the hose do not bend the air-lines or in any
other way harm the pneumatic system of the unit.
ENGLISH
Ref: Illustration attachment 17011

416011 rev 2012-02-29
Drain hose
Connect a drain hose to the drain outlet connector (item 12
illustration 2). Lead it on to, and secure it well to a regular
drain-water system.
The hose can be led into this connector via the slots on the side
of the unit, or through the open back of the unit. In either case,
make sure that the hose do not bend the air-lines or in any
other way harm the pneumatic system of the unit.
Ventilation
The air-driven extractor must be connected to a metal ducting
to lead the exhaust outdoors. An alternative is to lead it into a
hood that is in turn connected to a suitable ventilation system
approved for Zone 1. This hood should have an open design so
as to avoid constant extraction (see illustration 10).
The metal ducting may not be longer than 15 metres, and must
be connected in such a way as to ensure grounding.
PERMITTED SOLVENTS
The unit has two separate areas for cleaning:
1. The automatic washer (item 1 illustration 1). In this washer
water or water-based solvents can be used.
2. The sink (item 2 illustration 1). In this sink water only shall
be used.
Thinner/gun-wash must NOT under any circumstances be
used in this machine.
PERMITTED SOLVENT DRUMS
The DRESTER BOXER DOUBLE A can be used with different
types of drums, but they must comply with the following:
– The drums must fit into the unit
– The drums must be leak-free.
– Check for local regulations concerning max allowed volume
for keeping solvents in the unit
Solvent drums are not provided by Hedson Technologies,
thus Hedson Technologies does not take any responsibil-
ity for the drums. Follow the solvent supplier’s instructions
carefully.
COLLECTING TRAY
The unit must be installed in such a way as to prevent acciden-
tal leakage of solvent or contaminated water from spreading
into a drain water system, thus representing a hazard to the
environment. This can be done by:
– installing the unit in a location where floor and walls can
hold any accidental drum leakage, or
– equipping the unit with a collecting tray beneath the solvent
drum and water container that is large enough to hold the
volume of at least one leaking item.
PREPARATIONS FOR USE
Solvent drum
Remove the front panel (item 5 illustration 1) by lifting it up-
and-out.
Remove the foot-pedal console (items 6 illustration 1) by lifting
it up and folding it out to the side (see illustration 2).
Place the drum to the left underneath the unit (item 2 illustra-
tion 2). Insert the group of hoses containing the drain hose
from the automatic washer into this drum (item 4 illustration
2). Make sure that the hoses are properly led well down into
the drum, and that the opening is well sealed by the tapered
plug.
Drum plugs
There are several types of solvent drums on the market, each
with different diameter of the opening. With the unit, a card-
board box with a selection of tapered plugs is supplied (see
illustration 3). Select the plug that fit well into the opening of
the drums, and fit them onto the drum adaptor of the hoses
(see illustration 4).
Water
Fill the filtrate container (item 7 illustration 2) to 1/2 of the
volume with clean water.
Operating instructions
Operating instructions should be formulated on the basis of
this manual and translated into the language spoken by the
employees. It should always be available close to the machine.
To avoid confusion, the employees must be informed about the
solvent currently being used in the machine.

5
16011 rev 2012-02-29
OPERATING INSTRUCTIONS
Empty the spray-gun of any residual paint into a separate spills-
dish.
Open the main valve for compressed air (item 7 illustration 1).
Open the lid for the automatic washer (make sure it `clicks` into
the full open position).
Place the spray-gun inside (see illustration 5).
Be sure to fit the trigger clip following illustration 6, and to
push the spray-gun up against the nozzle for the paint-channel
(item 1 illustration 5) before you lock it into position with aid of
the magnets of the trigger clip.
If you prior to cleaning prefer to remove the Air-cap and the
needle of the spray-gun, then place those items as shown by
arrow 5 in illustration 5.
Close the lid, and start the automatic pre-wash cycle by press-
ing the foot pedal No.8 illustration 1.The spray-gun will now
be automatically cleaned for approx. 1.5 minutes with circulat-
ing solvent.
When the cleaning procedure is completed, the lid can be
opened and the spray-gun taken out. It can now be manually
further washed or rinsed with water.
By pressing foot pedal No.10 in illustration 1, recirculating
water will be fed through the cleaning brush placed in the sink
(item 1 illustration 7). Note that the ball-valve on the brush
(item 6 illustration 7) must be in an open position.
The spray-gun’s paint channel can now be rinsed with clean
water. Press the tapered nozzle of the rinse-gun (item 2 illustra-
tion 7) against the paint channel of the spray-gun. Pull the
triggers on the spray- and rinse-guns simultaneously. Then rinse
the outside of the spray-gun with the rinse-gun.
The brush and rinse-gun in the sink can be used independently
of the automatic washer at any time.
Connect the spray-gun to the air-line on the left side of the
machine (item 4 illustration 1), and blow out the spray-gun
through the funnel in the sink (item 3 illustration 7). By using
this funnel, you prevent the fumes from spreading within the
premises.
Finally, the spray-gun can be blown dry by using the air-gun on
the right side of the unit (item 12 illustration 1).
Close the lid after cleaning.
OPERATION WITHOUT TAP-WATER CONNECTION
If tap water is not available at the site of the gun-cleaner, you
have the option to use recycled water (obtained from the filter-
ing process) for the rinse-gun as well as the cleaning brush
In that case the machine should be reconnected as follows:
Disconnect the hose for the rinse-gun (item 1 illustration 9)
from the valve-panel, remove the red plug from the cross-
junction on the pump (item 2 illustration 9) and fit the hose in
its place.
The wash-brush as well as the rinse-gun in the sink will now
both operate with recycled water by pressing foot-valve 10
illustration 2.
When using the rinse-gun, the valve on the wash-brush (item 6
illustration 7) must be closed.
THE COAGULATION PROCESS
1. EMPTYING THE FILTRATE CONTAINER
When the water level reaches the level of the working platform
(item 4 illustration 7), it is time to perform the coagulation pro-
cess. The filtrate container (item 7 illustration 2) must however
first be completely drained of its remaining content.
Remove the front panel (item 5 illustration 1) by lifting it up-
and-out.
Turn the lever (item 9 illustration 2) to open position, turn the
lever on the cleaning-brush in the sink to a closed position and
start the draining by opening the valve for the pump (item 8
illustration 2).The pump will now completely drain the filtrate
container through the drain hose and into the regular drain-
water system.
You will be able to tell when the filtrate container is empty,
since the pump will start to run faster. Then close the valve for
the pump as well as for the drain hose.
2. COAGULATION
N.B.: IT IS ABSOLUTELY VITAL THAT THE COAGULATION PROCESS IS
CARRIED OUT WITH THE GREATEST CARE, SO THAT LARGE FLOCKS
OF COAGULATED PAINT ARE FORMED. OTHERWISE THE FILTERS WILL
IMMEDIATELY BECOME OBSTRUCTED, AND CANNOT BE RE-USED.
A: Remove the working platform (item 4 illustration 7B).
B: Open the valve for the water agitator (item 5 illustration 7B).
C: Add the coagulation powder as recommended by the paint
manufacturer.
D: Stir the powder with a stick for a moment to avoid that it
sinks down to the bottom in lumps.
D: Allow the agitator to run for a few minutes.
E: Stop the agitator occasionally for around 30 seconds since
this improves the coagulation process. The total coagulation
time is around 3-4 min, depending on the amount of powder,
the level of contamination, etc.
When this is done, close the valve for the agitator.

616011 rev 2012-02-29
3. FILTRATION
Open the drain-valve (item 10 illustration 2) and drain the wash-basin
completely into the filter (item 11 illustration 2). Clean the inside of
the wash-basin thoroughly with the cleaning brush (i.e. with recycled
water), so that any remains of residual flocks are completely drained
into the filter.
When this is done, close the drain-valve
CHANGING THE FILTER
N.B.: MAKE SURE THAT YOU USE ORIGINAL DRESTER FILTERS,
NR. 8701 (FINE FILTER), AND NR. 8702 (PRIMARY FILTER).
THESE FILTERS HAVE BEEN TESTED AND APPROVED BY THE
PAINT MANUFACTURERS.
The primary filter (item 2 illustration 11) collects most of the
coagulated sludge, while the fine filter (item 1 illustration 11)
collects the finer paint particles.
Remove the sludge from the primary filter after each coagula-
tion process (once it is completely dry, the sludge is easy to
remove from the filter). By doing so the primary filter can be
re-used up to 10 times.
The fine filter will gradually become blocked after trapping the
finer paint particles. In general, the fine filter can be used for
up to 5 coagulation processes. The fine filter must however be
changed every 1-2 months, otherwise there is a risk that mould
will develop.
N.B.: THE COAGULATION SLUDGE MUST BE HANDLED IN
ACCORDANCE WITH REGULATIONS FROM THE APPROPRIATE
AUTHORITY. INFORMATION FROM THE PAINT SUPPLIER MAY
BE NECESSARY.
SERVICE
Weekly
– Remove the strainers at the bottom of the automatic
washers (item 2 illustration 5) and clean them.
Do not forget to re-fit !
Monthly
– Remove the five nozzles in each automatic washer and
clean them with clean solvent. (see illustration 8).
When changing drums
– Check and if necessary clean the strainers on the suction
hoses.
When changing filters
– Check and if necessary clean the strainer on the suction
pipe (item 15 illustration 2).
– Take out the filtrate container (item 7 illustration 2) and
empty it completely. Rinse it with water and wipe it off with
cloth or paper.
Every month
– Change the water completely.

7
16011 rev 2012-02-29
SAFETY INFORMATION
Hazards may arise from improper use of the DRESTER BOXER
DOUBLE A. Hazards may also arise from improper choice/hand-
ling of drums or solvent. In order to maintain the high safety
standard of the unit, it is important that these instructions are
followed.
– Do not operate the unit until you have read and fully under-
stood this entire User’s Manual.
– The unit should be installed as described in the instructions.
– The unit should be used as described in the instructions.
– The unit should be maintained as described in the instruc-
tions.
– Only original spare parts may be used.
– This User’s Manual must be available and in legible condi-
tion in close proximity to the unit. Every user shall know
where to find the User’s Manual.
– Operating instructions should be formulated on the basis of
this Users Manual, and translated into the language spoken
by the employees.
– Do not modify or in any way alter the unit.
– Do not operate the unit unless it is properly vented. Do not
operate the unit if the extraction of vapors is insufficient.
– Avoid contact with liquid and vapour. Refer to the solvents’
MSDS (Material Safety Data Sheet).
– Wear chemical goggles or similar, to protect your eyes.
Wear chemical-resistant gloves to prevent skin-contact.
Wear chemical-resistant clothing to protect against spills or
splash.
– Personnel suffering from respiratory problems or allergies to
solvents used, must not operate the machine.
– Clean up spills immediately.
– Do not smoke, eat or drink while close to the unit.
– The unit is equipped with a safety valve that will interrupt
the automatic wash cycle if the lid is opened before the
wash cycle is completed.
– Spray guns or any other paint equipment items cleaned
in the unit must be suitable for cleaning in a Zone 1 area
(ref. Category 2 according to EN 13463-1/2001). If unsure,
please contact the spray gun manufacturer.
– The unit must be properly grounded using the attached
grounding cable. If plastic drums are used, the openings
should be wiped off with a damp cloth, to avoid static
electricity, before inserting or removing any hoses or other
equipment.
TECHNICAL DATA
Manufacturer HEDSON TECHNOLOGIES AB
Hammarvägen 4
SE-232 37 Arlöv
Sweden
Tel.: +46-40- 53 42 00
Type of machine DRESTER BOXER DOUBLE A
Permitted solvents See section “Permitted Solvents”
Max solvent (water based)
volume of machine 30 litres
(Check for local regulations
concerning max allowed volume
for keeping solvents in the unit)
Maximum drum size 30 litres
Compressed air needed 7–12 bar (110-180 psi), 350 l/
min (13 cfm)
Extraction capacity 360 m3/hour (225 cfm)
(with a 15 m extension)
330 m3/hour (206 cfm)
(with a 5 m extension)
Pump capacity: 10 l/min
Solvent pressure 2 bar (30 psi)
Weight 65 kg (140 lb)
Overall dimensions Height: 1510 mm (59,5”)
Width: 835 mm (33”)
Max depth: 650 mm (25,5”)
Depth at the floor: 610 (24”)
Extractor diameter 80 mm (3 3/16”)
Sound pressure level <70 dB(A)

816011 rev 2012-02-29
VERWENDUNGSZWECK
Die Maschine ist für die Reinigung von druckluftbetriebenen
Farbspritzpistolen, die zum Lackieren mit wasserbasierenden
Lacksystemen benutzt wurden, bestimmt.
Das Gerät hat zwei verschiedene Bereiche für die Reinigung:
1. Eine automatische Waschkammer (Teil 1 Abbildung 1), zur
Reinigung von Fließbecherpistolen.
In dieser Waschkammer dürfen Wasser sowie Lösemittel auf
Wasserbasis verwendet werden.
2. Ein Waschbecken (Teil 2 Abbildung 1), zur manuellen Rei-
nigung anderer Werkzeuge, die bei Fahrzeuglackierarbeiten
benutzt werden z.B.: Saugbeckerpistolen, Spateln, Pinseln
und ähnliche.
In diesem Waschbecken darf nur Wasser verwendet werden.
Für folgende Anwendungen darf das Gerät nicht verwendet
werden:
– Leeren überschüssiger Farbe in das Gerät
– Reinigung von elektrisch betriebenen Geräten
– Sammeln von verschiedenen Abfallarten
– Reinigung von Textilien
– Aufbewahrung von Gegenständen
– Reinigung der Hände oder anderer Teile des menschlichen
Körpers
– Reinigung von Gegenständen die für Essen und Trinken
verwendet werden
Der Koagulationsprozess (laut Empfehlung des Lackherstellers)
ermöglicht die Wiederverwendung des Waschwassers. BEI DER
ZUSTÄNDIGEN BEHÖRDE BESTÄTIGEN LASSEN, DASS DAS FIL-
TRATWASSER NACH DER KOAGULATION UND FILTRATION IN
DAS ABWASSERSYSTEM EINGELEITET WERDEN DARF. DAFÜR
BENÖTIGEN SIE INFORMATIONEN IHRES FARBHERSTELLERS.
MONTAGE
– Prüfen Sie als erstes, ob die Maschine während des
Transports beschädigt wurde. Entfernen Sie die Verpackung
und überprüfen Sie nochmals, ob die Maschine während
des Transports beschädigt wurde. Wenn ja, melden Sie dies
sofort dem Transportunternehmen.
– Passen Sie den druckluftbetriebenen Extraktor (Teil 3 Abbil-
dung 1) über der Flansch der automatischen Waschkammer
an und verbinden Sie ihn mit dem blauen Luftschlauch (Mit
Klebeband auf der Rückseite des Geräts befestigt), indem
Sie den Schlauch in den Anschluss des Extraktors stecken.
– Die Luftleitung auf der linken Seite des Geräts (Teil 4 Abbil-
dung 1) befindet sich während des Transports im Inneren
des Geräts. Nehmen Sie sie heraus und befestigen Sie sie
mit dem Magneten an einer geeigneten Stelle auf der
linken Seite. Die Luftleitung kann entweder außerhalb der
Seitenwand oder durch den Spalt zwischen Vorderdeckel
und Seitenwand geführt werden.
Diese Luftleitung ist zum Ausblasen der Spritzpistole nach
DEUTSCH
Hinweiss: Bildbeilage 17011
dem Reinigungsvorgang bestimmt.
– Die Luftpistole auf der rechten Seite des Geräts (Teil 12
Abbildung 1) befindet sich während des Transports im Inne-
ren des Geräts. Nehmen Sie sie heraus und befestigen Sie
sie mit dem Magneten an einer geeigneten Stelle auf der
rechten Seite. Die Luftleitung kann entweder außerhalb der
Seitenwand oder durch den Spalt zwischen Vorderdeckel
und Seitenwand geführt werden.
Diese Luftpistole ist zum Trockenblasen der Spritzpistole
nach dem Reinigungsvorgang bestimmt.
AUFSTELLUNG DES GERÄTS
DRESTER BOXER DOUBLE A entspricht der Gerätekategorie 2
(Ref. 94/9 EG) und darf demnach in einem Arbeitsraum Zone 1
(ATEX-Richtlinie 1999/92 EG) aufgestellt werden.
Diese Bedienungsanleitung ist Bestandteil des Geräts und muss
jederzeit verfügbar sein.
INSTALLATION
Druckluft
Das Gerät muss an Druckluft mit 7-12 bar (110-180 psi) ange-
schlossen werden. Während des Betriebs beträgt der Luftbedarf
des Geräts 250 Liter/Minute (9cfm).
Die Luft muss an den Wasserabscheider im Inneren des Geräts
angeschlossen werden (Teil 1 Abbildung 2). Um an diese Stelle
zu kommen, entfernen Sie die Frontblende (Teil 5 Abbildung 1)
indem Sie diese hoch und dann heraus heben.
Die Luftleitung kann in diesen Punkt durch die Schlitze an der
Seite des Geräts oder durch die offene Rückseite des Geräts
geführt werden. Stellen Sie in jedem Fall sicher, dass die Luftlei-
tung nicht die Luftschläuche des Gerätes verbiegt oder in son-
stiger Weise das pneumatische System des Gerätes beschädigt.
Um Druckverluste zu vermeiden müssen die Luftleitung und
Kupplungen ausreichend dimensioniert sein. Der Druckregler
am Gerät ist auf 6,5 bar (100 psi) voreingestellt. Dies ist die
optimale Einstellung und darf nicht verändert werden.
Es darf nur trockene und gereinigte Druckluft verwendet
werden. Wenn die Luft vorher nicht durch einen Wasserabschei-
der und einen Filter geleitet wird, können die pneumatischen
Komponenten beschädigt werden und die Herstellergarantie
erlischt.
Montieren Sie eine Kupplung auf die Luftleitung auf der linken
Seite des Geräts (Teil 4 Abbildung 1). Diese Luftleitung ist zum
Ausblasen der Spritzpistole nach dem Reinigungsvorgang
gedacht.

9
16011 rev 2012-02-29
Erdung des Geräts
Stellen Sie sicher, dass das Gerät ordnungsgemäß mit dem
Erdungskabel (Teil 6 Abbildung 2) geerdet ist.
Frischwasseranschluss
Schließen Sie einen Schlauch für Leitungswasser an den Was-
sereinlaufstutzen (Teil 13 Abbildung 2) an.
Der Schlauch kann durch die Schlitze an der Seite des Gerätes
oder durch die offene Rückseite des Gerätes zusammen geführt
werden. Stellen Sie in jedem Fall sicher, dass die Luftleitung
nicht die Luftschläuche des Gerätes verbiegt oder in sonstiger
Weise das pneumatische System des Gerätes beschädigt.
Abflussschlauch
Verbinden Sie einen Ablaufschlauch mit dem Auslass-Anschluss
(Teil 12 Abbildung 2). Schließen Sie ihn gut befestigt an ein
normales Abwassersystem an.
Der Schlauch kann durch die Schlitze an der Seite des Gerätes
oder durch die offene Rückseite des Gerätes zusammen geführt
werden. Stellen Sie in jedem Fall sicher, dass die Luftleitung
nicht die Luftschläuche des Gerätes verbiegt oder in sonstiger
Weise das pneumatische System des Gerätes beschädigt.
Belüftung
Der druckluftbetriebene Extraktor muss mit einer Metall-
Rohrleitung verbunden werden, um die Abgase nach außen zu
leiten. Alternativ können sie in eine Haube geleitet werden, die
wiederum mit einem geeigneten, für Zone 1 zugelassenen Ven-
tilationssystem verbunden ist. Diese Haube sollte eine offene
Konstruktion haben, um dauernde Extraktion zu vermeiden
(siehe Abbildung 10).
Die Metall-Rohrleitung sollte nicht länger als 15 Meter sein und
muss so angeschlossen sein, dass die Erdung gewährleistet ist.
ZULÄSSIGE LÖSEMITTEL
Das Gerät hat zwei verschiedene Bereiche für die Reinigung:
1. Die automatische Waschkammer (Teil1 Abbildung 1). In
dieser Waschkammer dürfen Wasser sowie Lösemittel auf
Wasserbasis verwendet werden.
2. Das Waschbecken (Teil 2 Abbildung 1). In diesem Waschbe-
cken darf nur Wasser verwendet werden.
Verdünner/ Pistolenreiniger dürfen unter KEINEN Umständen in
dieser Maschine verwendet werden.
ZULÄSSIGE LÖSEMITTELFÄSSER
Der DRESTER BOXER DOUBLE A kann mit verschiedenen
Fässern betrieben werden, die aber folgende Voraussetzungen
erfüllen müssen:
– Die Fässer müssen in das Gerät passen
– Die Fässer müssen dicht sein.
– Erkundigen Sie sich nach den örtlichen Vorschriften zum
maximal erlaubten Volumen der Lösemittelmenge, die das
Gerät beinhalten darf.
Lösemittelfässer werden nicht von Hedson Technologies ange-
boten, somit übernimmt Hedson Technologies auch keinerlei
Verantwortung für die Fässer. Befolgen Sie sorgfältig die Anwei-
sungen des Lösemittel-Lieferanten.
AUFFANGWANNE
Das Gerät darf nur so aufgestellt und betrieben werden, dass
ein unkontrolliertes Auslaufen des Lösemittels und eine Wasser-
verschmutzung durch Verteilen im Abwassersystem verhindert
wird und keine Umweltgefährdung hervorgerufen wird. Dafür
kann folgendermaßen gesorgt werden:
– Bauen Sie das Gerät an einem Ort auf, wo Boden und
Wände versehentlich auslaufende Flüssigkeit auffangen
können
– Statten Sie das Geräts unterhalb des Lösemittelfasses
mit einer Auffangwanne aus, die groß genug ist, um das
gesamte Volumen eines Fasses aufzufangen.
INBETRIEBNAHME
Lösemittelfass
Entfernen Sie die Frontblende (Teil 5 Abbildung 1), indem Sie
sie hochschieben und herausnehmen.
Entfernen Sie die Fußpedalkonsole (Teil 6 Abbildung 1) indem
Sie sie hochschieben und zur Seite herausklappen (siehe Abbil-
dung 2).
Stellen Sie das Fass links unter das Gerät (Teil 2 Abbildung 2).
Legen Sie die Gruppe von Schläuchen mit dem Ablaufschlauch
von der automatischen Waschkammer in dieses Fass (Teil 4
Abbildung 2). Stellen Sie sicher, dass die Schläuche richtig weit
unten in das Fass geführt werden und dass die Öffnung gut
versiegelt ist mit dem sich verjüngenden Stopfen.
Stopfen für die Fassöffnung
Es gibt mehrere Arten von Lösemittelfässern auf dem Markt,
jeweils mit unterschiedlich großem Öffnungsdurchmesser. Das
Gerät wird mit einer Auswahl konischer Stopfen geliefert (siehe
Abbildung 3). Wählen Sie den Stopfen, der am besten in die
Fassöffnung passt und stecken Sie in auf den Fass-Adapter der
Schläuche (siehe Abbildung 4).
Wasser
Füllen Sie den Filtratbehälter (Teil 7 Abbildung 2) zur Hälfte mit
sauberem Wasser.
Betriebsanleitung
Betriebsanweisungen sollten auf der Basis dieser Betriebs-
anleitung formuliert und in die Sprache, die die Angestellten
sprechen, übersetzt werden. Sie sollte stets in der Nähe des
Geräts verfügbar sein. Um Verwirrung zu vermeiden, müssen
die Mitarbeiter über das derzeit in der Maschine verwendete
Lösemittel informiert werden.

10 16011 rev 2012-02-29
BETRIEBSANLEITUNG
Überschüssige Farbreste aus Farbbechern nicht im Gerät aus-
waschen, sondern vorher in Lack-Sammelbehälter entleeren!
Hauptabsperrventil für Druckluft öffnen (Teil 7 Abbildung 1).
Öffnen Sie den Deckel der automatischen Waschkammer (stel-
len Sie sicher, dass er in die voll geöffnete Position einrastet).
Legen Sie die Spritzpistole hinein (siehe Abbildung 5).
Achten Sie darauf, die Bügelklemme entsprechend Abbildung
6 anzubringen, und die Spritzpistole gegen die Düse für den
Farbkanal zu drücken (Teil 1 Abbildung 5), bevor Sie sie mit
Hilfe des Magnets der Bügelklemme befestigen.
Wenn Sie es bevorzugen, vor dem Reinigen die Luftkappe und
die Nadel der Spritzpistole zu entfernen, dann platzieren Sie
diese Teile wie durch den Pfeil 5 in Abbildung 5 dargestellt.
Schließen Sie den Deckel und starten Sie den automatischen
Vorwaschgang, indem Sie das Fußpedal Nr.8 aus Abbildung
1 treten. Die Spritzpistole wird jetzt automatisch für ca. 1,5
Minuten mit zirkulierendem Lösemittel gereinigt.
Wenn der Reinigungsvorgang abgeschlossen ist, kann der De-
ckel geöffnet und die Spritzpistole herausgenommen werden.
Sie kann nun, falls erforderlich, manuell weiter gewaschen oder
gespült werden.
Durch Treten des Fußpedals Nr.10 in Bild 1 wird Umlaufwasser
durch die Reinigungsbürste in das Waschbecken geleitet (Teil
1 Abbildung 7). Beachten Sie, dass sich der Kugelhahn an der
Bürste (Teil 6 Abbildung 7) in offener Position befinden muss.
Der Farbkanal der Spritzpistole kann nun mit sauberem Wasser
abgespült werden. Drücken Sie die konische Düse der Spülpi-
stole (Teil 2 Abbildung 7) gegen den Farbkanal der Spritzpistole.
Ziehen Sie die Auslöser der Spritz- und Spül-Pistole gleichzeitig.
Danach spülen Sie die Außenseite der Spritzpistole mit der
Spülpistole ab.
Bürste und Spülpistole im Waschbecken können jederzeit unab-
hängig von der automatischen Waschkammer benutzt werden.
Schließen Sie die Spritzpistole an die Luftleitung an der linken
Seite des Geräts an (Teil 4 Abbildung 1) und blasen Sie die
Spritzpistole durch den Trichter im Waschbecken aus (Teil 3
Abbildung 7). Durch die Nutzung dieses Trichters verhindern Sie
die Ausbreitung der Dämpfe innerhalb der Räumlichkeiten.
Schließlich kann die Spritzpistole, durch Verwendung der Luft-
pistole auf der rechten Seite des Geräts (Teil 12 Abbildung 1),
trocken geblasen werden.
Schließen Sie nach der Reinigung den Deckel.
BETRIEB OHNE FRISCHWASSERANSCHLUSS
Wenn kein Leitungswasser am Standort des Pistolenreinigers
vorhanden ist, haben Sie die Möglichkeit wiederaufbereitetes
Wasser (aus der Filterung) für die Spülpistole sowie die Reini-
gungsbürste zu verwenden.
In diesem Fall sollte die Maschine wie folgt wieder angeschlos-
sen werden:
Trennen Sie den Schlauch für die Spülpistole (Teil 1 Abbildung
9) von der Ventilkonsole, entfernen Sie den roten Stecker von
der Kreuz-Verbindungsstelle an der Pumpe (Teil 2 Abbildung 9)
und montieren Sie hier den Schlauch.
Die Waschbürste sowie die Spülpistole im Waschbecken werden
nun mit wiederaufbereitetem Wasser durch Treten des Fußven-
tils 10 in Abbildung 2 betrieben.
Bei Verwendung der Spülpistole muss das Ventil auf der Wasch-
bürste (Teil 6 Abbildung 7) geschlossen werden.
DER KOAGULATIONSPROZESS
1. LEEREN DES FILTRATBEHÄLTERS
Wenn der Wasserstand die Höhe der Arbeitsplattform (Teil 4
Abbildung 7) erreicht, wird es Zeit, den Koagulationsprozess
auszuführen. Der Filtratbehälter (Teil 7 Abbildung 2) muss
jedoch zunächst von seinem übrigen Inhalt entleert werden.
Entfernen Sie die Frontblende (Teil 5 Abbildung 1), indem Sie
sie hochschieben und herausnehmen.
Drehen Sie den Kugelhahn (Teil 9 Abbildung 2) auf die Position
offen, schließen Sie das Ventil auf der Waschbürste und starten
Sie das Entleeren des Filtratbehälters durch Öffnen des Ventils
der Pumpe (Teil 8 Abbildung 2). Die Pumpe wird nun den Fil-
terbehälter vollständig über den Abflussschlauch entleeren und
das Wasser in das reguläre Abwassersystem leiten.
Sie werden in der Lage sein, zu beurteilen, wann der Filterbe-
hälter leer ist, da die Pumpe dann schneller arbeitet. Schließen
Sie dann das Ventil für die Pumpe sowie den Abflussschlauch.
2. KOAGULATION
HINWEIS: ES IST SEHR WICHTIG, DASS DER KOAGULATIONS-
PROZESS SORGFÄLTIG DURCHGEFÜHRT WIRD, DAMIT GROSSE
FLOCKEN ENTSTEHEN. ANDERENFALLS VERSTOPFT DER FILTER
SOFORT UND KANN NICHT WIEDER VERWENDET WERDEN.
A: Die Arbeitsplattform (Teil 4 Abbildung 7) entfernen.
B: Öffnen Sie das Ventil für das Wasserrührwerk (Teil 5 Abbil-
dung 7).
C: Das Koagulationspulver laut Vorgabe des Lackherstellers
zugeben.
D: Rühren Sie das Pulver eine Weile mit einem Stab um, um zu
verhindern, dass sich Klumpen auf dem Boden bilden.
D: Lassen Sie das Wasserrührwerk für ein paar Minuten laufen.

11
16011 rev 2012-02-29
E: Das Wasserrührwerk zeitweise für ca. 30 Sekunden ab-
schalten. Dies beeinflusst den Koagulationsprozess positiv. Die
gesamte Koagulationszeit beträgt etwa 3-4 Minuten. Sie ist
abhängig von der Pulvermenge, dem Verschmutzungsgrad etc.
Nachdem dies ausgeführt wurde, schließen Sie das Ventil für
das Rührwerk.
3. FILTERUNG
Öffnen Sie das Abflussventil (Teil 10 Abbildung 2) und entleeren
Sie das Waschbecken komplett in den Filter (Teil 11 Abbildung
2). Reinigen Sie das Innere des Waschbeckens gründlich mit der
Reinigungsbürste (z.B. mit aufbereitetem Wasser), sodass alle
Rückstände komplett in den Filter abgelassen werden.
Wenn dies geschehen ist, schließen Sie das Abflussventil.
FILTERAUSTAUSCH
HINWEIS: VERGEWISSERN SIE SICH NUR ORIGNAL DRESTER
FILTER ZU VERWENDEN, NR: 8701 (FEINER FILTER), UND NR.
8702 (PRIMÄRFILTER). DIESE FILTER WURDEN GETESTET UND
ZUGELASSEN VON DEN LACKHERSTELLERN.
Der Primärfilter (Teil 2 Abbildung 11) fängt den meisten
ausgeflockten Schlamm auf, während der Hauptfilter (Teil 1
Abbildung 11) die feineren Farbpartikel auffängt.
Entfernen Sie nach jedem Ausflockungsprozess den Schlamm
aus dem Primärfilter (wenn er einmal vollständig getrocknet
ist, kann man den Schlamm leicht aus dem Filter entfernen).
Dadurch kann der Primärfilter bis zu 10 Mal wiederverwendet
werden.
Der Hauptfilter wird nach und nach verstopft, nachdem die
feineren Farbpartikel aufgefangen wurden. Im Allgemeinen
kann der Hauptfilter bis zu 5 Mal für den Ausflockungsprozess
verwendet werden. Der Hauptfilter muss allerdings alle 1 bis 2
Monate ausgewechselt werden, ansonsten besteht das Risiko,
dass sich Schimmel bildet.
HINWEIS: DER AUSFLOCKUNGSSCHLAMM MUSS ENTSPRE-
CHEND DER EINSTUFUNG DER ZUSTÄNDIGEN BEHÖRDE
ENTSORGT WERDEN. HIERZU SIND INFORMATIONEN DES
LACKHERSTELLERS ERFORDERLICH.
WARTUNG
Wöchentlich:
– Entfernen Sie das Sieb am Boden der automatischen
Waschkammern (Teil 2 Abbildung 5) und reinigen Sie es,
vergessen Sie nicht, es wieder einzusetzen!
Monatlich:
– Demontieren Sie die fünf Düsen in jeder automatischen
Waschkammer, und reinigen Sie sie mit sauberem Lösemit-
tel. (siehe Abbildung 8).
Beim Wechsel der Fässer:
– Überprüfen und wenn nötig reinigen Sie die Siebe auf den
Saugschläuchen.
Beim Wechsel der Filter:
– Überprüfen und wenn nötig reinigen Sie das Sieb auf dem
Saugrohr (Teil 15 Abbildung 2).
– Nehmen Sie den Filterbehälter (Teil 7 Abbildung 2) heraus
und leeren Sie ihn vollständig aus. Spülen Sie ihn mit Was-
ser aus und wischen Sie ihn mit einem Tuch oder Papier ab.
Jeden Monat:
– Wechseln Sie das Wasser vollständig aus.

12 16011 rev 2012-02-29
SICHERHEITSINFORMATIONEN
Es können Risiken durch unsachgemäße Handhabung des
DRESTER BOXER DOUBLE A entstehen. Risiken können auch
bei ungeeigneter Wahl /Handhabung von Fässern oder Lösemit-
tel entstehen. Um den hohen Sicherheitsstandard des Geräts
zu erhalten, ist es wichtig, dass diese Anweisungen befolgt
werden.
– Benutzen Sie dieses Gerät nicht, wenn Sie die Betriebsanlei-
tung nicht vollständig gelesen und verstanden haben.
– Das Gerät sollte wie in der Anleitung beschrieben installiert
werden.
– Das Gerät sollte wie in der Anleitung beschrieben verwen-
det werden.
– Das Gerät sollte wie in der Anleitung beschrieben gewartet
werden.
– Es dürfen nur Original-Ersatzteile verwendet werden.
– Diese Betriebsanleitung muss verfügbar und in lesbarem
Zustand in der Nähe des Geräts sein. Jeder Benutzer muss
wissen, wo die Bedienungsanleitung zu finden ist.
– Betriebsanweisungen sollten auf der Basis dieser Betriebs-
anleitung formuliert und in die Sprache, die die Angestellten
sprechen, übersetzt werden.
– Ändern Sie das Gerät auf keinen Fall ab oder um.
– Betreiben Sie das Gerät nicht ohne es angemessen zu be-
lüften. Betreiben Sie das Gerät nicht, wenn die Ventilation
unzureichend ist.
– Vermeiden Sie den Kontakt mit Reinigungsflüssigkeit und
Dämpfen. Sehen Sie im SDB (Sicherheitsdatenblatt) der
Lösemittel nach.
– Tragen Sie chemische Schutzbrillen oder Ähnliches, um
Ihre Augen zu schützen. Tragen Sie chemisch-resistente
Handschuhe, um Hautkontakt zu vermeiden.Tragen Sie
chemisch-resistente Kleidung, um sich vor Flecken oder
Spritzern zu schützen.
– Mitarbeiter mit Atemwegs-Problemen oder Lösemittel-
Allergien dürfen die Maschine nicht bedienen.
– Beseitigen Sie Verschüttetes sofort.
– Rauchen, essen oder trinken Sie nicht, wenn Sie in der
Nähe des Geräts sind.
– Das Gerät ist mit einem Sicherheitsventil versehen, welches
den automatischen Waschzyklus unterbricht, wenn der
Deckel vor dem Ende des Waschzyklus geöffnet wird.
– Spritzpistolen oder jede andere Lackier-Ausrüstung, welche
im Gerät gereinigt werden, müssen für die Reinigung in
Zone 1 zugelassen sein (Ref. Kategorie 2 gemäß EN 13463-
1/2001). Wenn Sie unsicher sind, kontaktieren Sie bitte den
Spritzpistolen-Hersteller.
– Das Gerät muss ordnungsgemäß mit dem beiliegenden
Kabel geerdet sein. Wenn Kunststoff-Fässer verwendet
werden, sollten die Öffnungen mit einem feuchten Tuch
abgewischt werden, um statische Aufladung zu vermeiden,
vor dem Einsetzen oder Entfernen von Schläuchen oder
anderen Geräten.
TECHNISCHE DATEN
Hersteller HEDSON TECHNOLOGIES AB
Hammarvägen 4
SE-232 37 Arlöv
Schweden
Tel.: +46-40- 53 42 00
Geräte-Typ DRESTER BOXER DOUBLE A
Zulässige Lösemittel Siehe Sektion “Zugelassene Lösemittel”
Max Lösemittel (wasser-
basierend) Volumen
der Maschine 30 Liter
(Erkundigen Sie sich nach den
örtlichen Vorschriften zum maximal
erlaubten Volumen der Lösemittel-
menge, die das Gerät enthalten darf.)
Maximale Fassgröße 30
Benötigte Druckluft 7–12 bar (110-180 psi),
350 l/min (13 cfm)
Extraktionskapazität 360 m3/Stunde (225 cfm)
(mit einer 15 m Verlängerung)
330 m3/Stunde (206 cfm)
(mit einer 5 m Verlängerung)
Pumpenkapazität 10 l/min
Lösemittel-Druck 2 bar (30 psi)
Gewicht 65 kg (140 lb)
Gesamtmaße Höhe: 1510 mm (59,5”)
Maximale Tiefe: 650 mm (25,5”)
Tiefe am Boden: 610 (24”)
Extraktor-Durchmesser 80 mm (3 3/16”)
Schalldruckpegel <70 dB(A)

13
16011 rev 2012-02-29
DOMAINE D’UTILISATION
La machine est prévue pour le nettoyage de pistolets vapori-
sateur pneumatiques ayant été utilisés pour peindre avec des
systèmes de peinture à l’eau.
L’unité est dotée de deux zones séparées pour le nettoyage :
1. Un nettoyeur automatique (élément 1 illustration 1), conçu
pour le nettoyage de pistolets vaporisateur à coupes de
peinture alimentées par la gravité.
Dans ce nettoyeur, des solvants à base d’eau ou de l’eau
peuvent être utilisés.
2. Un évier (élément 2 illustration 1), conçu pour le nettoyage
à la main d’autres outils utilisés en connexion avec des
travaux de peinture de véhicules tels que : pistolets vapori-
sateur avec coupes de peinture alimentées par aspiration,
raclettes à peinture, pinceaux et autres.
Dans cet évier, n’utilisez que de l’eau.
Toute autre utilisation de l’unité est interdite, comme :
– Vider le trop-plein de peinture dans l’unité
– Nettoyer des éléments électriques rechargeables
– Collecter des déchets divers
– Nettoyage de matériaux textiles
– Entreposage d’éléments
– Nettoyer les mains et autres parties du corps
– Nettoyage de tout élément relié aux aliments ou à la bois-
son
Le processus de coagulation décrit ci-dessous (selon les recom-
mandations du fabricant de peinture) autorise la réutilisation
de l’eau de nettoyage. VÉRIFIEZ AVEC ATTENTION AUPRÈS DES
AUTORITÉS COMPÉTENTES POUR VOUS ASSURER QUE L’EAU
FILTRÉE OBTENUE APRÈS LE PROCESSUS DE COAGULATION
PEUT ÊTRE DÉVERSÉE DANS LE SYSTÈME ORDINAIRE D’ÉVA-
CUATION DES EAUX USÉES. IL PEUT ÊTRE UTILE DE VOUS
INFORMER AUPRÈS DU FABRICANT DE PEINTURE.
MONTAGE
– En premier lieu, vérifier que la machine n’a pas été endom-
magée pendant le transport. Retirer l’emballage et vérifier
de nouveau que la machine n’a pas été endommagée
pendant le transport. En cas de dommages, les déclarer
immédiatement au transporteur.
– Fixez l’extracteur pneumatique (élément 3 illustration 1)
au-dessus de la bride du laveur automatique, et connectez-
le au flexible à air bleu (attaché à l’arrière de l’unité) en
collant le flexible dans le connecteur de l’extracteur.
– La ligne d’air sur le côté gauche de l’unité (élément 4
illustration 1) est placée à l’intérieur de l’unité pour le
transport. Sortez-la et fixez-la avec l’aimant dans un empla-
cement commode sur le côté gauche. La ligne d’air peut
être acheminée soit à l’extérieur du coté de la machine, ou
à travers l’espace entre le couvercle avant et le coté de la
machine.
FRANÇAIS
Réf : illustration jointe 17011
La ligne d’air est conçue pour souffler le pistolet vaporisa-
teur après la procédure de nettoyage.
– Le pistolet pneumatique sur le côté droit de l’unité (élément
12 illustration 1) est placé à l’intérieur de l’unité pour le
transport. Sortez-le et fixez-le avec l’aimant dans un empla-
cement commode sur le côté droit. La ligne d’air du pistolet
pneumatique peut être acheminée soit à l’extérieur du
coté de la machine, ou à travers l’espace entre le couvercle
avant et le coté de la machine.
Le pistolet pneumatique est conçu pour sécher le pistolet
vaporisateur après la procédure de nettoyage.
MISE EN PLACE
DRESTER BOXER DOUBLE A est un équipement de catégorie 2
(réf. Directive ATEX 94/9 EC) et peut donc être utilisé dans un
lieu de travail classé Zone 1 (ref. Directive ATEX 1999/92 EC)).
Ce manuel fait parti de l’équipement et doit être toujours
accessible.
INSTALLATION
Air comprimé
La machine doit être raccordée à une arrivée d’air comprimé de
7 à 12 bars (110-180 psi). Lors de l’utilisation, la consomma-
tion d’air est de 250 litres/min (9 cfm).
L’air doit être raccordé au séparateur d’eau à l’intérieur de
l’unité (élément 1 illustration 2). Pour accéder à ce point, retirez
le panneau avant (élément 5 illustration 1) en le soulevant.
La ligne d’air peut être menée à ce point via les fentes sur
les côtés de l’unité, ou via l’ouverture arrière de l’unité. Dans
chacun des cas, veillez à ce que les flexibles de la ligne d’air ne
soient pas pliés ou n’endommagent d’aucune autre façon le
système pneumatique de l’unité.
Afin d’éviter des chutes de pression, la ligne d’air et les raccor-
dements doivent être de dimensions adéquates. Le régulateur
de la machine est préréglé à 6,5 bars (100 psi). Il s’agit du
réglage optimal, ne le modifiez pas.
L’air comprimé fourni doit être propre et sec. Si l’air ne passe
pas d’abord par un séparateur d’eau et un filtre, les compo-
sants pneumatiques de l’appareil peuvent être endommagés, ce
qui annulerait tout droit à la garantie.
Fixez un coupleur à la ligne d’air sur le côté gauche de l’unité
(élément 4 illustration 1). Cette ligne d’air est conçue pour
souffler le pistolet vaporisateur après la procédure de net-
toyage.
Mise à la masse de l’unité
Veillez à ce que l’unité soit correctement mise à la masse en
utilisant le câble de masse (élément 6 illustration 2).

14 16011 rev 2012-02-29
Connexion d’eau du robinet
Connectez un flexible pour l’eau du robinet au connecteur
d’admission d’eau (élément 13 illustration 2).
Le flexible peut être mené à ce connecteur via les fentes sur
les côtés de l’unité, ou via l’ouverture arrière de l’unité. Dans
chacun des cas, veillez à ce que le flexible ne soit pas plié ou
n’endommage d’aucune autre façon le système pneumatique
de l’unité.
Tuyau d’évacuation
Raccordez un flexible d’évacuation au connecteur de sortie
d’évacuation (élément 12 illustration 2). Raccordez-le et fixez-le
bien à un système normal d’évacuation d’eau.
Le flexible peut être mené à ce connecteur via les fentes sur
les côtés de l’unité, ou via l’ouverture arrière de l’unité. Dans
chacun des cas, veillez à ce que le flexible ne soit pas plié ou
n’endommage d’aucune autre façon le système pneumatique
de l’unité.
Ventilation
L’extracteur pneumatique doit être connecté à un conduit
métallique pour acheminer l’échappement à l’extérieur. Une so-
lution alternative consiste à l’acheminer dans une hotte qui est
connectée à un système de ventilation approprié et approuvé
pour la zone 1. Cette hotte doit avoir une conception ouverte
afin d’éviter l’extraction constante (voir illustration 10).
Le conduit métallique peut ne pas être plus long de 15 mètres,
et doit être connecté de manière à être à la masse.
SOLVANTS AUTORISÉS
L’unité est dotée de deux zones séparées pour le nettoyage :
1. Le laveur automatique (élément 1 illustration 1). Dans ce
nettoyeur, des solvants à base d’eau ou de l’eau peuvent
être utilisés.
2. L’évier (élément 2 illustration 1). Dans cet évier, n’utilisez
que de l’eau.
Du diluant ou du nettoyant pour pistolet NE DOIT JAMAIS être
utilisé dans cette machine.
BIDONS DE SOLVANT AUTORISÉS
Le DRESTER BOXER DOUBLE A peut être utilisé avec différents
types de bidons, mais ils doivent se conformer aux énoncés
suivants :
– Le bidon doit pouvoir s’adapter à l’intérieur de l’unité
– Les bidons ne doivent pas fuir.
– Vérifiez les réglementations locales concernant le volume
maximal admissible pour garder les solvants à l’emplace-
ment de l’unité
Les bidons de solvants ne sont pas fournis pas Hedson Techno-
logies, et Hedson Technologies ne prend donc aucune respon-
sabilité les concernant. Suivez attentivement les instructions du
fournisseur de solvant.
BAC RÉCEPTEUR
L’appareil doit être placé de façon à ce que les fuites acciden-
telles de solvant ou d’eau contaminée ne s’épandent pas dans
un système d’évacuation d’eau, puisque cela représenterait un
danger pour l’environnement. Cela peut être effectué par :
– l’installation de l’appareil dans un endroit ou le sol et les
murs peuvent contenir toute fuite de tambour, ou
– équiper l’appareil d’un bac récepteur sous chaque bidon de
solvant et récipient d’eau qui soit suffisamment grand pour
contenir le volume d’au moins un bidon fuyant.
PRÉPARATIONS POUR L’UTILISATION
Bidon de solvant
Ôtez le panneau avant (élément 5 illustration 1) en le soule-
vant.
Ôtez la console de pédale (éléments 6 illustration 1) en la
soulevant et en la pliant sur le côté (voir illustration 2).
Placez le bidon sur la gauche sous l’unité (élément 2 illustration
2). Insérez le groupe de flexibles contenant le flexible d’évacua-
tion à partir du laveur automatique dans ce bidon (élément 4
illustration 2).Veillez à ce que les flexibles soient correctement
menés à l’intérieur du bidon, et que l’ouverture soit bien scellée
par le raccordement fuselé.
Embranchements à tambour
Il y a différents types de bidons de solvant sur le marché,
chacun avec un diamètre différent d’ouverture. Avec l’unité,
une boîte en carton avec une sélection de raccords fuselés est
fournie (voir illustration 3). Sélectionnez le raccord qui convient
à l’ouverture des bidons, et fixez-les sur l’adaptateur de bidon
des flexibles (voir illustration 4).
Eau
Remplissez le récipient de filtration (élément 7 illustration 2) de
la moitié du volume avec de l’eau propre.
Instructions d’utilisation
Les instructions d’utilisation doivent être rédigées sur les
bases de ce manuel et traduites dans la langue parlée par les
employés. Il doit être en permanence disponible et à proximité
de l’appareil. Pour éviter toute confusion, les employés doivent
être informés du solvant actuellement utilisé dans la machine.

15
16011 rev 2012-02-29
INSTRUCTIONS D’UTILISATION
Videz le pistolet vaporisateur de toute peinture résiduelle dans
un récipient séparé.
Ouvrez la soupape principale pour l’air comprimé (élément 7
illustration 1).
Ouvrez le couvercle du nettoyeur automatique (veillez à ce qu’il
s’enclenche dans sa position ouverte).
Placez le pistolet vaporisateur à l’intérieur (voir illustration 5).
Veillez à fixer le clip de gâchette en suivant l’illustration 6, et à
positionner le pistolet vaporisateur contre la buse pour le canal
de peinture (élément 1 illustration 5) avant de le verrouiller à
son emplacement avec l’aide des aimants du clip de gâchette.
Si vous préférez nettoyer avant de retirer le chapeau d’air et
l’aiguille du pistolet vaporisateur, alors placez ces éléments
comme indiqué par la flèche 5 dans l’illustration 5.
Fermez le couvercle et démarrez le cycle de prélavage automa-
tique en appuyant sur la pédale n°8 de l’illustration 1. Le pisto-
let vaporisateur va maintenant être nettoyé automatiquement
pendant environ 1,5 minutes avec du solvant en recirculation.
Lorsque la procédure de nettoyage est achevée, le couvercle
peut être ouvert et le pistolet vaporisateur peut être retiré. Il
peut maintenant être nettoyé manuellement plus en profon-
deur, ou rincé à l’eau.
En appuyant sur la pédale n°10 de l’illustration 1, l’eau en
recirculation sera alimentée via la brosse de nettoyage placée
dans l’évier (élément 1 illustration 7). Notez que la soupape à
bille sur la brosse (élément 6 illustration 7) doit être en position
ouverte.
Le canal de peinture du pistolet vaporisateur peut à pré-
sent être rincé à l’eau propre. Appliquez l’embout fuselé du
pistolet de rinçage (élément 2 illustration 7) contre le canal de
peinture du pistolet vaporisateur. Appuyez simultanément sur
la gâchette du pistolet vaporisateur et sur celle du pistolet de
rinçage. Rincez ensuite l’extérieur du pistolet vaporisateur avec
le pistolet de rinçage.
La brosse et le pistolet de rinçage de l’évier peuvent être
utilisés indépendamment du laveur automatique à n’importe
quel moment.
Raccordez le pistolet vaporisateur à la ligne d’air sur le côté
gauche de la machine (élément 4 illustration 1), et soufflez le
pistolet vaporisateur via l’entonnoir dans l’évier (élément 3 il-
lustration 7). L’utilisation de cet entonnoir évite que les vapeurs
s’épandent dans les locaux.
Enfin, le pistolet vaporisateur doit être séché avec le pistolet
pneumatique du côté droit de l’unité (élément 12 illustration 1).
Fermez le couvercle après le nettoyage.
UTILISATION SANS CONNEXION À L’EAU
DU ROBINET
Si l’eau du robinet n’est pas disponible sur le site du nettoyeur
de pistolet, vous pouvez utiliser l’eau recyclée (obtenue par le
processus de filtration) pour le pistolet de rinçage aussi bien
que pour la brosse de nettoyage
Dans ce cas, la machine doit être reconnectée comme suit :
Débranchez le flexible du pistolet de rinçage (élément 1 illustra-
tion 9) du panneau de soupape, retirez la prise rouge de la
jonction en croix sur la pompe (élément 2 illustration 9) et fixez
le flexible à son emplacement.
La brosse de rinçage comme le pistolet de rinçage dans l’évier
fonctionneront à présent tout deux avec de l’eau recyclée en
appuyant sur la soupape à pied 10 de l’illustration 2.
Lorsque vous utilisez le pistolet de rinçage, la soupape sur la
brosse de nettoyage (élément 6 illustration 7) doit être fermée.
LE PROCESSUS DE COAGULATION
1. VIDER LE RÉCIPIENT DE FILTRATION
Lorsque le niveau d’eau atteint le niveau de la plateforme
de travail (élément 4 illustration 7), il est temps d’exécuter le
processus de floculation. Le récipient de filtration (élément 7
illustration 2) doit cependant être tout d’abord vidé du contenu
résiduel.
Ôtez le panneau avant (élément 5 illustration 1) en le soul-
evant.
Tournez le levier (élément 9 illustration 2) en position ouverte,
tournez le levier sur la brosse de nettoyage dans l’évier en posi-
tion fermée et démarrez l’évacuation en ouvrant la soupape
de la pompe (élément 8 illustration 2). La pompe va à présent
évacuer complètement le récipient de filtration via le flexible
d’évacuation dans le système habituel d’évacuation d’eau.
Vous serez capable de déterminer le moment où le récipient de
filtration est vide puisque la pompe fonctionnera plus rapide-
ment. Fermez enfin la soupape de la pompe et également le
flexible d’évacuation.
2. COAGULATION
N.B. : IL EST ABSOLUMENT VITAL QUE LE PROCESSUS DE COAGU-
LATION SOIT EFFECTUÉ AVEC LE PLUS GRAND SOIN, AFIN QUE
D’IMPORTANTS RÉSIDUS DE PEINTURE COAGULÉE SE FORMENT.
SANS QUOI LES FILTRES SERONT IMMÉDIATEMENT BOUCHÉS, ET NE
POURRONT PAS ÊTRE RÉUTILISÉS.

16 16011 rev 2012-02-29
A : Ôtez la plateforme de travail (élément 4 illustration 7).
B : Ouvrez la soupape du brasseur d’eau (élément 5 illustration
7).
C : Ajoutez de la poudre de coagulation comme recommandé
par le fabricant de peinture.
D : Mélangez la poudre avec un bâton pendant un moment
pour éviter qu’elle ne tombe au fond en mottes.
D : Faites fonctionner le brasseur pendant quelques minutes.
E : Arrêtez de temps en temps le brasseur pendant environ 30
secondes car cela améliore le processus de coagulation. Le
temps total de coagulation de d’environ 3 à 4 min, en fonc-
tion de la quantité de poudre, du niveau de contamination,
etc.
Lorsque c’est terminé, fermez la soupape du brasseur.
3. FILTRATION
Ouvrez la soupape d’évacuation (élément 10 illustration 2) et
faites complètement s’évacuer le bassin d’eau par le filtre (élé-
ment 11 illustration 2). Nettoyez soigneusement l’intérieur du
bassin d’eau avec la brosse de nettoyage (par exemple avec de
l’eau recyclée), afin que tout résidu de coagulation soit évacué
dans le filtre.
Lorsque c’est terminé, fermez la soupape d’évacuation
CHANGEMENT DE FILTRE
N.B. : VEILLEZ À UTILISER LES FILTERS DRESTER ORIGINAUX, NR. 8701
(FILTRE FIN), ET NR. 8702 (FILTRE PRINCIPAL). CES FILTRES ONT ÉTÉ
TESTÉS ET APPROUVÉS PAR LES FABRICANTS DE PEINTURE.
Le filtre primaire (élément 2 illustration 11) recueille la plus
grande partie des dépôts coagulés alors que le filtre fin (élé-
ment 1 illustration 11) retient les particules de peinture les plus
fines.
Éliminez les dépôts du filtre primaire après chaque processus
de floculation (il est facile d’enlever du filtre les dépôts séchés).
En procédant ainsi, le filtre primaire peut être réutilisé jusqu’à
10 fois.
Les plus petites particules de peinture obstrueront petit à petit
le filtre fin. Généralement, le filtre fin peut être utilisé pour 5
processus de coagulation au maximum. Le filtre doit toutefois
être changé tous les 1 ou 2 mois pour empêcher la formation
de moisissure.
N.B. : LES DÉPÔTS DE COAGULATION DOIVENT ÊTRE PRIS EN
CHARGE SELON LA RÉGLEMENTATION DE L’AUTORITÉ CONCERNÉE.
IL PEUT ÊTRE UTILE DE S’INFORMER AUPRÈS DU FABRICANT DE
PEINTURE.
ENTRETIEN
Hebdomadaire :
– Retirez les filtres en bas du laveur automatique (élément 2
illustration 5) et nettoyez-les, n’oubliez pas de les reposi-
tionner !
Mensuel :
– Retirez les cinq buses de chaque nettoyeur automatique et
nettoyez-les avec du solvant propre. (voir illustration 8).
Lors du changement de bidons :
– Vérifiez et nettoyez si nécessaire les filtres des flexibles
d’aspiration.
Lors du changement des filtres :
– Vérifiez et nettoyez si nécessaire le filtre du tuyau d’aspira-
tion (élément 15 illustration 2).
– Enlevez le récipient de filtration (élément 7 illustration 2) et
videz-le complètement. Rincez-le avec de l’eau et essuyez-
le avec un tissu ou du papier.
Chaque mois :
– Changer complètement l’eau.

17
16011 rev 2012-02-29
INFORMATIONS DE SÉCURITÉ
Des risques peuvent survenir en cas de mauvaise utilisation
du DRESTER BOXER DOUBLE A. Des risques peuvent égale-
ment survenir d’un choix ou d’une manipulation incorrecte
des bidons ou du solvant. Il est important de bien suivre les
instructions suivantes pour maintenir le haut niveau de sécurité
de la machine.
– N’utilisez pas l’appareil avant d’avoir lu et parfaitement
compris le présent manuel d’utilisation.
– L’appareil doit être installé selon les instructions.
– L’appareil doit être utilisé selon les instructions.
– L’appareil doit être entretenu selon les instructions.
– Il ne faut utiliser que des pièces détachées originales.
– Gardez ce mode d’emploi toujours disponible et lisible juste
à côté de l’appareil. Tout utilisateur doit savoir où trouver le
mode d’emploi.
– Les instructions d’utilisation doivent être rédigées sur les
bases de ce mode d’emploi et traduites dans la langue
parlée par les employés.
– Ne modifiez pas et n’altérez en aucune façon l’appareil.
– N’utilisez l’appareil que si l’endroit est correctement aéré.
N’utilisez pas l’appareil si l’extraction des vapeurs n’est pas
suffisante.
– Évitez tout contact avec des liquides ou des vapeurs.
Référez-vous à la FDS (feuille de données de sécurité) des
solvants.
– Portez des lunettes de protection ou quelque chose d’ana-
logue pour protéger vos yeux. Portez des gants de protec-
tion chimique pour éviter le contact avec la peau. Portez
des vêtements résistants aux produits chimiques pour vous
protéger des flaques et des éclaboussures.
– N’autorisez pas le personnel souffrant de problèmes respi-
ratoires ou d’allergies aux solvants à utiliser la machine.
– Nettoyez immédiatement les déversements accidentels.
– Ne fumez, ne mangez et ne buvez pas près de l’appareil.
– Cet appareil est équipé d’une soupape de sécurité qui
stoppe automatiquement le cycle de lavage automatique si
le couvercle est ouvert avant la fin du cycle de nettoyage.
– Les pistolets vaporisateur et autres éléments d’équipement
de peinture nettoyés dans l’unité doivent convenir pour un
nettoyage en Zone 1 (réf. Catégorie 2 selon la norme EN
13463-1/2001). Catégorie 2 en conformité avec la norme
EN 13463-1/2001). Si vous n’êtes pas sûr, prenez contact
avec le fabricant de pistolet vaporisateur.
– L’appareil doit être correctement relié à la terre avec le
câble de masse fourni. Si des tambours en plastique sont
utilisés, les ouvertures devraient être essuyées avec un
chiffon humide pour éliminer l’électricité statique avant de
relier ou de retirer un tuyau ou un autre équipement.
CARACTÉRISTIQUES TECHNIQUES
Fabricant HEDSON TECHNOLOGIES AB
Hammarvägen 4
SE-232 37 ARLÖV
Suède
Tél : +46-40- 53 42 00
Type de machine DRESTER BOXER DOUBLE A
Solvants autorisés Voir la section
“Solvants autorisés”
Volume maximal de solvant
(à l’eau) de la machine 30 litres
(Vérifiez les réglementations
locales concernant le volume
maximal admissible pour garder
les solvants à l’emplacement de
l’unité)
Taille maximale de bidon 30 litres
Air comprimé nécessaire 7–12 bars (110-180 psi),
350 l/min (13 cfm)
Capacité d’extraction 360 m3/heure (225 cfm)
(avec une extension de 15 m)
330 m3/heure (206 cfm)
(avec extension de 5 m)
Capacité de la pompe 10 l/min
Pression du solvant 2 bars (30 psi)
Poids 65 kg (140 lb)
Dimensions globales Hauteur : 1510 mm (59,5”)
Largeur : 835 mm (33”)
Profondeur maximale : 650 mm
(25,5”)
Profondeur au sol : 610 (24”)
Diamètre de l’extracteur 80 mm (3 3/16”)
Niveau de la pression acoustique
<70 dB(A)

18 16011 rev 2012-02-29
ANVÄNDNINGSOMRÅDE
Maskinen är avsedd för rengöring av tryckluftdrivna färgsprut-
pistoler som har används för lackering med system på vatten-
baserad färg.
Maskinen har två separata tvättområden:
1. En automattvätt (detalj 1 bild 1), avsedd för rengöring av
färgsprutpistoler med överliggande kopp.
I denna tvätt kan vatten eller vattenbaserade lösningsmedel
användas.
2. En vask (detalj 2 bild 1), avsedd för manuell rengöring av
andra verktyg som används i samband med fordonslack-
eringsjobb såsom: färgsprutpistoler med underliggande
kopp, spacklar, penslar och liknande.
I detta utrymme får endast vatten användas.
All annan användning av maskinen är förbjuden såsom:
– Att tömma överbliven färg i maskinen
– Att rengöra elektriskt uppladdningsbara objekt
– Att samla diverse avfall
– Att tvätta textilier
– Att lagra saker
– Att tvätta händerna eller andra kroppsdelar
– Att rengöra objekt avsedda för mat och dryck
Koaguleringsprocessen som beskrivs nedan (enligt rekommen-
dation från färgtillverkaren) gör att tvättvattnet kan återanvän-
das.
KONTROLLERA MED BEHÖRIG MYNDIGHET ATT FILTRATVATT-
NET SOM MAN FÅR EFTER KOAGULERINGEN FÅR TÖMMAS UT
I DET ORDINARIE AVLOPPSSYSTEMET. HÄRFÖR KAN INFORMA-
TION FRÅN FÄRGTILLVERKAREN VARA NÖDVÄNDIG.
MONTERING
– Först av allt, se efter om maskinen har skadats under trans-
porten. Avlägsna emballaget och kontrollera igen att inte
maskinen har skadats under transporten. Om så är fallet,
meddela omedelbart transportören.
– Passa in det luftdrivna utsuget (detalj 3 bild 1) över flänsen
på automattvätten och anslut det till den blå luftslangen
(fäst på maskinens baksida) genom att trycka in slangen i
utsugets koppling.
– Luftslangen på vänstra sidan av maskinen (detalj 4 bild 1)
är placerad inuti maskinen under transporten. Ta ut den och
fäst den med magneten på lämplig plats på vänstra sidan.
Luftslangen kan ledas antingen utanför sidoväggen, eller
genom springan mellan framluckan och sidoväggen.
Denna luftslang används för att blåsa ur sprutpistolen efter
tvättningen.
– Luftpistolen på högra sidan av maskinen (detalj 12 bild 1)
är placerad inuti maskinen under transporten. Ta ut den och
fäst den med magneten på lämplig plats på högra sidan.
Luftslangen för luftpistolen kan ledas antingen utanför
sidoväggen eller genom springan mellan framluckan och
sidoväggen. Denna luftpistol används för att blåsa ur sprut-
pistolen efter tvättningen.
PLACERING
DRESTER BOXER DOUBLE A är utrustning av Kategori 2 (ref.
ATEX-direktiv 94/9 EC) och kan därför placeras på platser klas-
sade som Zon 1 (ref. ATEX-direktiv 1999/92 EC).
Denna manual är en del av utrustningen och skall förvaras så
att den alltid finns tillgänglig.
INSTALLATION
Tryckluft
Maskinen skall anslutas till tryckluft på 7-12 bar. När den
används förbrukar maskinen 250 liter/min av luft.
Luften ska anslutas till vattenavskiljaren på insidan av maski-
nen (detalj 1 bild 2). För att komma åt denna, ta bort frontpa-
nelen (detalj 5 bild 1) genom att lyfta den upp och ut.
Luften kan ledas till vattenavskiljaren via hålen i maskinens
sida, eller genom maskinens öppna baksida. I vilket fall som
helst, se till att luftslangen inte böjer slangar eller på annat sätt
skadar det pneumatiska systemet.
För att förhindra tryckfall skall tryckluftslang och kopplingar
vara tillräckligt dimensionerade. Regulatorn på maskinen är
förinställd på 6,5 bar. Detta är det optimala för maskinen och
får inte ändras.
Tryckluften till maskinen skall vara ren och torr. Om luften
inte först leds genom en vattenavskiljare och ett filter kan
maskinens luftkomponenter skadas och i sådant fall äventyras
eventuella garantianspråk på maskinen.
Montera en snabbkoppling på luftslangen som sitter på maski-
nens vänstra sida (detalj 4 bild 1). Denna luftslang används för
att blåsa ur sprutpistolen efter tvättningen.
Jordning
Se till att maskinen jordas ordentligt genom att ansluta
jordningskabeln (detalj 6 bild 2) till en lämplig jordningspunkt
i verkstaden.
Anslutning till vatten
Anslut en slang med kranvatten till vattenanslutningen (detalj
13 bild 2).
Slangen kan ledas till denna koppling via hålen i maskinens
sida eller genom den öppna baksidan. I vilket fall som helst, se
till att slangen inte böjer luftslangar eller på annat sätt skadar
maskinens pneumatiska system.
SVENSKA
Ref: Bildbilaga 17011

19
16011 rev 2012-02-29
Avloppsslang
Anslut en avloppsslang till avloppskopplingen (detalj 12 bild 2).
Led ut avloppsslangen till det ordinarie avloppssystemet och
fäst den där.
Slangen kan ledas till denna koppling via hålen i maskinens
sida eller genom den öppna baksidan. I vilket fall som helst, se
till att slangen inte böjer luftslangar eller på annat sätt skadar
maskinens pneumatiska system.
Ventilation
Det luftdrivna utsuget måste anslutas till ett metallrör för att
leda avgaserna utomhus. Ett alternativ är att leda dem till en
huv som i sin tur är ansluten till ett passande ventilationssys-
tem godkänt för Zon 1. Denna huv skall ha en öppen design för
att undvika konstant utsug (se bild 10).
Metallröret skall inte vara längre än 15 meter och måste vara
anslutet på ett sådant sätt att jordning kan säkerställas.
TILLÅTNA LÖSNINGSMEDEL
Maskinen har två separata tvättområden:
1. Automattvätten (detalj 1 bild 1). I denna tvätt kan vatten
eller vattenbaserade lösningsmedel användas.
2. Vasken (detalj 2 bild 1). I detta utrymme får endast vatten
användas.
Thinner/gun-wash får INTE under några omständigheter anvä
das i denna maskin.
TILLÅTNA DUNKAR
DRESTER BOXER DOUBLE A kan användas med olika typer av
dunkar, men de måste uppfylla följande krav:
– Dunkarna måste passa i maskinen
– Dunkarna måsta vara täta.
– Kontrollera lokala föreskrifter gällande maximalt tillåten
volym av lösningsmedel i maskinen
Dunkar för lösningsmedel tillhandahålls inte av Hedson Tech-
nologies, varför Hedson Technologies inte tar något ansvar för
dunkarna. Följ leverantörens instruktioner noggrant.
UPPSAMLINGSKÄRL
Maskinen måste placeras och användas på så sätt att ett even-
tuellt läckage av lösningsmedel eller förorenat vatten inte kan
spridas till ett avloppsvattensystem, och därmed utgöra en fara
för miljön. Detta kan t.ex. ordnas genom att:
– Placera maskinen i ett utrymme, där t.ex. väggar och golv
kan hålla volymen av ett läckande fat, eller
– arrangera ett uppsamlingskärl under dunkarna för lösnings-
medel, stort nog att hålla volymen av minst en läckande
dunk.
IDRIFTTAGANDE
Lösningsmedelsdunk
Ta bort frontpanelen (detalj 5 bild 1) genom att lyfta den upp
och ut.
Lyft av fotventilkonsolen (detalj 6 bild 1) genom att lyfta upp
den och vika den ut mot sidan (se bild 2).
Placera dunken till vänster under maskinen (detalj 2 bild 2).
Stick ner den grupp av slangar som innehåller avloppsslangen
från automattvätten i denna dunk (detalj 4 bild 2). Se till att
slangarna leds ner i dunken ordentligt och att öppningen är
riktigt förseglad med den konformade pluggen.
Dunkpluggar
På marknaden finns det olika typer av dunkar för lösningsme-
del, var och en med olika storlek på öppningen. Tillsammans
med maskinen levereras kartonger med ett antal konformade
pluggar (se bild 3). Välj ut de pluggar som passar öppningen i
dunkarna och trä på dem på slangarnas dunkadapter (se bild 4).
Vatten
Fyll filtratbehållaren (detalj 7 bild 2) till hälften med rent vatten.
Bruksanvisning
En bruksanvisning ska göras med denna manual som bas
och översättas till det språk som de anställda talar. Den ska
alltid vara tillgänglig i närheten av maskinen. För att förhindra
förväxlingar skall personalen alltid vara informerade om vilket
lösningsmedel som används i maskinen.

20 16011 rev 2012-02-29
BRUKSANVISNING
Töm pistolen på färgrester i ett separat spillfat.
Öppna huvudventilen för tryckluft (detalj 7 bild 1).
Öppna luckan till automattvätten (se till att den klickar in i fullt
öppen position).
Sätt in pistolen (se bild 5).
Var särskilt noga med att applicera bygelklämman enligt bild
6 och att trycka upp pistolen mot munstycket för färgkanalen
(detalj 1 bild 5) innan den fixeras med hjälp av magneterna på
bygelklämman.
Om du föredrar att före rengöringen montera av luftkappan och
sprutpistolens nål, så placera dessa föremål så som visas med
pil 5 i bild 5.
Stäng luckan och starta den automatiska förtvätten genom att
trycka på fotpedalen Nr 8 i bild 1. Pistolen tvättas då automa-
tiskt med cirkulerande lösningsmedel i cirka 1,5 minut.
När tvättprocessen är klar kan luckan öppnas och pistolen tas
ut. Den kan nu tvättas eller sköljas ytterligare med vatten.
Genom att trycka ner fotpedal nr 10 i bild 1 kommer återvun-
net vatten att matas genom borsten som ligger i vasken (detalj
1 bild 7). Observera att the kulventilen på borsten (detalj 6 bild
7) måste vara öppen.
Sprutpistolens färgkanal kan nu sköljas med rent vatten. Pressa
det koniska munstycket på sköljpistolen (detalj 2 bild 7) mot
sprutpistolens färgkanal. Tryck in sprut- och sköljpistolens
avtryckare samtidigt. Skölj sedan utsidan av sprutpistolen med
hjälp av sköljpistolen.
Borsten och sköljpistolen i vasken kan när som helst användas
oberoende av den automatiska tvätten.
Anslut pistolen till luftslangen på maskinens vänstra sida (detalj
4 bild 1). Blås ur pistolen genom tratten i vasken (detalj 3 bild
7). Genom att använda denna tratt förhindras att sprayångorna
sprids i lokalen.
Slutligen kan sprutpistolen blåsas torr genom att använda
luftpistolen på maskinens högra sida (detalj 12 bild 1).
Stäng locket efter tvätten.
DRIFT UTAN KRANVATTENANSLUTNING
Om kranvatten inte finns i närheten av maskinen finns möjlig-
heten att använda återvunnet vatten (fås genom filtreringspro-
cessen) för både sköljpistolen och tvättborsten
Om så är fallet skall maskinen kopplas om enligt följande:
Koppla loss slangen till sköljpistolen (detalj 1 bild 9) från
ventilpanelen, ta bort den röda pluggen från anslutningen på
pumpen (detalj 2, bild 9) och montera slangen på dess plats.
När du nu trycker på fotpedal 10 bild 2, så förses både tvätt-
borsten och sköljpistolen i vasken med återvunnet vatten.
När sköljpistolen används måste ventilen till borsten (detalj 6
bild 7) vara stängd.
KOAGULERINGSPROCESSEN
1. TÖMNING AV FILTRATKÄRLET
När vattennivån når upp till arbetsbordets nivå (detalj 4 bild
7), måste koaguleringsprocessen genomföras. Men först måste
filtratkärlet (detalj 7 bild 2) tömmas helt på sitt återstående
innehåll.
Ta bort frontpanelen (detalj 5 bild 1) genom att lyfta den upp
och ut.
Öppna ventilen för avloppsslangen (detalj 9 bild 2), stäng
ventilen på borsten i vasken, och starta därefter tömningen
genom att öppna ventilen för pumpen (detalj 8 bild 2). Pumpen
pumpar nu det återstående filtratvattnet till avloppssystemet
via avloppsslangen.
Man kan höra att pumpen går snabbare när filtratkärlet är
tomt. Stäng då ventilerna för pumpen och för avloppsslangen.
2. KOAGULERING
OBS! DET ÄR MYCKET VIKTIGT ATT KOAGULERINGSPROCES-
SEN UTFÖRS OMSORGSFULLT, SÅ ATT DET BILDAS STORA
FLOCK AV KOAGULERAD FÄRG. OM SÅ EJ ÄR FALLET KOM-
MER FILTRET OMEDELBART ATT SÄTTAS IGEN OCH KAN DÅ EJ
ÅTERANVÄNDAS.
This manual suits for next models
2
Table of contents
Languages:
Other Hedson Cleaning Equipment manuals