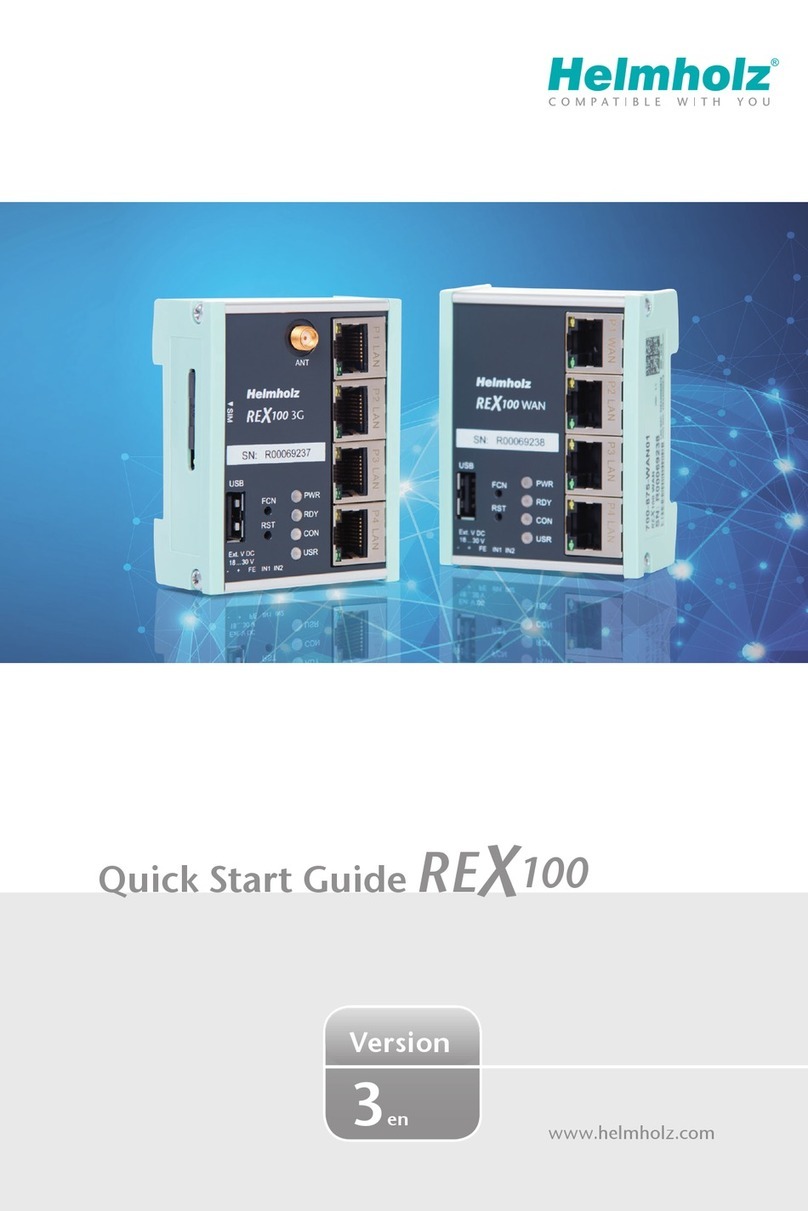
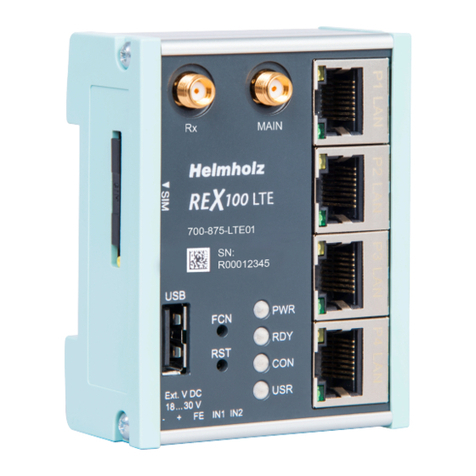
Helmholz 700-877-WAN02 User manual

Helmholz GmbH & Co. KG | Hannberger Weg 2 | 91091 Großenseebach | Germany 03.05.2023
Phone +49 9135 7380-0 | Fax +49 9135 7380-110 | info@helmholz.de | www.helmholz.de
Quick Start Guide
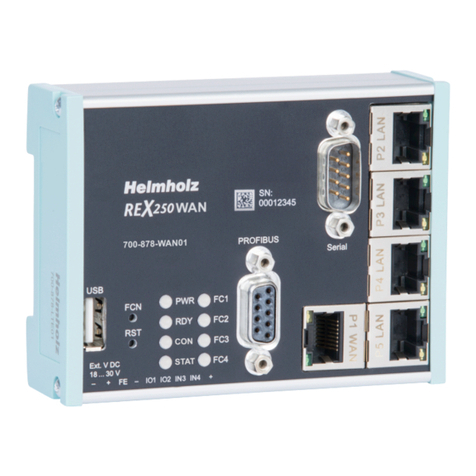
REX 200/250 Router
Order numbers:
700-877-WAN02 | 700-878-WAN02
700-877-LTE02 | 700-878-LTE02
700-877-WIF02 | 700-878-WIF02
from firmware V 7.2.3
Version
en
7

QuickStart Guide REX 200/250 | Version 6 | 03.05.2023 2
Content
1Safety instructions ................................................................................................ 4
2Introduction to the function of the REX 200/250 ................................................. 5
3Prepare and connection ....................................................................................... 5
3.1 Power supply ............................................................................................................................... 5
3.2 Power source requirement ........................................................................................................... 5
3.3 Terminals and Interfaces ............................................................................................................... 6
3.4 Installation position/minimum clearances..................................................................................... 6
3.5 2x IO1 & IO2 digital inputs/outputs and 2x IN3 & IN4 ................................................................. 6
3.6 REX 200/250 WAN........................................................................................................................ 7
3.7 Antenna connection ..................................................................................................................... 7
3.7.1 REX 200/250 WiFi ..................................................................................................................... 7
3.7.2 REX 200/250 LTE (4G)............................................................................................................... 8
3.8 REX 200/250 LTE + REX 200/250 Wi-Fi with failover...................................................................... 8
3.9 Boot process................................................................................................................................. 8
4Access to the myREX24 V2 portal ......................................................................... 9
4.1 Registration .................................................................................................................................. 9
4.2 Login to the myREX24 V2 portal server ....................................................................................... 10
4.3 Navigation in the portal.............................................................................................................. 10
4.4 Simple and extended views ........................................................................................................ 10
5Initial router-configuration via the myREX24 V2 portal......................................11
5.1 Creating a new project ............................................................................................................... 11
5.2 Creating a new device ................................................................................................................ 12
5.3 Configure REX 200/250 (connection data).................................................................................. 12
5.4 Step 1 „Device “– Selection of the type and name ...................................................................... 12
5.5 Step 2 „Internet“ – Network settings .......................................................................................... 13
5.6 Step 3 „Configuration “– Download file to PC ............................................................................ 14
6Router-configuration transfer options ................................................................14
6.1 Transferring the configuration using a USB flash drive ................................................................ 15
6.2 Synchronization.......................................................................................................................... 16
7Connection to the machine network .................................................................. 17
8Tips und tricks ....................................................................................................18
8.1 Checking the device status ......................................................................................................... 18
8.2 VPN port and China Gateway ..................................................................................................... 20

QuickStart Guide REX 200/250 | Version 6 | 03.05.2023 3
8.3 Diagnostic page ......................................................................................................................... 21
8.4 Is a MAC address filter activated in the firewall? (relevant for internet access via P1 WAN interface)
21
8.5 Is the connection established over a proxy? (relevant for internet access via P1 WAN interface) .. 21
8.6 Device configuration: Services –NTP-Server ............................................................................... 22
8.7 Device configuration: Services –Mail settings (relevant for internet access via P1 WAN interface) 22
8.8 no or inadequate mobile communications connection ............................................................... 22
9Remote maintenance of Ethernet CPUs ..............................................................23
9.1 Device settings: Services –Firewall –SNAT ................................................................................. 23
9.2 Search over IP............................................................................................................................. 23
10
Setting up the MPI/PROFIBUS interface
(REX 250 only)......................................24
10.1 Installing driver........................................................................................................................... 24
10.2 Creating a station ....................................................................................................................... 24
10.3 Assingning an IP-Adresse and name............................................................................................ 24
11 Setting up the VCOM LAN for serial communication (REX 250 only)...............25
12 Description of LEDs and buttons......................................................................26
12.1 Function and status LEDs in normal operation ............................................................................ 26
12.2 RJ45 network LEDs...................................................................................................................... 26
12.3 Buttons....................................................................................................................................... 26
12.4 myREX24 V2 portal LEDs ............................................................................................................ 27
13 Resetting to factory settings ............................................................................27
14 Alternative configuration without myREX24 V2 portal ....................................28
15 Load configuration from USB stick................................................................... 28
16 Load firmware file from the USB stick .............................................................. 29
17 Technical data ................................................................................................. 30
17.1 REX 200/250 WAN...................................................................................................................... 30
17.2 Additional interfaces REX 250 ..................................................................................................... 31
17.3 REX 200/250 LTE ........................................................................................................................ 31
17.4 REX 200/250 WiFi ....................................................................................................................... 32

QuickStart Guide REX 200/250 | Version 6 | 03.05.2023 4
1Safety instructions
Target audience
This description is only intended for trained personnel qualified in control and automation en-
gineering who are familiar with the applicable national standards. For installation, commission-
ing, and operation of the components, compliance with the instructions and explanations in
this operating manual is essential. The specialist personnel is to ensure that the application or
the use of the products described fulfills all safety requirements, including all applicable laws, regulations,
provisions, and standards.
Intended use
The device has a protection rating of IP 20 (open type) and must be installed in an electrical
operating room or a control box/cabinet in order to protect it against environmental influences.
To prevent unauthorized operation, the doors of control boxes/cabinets must be closed and
possibly locked during operation. The consequences of improper use may include personal in-
jury to the user or third parties, as well as property damage to the control system, the product, or the envi-
ronment. Use the device only as intended!
Operation
Successful and safe operation of the device requires proper transport, storage, setup, assem-
bly, installation, commissioning, operation, and maintenance. Operate the device only in
flawless condition. The permissible operating conditions and performance limits (technical
data) must be adhered to. Retrofits, changes, or modifications to the device are strictly for-
bidden. The devices contain components that can be damaged or destroyed by electrostatic discharge.
When handling the devices, observe the necessary safety measures against electrostatic discharge (ESD) in
accordance with EN 61340-5-1 and EN 61340-5-2.
Security
The device is a network infrastructure component and therefore an important element in the
security consideration of a plant. When using the device, therefore, observe the relevant rec-
ommendations to prevent unauthorized access to installations and systems.
RF radiation
Device variants with an integrated modem should be installed and operated with a minimum
distance of 20 cm between the radiator / antenna and your body.
Information
This document explains the initial commissioning of the REX 200/250 Router. The latest version
of the document and a detailed manual can be found at www.helmholz.de or scan the QR code
directly.

QuickStart Guide REX 200/250 | Version 6 | 03.05.2023 5
2Introduction to the function of the REX 200/250
The REX 200/250 is an industrial router suitable for worldwide remote access (depending on the REX var-
iant) to IPv4-capable end devices (PLC, HMI, IP cameras, etc.). This Quick Start Guide explains the basic
settings in the myREX24 V2 portal and shows how to transfer the configuration made there to the REX
200/250 unit.
No integration into a PLC engineering tool by means of a GSDML file is necessary and system states can
be viewed and diagnoses can be carried out on the password-protected website of the device.
Internet access and a valid account for the myREX24 portal are required for the configuration. The free of
charge software shDIALUP for Windows operating systems is available to you by downloading from
www.helmholz.de.
We recommend using the current version (from V3.7R1.0) of the "shDIALUP" client software for
commissioning. For a successful and secure connection to the myREX24 V2 portal, the firmware sta-
tus of all REX routers should be checked regularly and, if necessary, updated with the help of the sys-
tem settings in your myREX24 account.
3Prepare and connection
Depending on the REX variant, the LAN ports P1 to P4 or P2 to P4 are available for connection to the ma-
chine network. Internal switch functions are active even if the REX 200/250 router is not connected to
the Internet.
For devices with a modem, antennas available as accessories and a mini-SIM card (except for Wi-Fi vari-
ants) are required for access to a GSM network.
This serves the purpose of identification for the
network operator. The insert is found on the
left housing side. In order to unlock and re-
move the insert, please press the recessed yel-
low button next to the card reader. Please use
the supplied tool (SIM card ejector) for this.
When selecting a mobile phone contract, please use a standard mobile phone data tariff. Please
avoid IoT tariffs, because these are often only designed for small amounts of data or low transmis-
sion speeds.
3.1 Power supply
The REX 200/250 is designed exclusively for operation with safety extra-low voltage (SELV / PELV) and is
supplied with 24 V DC via the supplied connector.
The housing of the REX 100 is not earthed. Please make sure to connect the functional earthing con-
nection (FE) of the device to the reference potential of your control cabinet or system structure in order
to ensure correct ESD derivation of the antenna and network sockets.
3.2 Power source requirement
This device may only be operated with power supplies that meet the requirements of EN 62368-1 for
power sources of limited power. Otherwise, the device must be operated in a housing that meets the re-
quirements of fire protection according to EN 62368-1.

QuickStart Guide REX 200/250 | Version 6 | 03.05.2023 6
3.3 Terminals and Interfaces
Rigid copper wires with a max. diameter of 1.5 mm² can be clamped onto the provided connector plug.
Network cables corresponding to at least category 5/5e (CAT-5) should be connected to the RJ-45 sockets.
3.4 Installation position/minimum clearances
The router was designed to be mounted on DIN rails (as per DIN EN 50 022) and intended for installation
in switch cabinets. Installation and mounting must take place in accordance with VDE 0100/IEC 364.
The router can be installed in any position.
It is recommended that minimum clearances to neighboring assemblies are observed during assembly. If
the distances 30 mm on the top and on bottom and 10 mm on each side are maintained, easy access to
the connections and contact options on the router is possible without having to remove other system
parts. In addition, there should always be enough space for the necessary cable routing.
3.5 2x IO1 & IO2 digital inputs/outputs and 2x IN3 & IN4
Due to the electrical isolation of the bi-directional input/output wiring, an additional supply voltage of
24 volts DC must be applied. The alarm inputs can be activated with potential-free switches, buttons or
relay contacts.
Depending on the configuration in the myREX24 V2 portal, one to four (or, in the case of multiplex
wiring, up to 99) different email/text message recipients can be alerted with individual message texts.
One input each can also be configured for establishing the connection to the myREX24 V2 portal or for a
REX system restart.

QuickStart Guide REX 200/250 | Version 6 | 03.05.2023 7
The configurable output wiring makes available signals for the status of an active Internet, VPN or user
connection or a device fault of the REX 200/250.
When using outputs O1 and O2, the corresponding input signals I1 and I2 assume the respective
output status and can themselves no longer be used externally for other alarm input signals.
3.6 REX 200/250 WAN
Connect the WAN interface of the REX 200/250 (P1 WAN) with a patch cable with the higher level (com-
pany) network/router. All device variants have 4 additional LAN ports for connection to the machine
network and for commissioning via PC.
3.7 Antenna connection
Only connect antennas that are included in the Helmholz accessories and ensure prior to installation
that the antenna is positioned in such a way that the modems receive a permanent radio signal to a
WLAN access point or can connect to an adequate 4G mobile network. Also be sure to follow the instruc-
tions from the technical data sheets of the antenna manufacturer and do not install these into metal
housings (e.g., control cabinet).
3.7.1 REX 200/250 WiFi
With this device variant, a wireless connection to the Internet can also be configured as an alternative to
the P1 WAN interface. The WLAN radio module only works in the 2.4 GHz range and it must be ensured
that the required inter-net connection can be established via an existing access point in the (company)
network. The required WLAN antenna is connected to the RP-SMA socket.

QuickStart Guide REX 200/250 | Version 6 | 03.05.2023 8
3.7.2 REX 200/250 LTE (4G)
For radio reception, a suitable antenna must at least be screwed onto the SMA socket “MAIN”. In order to
improve the data throughput, a second antenna terminal is available on the REX 100 LTE router with the
SMA socket “Rx” that can be used as an option. This functionality is called antenna diversity in the
“WCDMA mode” and Downlink-MIMO in the “LTE mode”. The second receiver antenna should not be
located in the immediate vicinity of the main antenna. In order to improve the diversity gain and reduce
other reciprocal interactions (interference effects), the two antennas should be (taking the space availa-
ble in the application into account) installed with the greatest possible distance between them.
For the same reason, the second antenna should be mounted cross-polarized (rotated by 90° in relation to
the main antenna).
3.8 REX 200/250 LTE + REX 200/250 Wi-Fi with failover
Only with this device variant, a failover can be parameterized in the configuration if required (see chap-
ter 5.5). For this application, connect the WAN interface (P1 WAN) of the REX 200/250 with a patch ca-
ble to the higher-level (company) network/router.
Furthermore, the requirements from points 3 and 3.6 must be met. The VPN connection is primarily im-
plemented via the WAN interface. If the connection is not established or is interrupted, the REX 100 au-
tomatically switches to the appropriate wireless connection. As soon as WAN is available again, it
switches back. The switchover takes place with a delay to detect if there is just a short interruption.
Application example
3.9 Boot process
The PWR LED lights up when the 24-volt supply voltage is applied. The boot process starts following the
internal system check, which is indicated by the blinking RDY LED. The REX 100 is ready for operation as
soon as the PWR LED and RDY LED light up continuously (duration: approx. 90 sec.).

QuickStart Guide REX 200/250 | Version 6 | 03.05.2023 9
The 4G products 700-877-LTE01 and 700-878-LTE01 are intended for use in Europe and Asia. Be-
fore using an LTE router, please compare the LTE frequency bands of the selected device with the sup-
ported frequency bands of the provider in the country of use.
If you have any further questions on this issue, our technical sales team will be happy to help you.
4Access to the myREX24 V2 portal
The complete configuration of the REX 200/250 can be done via the myREX24 V2 portal.
The shDIALUP remote client software enables you to administrate the myREX24 V2 portal and realize a
VPN tunnel to a REX router. The software (shDIALUP) can be found in the download area at
www.helmholz.de. There you can also download more documents with additional information at any
time.
Alternatively, you can create the REX configuration on the myREX24 server with an HTTPS-secured
direct call from your browser. The call is possible via the following URL: https://v2.myREX24.net.
However, it is not possible to realize a VPN remote maintenance via the browser.
Always use your myREX24 V2 account data to log in.
Information on alternative parameterization methods can be found in Chapter 14.
4.1 Registration
You should only register at www.myREX24.net if you do not yet have a myREX24 V2 portal account or
have not received user access from a myREX24 account administrator.
Fill out the required fields there. After your data is checked by our service team (Mon. to Fri., 8 a.m. to 5
p.m. CET), you will receive two separate e-mails with the access data.
One e-mail contains the username, and the second the password.

QuickStart Guide REX 200/250 | Version 6 | 03.05.2023 10
4.2 Login to the myREX24 V2 portal server
Install the shDIALUP software with administrative rights under a Windows operating system. After open-
ing the program, select the “V2.myREX24.net” server in the top menu bar and then log in to the
myREX24 V2 portal with your access data.
Your login name can be comprised of your username and company name separated by the @ symbol,
for example: admin@helmholz
Following the initial login, you will be prompted to register a new, individual password for your account.
As the account administrator, you can create and administer additional users after logging in to the
myREX24 V2 portal if necessary.
4.3 Navigation in the portal
Once a user has logged in for the first time, he or she is
guided through a tutorial. Navigation, basic settings and
switching from the simple view to the extended view are
shown.
4.4 Simple and extended views
You can choose between the two views in the menu
interface of the myREX24 V2 portal. The “simple
view” is active the first time you log in. You can
switch to the “extended view” at any time without changes being lost or losing their validity.
The simple view is mainly used throughout the rest of this Quick Start Guide. The extended view is also
presented in some places for purposes of illustration.

QuickStart Guide REX 200/250 | Version 6 | 03.05.2023 11
5Initial router-configuration via the myREX24 V2 portal
The following information describes the basic configuration steps required to set up a REX router for a
VPN connection. A description of the extended functions can be found in the online help or in the man-
uals/white papers.
You can go to the online help in the myREX24 V2 portal using the question mark symbol in the lower
left-hand area of the screen.
When you log in for the first time, the myREX24 portal guides you through a brief tutorial. It is recom-
mended to re-issue the password for your myREX24 account once in accordance with the tutorial.
5.1 Creating a new project
A project is the highest level for carrying out the following tasks:
-- Device administration
-- Remote maintenance
-- Monitoring and alarms
-- Data logging
-- Visualizations
Initially, at least one new project must be created in which a router is assigned. Navigate to the Admin-
istration section by using the marked symbol (the tutorial also brings you to this point).
A unique “project”name is now issued in this menu. Additional account users, if created, can be assigned
to this project on the “Access” tab.

QuickStart Guide REX 200/250 | Version 6 | 03.05.2023 12
5.2 Creating a new device
A router can be added to the tree structure using the green plus symbol or with a right-click of the mouse.
If a project does not yet have a router, the same function is made available in the main view by way of the
green button “
Create new device
”.
Clicking the respective button starts the configuration assistant, which guides the user through the set-
tings.
5.3 Configure REX 200/250 (connection data)
Three simple steps are enough for minimal configuration of the router.
-Selection of the device type
-Network settings
-Transfer of the configuration to the REX router
5.4 Step 1 „Device “– Selection of the type and name
In the first step, the correct device type (matching the device order number) must be selected. A unique,
freely selectable name should be assigned to this router.

QuickStart Guide REX 200/250 | Version 6 | 03.05.2023 13
Only numbers and letters may be used (0 to 9, A to Z, a to z and no spaces or special characters).
5.5 Step 2 „Internet“ – Network settings
In Step 2, the network configuration for the LAN, WAN and, depending on the version, the LTE cellular
or the Wi-Fi settings must be defined.
LAN All REX 200/250 routers come with the IP address 192.168.0.100/24 as a default. If necessary,
modify the IP address and subnet mask according to the specifications from the machine net-
work to be maintained remotely.
WAN The required information for the DHCP or static IP settings is provided by the respective net-
work administrator. DHCP is preset at the factory.
Modem The parameters for the APN access point (Access Point Name) of the card provider and the cor-
rect SIM PIN must be available to you and be stored here. There are already several providers
available for selection (sorted by country). If the correct provider is not present, this can also
be entered manually.
WLAN Enter the Wi-Fi-specific access data. The corresponding data provides you with the responsible
network administrator.
If you use DHCP, make sure that the DHCP server does not assign an IP address the WAN interface
that is already active on the LAN side. IP addresses from two different subnets must be assigned to
each router’s LAN and WAN interfaces.

QuickStart Guide REX 200/250 | Version 6 | 03.05.2023 14
Examples: LAN network settings, WLAN or APN access data and download
5.6 Step 3 „Configuration “– Download file to PC
In step 3, the basic settings of a minimum configuration for the REX 100 are now stored in your portal
account and must now be transferred to the device. By clicking on the download button (here marked in
red), the configuration file is downloaded from the portal server and can then be transferred to the REX
router using a FAT-formatted USB stick.
We recommend the “Download configuration to PC” variant for the initial configuration.
6Router-configuration transfer options
Newly created or subsequently modified device configurations can be transferred to the REX 200/250 in a
variety of ways.

QuickStart Guide REX 200/250 | Version 6 | 03.05.2023 15
1. Download configuration to PC (via USB flash drive). The configuration file is saved on the PC and
can subsequently be transferred to the REX 200/250 using a USB stick (subsequent procedure de-
scribed in chapter 6.1).
2. Synchronize (recommended for subsequent modifications). If the router has already been config-
ured and a connection with the portal is established, each subsequent change to the configuration
can be carried out via the existing VPN remote connection (further procedure described in Section
6.2).
3. Transfer configuration to the device (with LAN connection, only possible via shDIALUP). For this
configuration option, the REX 200/250 must be accessible directly in the LAN from the PC. The PC
must also be logged in on the Internet via the shDIALUP dial-up client using your myREX24 ac-
count at the same time.
The transfer via USB stick (point 1) is explained in this Quick Start Guide, and how retroactive changes
can be transferred via the function “Synchronization” (Point 2).
6.1 Transferring the configuration using a USB flash drive
Ensure that the power supply is connected to the REX 200/250. Download the configuration file pro-
vided through the myREX24 portal to the FAT-formatted USB flash drive connected to your PC using the
download symbol.
The myrex24.mbn(x) configuration file must be stored in the root directory of your USB flash drive
and may not be renamed.
Now carry out the steps described in chapter 15 “Load configuration/ firmware update from the USB
stick”.

QuickStart Guide REX 200/250 | Version 6 | 03.05.2023 16
6.2 Synchronization
As soon as the REX 200/250 has logged into your account in the portal, you can transfer subsequent
changes at any time with “Synchronize”. Where there is an existing myREX24-V2 portal connection, the
REX 200/250 checks cyclically whether there is a new configuration available for its serial number and
then loads it automatically.
As soon as you have modified and saved one or more parameters, a gray exclamation mark symbol ap-
pears next to the in green animated online LED with the tooltip: "Device configuration not up to date".
Click this symbol (or the "Synchronize" button) to start the process.
Synchronization in the
simplified view:
Synchronization in the
extended view
:

QuickStart Guide REX 200/250 | Version 6 | 03.05.2023 17
The synchronization function is confirmed through the following dialog:
In this menu, you can select optional user-defined settings, such as the sending of
information/confirmation mails.
The REX router now accepts the new settings and restarts automatically. As soon as the boot process has
concluded, the REX router logs into the portal again.
7Connection to the machine network
The following steps presume that the REX 200/250 has already been configured and that you have
successfully logged into your account with shDIALUP. A secure VPN connection to the end device
cannot be implemented via the browser view (https://v2.myREX24.net).
Logged-in REX 200/250 routers are identified with a green circle in the dashboard. The secure VPN con-
nection between the PC and REX router is not established until the connection button is clicked.
Effective immediately, you can view the setup of your REX router and the functional
overview of the myREX24 V2 portal very easily online.
https://youtu.be/r4KxlV-VgdY
Video tutorial (3:22 min.)

QuickStart Guide REX 200/250 | Version 6 | 03.05.2023 18
The active connection status to the REX 200/250 is represented by an animated orange connection but-
ton. The number of active connections made using this account is shown with details in the menu bar.
Once the VPN connection to the REX 200/250 has been established, all the IPv4 packets valid for the ap-
plicable LAN network on the system side will be forwarded. The parameters (port, VPN IP, LAN IP etc.)
used for this connection are also shown with details in the status bar at the bottom.
To end a remote access connection, click the orange animated connection button and then confirm dis-
connection of the remote connection.
8Tips und tricks
8.1 Checking the device status
The device status website of the REX 200/250 shows the connection status and the active configuration
data of the router. To this purpose, the REX 200/250 must be accessible in the LAN, meaning that the
TCP/IP address of a PC must be in the same IP subnet. To this purpose, enter the LAN IP address of the
REX 100 into the address bar of a browser. The authentication information is printed on the back of the
device.
Example of a preset individual device password:
The access data for the web interface can be changed in the myREX24 portal in the respective device
settings under "Services - User Administration" or additional users can be created for this REX router.

QuickStart Guide REX 200/250 | Version 6 | 03.05.2023 19
Please note that access to the web interface is only possible via the HTTPS protocol
(https://192.168.0.100).
The First Start Assistant then opens. You must select “Portalserver” for the myREX24 portal configuration
described here.
Using the extended view for the “Classic Router” is preferable for the configuration of your own VPN
connections using the device web interface. There you can find extended setting options for the configu-
ration of VPN connections that are independent of myREX24 portal.
To get more information on each step of the router connection, click the Info icon in the various status
fields.
The web interface at the routers can be deactivated for security reasons. If the interface is not accessi-
ble, please check the corresponding setting in the myREX24 portal. Make sure that there are no ad-
dress space conflicts with any other network interfaces (do not assign the same IP address more than
once) on your PC so that you can communicate properly with the REX 200/250.

QuickStart Guide REX 200/250 | Version 6 | 03.05.2023 20
8.2 VPN port and China Gateway
The REX 200/ 250 establishes an outgoing VPN connection via port 1194 (TCP) to the address vpn-
v2.myrex24.net (5.39.123.21) by default.
As an alternative you can also configure port 80 or 443 (device configuration menu “Services” -> “VPN” -
> “VPN Port”).
Relevant for Internet access via the WAN interface: clarify all details about the settings in advance with
the responsible IT department. In order to be able to establish a secure connection to the myREX24 V2
server with shDIALUP or the REX router, at least one of the following TCP ports (80, 1194 or 443) must be
open for the VPN tunnel in the customer's firewall.
China Gateway: By default,
No Gateway
is set
If the REX Router is used in China, the Gateway “China –Shenzhen Datacenter” can be selected.
URL: vpncn-v2.myrex24.net
IPv4 address: 43.247.70.163 (if name resolution does not work).
Do not use the China Gateway outside China!
This manual suits for next models
7
Table of contents
Other Helmholz Network Router manuals

Helmholz
Helmholz REX 300 User manual

Helmholz
Helmholz REX 100 WiFi User manual

Helmholz
Helmholz REX 100 WiFi User manual

Helmholz
Helmholz REX 100 3G User manual

Helmholz
Helmholz REX 100 User manual

Helmholz
Helmholz REX 300 User manual

Helmholz
Helmholz 700-200-LAN01 User manual

Helmholz
Helmholz REX 300 User manual

Helmholz
Helmholz WALL IE User manual

Helmholz
Helmholz REX 100 3G User manual