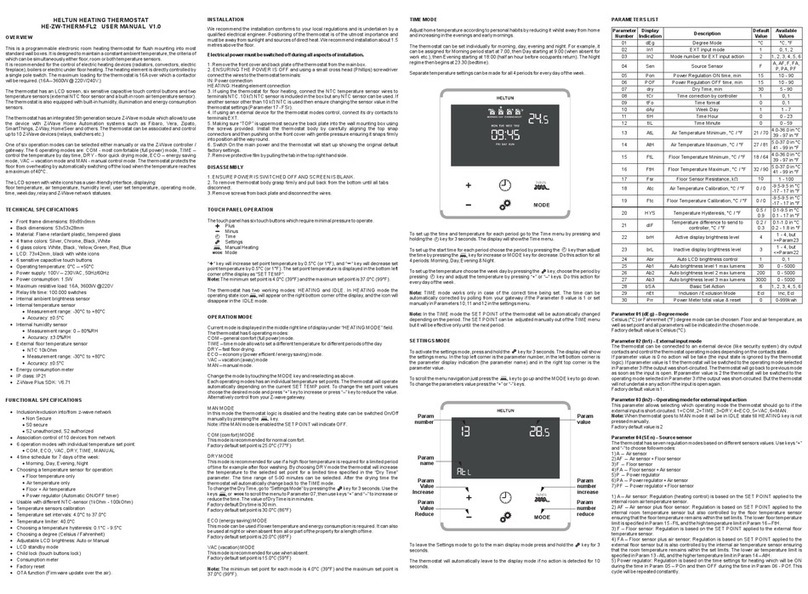
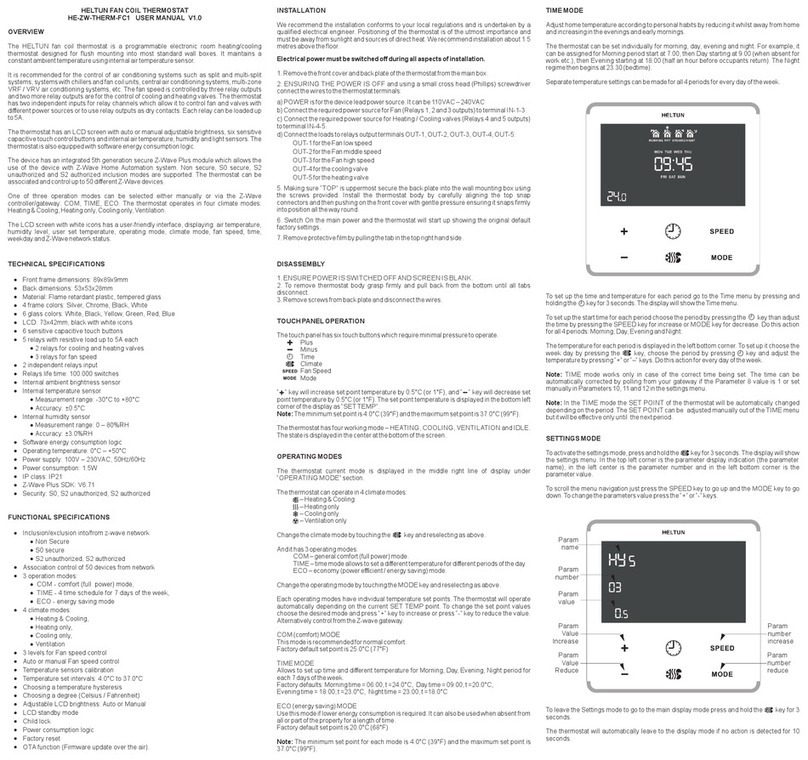
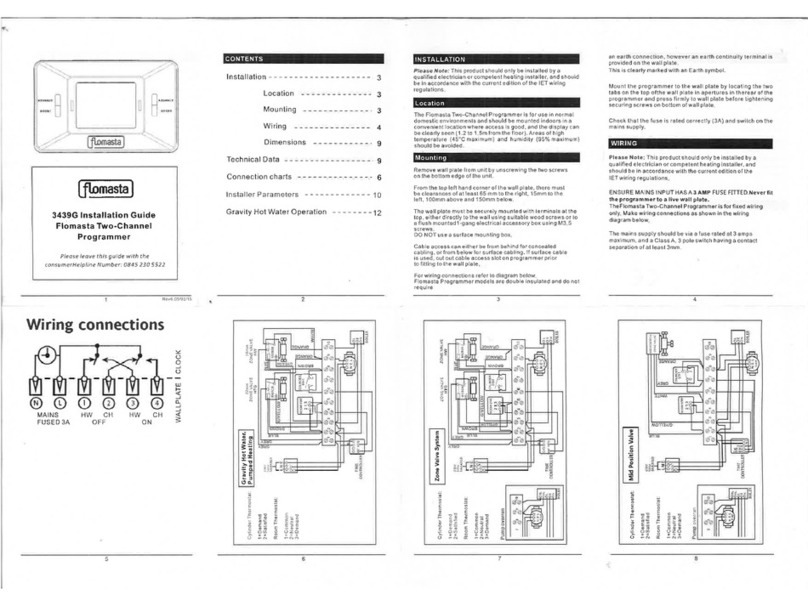
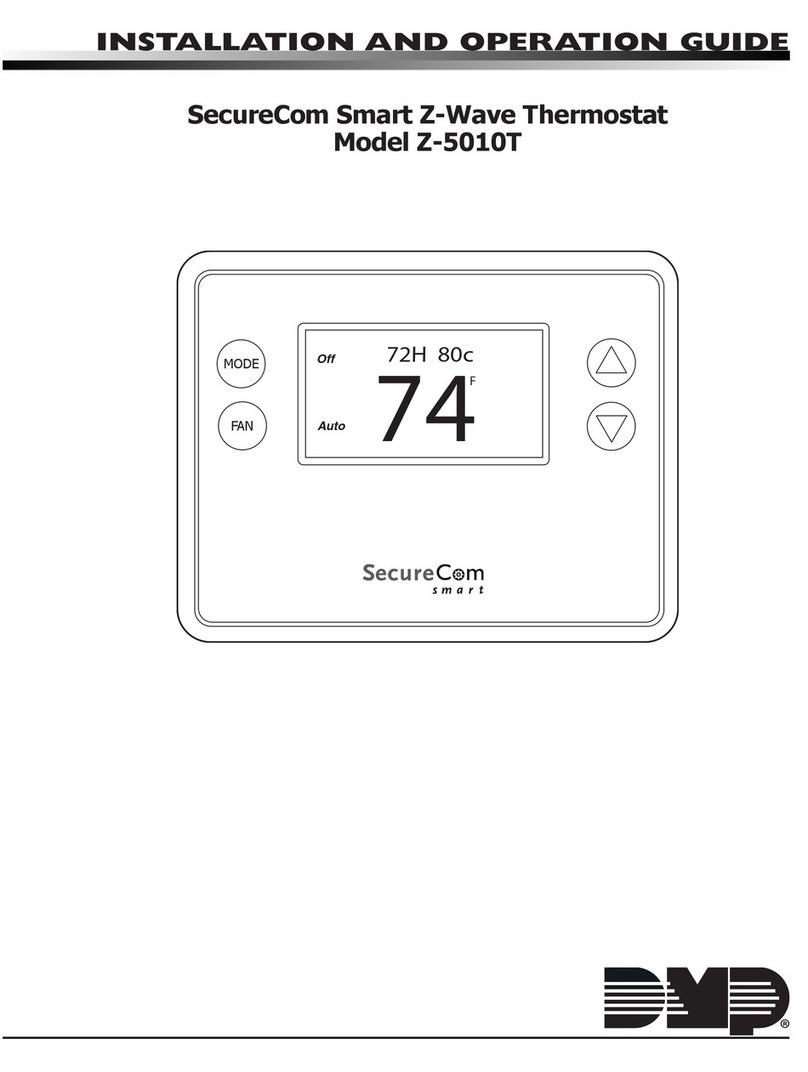
Heltun HE-HT01 User manual

QUICK START GUIDE
Heating Thermostat HE-HT01

Founder of HELTUN
Ashot Mashuryan
We are inspired by your imagination of
home comfort when making it into reality.
Welcome to the club of bizarre dream makers.

5
11
17
23
29
35
41
47
53
59
65
71
77
83
English .................................................................................................................................
Русский ..............................................................................................................................
Français ..............................................................................................................................
Deutsch .............................................................................................................................
Nederlands ........................................................................................................................
Italiano ..............................................................................................................................
Español ..............................................................................................................................
Polskie ................................................................................................................................
Hrvatski ..............................................................................................................................
Magyar ...............................................................................................................................
Slovenský ..........................................................................................................................
Lietuvis ..............................................................................................................................
Svenska ..............................................................................................................................
Română ..............................................................................................................................


5 6
7 8

9 10
11 12
Your HELTUN product uses Z-Wave SmartStart to make installation
easy.This card contains information you need to associate
the product securely with your Z-Wave network.
Save it where you can easily retrieve it later.
SECURITY CARD
Extend your warranty to three years while keeping this information
safe by registering your product at: bonus.heltun.com
SN:
DSK:
PIN:
XXXXX-XXXXX-XXXXX-XXXXX-
XXXXX-XXXXX-XXXXX-XXXXX
XXXXX
SmartStart
HEHT01 HEATING THERMOSTAT
XXXXXXXXXXX

OVERVIEW
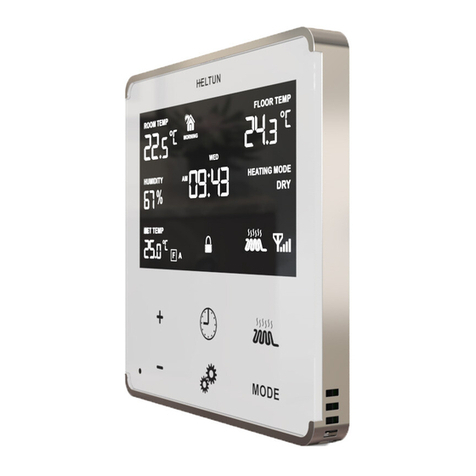
The HELTUN HE-HT01 Advanced Programmable Thermostat is elegantly designed and‘Impossibly
Smart’ providing wireless over-the-Internet control of your home’s heating system. The HE-HT01 is
‘Impossibly Thin’on the wall yet packed with features to help you save energy while providing the
ultimate in comfort and convenience.
Controls electric heating systems
The HE-HT01 is designed to maintain constant room and oor temperatures by providing sensors for both ambient and radiant oor
heating systems. It controls electric heating systems like radiators, convection or electric replaces, plus boilers, and electric underoor
heating. Heating elements are directly controlled via a 16 Amp switch.
Multiple built-in sensors
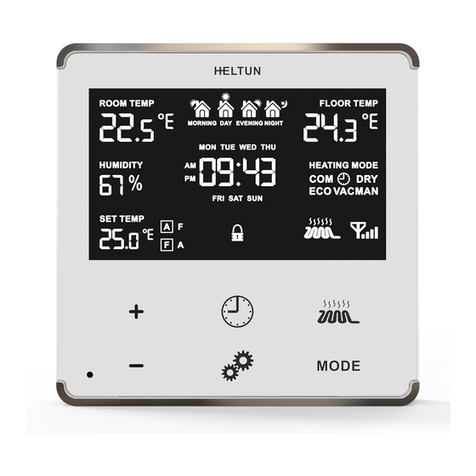
The HE-HT01 has an LCD screen, six high sensitivity capacitive touch buttons, and two temperature sensors for monitoring: ambient air
temperatures, and oor temperatures using the included external NTC sensor. It is also equipped with built-in sensors for: humidity,
illumination, and energy consumption. You can instantly access information from all sensors on the user-friendly display.
Monitor all important information without even a touch
The at-a-glance display shows: ambient air temperature, oor temperature, user set point, humidity level, current operating mode, time,
day of the week, and status of the Z-Wave network & relay. Display brightness adjusts to ambient light conditions automatically making
it always easy to read.
Highly congurable with automatic safety
You can select one of six operation modes with individual set points either manually, or by using a Z-Wave controller/gateway.
As a safety measure, the HE-HT01 protects radiant oor systems from overheating by automatically switching o if the oor
temperature reaches 40°C.
Know how much energy you use
The HE-HT01 built-in Power Consumption System precisely monitors how much energy you used during any particular day, week,
or month.
Based on the latest Z-Wave platform
The HE-HT01 integrates a Z-Wave Plus v2 700 platform module allowing it to be used with Z-Wave home automation systems. The
HE-HT01 supports Z-Wave‘S0’and‘S2’ security protocols, SmartStart technology, and can be connected (“associated”) to other Z-Wave
devices, such as relays, switches, etc.
5

TECHNICAL SPECIFICATIONS
Declaration of Conformity
Hereby, Heltun declares that the device is in compliance with directives:
EMC 2014/30/EU, LVD 2014/35/EU, RED 2014/53/EU, RoHS 2011/65/EU.
Front frame (on wall) dimensions: 89mm (H) х 89mm (W) х 9mm (D)
Rear electronics package dimensions: 53mm (H) х 53mm (W) х 28mm (D)
Materials: Tempered glass display/body, Flame retardant plastic
5 frame colors: White, Gloss Black, Matte Black, Silver, Chrome
6 glass colors: White, Black, Yellow, Green, Red, Blue
LCD: 73mm x 42mm (3.3 inch), black with white segments
6 capacitive-touch buttons
Operating temperature: 0°С to +50°С
Operating humidity: 10% to 95% RH
Power supply: 85-265VAC 50Hz/60Hz or 24-48VDC
Power consumption: <1W
Maximum resistive load: 16А (4000W @ 250VAC)
Relay switching with zero-cross technology
Relay life time: 100.000 switches
Internal ambient light sensor
Internal temperature sensor
- Measurement range: –30°C to +80°C
- Accuracy: ±0.5°C
Internal humidity sensor
- Measurement range: 0% to 80% RH
- Accuracy: ±3.0% RH
External oor temperature sensor
- NTC 10kΩ
- Measurement range: –30°C to +80°C
- Accuracy: ±0.5°C
Real-time energy consumption meter
IP class: IP21
Z-Wave Plus V2 SDK: V7.11
Z-Wave 700 module: ZGM130S
Requires mounting to ush electrical junction box: round or square type – min. depth 40mm

Placement of the HE-HT01 is of utmost importance for proper operation and must be away from sunlight and sources of direct heat. For
air temperature proper measurement we recommend installing the HE-HT01 approximately 1.5 meters above the oor.
Remove the display unit and backplate of the HE-HT01 from the packaging.
FIRST ENSURE THE POWER IS OFF at the main circuit breaker, and then test the wires with a probe or multimeter to verify. Insert the
power and heater wires to the correct HE-HT01 terminals by inserting a small Phillips-head screwdriver into the slot beneath each
terminal and unscrew to open.
Follow diagrams on Figure 1 (or 2 or 3 or 4) and the instructions below:
• Power wires: Connect Line & Neutral wires to L & N terminals labeled“IN”.
• Heater wires: Connect Line & Neutral wires to L & N terminals labeled with Heating Element graphic .
Note: HELTUN recommends installing cord terminals (electric wire ferrules) on the ends of wires before connecting them to the
HE-HT01 outputs (various colors terminals are included).
Tighten wires using Phillips screwdriver in slot beneath each wire.
Note: It is possible to connect Neutral wire from heater directly to your neutral line (Figure 2 or 4).
Note: Zero-Cross technology is unavailable if the device uses DC voltage (24-48VDC).
If using the HE-HT01 for radiant oor heating, connect the NTC temperature sensor wire to the terminals labeled“NTC”. A 10 kΩ NTC
sensor is included inside the HE-HT01 packaging, but any NTC sensor can be used.
Note: If an NTC sensor other than 10 kΩ is used, you must change the sensor resistance value in the settings menu (Parameter 10 – FSr).
Note: If the oor sensor is disconnected or damaged“—”will be shown on the LCD display under the FLOOR TEMP label.
If you will be using an external device to select modes for the HE-HT01 (such as a security system), connect wires from the external
device’s dry contacts to the two HE-HT01 terminals labeled “EXT”or“S1” &“Sx”.
Two dierent connection methods for external control are possible: (see Figures 1 & 3).
Note: In case of using Figure 3 or 4, it is MANDATORY to connect S1 terminal to the same wire connected to terminal N on the device
(labeled as“IN”) through dry contacts of an external device (like a wall switch).
Making sure the HE-HT01 backplate is oriented on the wall with the word“TOP”pointed upwards, secure the backplate to the electrical
junction box using the four provided screws (do not overtighten).
Once the backplate is secured onto the wall, assemble the HE-HT01 display unit onto the backplate by rst carefully aligning the two
top snap connectors, and then gently pushing the entire display unit until it‘snaps’into position all the way around.
Next, switch On the main power at the circuit breaker. The HE-HT01 will start up showing the original default factory settings.
Remove the clear protective lm from the display unit by pulling on the top right-hand tab.
1.
2.
3.
4.
5.
6.
7.
8.
INSTALLATION
The HELTUN HE-HT01 thermostat must be installed by a licensed electrician in a manner that conforms to local regulations and
building codes. Provide these instructions to the licensed electrician who is installing the HE-HT01.
WARNING: Electrical power must be switched o during installation.

The Parameter 1 (“ Eg”) allows you to manually change the Z-Wave frequency which is mandated in your geographical region.
Modication is possible only while the HE-HT01 is in a ‘Non-Included State.’ While in an ‘Included State’, the Antenna icon will
be shown at the bottom right corner of the LCD screen and modication of this Parameter will be disabled. To navigate through the
dierent values, use the Plus (+) and Minus (–) buttons. After the Frequency Region has been selected, hold the Clock button to
save the Parameter value and reboot the device for the new settings to take eect.
SmartStart-enabled products can be added to a Z-Wave network by scanning the Z-Wave QR Code shown on the product with
gateways/controllers that provide for SmartStart inclusion. In this case, no further action will be required and the SmartStart product will
be added automatically within ten minutes of being turned on in the vicinity of a network.
To add the HE-HT01 to the Z-Wave network using SmartStart:
Set the main controller in Security S2 Authenticated“Add Mode”.
Input the thermostat DSK to the controller (or scan the QR code).
Power on the device.
Wait for the adding process to complete.
Successful adding will be conrmed by displaying the Antenna with signal strength bars icon in the bottom right corner
of the main screen.
Note: The device security code (DSK) and SmartStart QR code are printed on the HE-HT01 back panel plus on the included Security Card
(see Figures 9 & 10).
S0, S2 unauthorized, and S2 authorized Inclusion Modes are supported. If you use the S2 authorized Inclusion Mode the security key
should be used during the inclusion process. The Security Key is printed on a card located with this quick start guide and also on the
HE-HT01 backplate (see Figures 9 & 10).
Note: Be sure to save this key. Without the key, it is impossible to perform an Inclusion in S2 authorized mode.
Z-WAVE NETWORK
Frequency Region
Security
SmartStart
1.
2.
3.
To disassemble, ENSURE POWER IS SWITCHED OFF at the main circuit breaker AND THE LCD SCREEN IS BLANK.
To remove the HE-HT01 display unit grasp rmly at the bottom and pull backwards while tilting outwards until all tabs disconnect.
Remove screws from backplate and disconnect the wires by inserting a small Phillips-head screwdriver into the slot beneath each wire
and unscrewing to release.
DISASSEMBLY
The HE-HT01 may be operated in any Z-Wave network with other Z-Wave certied devices from other manufacturers. The HELTUN
HE-HT01 will act as a ‘repeater’for other devices regardless of manufacturer or brand to increase the reliability of the overall network.
1.
2.
3.
4.
5.

Enter“SETTINGS” Mode by pressing and holding the Gear button for three seconds.
Scroll menu to“Parameter 2 – nEt”using the Heating Element button to scroll up, and the“MODE” button to scroll down.
The current state of the network will be displayed in the Parameter Value position (upper right). It should display:“InC”.
Note:
If “EcL”is displayed, the HE-HT01 is already Excluded.
Start the Exclusion Mode from the gateway/controller.
Press the Minus“–”button in the HE-HT01 Parameter 2 to start the Exclusion process.
Note that lines will be moving in the Parameter value position (upper right).
The Antenna icon should appear in the bottom right corner and“EcL” in the value position if the Exclusion was successful.
If the Antenna with signal strength bars icon or“InC” in value position are displayed, repeat the Exclusion process.
Including the HE-HT01 to an Existing Z-Wave Network
To add the HE-HT01 to an existing Z-Wave network (i.e.“inclusion”), do the following:
1.
2.
3.
4.
5.
6.
7.
8.
1.
2.
3.
4.
5.
6.
7.
8.
Removing the HE-HT01 from Z-Wave network
To remove the HE-HT01 from a Z-Wave network (i.e. “Exclusion”), do the following:
Note: If the HE-HT01 has previously been part of a Z-Wave network and not Excluded since, Inclusion is not possible without rst
performing an Exclusion or Factory Reset procedure.
Note: If the HE-HT01 is included in the Z-Wave network the Antenna icon will appear in the bottom right corner of the main screen
with signal strength bars .
Enter“SETTINGS” Mode by pressing and holding the Gear button for three seconds.
Scroll menu to“Parameter 2 – nEt”using the Heating Element button to scroll up, and the“MODE” button to scroll down.
The current state of the network will display in the Parameter Value position (upper right). It should display“EcL”.
Note: If“InC” is displayed, the HE-HT01 must rst be Excluded from an existing Z-Wave network (see “Exclusion”below).
Start the Inclusion Mode from the gateway/controller.
On the HE-HT01 in Parameter 2, press the Plus“+”key to start the Inclusion process.
Note that lines will be moving in the Parameter value position (upper right).
The Antenna with signal strength bars icon should appear at the bottom right corner if Inclusion was successful.
If only the Antenna icon or“Err”is displayed in theValue position, the HE-HT01 Inclusion was not successful (try repeating steps 4-7).

FACTORY RESET (RES)
By pressing and holding the “MODE” key for ten seconds, the HE-HT01 will enter Factory Reset Mode, displaying “REs” in the left bottom
corner,“y” in top left corner and“n” in top right corner. Press the Plus (+) button to revert to factory settings, or the Heating Element
button to cancel. The factory reset will change all the Parameters to their original factory default values and will also Exclude the
device from any Z-Wave network.
Note: Please use this procedure only when the network primary controller is missing or otherwise inoperable.
FULL VERSION OF OPERATING MANUAL
You can obtain a full version of the HE-HT01 Operating Manual by visiting support.heltun.com.
LIMITED WARRANTY
HELTUN warrants this product to be free from defects in workmanship or materials, under normal use and service, for a period of one (1)
year from the date of purchase by the consumer ("Warranty Period"). HELTUN will extend this Warranty Period to three (3) years from the
date of consumer purchase for any consumer who registers their warranty with HELTUN at this website page: bonus.heltun.com. This
Limited Warranty applies only to the rst end-user of the product and is not transferable.
If during the Warranty Period the product is determined to be defective or malfunctions due to workmanship or materials, HELTUN, at
HELTUN's option, shall either repair or replace the defective product. If the product is defective, (i) return it with dated proof of purchase
to the place it was purchased; or (ii) contact HELTUN Customer Care by email at [email protected]. HELTUN Customer Care will make
the determination whether the product should be returned or whether a replacement product will be sent to you.
EXCEPT AS MAY BE OTHERWISE PROVIDED BY APPLICABLE LAW, THIS LIMITED WARRANTY IS IN LIEU OF ALL OTHER COVENANTS AND WARRANTIES,
EITHER EXPRESS OR IMPLIED, INCLUDING WITHOUT LIMITATION, ANY IMPLIED WARRANTIES OF MERCHANTIBILITY OR FITNESS FOR A PARTICULAR
PURPOSE, OR NON-INFRINGEMENT. HELTUN MAKES NO OTHER WARRANTIES, EXPRESS OR IMPLIED.
THIS LIMITED WARRANTY DOES NOT COVER REMOVAL OR REINSTALLATION COSTS. THIS LIMITED WARRANTY SHALL NOT APPLY IF IT IS SHOWN BY
HELTUN THAT THE DEFECT OR MALFUNCTION WAS CAUSED BY DAMAGE DONE BY A CONSUMER INCLUDING DURING INSTALLATION. THIS LIMITED
WARRANTY IS VOID IF DEFECT(S) RESULT FROM A FAILURE TO HAVETHIS PRODUCT INSTALLED PROPERLY.
HELTUN'S SOLE RESPONSIBILITY AND THE CONSUMER'S SOLE REMEDY UNDERTHIS LIMITED WARRANTY SHALL BE TO REPAIR OR REPLACE THE PRODUCT
WITHIN THE TERMS STATED ABOVE. HELTUN SHALL NOT BE LIABLE FOR ANY LOSS OR DAMAGE OF ANY KIND, INCLUDING ANY INCIDENTAL OR
CONSEQUENTIAL DAMAGES RESULTING, DIRECTLY OR INDIRECTLY, FROM ANY BREACH OF ANYWARRANTY, EXPRESS OR IMPLIED, OR ANY OTHER FAILURE
OF THIS PRODUCT. IN NO EVENT SHALL HELTUN'S LIABILITY EXCEED THE AMOUNT ACTUALLY PAID FOR THE PRODUCT WHETHER SUCH LIABILITY ARISES
FROM A CLAIM BASED ON WARRANTY, TORT, OR CONTRACT. THESE LIMITATIONS ON LIABILITY SHALL REMAIN IN EFFECT EVEN IF HELTUN WAS ADVISED
OF THE POSSIBILITY OF SUCH INJURIES, LOSSES, OR DAMAGES.
SOME JURISDICTIONS DO NOT ALLOW THE EXCLUSION OR LIMITATION OF INCIDENTAL OR CONSEQUENTIAL DAMAGES, SO THIS LIMITATION MAY NOT
APPLY TO YOU. THIS LIMITED WARRANTY IS THE ONLY EXPRESS WARRANTY HELTUN MAKES ON THIS PRODUCT.
If you have any questions concerning this limited warranty, please write HELTUN Customer Care at [email protected].
In the event of any conict, discrepancy, contradiction, uncertainty or ambiguity between English language version of this “Quick Start
Guide”and any subsequent translation into any other language thereof, the English language version shall govern and prevail.
10 English

ОБЗОР
Термостат HE-HT01 производства компании HELTUN является высокотехнологичным
программируемым термостатом для отопительных систем. Это элегантно спроектированное,
«Невероятно Тонкое» и «Невероятно Умное» устройство помогает вам экономить энергию с
первого дня, управлять системой отопления дистанционно, создавая абсолютный комфорт в
вашем доме.
Контролирует электрические отопительные системы
Термостат HE-HT01 поддерживает в помещении постоянную температуру воздуха и пола посредством встроенного датчика
температуры воздуха и выносного датчика температуры пола. HE-HT01 способен управлять такими системами электрического
отопления как радиаторы, конвекторы, камины и котлы. Нагревательные элементы управляются напрямую однополюсным
выключателем с максимальной нагрузкой до 16 Ампер.
Имеет множество встроенных датчиков
HE-HT01 оснащен ЖК дисплеем, шестью чувствительными емкостными сенсорными кнопками управления и двумя датчиками
температуры (встроенным датчиком температуры окружающего воздуха и внешним NTC датчиком температуры пола). Устройство
также оснащено встроенными датчиками влажности воздуха, освещения и энергопотребления. И вы можете мгновенно получить
доступ к информации со всех датчиков на удобном пользовательском дисплее.
Позволяет читать данные без дополнительных усилий
Удобный дисплей устройства показывает: температуру окружающего воздуха, температуру пола и заданные их значения
пользователем, а также уровень влажности, текущий режим работы термостата, время, день недели и состояние сети Z-Wave и
реле. Яркость дисплея автоматически регулируется под освещение комнаты, что облегчает чтение данных днем и ночью.
Обеспечивает комфорт и безопасность
HE-HT01 позволяет выбрать один из шести режимов работы вручную, либо с помощью Z-Wave контроллера/шлюза.
Термостат обеспечивает защиту системы теплого пола от перегрева - автоматически отключает нагрузку при достижении
температуры 40°C.
Знайте, сколько энергии вы используете
Встроенная система энергопотребления HE-FT01 отслеживает, сколько энергии вы использовали в течение определенного дня,
недели или месяца.
Собран на последней платформе Z-Wave
В термостате HE-HT01 встроен модуль на платформе Z-Wave Plus v2 700, что позволяет использовать его с системами домашней
автоматизации Z-Wave. HE-HT01 поддерживает протоколы безопасности Z-Wave ‘S0’ и ‘S2’, технологию SmartStart и может быть
подключен («связан») с другими устройствам Z-Wave, таким как реле, коммутаторы и другим.
11
Русский

ТЕХНИЧЕСКИЕ ХАРАКТЕРИСТИКИ
Декларация соответствия
Настоящим Heltun заявляет, что устройство соответствует директивам:
EMC 2014/30/EU, LVD 2014/35/EU, RED 2014/53/EU, RoHS 2011/65/EU.
Размеры передней (настенной) рамки: 89мм (В) х 89мм (Ш) х 9мм (Г)
Размеры задней панели электроники: 53 мм (В) х 53 мм (Ш) х 28 мм (Г)
Материалы: дисплей из закаленного стекла, корпус из огнестойкого пластика
5 цветов рамки: белый, черный глянец, черный матовый, серебристый, хромированный
6 цветов стекла: белый, черный, желтый, зеленый, красный, синий
ЖК-дисплей: 73мм х 42мм (3.3 дюйма), черный с белыми сегментами
6 емкостных сенсорных кнопок
Рабочая температура: от 0°С до + 50°С
Рабочая влажность: от 10% до 95% относительной влажности
Питание: 85-265 В переменного тока, 50 Гц / 60 Гц или 24-48 В постоянного тока.
Потребляемая мощность: <1 Вт
Максимальная резистивная нагрузка: 16А (4000 Вт при 250 В переменного тока)
Релейное переключение с технологией пересечения ноля (zero-cross)
Срок службы реле: 100.000 переключений
Встроенный датчик внешней освещенности
Встроенный датчик температуры
- Диапазон измерений: от –30°C до +80°C
- Точность: ±0.5°C
Встроенный датчик влажности
- Диапазон измерений: от 0% до 80% относительной влажности
- Точность: ±3.0% относительной влажности
Внешний датчик температуры пола
- NTC 10kΩ
- Диапазон измерений: от –30°C до +80°C
- Точность: ±0.5°C
Счетчик потребления энергии в режиме реального времени
Степень защиты: IP21
Z-Wave Plus V2 SDK: V7.11
Модуль Z-Wave 700: ZGM130S
Требования для электрической монтажной распределительной коробки:
круглого или квадратного типа - мин. глубина 40мм
12 Русский

ВАЖНО! Термостат следует устанавливать вдали от прямого солнечного света и источников тепла. Для корректного измерения
температуры воздуха мы рекомендуем устанавливать HE-HT01 примерно на высоте 1.5 метра от пола.
Извлеките блок дисплея и заднюю панель HE-HT01 из упаковки.
СНАЧАЛА УБЕДИТЕСЬ, ЧТО ПИТАНИЕ ОТКЛЮЧЕНО на главном автомате цепи, затем проверьте провода на отсутствие напряжения
с помощью тестера или мультиметра. Вставьте небольшую отвертку с крестообразным шлицем в паз под каждой клеммой и
открутите винты, чтобы открыть клеммы.
Следуйте схемам подключения на Рисунке 1 (или 2, или 3, или 4) и инструкциям ниже:
• Провода питания: Подключите провода Фаза(L) и Ноль(N) к клеммам L & N с маркировкой «IN».
• Провода нагревателя: Подключите провода Фаза(L) и Ноль(N) к клеммам L & N, с маркировкой Нагревательный
Элемент .
Затяните все клеммы с помощью крестообразной отвертки.
Примечание: HELTUN рекомендует устанавливать кабельные наконечники на концах проводов перед подключением их к
выходам HE-HT01 (наконечники различных цветов прилагаются).
Примечание: Можно подключить нулевой провод от нагревателя непосредственно к нейтральной линии сети (Рис. 2 или 4).
Примечание: Технология Zero-Cross недоступна, если устройство подключено к сети постоянного тока с напряжением.
Если вы используете HE-HT01 для теплого пола, подключите провода датчика температуры NTC к клеммам с надписью «NTC».
NTC датчик 10 kΩ входит в комплект HE-HT01, но можно использовать любой другой NTC датчик.
Примечание: Если используется датчик NTC, отличный от 10 kΩ, необходимо изменить значение сопротивления датчика в
меню настроек (Параметр 10 – FSr).
Примечание: Если датчик температуры пола отсоединен или поврежден, на ЖК-дисплее под меткой FLOOR TEMP будет
отображаться символ «—».
Если вы будете использовать внешнее устройство для изменения режимов HE-HT01 (например, охранную систему), подключите
провода сухих контактов внешнего устройства системы к двум клеммам HE-HT01, помеченным «EXT» или «S1» и «Sx».
Возможны два разных способа подключения для внешнего управления: (см. схемы на Рис. 1 и 3).
Примечание: В случае использования схем на Рис. 3 или 4 ОБЯЗАТЕЛЬНО подключать клемму S1 (через сухие контакты
внешнего устройства, например, настенного выключателя) к тому же проводу сети, которая подключена к клемме N на
устройстве (помеченной как «IN»).
Убедившись, что задняя панель HE-HT01 на стене ориентирована маркировкой «TOP» наверх, закрепите заднюю панель в
электрической распределительной коробке с помощью четырех прилагаемых винтов (не перетягивайте).
После того как задняя панель закреплена на стене, установите дисплей HE-HT01 на заднюю панель, сначала поставив на две
верхние защелки, а затем осторожно надавив на дисплей по краям, пока он не «защелкнется» по всему периметру.
Затем включите питание на основном автомате электрической цепи. HE-HT01 включится и начнет работать по заводским настройкам.
Снимите прозрачную защитную пленку с дисплея, потянув за верхний правый язычок.
1.
2.
3.
4.
5.
6.
7.
8.
УСТАНОВКА
Термостат HE-HT01 компании HELTUN должен быть установлен лицензированным электриком, руководствуясь настоящими
инструкциями и местными правилами и строительными нормами.
Предоставьте эти инструкции лицензированному электрику, который устанавливает HE-HT01.
ВНИМАНИЕ: Во время установки термостата электропитание сети должно
быть отключено!
13
Русский

1.
2.
3.
Чтобы демонтировать устройство, УБЕДИТЕСЬ, ЧТО ПИТАНИЕ ОТКЛЮЧЕНО на главном автомате электрической цепи, а
ЖК - ЭКРАН - ЧЕРНЫЙ.
Для снятия блока дисплея HE-HT01 крепко возьмитесь за нижнюю часть и потяните на себя сначала нижнюю часть, потом
верхнюю часть, пока все крепежи не отсоединятся.
Снимите винты с задней панели и, вставив небольшую отвертку с крестообразным шлицем в паз под каждой клеммой,
отвинтите болты, чтобы освободить провода.
ДЕМОНТАЖ
СЕТЬ Z-WAVE
HE-HT01 может работать в любой сети Z-Wave с другими сертифицированными Z-Wave устройствами других производителей.
HELTUN HE-HT01 будет выступать в качестве «ретранслятора» для других устройств независимо от производителя или марки,
повышая надежность всей сети.
Диапазон частот
Параметр 1 (« Eg») позволяет вам вручную изменять частоту Z-Wave на ту, которая действует в вашем регионе. Модификация
возможна только тогда, когда HE-HT01 находится в состоянии «Не включен в сеть». В режиме «Включен в сеть» в правом нижнем
углу ЖК дисплея будет отображаться значок Антенны , и изменение Параметра частоты будет неактивно. Для навигации
по различным значениям используйте кнопки «плюс» (+) и «минус» (-). После выбора частоты региона, чтоб новые настройки
вступили в силу, удерживайте кнопку Часы , чтобы сохранить значение Параметра и перезагрузить устройство.
Безопасность
Поддерживаются следующие режимы добавления в сеть: S0, S2 неавторизованный и S2 авторизованный. Если вы используете
авторизованный режим добавления S2, во время процесса добавления в сеть следует использовать ключ безопасности. Ключ
безопасности напечатан на карте, которая располагается вместе с данным руководством, а также напечатан на задней панели
HE-HT01 (см. Рис. 9 и 10).
Примечание: Обязательно сохраните этот ключ. Без ключа невозможно выполнить добавление в сеть в авторизованном режиме S2.
14 Русский
Установите главный контроллер в режим Security S2 Authenticated «Add Mode».
Введите Ключ Безопасности Устройства (DSK) в контроллер (или отсканируйте QR-код).
Включите питание устройства.
Дождитесь завершения процесса добавления.
Успешное добавление будет подтверждено отображением Антенны с полосками мощности сигнал в правом нижнем
углу основного экрана.
1.
2.
3.
4.
5.
SmartStart
Устройства с поддержкой SmartStart можно добавить в сеть Z-Wave, отсканировав Z-Wave QR-код на продукте с помощью
приложения контроллера, которое обеспечивает SmartStart подключение. В этом случае никаких дополнительных действий не
требуется, и устройство с SmartStart будет добавлено автоматически в течение десяти минут после включения вблизи сети.
Чтобы добавить HE-HT01 в сеть Z-Wave с помощью SmartStart:
Примечание: Ключ Безопасности Устройства (DSK) и QR-код для SmartStart напечатаны на задней панели HE-HT01 и на
прилагаемой карте безопасности (см. Рисунки 9 и 10).

Войдите в режим «НАСТРОЙКИ», нажав и удерживая кнопку Шестеренки в течение трех секунд.
Прокрутите меню до «Параметра 2 - nEt», используя кнопку Нагревательного Элемента для прокрутки вверх и
кнопку «MODE» для прокрутки вниз.
Текущее состояние сети будет отображаться в поле значения Параметра (вверху справа). Должно отображаться: «InC».
Примечание: Если отображается «EcL», HE-HT01 уже удален из сети.
Запустите режим удаления устройства в контроллере.
На HE-HT01 в Параметре 2 нажмите кнопку «–», чтобы начать процесс удаления.
Обратите внимание, что в поле значение Параметра (вверху справа) начнут двигаться линии.
Если удаление прошло успешно, в правом нижнем углу должна появиться пиктограмма Антенны без уровня сигнала
антенны, без уровня сигнала», а в поле значения Параметра должно отобразиться «EcL».
Если отображается Антенна со значком мощности сигнала или «InC» в поле значения Параметра, повторите процесс
удаления.
Добавление HE-HT01 в существующую сеть Z-Wave
Чтобы добавить HE-HT01 в существующую сеть Z-Wave (т.е. «inclusion»), выполните следующие действия:
1.
2.
3.
4.
5.
6.
7.
8.
1.
2.
3.
4.
5.
6.
7.
8.
Удаление HE-HT01 из сети Z-Wave
Чтобы удалить HE-HT01 из сети Z-Wave (т.е. «Exclusion»), выполните следующие действия:
15
Русский
Примечание: Если HE-HT01 ранее был добавлен в сеть Z-Wave и не был удален, добавление в новую сеть будет невозможно без
предварительного выполнения процедуры удаления или сброса к заводским настройкам.
Примечание: Если HE-HT01 добавлен в сеть Z-Wave, в правом нижнем углу основного экрана появится значок Антенны с
полосками уровня сигнала .
Войдите в режим «НАСТРОЙКИ», нажав и удерживая кнопку Шестеренки в течение трех секунд.
Прокрутите меню до «Параметра 2 - nEt», используя кнопку Нагревательного Элемента для прокрутки вверх и
кнопку «MODE» для прокрутки вниз.
Текущее состояние сети будет отображаться в позиции значения параметра (вверху справа). Должно отображаться «EcL».
Примечание: Если отображается «InC», HE-HT01 сначала должен быть удален из существующей сети Z-Wave
(см. «Удаление» ниже).
Запустите режим добавления устройства на контроллере.
На HE-HT01 в Параметре 2 нажмите кнопку «+», чтобы начать процесс добавления.
В поле значения Параметра (вверху справа) начнут двигаться линии.
Если добавление было успешным, в правом нижнем углу должна появиться пиктограмма Антенны с индикатором мощности
сигнала .
Если отображается только пиктограмма Антенны без мощности сигнала или в поле значения Параметра отображается
«Err», добавление HE-HT01 не было успешным (попробуйте повторить шаги 4-7).

16 Русский
ЗАВОДСКИЕ НАСТРОЙКИ (RES)
Нажав и удерживая кнопку «MODE» в течение десяти секунд, HE-HT01 перейдет в режим «Сброс к Заводским Настройкам», отображая
«REs» в левом нижнем углу, «y» в верхнем левом углу и «n» в верхнем правом углу. Нажмите кнопку «+», чтобы сбросить устройство к
заводским настройкам, или кнопку Нагревательного Элемента «Значдля отмены. Сброс к заводским настройкам изменит все
параметры на заводские значения по умолчанию, а также удалит устройство из любой сети Z-Wave.
Примечание: Используйте эту процедуру только в том случае, если основной сетевой контроллер отсутствует или не работает.
ПОЛНАЯ ВЕРСИЯ РУКОВОДСТВА ПО ЭКСПЛУАТАЦИИ
Вы можете получить полную версию руководства по эксплуатации HE-HT01, посетив support.heltun.com.
ОГРАНИЧЕННАЯ ГАРАНТИЯ
Гарантийный срок продукта – 1 (один) год со дня его покупки потребителем. Компания HELTUN может продлить «Гарантийный Срок» до
3 (трех) лет со дня покупки продукта, если покупатель зарегистрирует факт приобретения устройства на странице веб-сайта HELTUN по
ссылке: bonus.heltun.com. Данное условие гарантии действует только для первого конечного пользователя продукта и не подлежит
передаче следующему.
Если в течение «Гарантийного Срока» продукт будет признан дефектным или неисправным по вине изготовителя, компания HELTUN
обязана либо отремонтировать устройство, либо заменить его новым. В таких случаях покупатель должен (i) вернуть товар с
документом, подтверждающим его покупку, в торговую точку, где он был приобретен; или (ii) связаться по данному вопросу со службой
ЗА ИСКЛЮЧЕНИЕМ СЛУЧАЕВ, КОГДА ПРИМЕНИМЫМ ЗАКОНОДАТЕЛЬСТВОМ МОЖЕТ БЫТЬ ПРЕДУСМОТРЕНО ИНОЕ, НАСТОЯЩАЯ ОГРАНИЧЕННАЯ
ГАРАНТИЯ ЗАМЕНЯЕТ СОБОЙ ВСЕ ДРУГИЕ СОГЛАШЕНИЯ И ГАРАНТИИ, ЯВНЫЕ ИЛИ ПОДРАЗУМЕВАЕМЫЕ, ВКЛЮЧАЯ, ПОМИМО ПРОЧЕГО, ЛЮБЫЕ
ПОДРАЗУМЕВАЕМЫЕ ГАРАНТИИ ТОВАРНОЙ ПРИГОДНОСТИ ИЛИ ПРИГОДНОСТИ ДЛЯ ОПРЕДЕЛЕННОЙ ЦЕЛИ, А ТАКЖЕ НЕНАРУШЕНИЯ ПРАВ.
HELTUN НЕ ДАЕТ НИКАКИХ ДРУГИХ ГАРАНТИЙ, ЯВНЫХ ИЛИ ПОДРАЗУМЕВАЕМЫХ.
ДАННАЯ ОГРАНИЧЕННАЯ ГАРАНТИЯ НЕ РАСПРОСТРАНЯЕТСЯ НА РАСХОДЫ ПО УДАЛЕНИЮ ИЛИ ПЕРЕУСТАНОВКЕ ОБОРУДОВАНИЯ. НАСТОЯЩАЯ
ОГРАНИЧЕННАЯ ГАРАНТИЯ НЕ ПРИМЕНЯЕТСЯ, ЕСЛИ КОМПАНИЯ HELTUN ДОКАЗАЛА, ЧТО ДЕФЕКТ ИЛИ НЕИСПРАВНОСТЬ БЫЛИ ВЫЗВАНЫ
ПОВРЕЖДЕНИЕМ, НАНЕСЕННЫМ ПОТРЕБИТЕЛЕМ, В ТОМ ЧИСЛЕ ВО ВРЕМЯ МОНТАЖА. ЭТА ОГРАНИЧЕННАЯ ГАРАНТИЯ НЕДЕЙСТВИТЕЛЬНА, ЕСЛИ
ДЕФЕКТ(Ы) ЯВЛЯЕТСЯ РЕЗУЛЬТАТОМ НЕПРАВИЛЬНОЙ УСТАНОВКИ ДАННОГО ПРОДУКТА.
ЕДИНСТВЕННАЯ ОТВЕТСТВЕННОСТЬ HELTUN И ЕДИНСТВЕННОЕ СРЕДСТВО ЗАЩИТЫ ПОТРЕБИТЕЛЯ В СООТВЕТСТВИИ С НАСТОЯЩЕЙ ОГРАНИЧЕННОЙ
ГАРАНТИЕЙ ЗАКЛЮЧАЕТСЯ В РЕМОНТЕ ИЛИ ЗАМЕНЕ ИЗДЕЛИЯ В ТЕЧЕНИЕ УКАЗАННЫХ ВЫШЕ СРОКОВ. HELTUN НЕ НЕСЕТ ОТВЕТСТВЕННОСТИ ЗА ЛЮБЫЕ
УБЫТКИ ИЛИ УЩЕРБ ЛЮБОГО РОДА, ВКЛЮЧАЯ ЛЮБЫЕ СЛУЧАЙНЫЕ ИЛИ КОСВЕННЫЕ УБЫТКИ, ВОЗНИКШИЕ ПРЯМО ИЛИ КОСВЕННО В РЕЗУЛЬТАТЕ
ЛЮБОГО НАРУШЕНИЯ ЛЮБОЙ ГАРАНТИИ, ЯВНОЙ ИЛИ ПОДРАЗУМЕВАЕМОЙ, ИЛИ ЛЮБОЙ ДРУГОЙ НЕИСПРАВНОСТИ ДАННОГО ПРОДУКТА.
ОТВЕТСТВЕННОСТЬ HELTUN НИ В КОЕМ СЛУЧАЕ НЕ ДОЛЖНА ПРЕВЫШАТЬ СУММУ, ФАКТИЧЕСКИ УПЛАЧЕННУЮ ЗА ПРОДУКТ, НЕЗАВИСИМО ОТ ТОГО,
ВОЗНИКАЕТ ЛИ ТАКАЯ ОТВЕТСТВЕННОСТЬ ИЗ ПРЕТЕНЗИИ, ОСНОВАННОЙ НА ГАРАНТИИ, ДЕЛИКТЕ ИЛИ КОНТРАКТЕ. ЭТИ ОГРАНИЧЕНИЯ
ОТВЕТСТВЕННОСТИ ОСТАЮТСЯ В СИЛЕ ДАЖЕ В ТОМ СЛУЧАЕ, ЕСЛИ КОМПАНИЯ HELTON БЫЛА ПРЕДУПРЕЖДЕНА О ВОЗМОЖНОСТИ ТАКИХ УБЫТКОВ
ИЛИ УЩЕРБА.
В НЕКОТОРЫХ ЮРИСДИКЦИЯХ НЕ ДОПУСКАЕТСЯ ИСКЛЮЧЕНИЕ ИЛИ ОГРАНИЧЕНИЕ СЛУЧАЙНОГО ИЛИ КОСВЕННОГО УЩЕРБА, ПОЭТОМУ ЭТО
ОГРАНИЧЕНИЕ МОЖЕТ НЕ ОТНОСИТЬСЯ К ВАМ. ДАННАЯ ОГРАНИЧЕННАЯ ГАРАНТИЯ ЯВЛЯЕТСЯ ЕДИНСТВЕННОЙ ПРЯМОЙ ГАРАНТИЕЙ, КОТОРУЮ
HELTUN ДАЕТ НА ЭТОТ ПРОДУКТ.
Если у вас есть какие-либо вопросы относительно этой ограниченной гарантии, пожалуйста, напишите в службу поддержки клиентов
В случае любого противоречия, несоответствия, расхождения, неопределенности или двусмысленности между «Руководством» на этом
языке и на английском языке и в любом последующем переводе на любой другой язык, версия на английском языке имеет
преимущественную силу.

APERÇU
Le thermostat programmable avancé HELTUN HE-HT01 est élégamment conçu et
«Incroyablement Intelligent», orant un contrôle sans l par Internet du système de chauage de
votre maison. Le HE-HT01 est «Incroyablement Mince» sur le mur mais regorge de
fonctionnalités pour vous aider à économiser de l'énergie tout en orant le summum du confort et
de la commodité.
Contrôle les systèmes de chauage électrique
Le HE-HT01 est conçu pour maintenir des températures ambiantes et au sol constantes en fournissant des capteurs pour les systèmes de
chauage par le sol ambiant et radiant. Il contrôle les systèmes de chauage électrique comme les radiateurs, les cheminées à convection
ou électriques, ainsi que les chaudières et le chauage au sol électrique. Les éléments chauants sont directement contrôlés via un relais
de 16 ampères.
Plusieurs capteurs intégrés
Le HE-HT01 possède un écran LCD, six boutons tactiles capacitifs à haute sensibilité et deux capteurs de température pour la surveillance:
les températures de l'air ambiant et les températures du sol à l'aide du capteur NTC externe inclus. Il est également équipé de capteurs
intégrés pour: l'humidité, la luminosité et la consommation d'énergie. Vous pouvez accéder instantanément aux informations de tous les
capteurs sur l'écran convivial.
Surveillez toutes les informations importantes sans même le toucher
L'achage en un coup d'œil indique: température de l'air ambiant, température du sol, point de consigne utilisateur, niveau d'humidité,
mode de fonctionnement actuel, heure, jour de la semaine et état du réseau et du relais Z-Wave. La luminosité de l'écran s'adapte
automatiquement aux conditions de lumière ambiante, ce qui la rend toujours facile à lire.
Hautement congurable avec sécurité automatique
Vous pouvez sélectionner l'un des six modes de fonctionnement avec des points de consigne individuels soit manuellement, soit en
utilisant un contrôleur/passerelle Z-Wave. Par mesure de sécurité, le HE-HT01 protège les systèmes de plancher radiant contre la surchaue
en s'éteignant automatiquement si la température du plancher atteint 40°C.
Sachez combien d'énergie vous utilisez
Le système de consommation électrique intégré au HE-HT01 surveille avec précision la quantité d'énergie que vous avez utilisée au cours
d'une journée, d'une semaine ou d'un mois.
Basé sur la dernière plateforme Z-Wave
Le système de consommation électrique intégré au HE-HT01 surveille avec précision la quantité d'énergie que vous avez utilisée au cours
d'une journée, d'une semaine ou d'un mois.
17
Français

SPÉCIFICATIONS TECHNIQUES
Déclaration de conformité
Par la présente, Heltun déclare que l'appareil est conforme aux directives:
EMC 2014/30/EU, LVD 2014/35/EU, RED 2014/53/EU, RoHS 2011/65/EU.
Dimensions du cadre avant (sur le mur): 89mm (H) х 89mm (L) х 9mm (P)
Dimensions du boîtier électronique arrière: 53mm (H) х 53mm (L) х 28mm (P)
Matériaux: écran/corps en verre trempé, plastique ignifuge
5 couleurs de cadre: Blanc, Noir Brillant, Noir Mat, Argent, Chrome
6 couleurs de verre: Blanc, Noir, Jaune, Vert, Rouge, Bleu
LCD: 73mm x 42mm (3.3 pouces), noir avec segments blancs
6 boutons tactiles capacitifs
Température de fonctionnement: 0°С à +50°С
Humidité de fonctionnement: 10% à 95% HR
Alimentation: 85-265VAC 50Hz / 60Hz ou 24-48VDC
Consommation électrique: <1W
Charge résistive maximale: 16А (4000W @ 250VAC)
Commutation de relais avec technologie Zero-Cross
Durée de vie du relais: 100.000 commutations
Capteur de lumière ambiante interne
Capteur de température interne
- Plage de mesure: –30°C to +80°C
- Précision: ±0.5°C
Capteur d'humidité interne
- Plage de mesure: 0% to 80% RH
- Précision: ±3.0% RH
Capteur de température au sol externe
- NTC 10kΩ
- Plage de mesure: –30°C to +80°C
- Précision: ±0.5°C
Compteur de consommation d'énergie en temps réel
Classe IP: IP21
SDK Z-Wave Plus V2: V7.11
Module Z-Wave 700: ZGM130S
Nécessite un montage dans une boîte d’encastrement électrique:
type rond ou carré - min. profondeur 40 mm
18 Français
Other manuals for HE-HT01
3
This manual suits for next models
1
Table of contents
Languages:
Other Heltun Thermostat manuals

Heltun
Heltun HE-HT01 User manual

Heltun
Heltun HE-ZW-THERM-FC1 User manual

Heltun
Heltun HE-FT01 User manual

Heltun
Heltun HE-HT01 User manual

Heltun
Heltun HE-FT01 User manual

Heltun
Heltun HE-ZW-THERM-FL1 User manual

Heltun
Heltun HE-ZW-THERM-FL2 User manual

Heltun
Heltun HE-HT01 User manual

Heltun
Heltun HE-FT01 User manual
Popular Thermostat manuals by other brands

Honeywell
Honeywell TH8320WF01 user guide

Honeywell
Honeywell T8424C1042 Guide de l'utilisateur

Salus
Salus ERT20 Operating and mounting instructions

Lux Products
Lux Products LuxPro Smart Temp P621U Installation and operating instructions

Hunter
Hunter 44200 owner's manual

eve thermo
eve thermo 2ET309901000 Get started