manuals.online logo
Brands
  1. Home
  2. •
  3. Brands
  4. •
  5. Helvex
  6. •
  7. Plumbing Product
  8. •
  9. Helvex INTEGRA UMO8-INN-01 User manual

Helvex INTEGRA UMO8-INN-01 User manual

1-02-3165-2
UMO8-INN-01
INTEGRA
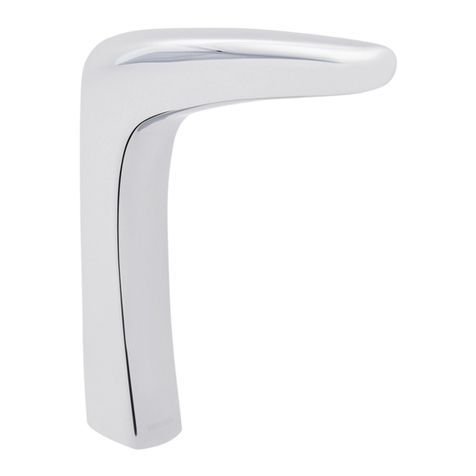
Single Handle Sink Faucet
Monomando para Lavabo
UMO8-INN-01
adjustable wrench
perico llave allen 5/64"
5/64" allen wrench llave de mantenimiento
maintenance wrench
llave inglesa
wrench
1cold
fría
hot
caliente
angle valves
(not included)
válvulas angulares
(no incluidas)
(Finished Floor Level)
(Nivel de Piso Terminado)
FFL
NPT
8,0"
(20,3 cm*)
21,6"
(55 cm*)
*Recommended Dimensions
*Medidas Recomendadas
Close the water supply. / Cierre el suministro de agua.
Locate and close the water supply valves. They are usually found
underneath the sink. If it is a replacement faucet, remove the old
faucet and clean the entire sink’s surface.
Ubique y cierre las válvulas de suministro de agua. Generalmente
se encuentran debajo del lavabo. Si se trata de un reemplazo de
grifo, quite el grifo viejo y limpie completamente la superficie del
lavabo.
Items Included in the Product /
Recommended Tools and Materials /
Artículos Incluidos en el Producto
Herramientas y Materiales Recomendados
1,40
20 137,89
Model / Modelo
Minimum / Mínima Maximum / Máxima
kg/cm²
PSI kPa kg/cm²
PSI kPa
5,624
80 551,84
Caution: Do not exceed the pressure of:
Precaución: No exceder la presión de: 8,788
125 861,84
This product can expose you to chemicals including lead, which is known to the State of California to cause
cancer. For more information go to www.P65Warnings.ca.gov. / Este producto puede exponerlo a sustancias
químicas, incluido el plomo, que es conocido por el estado de California como causante de cáncer. Para
obtener más información, visite www.P65Warnings.ca.gov.
Para disminuir el riesgo de lesiones o daños a la propiedad, lea todas las instrucciones antes de instalar el
producto. Utilice gafas de seguridad. En obras de construcción, instalación, modificación, ampliación y
reparación deben cumplir con el reglamento de construcción y obras de su localidad. El producto ilustrado
puede sufrir cambios de aspecto como resultado de la mejora continua a la que está sujeto.
To reduce the risk of injury or property damage, please read all instructions before installing the product.
Wear safety glasses. For any construction, installation, alteration, extension or repair, comply with your local
building codes. The product’s illustration may vary in appearance to the actual product as result of the
continuous improvement process it is subject to.
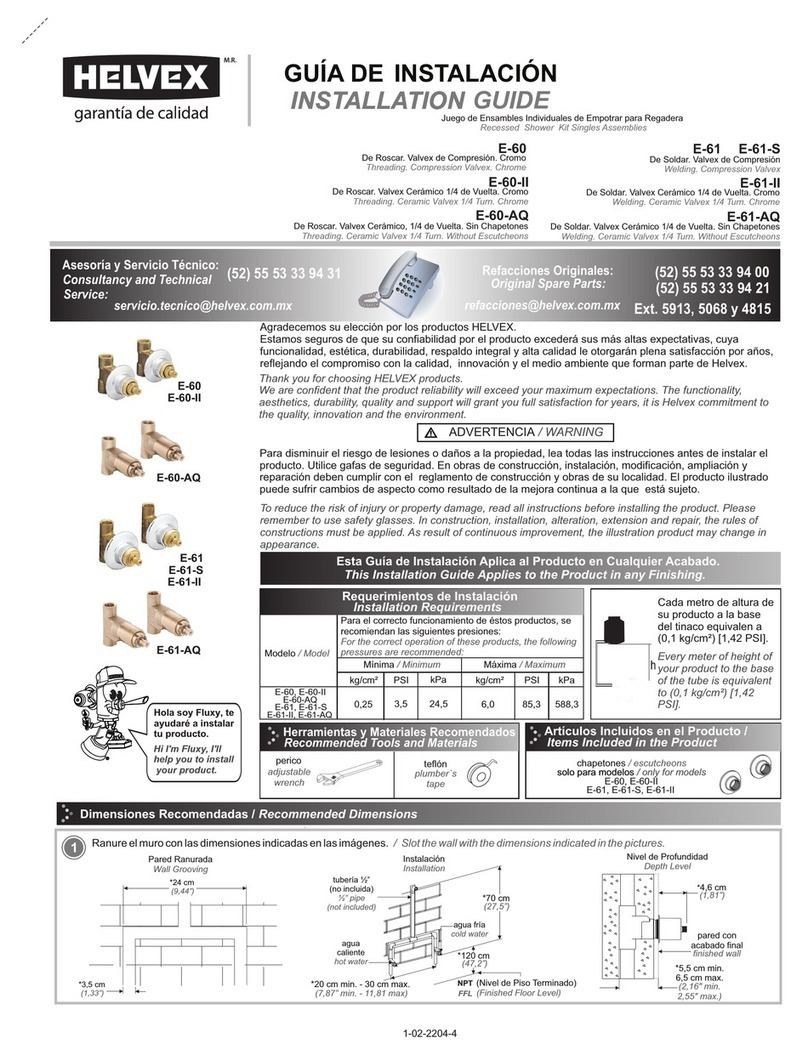
Agradecemos su elección por los productos HELVEX.
Estamos seguros de que su confiabilidad por el producto excederá sus más altas expectativas, cuya
funcionalidad, estética, durabilidad, respaldo integral y alta calidad le otorgarán plena satisfacción por años,
reflejando el compromiso con la calidad, innovación y el medio ambiente que forman parte de Helvex.
Thank you for choosing HELVEX products.
We are confident that the product reliably will exceed your highest expectations. This product’s functionality,
aesthetics, durability, quality and support will grant you full satisfaction for years, thus reflecting Helvex’s
commitment to quality, innovation and the environment.
Requerimientos de Instalación
Installation Requirements
This Installation Guide Applies to the Product in any Finishing.
Esta Guía de Instalación Aplica al Producto en Cualquier Acabado.
For the correct functioning of these products, the recommended water pressures is:
Para el correcto funcionamiento de estos productos, se recomiendan las siguientes presiones:
2
o´ring
2
Instalación de las Mangueras
Hoses Installation /
tuerca
separator
separador
washer
nut
rondana separator
tuerca
nut
washer
rondana
separador
connectors
conectores
connectors
conectores
Insert the separator and the washer.
Screw the nut to fix and screw the
connectors. / Inserte el separador y la
rondana. Enrosque la tuerca para fijar y
enrosque los conectores.
Unscrew the connectors and the nut,
remove the washer and the separator. /
Desenrosque los conectores y la tuerca,
remueva la rondana y el separador.
supply lines
líneas de
alimentación
hot water
agua caliente
cold water
agua fría
Open the water supply and purge the supply lines. / Abra
el suministro de agua y purgue la línea de alimentación.
connectors
conectores
supply lines
líneas de
alimentación
Screw the hoses (not included) to the connectors and then to the
supply line. / Enrosque las mangueras (no incluidas) a los
conectores y posteriormente a la línea de alimentación.
Check for leaks above and below the
sink. / Revise que no existan fugas
encima y debajo del lavabo.
To open and close the water flow, move the handle up and
down. To adjust the water temperature, turn clockwise for hotter
and counterclockwise for colder. / Para abrir y cerrar el flujo de
agua, levante y baje el maneral. Para regular la temperatura,
gire a la izquierda para más caliente y a la derecha para más
fría.
Operation / Operación
Insert the faucet into the sink and
check that the o’ring is placed. / Inserte
la salida en el lavabo y verifique que
se coloque el o’ring.
Apply plumber´s tape on the
threaded connections, in order
to prevent leaks.
Coloque cinta teflón en las
conexiones roscadas para
evitar fugas.
hoses
(not included)
1/2"-14 NPSM x 1/2"-14 NPSM x 24"
mangueras
(no incluidas)
Open the water supply line. / Abra el suministro de agua.
hot
caliente
cold
fría
3
11
13
Remove escutcheon, the gasket and the spherical
escutcheon. / Retire el chapetón, el antifricción y el chapetón
esférico.
12
escutcheon
empaque
spherical escutcheon
chapetón esférico
aerator
aireador
gasket
empaque
Unscrew the body, remove the gasket and the aerator, clean
the aerator and a soft brush. with water / Desenrosque el
barril, retire el empaque y el aireador, limpie el aireador con
agua y un cepillo suave.
Screw the body, with the aerator and the gasket. / Enrosque el
barril con el aireador y el empaque.
aerator
aireador
gasket
empaque
Unscrew the set screw from the handle with the allen wrench
(included) and remove the handle. / Desenrosque el opresor
del maneral con la llave allen (incluida) y retire el maneral.
set screw
opresor
handle
maneral
Unscrew the locknut with the maintenance wrench (included), replace the cartridge and reassemble. / Desenrosque la tuerca con de sujeción
la llave de mantenimiento (incluida), cambie el cartucho y vuelva a ensamblar.
cartridge
cartucho
locknut
tuerca de sujeción
Sh-1569
anti-friction
anti frcicción
Connections are possibly not tightened enough. /
Es posible que las conexiones no estén
firmemente apretadas.
No water flow.
/ No sale agua.
The main water supply valves are closed. / Las válvulas
de alimentación principal se encuentran cerradas.
The faucet is loose.
/ La salida está floja
There are leaks in the
connections. / Hay fuga
en las conexiones.
There is low water flow. /
Existe poco flujo de
agua.
The nut is not tightened. / La tuerca no está apretada.
The lever handle is closed. / La palanca maneral se
encuentra cerrada.
Clogged aerator. / Aireador obstruido.
Open the water supply valves (page 2, step 7).
/ Abra las válvulas principales de agua (pág. 2, paso 7).
Tighten the nut firmly (page 2, step 4). / Apriete
firmemente la tuerca (pág. 2, paso 4).
Lift and/or turn the handle’s lever, according to the product
operation (page 2, step 8). / Levante y/o gire la palanca
maneral según la operación del producto (pág. 2, paso 8).
Remove the aerator and clean it (page 3, step 9 and 10).
/ Retire el aireador y límpielo (pág. 3, paso 9 y 10).
Tighten the connections firmly (page 2, step 6) Hoses
installation. / Apriete firmemente la conexión (pág. 2, paso 6)
Instalación de las mangueras.
Troubleshooting / Posibles Causas y Soluciones
R
E
C
Y
C
L
E
It is very important to follow the instructions below to preserve HELVEX products
finishings shiny and in perfect conditions:
1. Use only water and a clean cloth.
2. Do not use fibers, powders, abrasives, or chemicals.
3. Do not use sharp objects to clean the finishings.
4. It is recommended to clean your device daily.
Visit our website www.helvexusa.com
Es muy importante seguir las siguientes instrucciones para conservar los
acabados de los productos HELVEX, con brillo y en perfecto estado:
1. Utilice únicamente agua y un paño limpio.
2. No utilice fibras, polvos, abrasivos, ni productos químicos.
3. No utilice objetos punzo-cortantes para limpiar los acabados.
4. Se recomienda realizar la limpieza de su producto diariamente.
Visite nuestra página www.helvexusa.com
/ Recomendaciones de LimpiezaCleaning Recommendations
Toll free number / línea sin costo
(855) 267 2498
[email protected]

Other Helvex Plumbing Product manuals

Helvex 323-19-0.5 User manual

Helvex

Helvex 323-19-0.5 User manual

Helvex NUVA E-47 User manual

Helvex

Helvex NUVA E-47 User manual

Helvex MAGNA DX User manual

Helvex

Helvex MAGNA DX User manual

Helvex 4954 User manual

Helvex

Helvex 4954 User manual

Helvex TV-030 User manual

Helvex

Helvex TV-030 User manual

Helvex 312-WC-4.8 User manual

Helvex

Helvex 312-WC-4.8 User manual

Helvex 24 User manual

Helvex

Helvex 24 User manual

Helvex REJ-01 User manual

Helvex

Helvex REJ-01 User manual

Helvex TV-121 User manual

Helvex

Helvex TV-121 User manual

Helvex 285-19 User manual

Helvex

Helvex 285-19 User manual

Helvex H-3003 User manual

Helvex

Helvex H-3003 User manual

Helvex CENTURY E-928 User manual

Helvex

Helvex CENTURY E-928 User manual

Helvex 27 User manual

Helvex

Helvex 27 User manual

Helvex Nuva H-900 User manual

Helvex

Helvex Nuva H-900 User manual

Helvex SQUADRA UE-929 User manual

Helvex

Helvex SQUADRA UE-929 User manual

Helvex TH-058 User manual

Helvex

Helvex TH-058 User manual

Helvex TH-063 User manual

Helvex

Helvex TH-063 User manual

Helvex UTV-305 User manual

Helvex

Helvex UTV-305 User manual

Helvex Mangna DX Mangna DX User manual

Helvex

Helvex Mangna DX Mangna DX User manual

Helvex EP-95 User manual

Helvex

Helvex EP-95 User manual

Helvex Explora HOT-106 User manual

Helvex

Helvex Explora HOT-106 User manual

Helvex 185-19-1 User manual

Helvex

Helvex 185-19-1 User manual

Helvex 282-H User manual

Helvex

Helvex 282-H User manual

Helvex 313-38-4.8 User manual

Helvex

Helvex 313-38-4.8 User manual

Popular Plumbing Product manuals by other brands

Delta 24902 installation instructions

Delta

Delta 24902 installation instructions

Delta Leland 978-DST Specification sheet

Delta

Delta Leland 978-DST Specification sheet

1 BY ONE Naturalife 729NA-0001 instruction manual

1 BY ONE

1 BY ONE Naturalife 729NA-0001 instruction manual

GoldenDesigns MX-M356-01 instruction manual

GoldenDesigns

GoldenDesigns MX-M356-01 instruction manual

FLORABEST FRWS 9 A1 Assembly instructions

FLORABEST

FLORABEST FRWS 9 A1 Assembly instructions

Delta IN2ITION 75494 quick start guide

Delta

Delta IN2ITION 75494 quick start guide

Delta 140-DST Series installation guide

Delta

Delta 140-DST Series installation guide

Delta 25769LF quick start guide

Delta

Delta 25769LF quick start guide

Delta Allora 989-DST Series parts manual

Delta

Delta Allora 989-DST Series parts manual

Delta 100 Series manual

Delta

Delta 100 Series manual

Delta GANOT 95A9135-33S-SS manual

Delta

Delta GANOT 95A9135-33S-SS manual

Delta IN2ITION 58065 Series installation instructions

Delta

Delta IN2ITION 58065 Series installation instructions

Lifepro REJUVACURE user manual

Lifepro

Lifepro REJUVACURE user manual

Willoughby Industries, Inc. WWF-4203 Series Installation & operation manual

Willoughby Industries, Inc.

Willoughby Industries, Inc. WWF-4203 Series Installation & operation manual

AMA COMETA CM4600 Assembly, Use and Maintenance Manual

AMA

AMA COMETA CM4600 Assembly, Use and Maintenance Manual

Delta Signature 340 Series Specification sheet

Delta

Delta Signature 340 Series Specification sheet

Delta 141 Series parts manual

Delta

Delta 141 Series parts manual

Delta B4310LF-SS manual

Delta

Delta B4310LF-SS manual

manuals.online logo
manuals.online logoBrands
  • About & Mission
  • Contact us
  • Privacy Policy
  • Terms and Conditions

Copyright 2025 Manuals.Online. All Rights Reserved.