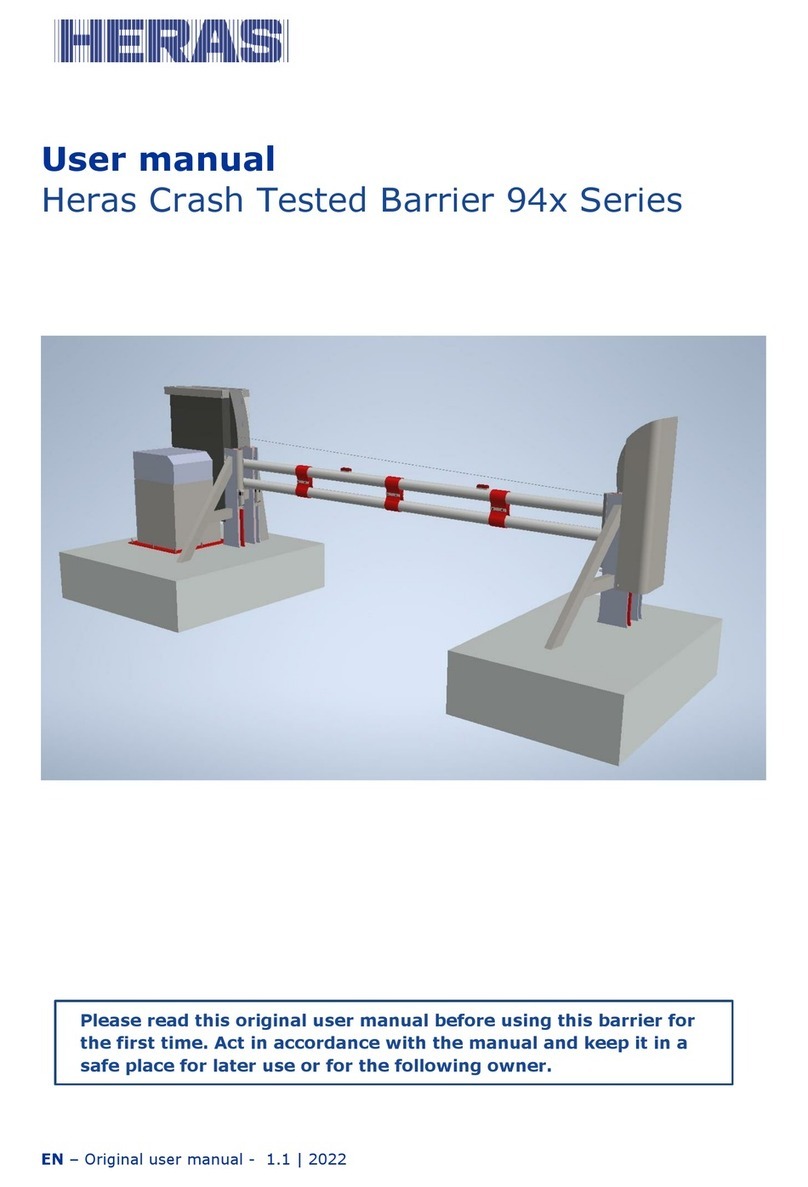
Heras Saros User manual

EN – Translation of the original user manual -1.0 | 2021
User Manual
Barrier Saros
Please read this original user manual before using this barrier for the
first time! Act in accordance with the manual and keep it in a safe
place for later use or for the following owner.

EN – Translation of the original user manual -1.0 | 2021
2

EN – Translation of the original user manual -1.0 | 2021
3
CONTENTS
FOREWORD .......................................................................................................... 6
1 PREFACE.......................................................................................................... 7
1.1 MANUFACTURER /SUPPLIER........................................................................ 7
1.2 SERVICE /MAINTENANCE............................................................................ 7
1.3 DEFINITIONS: USER /OPERATOR /ENGINEER................................................ 7
1.4 PRESCRIBED USE /APPLICATION ................................................................. 8
1.5 CONFORMITY ............................................................................................ 8
1.6 DELIVERY ................................................................................................. 8
1.7 GENERAL INFORMATION REGARDING THE ELECTRICAL CONNECTIONS .............. 9
1.8 DELIVERY OF BARRIER................................................................................ 9
SAFETY......................................................................................................... 10
2.1 EXPLANATION OF THE SYMBOLS ................................................................ 10
2.2GENERAL SAFETY INSTRUCTIONS............................................................... 10
2.3 SAFETY PROVISIONS EMPLOYED ................................................................ 11
2.4 INTENDED USE........................................................................................ 11
2.5 SAFETY DURINGUSE ................................................................................ 11
2.6 SAFETY DURING INSTALLATION, MAINTENANCE AND DISASSEMBLY................ 12
OPERATION.................................................................................................. 13
3.1 OPENING/CLOSING BARRIER -NORMAL USE ................................................ 13
3.2 OPEN /CLOSE BARRIER MANUALLY ............................................................. 13
OPERATING THE BARRIER MANUALLY ................................................... 13
DESCRIPTION .............................................................................................. 15
4.1 SAROS ................................................................................................... 15
4.2 SAFETY EDGES ........................................................................................ 16
4.3 PHOTOCELLS........................................................................................... 16
4.4 LOOP DETECTION .................................................................................... 16
4.5 LASER .................................................................................................... 16
4.6 ACCESSOIRES......................................................................................... 17
Traffic light (optional) ......................................................................... 17
Flash light (optional*)......................................................................... 17
Remote control (optional) ................................................................... 17
4.7 OPERATING MODES.................................................................................. 17
Hold-to-run-control ............................................................................ 17
Automatic mode ................................................................................ 18
4.8 AUTOMATICALLY CHANGING OPERATING MODES.......................................... 19
CONTROL UNIT AND DISPLAY READINGS .................................................... 20
5.1 TOTAL VIEW OF HMD SAROS...................................................................... 20
5.2 FULL VIEW OF THE CONTROL SYSTEM ......................................................... 21
5.3 ROTARY AND SELECTION SWITCH .............................................................. 22

EN – Translation of the original user manual -1.0 | 2021
4
5.4 LCD DISPLAY........................................................................................... 22
Operating mode display ...................................................................... 22
Sensor display................................................................................... 23
Error/event display ............................................................................ 24
Selecting the menu system ................................................................. 25
Menu system..................................................................................... 25
Entering the password ........................................................................ 25
5.5 MENU OVERVIEW..................................................................................... 27
5.6 MENU STRUCTURE, DISPLAYED TEXTS AND REFERENCES............................... 28
5.7 SETTING THE NATIONAL LANGUAGE ........................................................... 33
INSTALLATION OF THE CONTROL SYSTEM ................................................... 33
6.1 ELECTRICAL CONNECTION ........................................................................ 33
6.2 POWER SUPPLY FROM THE ELECTRICITY GRID.............................................. 34
Connection of the motor ..................................................................... 34
6.3 CONNECTING THE INPUTS AND OUTPUTS .................................................... 34
Supply of external devices with 24 VDC .................................................. 35
6.4 OPERATING DEVICES AND LIMIT SWITCHES ................................................ 35
Limit switches ................................................................................... 36
Operating keys for hold-to-run operation............................................... 37
Stop function .................................................................................... 37
Operating keys OPEN.......................................................................... 38
Operating keys CLOSE ........................................................................ 38
Control element switchover impulse pushbutton (toggle) ......................... 38
6.5 FIXED SAFETY CONTACT STRIPS ................................................................ 39
Fixed safety contact strips in close direction SKL) ................................... 39
Light barrier ...................................................................................... 39
Connecting a light barrier.................................................................... 40
Overview installation plan of the inputs ................................................. 41
6.6 RELAY OUTPUTS ...................................................................................... 41
6.7 RADIO RECEIVER AND ARIAL ..................................................................... 42
PROGRAMMING AND SETTINGS ................................................................... 44
7.1 CHANGING THE DIRECTION OF ROTATION OF THE DRIVE............................... 44
7.2 SET BARRIER BOOM LENGTH ..................................................................... 44
7.3 REFERENCE RUN...................................................................................... 45
7.4 DETERMINE THE MAXIMUM SWITCH-OFF THRESHOLD OF THE MOTOR POWER... 46
7.5 DETERMINE THE MOTOR POWER OFF THRESHOLD FOR SLOW MOVEMENT ........ 46
7.6 CONNECTING FLASHLIGHTS ...................................................................... 47
7.7 BARRIER STATUS INDICATIONS................................................................. 47
7.8 SETTING THE TIMERS ............................................................................... 47
Hold-open time.................................................................................. 48
Closing from intermediate positions ...................................................... 48
Closing run shortening with a light barrier ............................................. 49
7.9 MAINTENANCE EVENTS............................................................................. 49
Cycle counter .................................................................................... 49

EN – Translation of the original user manual -1.0 | 2021
5
Motor runtime counter ........................................................................ 50
Maintenance interval .......................................................................... 50
Maintenance request with flashlight ...................................................... 50
Reset maintenance request ................................................................. 51
7.10 BACKING UP PARAMETERS ..................................................................... 51
7.11 RELOADING PARAMETERS ...................................................................... 52
7.12 RADIO REMOTE CONTROL ...................................................................... 52
Displaying the number of transmitters .................................................. 52
Registering new transmitters ............................................................... 53
Registering key functions .................................................................... 53
Deleting a transmitter......................................................................... 54
Deleting a transmission location........................................................... 55
Deleting all transmitters...................................................................... 55
7.13 DIAGNOSTIC SUPPORT .......................................................................... 55
Version display .................................................................................. 55
Barrier status display.......................................................................... 56
Sensor status .................................................................................... 57
Temperature status............................................................................ 57
Motor current display.......................................................................... 57
Log system ....................................................................................... 58
FAULTS......................................................................................................... 59
8.1 DEFECTIVE PHOTOCELL OR SAFETY EDGE.................................................... 59
8.2 PARAMETERS REFERENCE/ERROR NUMBERS ................................................ 59
EMERGENCY STOP ........................................................................................ 63
MAINTENANCE INSTRUCTIONS ................................................................. 63
10.1 BARRIER MAINTENANCE ........................................................................ 63
10.2 DRIVE UNIT MAINTENANCE .................................................................... 64
10.3 CLEANING ........................................................................................... 64
DECOMMISSIONING AND REMOVAL .......................................................... 64
SPARE PARTS ............................................................................................ 65
TECHNICAL DATA ...................................................................................... 65
13.1 BARRIER DIMENSIONS .......................................................................... 65
13.2 OPERATING CONDITIONS AND SPECIFICATIONS ....................................... 66
13.3 SPEEDS............................................................................................... 66
13.4 SPRING SETTINGS ................................................................................ 66
13.5 DRIVE DESCRIPTION ............................................................................. 67
APPENDIX A: DECLARATIONS DOP / DOC .......................................................... 69
APPENDIX B: ELECTRIC DIAGRAM HMD SAROS ................................................. 75

EN – Translation of the original user manual -1.0 | 2021
6
FOREWORD
This manual enables you to operate and maintain the barrier correctly. Possible
options are briefly described. The Operation chapter explains the control unit.
Among other things, it describes how you can change various settings. The
Maintenance chapter is extremely important to ensure that you can continue to
operate your barrier problem free in the long term.
Please read this user manual carefully before using the barrier.
Store the manual in a safe place to be able to refer to it later if required. This
description is intended for the operator of the barrier. The installer uses a
separate manual to assemble and install the barrier.
The installer uses an installation scheme for the drive concerned and works
according to the applicable standards. In the event of a fault, you should contact a
Heras certified technician.

EN – Translation of the original user manual -1.0 | 2021
7
1 PREFACE
1.1 MANUFACTURER / SUPPLIER
Manufacturer: Heras B.V.
Hekdam 1, 5688 JE Oirschot
Netherlands
Tel.: +31(0)499-551225
www.heras.com
Technical Construction File: Heras B.V. manager, PD Department
1.2 SERVICE / MAINTENANCE
In the event of problems, failures or questions you can contact:
Heras Netherlands
Telephone
+31(0) 499 551 255
Heras Germany
Telephone
+49 (0)1805 437277
Heras UK
Telephone
+44(0) 1302 364 551
Heras France
Telephone
+33(0) 3 88 067 000
Heras Norway
Telephone
+47(-) 22 900 555
Heras Sweden
Telephone
+46(0) 77 1506050
1.3 DEFINITIONS: USER / OPERATOR / ENGINEER
User: Anyone using the barrier.
Operator: A user who is familiar with all safety aspects dealt with in this
manual. Operators are not allowed to carry out any installation work
on the barrier unless explicitly specified.
Engineer: The engineer is a Heras fitter (or an engineer employed by the
customer who has been given explicit permission in writing from
Heras) who is qualified to perform technical interventions on the
barrier.

EN – Translation of the original user manual -1.0 | 2021
8
1.4 PRESCRIBED USE / APPLICATION
Only the correct installation and maintenance by an authorised/qualified company
or person in agreement with the user manual, logbook, checklists and
maintenance lists can ensure the safe operation of the system.
A qualified person is, according to EN 12604 and EN 12453, a person who has the
required training, qualified knowledge and practical experience required to install,
test and maintain a barrier correctly and safely.
1.5 CONFORMITY
The installation complies with the following EU/UK Directives/regulations:
EU
2006/42/
EC
Machine Directive
EU
2014/30
EU
EMC Directive (electromagnetic compatibility)
EU
305/2011
EC
Construction Product Regulation
UK
Supply of Machinery (Safety) Regulations 2008
UK
Electromagnetic Compatibility Regulations 2016
UK
Construction Products Regulations 2013
The design and production have been executed compliant with the applicable
product standard EN 13241 and EN 12453.
A Declaration of Performance (DoP) and Declaration of Conformity (DoC) are
obligatory for this product. The DoP and DoC are included in Appendix A.
The CE or UKCA mark is located on the cabinet of the barrier.
1.6 DELIVERY
The barrier must be installed, connected, set up and tuned by a fitter or an
engineer who also connects and programs any accessories. The barrier control
unit is adjusted to the options/accessories agreed with the user. The relevant
options are laid down during hand-over.
Of course, you can add optional/accessories afterwards. Contact your supplier for
this.
Barriers are always delivered fully tested.

EN – Translation of the original user manual -1.0 | 2021
9
1.7 GENERAL INFORMATION REGARDING THE ELECTRICAL
CONNECTIONS
Electrical connections must be made compliant with the supplied wiring diagram.
It is important that the system is correctly earthed (Protective grounding in
accordance with DIN VDE).
Because EMC-related suppression components can leak current to the earth cable,
it is advisable that you do not protect the control unit with a Residual Current
Device. When switching on the system, a high starting current can be generated
due to the charging of the intermediate circuit.
If after measurement during commissioning it appears that the leakage current
exceeds the permitted 3.5 mA, an additional grounding, in accordance with EN
60335-1 and IEC 30364-5-54, must be provided. Measurement is made according
to EN 60335-2-103. Consult your installer for this.
Take into account good shielding, for example an automatic circuit breaker 16A B
characteristic.
Ensure that the feeder cables are not carrying power during commissioning.
1.8 DELIVERY OF BARRIER
After installation and commissioning, by a Heras technician or a technician
trained by Heras, the cover of the barrier must be closed. This is done to
prevent unauthorised access.

EN – Translation of the original user manual -1.0 | 2021
10
SAFETY
2.1 EXPLANATION OF THE SYMBOLS
Caution: To prevent personal injury, you must observe the safety
instructions below.
Note: To prevent material damage, you must observe the safety
instructions below.
Information:This is followed by further information or by a reference to
other documents.
Warning: Risk of limbs getting crushed
2.2 GENERAL SAFETY INSTRUCTIONS
•The operator must read the entire user manual before the barrier is used
for the first time. The instructions stated in the user manual must be
observed and complied with. All other forms of use can cause unexpected
hazards and are forbidden.
•Applying a third-party drive unit, motor and/or safety edge may affect
safety and will invalidate the CE mark.
•The barrier must only be put into use if all safety facilities are in place and
connected, and work properly.
•All faults which might present a source of danger to the user or to third
persons must be eliminated immediately.
•All warnings and safety notices on the equipment must be in place and
clearly legible at all times.
•It is not permitted to mount items to the barrier arm and / or housing other
than as prescribed by Heras. Think of traffic and other signs and such. This
can negatively affect the safe operation of the barrier.
•All alterations or extensions to the barrier must be carried out by qualified
personnel using parts which the manufacturer has defined as suitable for
such alterations or extensions. Any failure to comply with these instructions
will be considered as non-compliant behavior and will invalidate the
manufacturer's guarantee, as a result of which the risk entirely transfers to
the user.
•Improper usage or servicing or ignoring the operating instructions can be a
source of danger for persons, and/or result in material damage.

EN – Translation of the original user manual -1.0 | 2021
11
•If the meaning of any part of these installation and operating instructions is
not clear, then please contact your supplier before you use the equipment.
•This manual must always be available at the location of use of the barrier.
This manual must be thoroughly read and applied by all persons responsible
for the operation, maintenance and repair of the barrier.
2.3 SAFETY PROVISIONS EMPLOYED
•To protect people and goods from injury or damage, the barrier is fitted
with safety provisions including safety edges and/or photocells.
These serve as emergency provisions that immediately stop and reverse the
movement of the barrier. It is forbidden to use these provisions to stop the
barrier normally.
•For a barrier with hold-to-run control, the above-mentioned safety
provisions are not necessary and will therefore not be standard provisions.
With this type of operation, the barrier stops immediately as soon as the
switch is released.
2.4 INTENDED USE
Giving safe access for goods and vehicles accompanied or driven by persons in
industrial, commercial or residential premises.
2.5 SAFETY DURING USE
Children or people with a disability must not operate the barrier. Parents
must supervise their children to prevent them playing with the barrier.
PARENTS ARE RESPONSIBLE FOR THEIR CHILDREN
•Keep a safe distance from the moving barrier. Warning icons to this
effect have been installed in various locations.
•Only pass through the barrier when it is completely open.
•The barrier must not be opened in windy conditions; wind force 10
Beaufort for arms ≥ 4 to 6 meters and wind force 12 Beaufort for arms
of 3 to 4 meters. The barrier arm can swing in a way that can result in
damage to the construction.
•When hold-to-run-control is employed, the barrier must only be
operated if it can be seen completely, directly and in real-time.
Operation must be via a permanently installed operating device, for
instance a key switch or push button. This operating device must be
located in such a way that the operator's position is safe. The barrier
must stop immediately when the button or key is released. Other
operating devices are not allowed.

EN – Translation of the original user manual -1.0 | 2021
12
•The barrier must be able to move freely without obstacles in the passage
and entire area where the barrier can move. Do not insert objects above
or under the barrier arm that could block the barrier arm.
•The barrier arm must always be free from snow, ice or dirt that might
affect its behaviour. In the event of frost, check this before
commissioning the barrier. If the barrier arm is blocked, the barrier will
not move at all or will not complete its movement. Irregularities can
damage the drive and / or transmission.
•Climbing the barrier is strictly forbidden as people climbing the barrier
could be hurt if the barrier is started unexpectedly.
•Do not place any obstacles in the opening.
•Always lock the cabinet during use.
2.6 SAFETY DURING INSTALLATION, MAINTENANCE AND DISASSEMBLY
•When work is carried out or while cleaning the barrier, the power supply
to the system must be switched off and it must be ensured that it
cannot be switched on unexpectedly.
•To move the barrier manually, first switch the automatic fuse in the
cabinet to “off” and make sure it cannot be switched on again (e.g. by
locking the cabinet).
•The barrier is driven by means of a lever construction. This is located in
the cabinet. Beware of moving parts when carrying out maintenance in
and near the barrier cabinet.
•The EN 12453 and EN 13241 standard must be taken into consideration
during installation and maintenance. To achieve a good safety level, the
above standard and the national regulations must be taken into account
in non-EC countries.
•Never disassemble the arm when closed; there is great tension
on the springs.

EN – Translation of the original user manual -1.0 | 2021
13
OPERATION
3.1 OPENING/CLOSING BARRIER - NORMAL USE
The barrier can be operated using pulse operation, for instance via a button or key
switch. The location of the operating device depends on the customer's choice or
the operating mode.
•OPEN:
Press the “Open” button. The barrier opens to the next end position.
•CLOSE:
Press the "Close" button. The barrier closes completely.
•STOP:
Press the "Stop" button. The barrier will stop immediately, irrespective of
its direction of travel. To restart the barrier press
“Open” or "Close".
3.2 OPEN /CLOSE BARRIER MANUALLY
In an emergency, the barrier can also be opened or closed manually. To do this
the cabinet must be opened.
OPERATING THE BARRIER MANUALLY
•Unlock the cabinet via the lock on the back
•Lift the lid vertically from the front
•Switch off the power
•Then dismantle the rear by removing the 6 screws

EN – Translation of the original user manual -1.0 | 2021
14
•Take the tool supplied by Heras and place it on the hexagon on the motor.
By turning it clockwise the barrier can be opened, counter clockwise to
close
The barrier can be powered up in any position. Close the cabinet in reverse order.
Remove the key before operating again.

EN – Translation of the original user manual -1.0 | 2021
15
DESCRIPTION
4.1 SAROS
The Saros is a fully assembled barrier for passageways up to 6 meters in a single
version and up to 12 meters in a double version.
Applications include port areas, company buildings, office buildings, storage sites,
garden and landscape areas, high-risk sites, airports, transport and distribution
sites, and parking garages.
Illustration 1: Saros barrier terms
Catch post
Cabinet
Barrier arm, possible
with LED
Barrier cover
Pendulum support

EN – Translation of the original user manual -1.0 | 2021
16
4.2 SAFETY EDGES
Barriers from Heras can be protected by safety edges. If the safety device touches
an obstacle, the barrier will immediately stop and reverse. Safety edges have
been fitted to the moving part of the barrier. They are not required for hold-to-
run-control. These strips serve as safety components.
Before the barrier is moved, the control system checks the status of the safety
edge. If the safety edge is faulty, the barrier can only be opened and closed in
hold-to-run-mode. In that case, consult a qualified engineer.
See the chapter 1.2 “SERVICE /MAINTENANCE”
4.3 PHOTOCELLS
Photocells detect whether there are obstacles in the path taken by the barrier. If
an obstacle is detected, the barrier will stop immediately and opens to its original
starting point. Dependent on the device, the barrier will restart. The photocell is
only active when the barrier is being closed. Barriers can be fitted with multiple
photocells.
4.4 LOOP DETECTION
A detection loop is an induction loop embedded in the road surface that, with the
assistance of electronics, can detect a vehicle. When the loop detects a vehicle,
the barrier will open and/or stay open. Detection loops do not detect people.
4.5 LASER
A laser is a motion and presence related detection device intended for detecting
objects in the detection zone. The laser must read in a reference point as part of
the installation process. The barrier will no longer close without a reference point.
The laser will ensure that the barrier does not close or open again during closing if
an object is in the field.
The laser can also be set so that the barrier opens when a vehicle approaches.

EN – Translation of the original user manual -1.0 | 2021
17
4.6 ACCESSOIRES
Traffic light (optional)
Red/green signal lights that indicate the open/closed position statuses. People are
only allowed to pass through the barrier opening when the green light is on.
Flash light (optional*)
A flashing beacon to ensure extra attention before and while the barrier is
opening/closing. A technician can program the switching time.
* In some countries, a flashing light is obligatory.
Remote control (optional)
Remote control to open, stop and close the barrier.
See the chapter “REMOTE CONTROL”
Ensure that the remote control cannot come within reach of children and
that it can only be accessed by authorised people. Only use the remote
control in the vicinity of the barrier, so that you can see the entire barrier.
Note that the button of the remote control can be pressed accidentally, for
instance, when it is in a pocket and this can lead to undesired barrier movements.
4.7 OPERATING MODES
The control software is divided into separate function modules and is available to
users in two possible operating modes:
•hold-to-run-mode
•automatic mode
Hold-to-run-control
The barrier drive can be operated in hold-to-run operating mode with limited
comfort. In hold-to-run operating mode, the barrier does not require safety
features. The barrier will move as long as an OPEN or CLOSE key is pressed.

EN – Translation of the original user manual -1.0 | 2021
18
it shall only be possible to operate the manual actuators in such a position
that allows full, direct and permanent real-time view of the door during the
barrier movement and ensures that the person controlling the door is not in a
hazardous position. No controls other than manual actuators are to be installed.
The barrier shall stop when the manual actuators is released.
Automatic mode
If the safety facilities have been installed completely, the motor drive will usually
work in this automatic mode. The user can only use all motor drive functions in
automatic mode. Total safety of the barrier is guaranteed here by the activated
safety facilities.
Opening or closing the barrier can be initiated in automatic mode by means of:
•Hold-to-run buttons OPEN and CLOSE
•Impuls input OPEN and CLOSE
•impulse input for TOGGLE function OPEN, STOP,CLOSE, STOP
•Command coming from the remote control
Every movement command causes the full action that has been selected to be
performed (open barrier, close barrier etc.). Every action is stopped immediately
by a stop command or a signal from the safety facilities.
Activating the safety edge causes the barrier to immediately move in the opposite
direction. If a photocell is interrupted while the barrier is closing, this will cause
the barrier to be opened as far as the point where the closing movement started.
A movement command for the opposite direction will gradually decelerate the
barrier and then cause it to move in opposite direction.
Automatic mode if the barrier has not been installed fully yet:
If the barrier has not been fully installed yet, or if motor drive programming
has not been completed yet, the motor drive will work in a special safety
mode (e.g.: the end positions of the barrier have not been defined yet). The
barrier will then only run at dead man's mode speed. Only after the OPEN and
CLOSED end positions have been set and after a measuring run at dead man's
mode speed has been performed, will the system switch over to the automatic
mode speed. If the power supply to the drive has been interrupted, the barrier will
also only run at dead man's mode speed until the first time when an end position
has been reached.

EN – Translation of the original user manual -1.0 | 2021
19
4.8 AUTOMATICALLY CHANGING OPERATING MODES
If electronic safety facilities on the barrier are out of operation (e.g. faulty
photocell), the motor drive can automatically switch over from automatic mode to
hold-to-run-control. This automatic switch-over will take place only for the
individual motor movement that has been started and only if the key provided for
hold-to-run-control is pressed. After this, the motor drive will switch over to
automatic mode again, but if a new fault occurs or if the fault is not remedied, the
system can switch over to hold-to-run-control again for the next movement.
Changing between operating modes is possible in the following directions:
•Automatic mode -> Hold-to-run-control mode
•Dead man's mode -> Automatic mode (if safety has been
restored)

EN – Translation of the original user manual -1.0 | 2021
20
CONTROL UNIT AND DISPLAY READINGS
5.1 TOTAL VIEW OF HMD SAROS
Illustration 2: view of HMD Saros
Motor connection
Mains switch
Space for extra
components
Control unit HMD Saros
Motor
Table of contents
Other Heras Control System manuals
Popular Control System manuals by other brands

Governors America
Governors America EDG5500 manual

Bedrock
Bedrock Secure OSA Remote user manual

Commodore
Commodore VIC-RELAY-CASSETTE user manual

Resol
Resol DeltaSol Pool Mounting connection and operation troubleshooting

Linear Access
Linear Access AM/II Installation and programming instructions

Siemens
Siemens SINUMERIK 802D sl Programming and operating manual

iO HVAC Controls
iO HVAC Controls ZP3-HCMS Installation and operation instructions

Honeywell
Honeywell W180 owner's manual

Bosch
Bosch IUI-DACM/K1-EX installation instructions

Ansul
Ansul AutoPulse Z-28 instructions

TeeJet
TeeJet DYNAJET FLEX 7140 INSTALLATION, SETUP AND USER GUIDE

GSK
GSK GSK983Ma user manual