manuals.online logo
Brands
  1. Home
  2. •
  3. Brands
  4. •
  5. Herman Miller
  6. •
  7. Indoor Furnishing
  8. •
  9. Herman Miller Canvas Vista Installation instructions

Herman Miller Canvas Vista Installation instructions

Power Driver Phillips Bit Metric Allen
Wrench
Metric Socket
Wrench
Hammer Flat Blade
Screw Driver
Tools Required
Products Included
HermanMiller
Canvas Vista Chase Installation and
Disassembly for Recycling Instructions
How to assemble Canvas Vista Chase
FG110
FG11A
FG157
FG121
FG292
FG156
L2CF
FG696
L2CFS
FG119
FG154
FG144
FG2B1
FG152
FG141
FG2B2
FG117
FG290
FG142
FG2B3 FGX10
FG150 FG160
Safety Glass
WARNING
All electrical connections to building electrical sources must
be made by a qualied electrician according to national, state
and local electrical codes.
!
WARNING
Disconnect power before installation. Failure to do so can
cause electrical shock and personal injury.
!
WARNING
Electrically interconnected units must be mechanically
interconnected.
!
1HermanMiller Replacement Instructions1BMJH0 rev B
2HermanMiller Replacement Instructions1BMJH0 rev B
Canvas Vista Chase Installation Steps – Basic Conguration
. Position the Chase extrusions upside down on the floor in the
approximate intended location. Place the Bottom Covers next to
each Chase.
. Lay the bundle of data cables into the center cavity of the chase.
. Loosely assemble the power harness onto the bottom of the chase in the
correct position. Note there is an indicator on the harness assembly that will
align with a mark in the chase for the le, right, or center location.
a. Power Harness Subassembly
- Install the four M screws through the harness bracket
and loosely install the T- Nuts.
- Do not install the harness cover at this time.
(Note: If a Chicago Power solution is being installed instead of the standard
power module please see the special instructions in step  on Page .)
. Connect one side of the power jumpers to the power harnesses (leave
the second end of the jumper unconnected) and tuck the conduit for the
jumpers into the center channel next to the data cables. Connect the Power
entry harness to the appropriate power harness at this time as well.
(Note: If a Ceiling power Entry is being used to bring power into the system
please see special instructions in Instruction Sheet BMV. If a New York
Power Entry will need to be used see the special instructions in Instruction
Sheet BMVC.)
WARNING
All electrical connectors must be fully engaged and locked.
Loose connections can cause re and/or electrical shock.
!
3HermanMiller Replacement Instructions1BMJH0 rev B
. To connect power harness, slide connector into bracket from the
front to clear snaps.
Then slide forward into the harness until the snaps engage.
Make sure the snaps are fully engaged with the harness at both the top and
bottom.
c. Separate the two chases where the leg will be installed by
about ” (since the power harnesses are loosely installed and
the jumpers are only connected at one end they will slide slightly
to allow this separation).
d. Install the two alignment pins into one of the chase ends.
Tap the pins into the chase until the knurled area is completely
inside the chase.
b. Loosely assemble the two nut plates to the top side of the top plate
using the M screws.
. Assemble the intermediate legs in the appropriate locations
where two chases come together.
a. Assemble the foot to the bottom of the leg for the T-Leg
version of the intermediate leg.
Snap
Snap
4HermanMiller Replacement Instructions1BMJH0 rev B
e. Slide the leg into one of the chase ends with the nut plates
engaged in the slots of the chase.
f. Slide the two chases together over the alignment pins. Then
slide the leg so it is centered over the joint between the two
chases.
g. Make sure the joint is tight and then tighten the screws in the
nut plates.
. Loosely assemble the End Legs (or A-legs) to the end of the
chase. Slide them in about ” in from the end of the Chase.
a. Remove the Inner Cover and the top Corner Bracket from the
End Leg and set aside.
b. Assemble the Chase foot to the bottom of the leg for the T-Leg
version of the end leg using the two M Screws.
c. Loosely assemble the two nut plates to the top side of the top
plate using the two M screws and the two long M hex bolts
5HermanMiller Replacement Instructions1BMJH0 rev B
d. Slide the leg into the end of the Chase with the nut plates
engaged in the slots in the chase.
. Install the End Caps into both ends of the run of Chase
Extrusions.
a. Install the set screw into the end cap. Press the end cap flush
to the end of the chase. Tighten the set screw.
. Slide the end legs back up against the End Cap and tighten the
screws in the nut plates to secure.
. Connect the ends of the jumpers that were le disconnected. Make
sure that the jumper ends are connected to the same side of the harness.
Double check the power harness location to ensure the harness indicator
is aligned with the mark in the Chase then tighten the M bolts to secure
the harness.
WARNING
All electrical connectors must be fully engaged and locked.
Loose connections can cause re and/or electrical shock.
!
6HermanMiller Replacement Instructions1BMJH0 rev B
. Install the receptacles in the power harness as needed.
WARNING
All electrical connectors must be fully engaged and locked.
Loose connections can cause re and/or electrical shock.
!
. Install the Power Harness Cover.
a. Knock out the covers over the Data openings as needed.
b. Pull the data cables through the appropriate openings.
c. Pull the base of the cover open and snap over the power harness
receptacles.
Note: If the data face-plates and data-jacks are already installed in the
harness cover make sure that the jumper conduit is routed toward the
side of the harness cover as the cover in installed so that the conduit
does not interfere with the data-jacks (see diagram below).
d. Install the four bolts to secure to the Chase.
e. Note: If  amp receptacles are used the area in the cover above the
receptacle may need to be broken out along the score lines in order for
the cover to t over the larger receptacles.
Data Jacks
Data Jacks
Harness Cover Data Face plate
Data Face plate
Harness Conduit
Harness Conduit
Conduit needs to be
routed between the wall
of the harness cover and
the sides of the data jack.
Harness Cover
7HermanMiller Replacement Instructions1BMJH0 rev B
. Install the Chase bottom covers in the open areas of the
chase by snapping them into the grooves in the center channel.
Install the side noted on the plastic part as “install this end rst”
into the groove and snap in the other side. Slide the covers
together to interlock them. Note that the covers can be broken
at the score marks to create a shorter cover as needed.
Install this end rst
Shorter cover
. Stand the Chase upright properly supporting the Chase at
each joint and at each end. Level the chase and check all joint
to make sure that are tight.
a. Leveling the Chase can take place in two locations depending
on the amount of leveling required. If more than ½” of
movement is required, remove the two bolts (or  bolts in the
end leg) from the top of the leg, raise up the inner portion of the
leg in ½” increments and re-install the two bolts.
b. Leveling an A-Leg
. Remove the two face screws.
. Loosen the screw at the bottom of the yoke to allow the leg to move
freely. Loosen it just enough to move the yoke to desired location.
8HermanMiller Replacement Instructions1BMJH0 rev B
. Move the yoke casting to the desired location and screw the
two face screws back into the side of the yoke and tighten.
. Tighten the bottom screw.
C. Smaller adjustments of ½” or les can be made using the
glides at the bottom of the leg or foot.
. Install the upper corner bracket on each of the Chase end legs.
9HermanMiller Replacement Instructions1BMJH0 rev B
. Install the Chase End Leg Covers by engaging the tabs in the slots
and pressing the cover down into position. To assist in pressing the cover
down, place a flat blade screw driver into the slot in the notch at the top
of the cover and rotate screw driver to force the cover down. Remove the
knock-out at the bottom as required to allow for the power entry or data
cables.
To remove knock-out lay on the
floor with the tabs down and
impact with a hammer here.
. If power is routed up the intermediate leg, install the
intermediate leg power cover.
a. Open the side flanges of the cover and snap it over the
Intermediate Leg.
b. Install the two bolts at the top to secure it to the top plate of
the leg.
c. Install the zip tie through the holes in the two tabs at the
bottom of the cover to secure at the bottom.
Canvas Vista Chase Installation Steps – Storage Support (Two Types)
Alternative Step 
a. Install Chase mounted Storage Support (Clamp Mount Version)
This is an alternative support to the leg installation described in step 
and would be performed at the same time:
10HermanMiller Replacement Instructions1BMJH0 rev B
b. Separate the two chases where the support will be installed
by about ” (since the power harnesses are loosely installed
they will slide slightly to allow this separation).
c. Install the two alignment pins into one of the chase ends.
Tap the pins into the chase until the knurled area is completely
inside the chase.
e. Slide the two chases together over the alignment pins. Then
slide the support so the top plate is centered over the joint
between the two chases.
f. Make sure the joint is tight and then tighten the screws in the
nut plates.
Steps  through  would be the same.
d. Slide the support into one of the chase ends with the nut
plates engaged in the slots of the chase. Make sure the open
side of the bottom clamp is facing toward the storage unit that
will be supporting the chase.
a. Stand the Chase upright properly supporting the Chase at each
joint and at each end. Make sure someone is supporting the joint
where the storage support is located as the chase is rotated upright.
Slide the Storage unit into the opening of the storage support bottom
clamp. The clamp will engage in the opening between the top panel
and the side panel of the storage unit. Level the chase and check all
joint to make sure that all joints are tight.
a. Leveling the Chase can take place in two locations depending
on the amount of leveling required. If more than ½” of
movement is required, remove the two bolts from the top of the
leg, raise up the inner portion of the leg in ½” increments and
re-install the two bolts.
11HermanMiller Replacement Instructions1BMJH0 rev B
b. Smaller adjustments of ½” or les can be made using the
glides at the bottom of the leg or foot, or the bottom of the
storage unit.
c. Open the drawer or door of the storage unit and install the two
M set screws into the bottom clamp of the storage support and
tighten to secure the clamp to the storage unit top.
b. Install Chase mounted Storage Support.
a. Loosely assemble the two nut plates to the top side of the top plate
using the M screws. Separate the Top plate and inner extrusion from
the Bottom weldment of the storage support by removing the two M
screws from the side of the storage support.
Through Mount Version
Step b
b. Separate the two chases where the support will be installed by about
” (since the power harnesses are loosely installed they will slide
slightly to allow this separation).
c. Install the two alignment pins into one of the chase ends. Tap the
pins into the chase until the knurled area is completely inside the
chase.
12HermanMiller Replacement Instructions1BMJH0 rev B
d. Slide the Top half of the storage support into one of the chase
ends with the nut plates engaged in the slots of the chase.
e. Slide the two chases together over the alignment pins. Then
slide the support so the top plate is centered over the joint
between the two chases.
f. Make sure the joint is tight and then tighten the screws in the
nut plates.
g. Install the bottom half of the Storage support to the top of the
storage unit. Based on the desired nal location of the storage
unit with respect to the chase locate and mark the four mounting
holes in the bottom of the storage support weldment.
Pre-drill the holes in the top with a /” diameter drill bit. Fasten the storage support weldment to the storage unit
top with the self-tapping screws.
13HermanMiller Replacement Instructions1BMJH0 rev B
Make sure the holes in the side of the weldment are facing the same
direction as the side holes in the top half on the storage support that
is mounted to the chase.
Steps  through  would be the same.
a. Stand the Chase upright properly supporting the Chase at
each joint and at each end. Make sure someone is supporting
the joint where the storage support is located as the chase is
rotated upright. Li the Chase in the area where the storage
support is located just enough to slide the storage unit under
the support and slide the upper portion of the support into the
lower portion of the support. Install the two M screws into the
side of the storage support to secure. Level the chase and check
all joint to make sure that are tight.
a. Leveling the Chase can take place in two locations depending
on the amount of leveling required. If more than ½” of
movement is required, remove the two bolts from the top of the
leg, raise up the inner portion of the leg in ½” increments and
re-install the two bolts.
b. Smaller adjustments of ½” or less can be made using the glides
at the bottom of the leg or foot, or the bottom of the storage unit.
14HermanMiller Replacement Instructions1BMJH0 rev B
b. Locate the Post Leg using the pre-drilled holes in the work
surface. Note that some of the required leg holes are pre-drilled
in the surface, but the remaining holes need to be marked and
pre-drilled with a /” drill bit. Secure the leg to the top with
the self-tapping screws. Note that if a shared post leg is used,
the leg is half on one surface and half on the adjacent surface.
In some congurations, the Chase attached work surfaces may be needed
to help support and stabilize the Chase (Applications where the surfaces
are parallel to the chase – bench applications). The following describes
the process for installing the Chase attached work surfaces. These steps
would happen as part of step  where the chase is rotated upright.
. If a work surface will be needed to help support the chase, prior to
turning the Chase upright, prepare the work surface for installation to the
Chase:
a. Turn the work surface upside down and locate the Work surface tethers
using the pre-drilled holes along the long edge of the top (for parallel
applications). Note that two of the holes are pre-drilled. The other two
need to be marked and drilled using a /” drill bit. Fasten the work
surface tethers using the self-tapping screws. Install the two M set
screws into the bottom of the tethers. Turn them in just a few threads to
hold them in place.
Canvas Vista Chase Installation Steps – Work Surface Support
c. If a T-Leg (FGB) is being used to support the surface, the foot must be
installed to the bottom of the leg.
c. Place the spacer on the bottom plate in the pocket at the bottom of
the leg. Place the foot on top of the spacer at the bottom of the leg.
c. Install the two M bolts to secure the foot to the bottom of the leg.
c. Install the work surface stiener using the pre-drilled holes to locate the
stiener on the center of the table. Note that only select holes are
pre-drilled in the top the remaining holes must be marked and pre-drilled
using the /” bit. Secure the stiener to the top using self-tapping screws.
15HermanMiller Replacement Instructions1BMJH0 rev B
. position power box up to underside of chase extrusion at
desired location. Engage nut plate inside chase groove by fully
inserting button head screw and turning until tight.
Chicago Power Entry - FG
. Insert button head screws through holes in power box and
into nut plate
Step 
. Install outlets per local electrical code.
. Install cover over power box. Attach cover to power box using button
head screws.
For more information about our products and services please visit us at
hermanmiller.com or call ()  .
© Herman Miller, Inc., Zeeland, Michigan Printed in U.S.A. Part No. BMJH  B
a. Turn the chase upright as described in step  above, except that
one person must hold on to the chase to steady it until at least one of
the work surfaces is installed.
b. Turn the work surface assembly right side up. With at least two
people, tip the front edge of the surface up and engage the ends of
the tether brackets into the outside slot of the Chase. Rotate the
front of the surface down until the legs are touching the floor. Slide
the surface assembly le or right till it is in the desired location, then
secure the assembly to the chase by tightening the set screw at the
bottom of the work surface tethers.
c. At this point the chase should be stable and the leveling
process can be completed as described in step  (above).
d. Additional surfaces can be installed by repeating this
procedure.

Other manuals for Canvas Vista
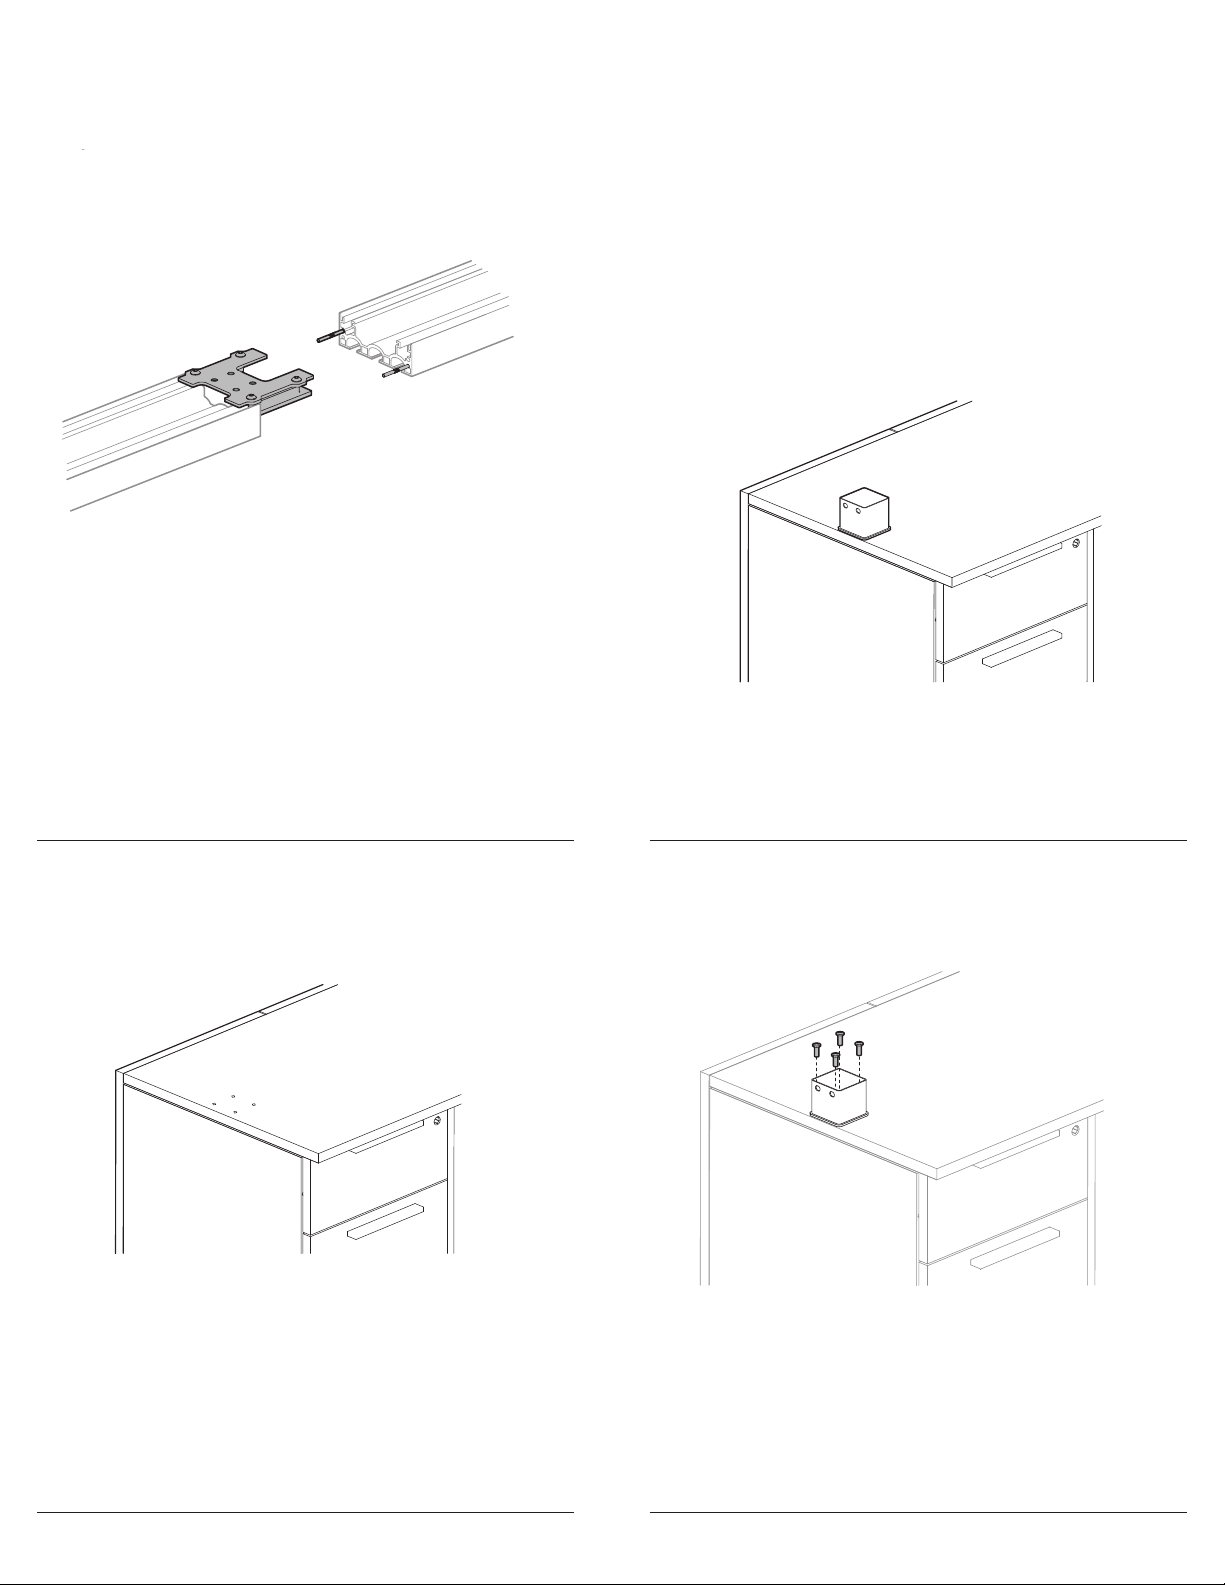
2

This manual suits for next models

23

Other Herman Miller Indoor Furnishing manuals

Herman Miller OE1 User manual

Herman Miller

Herman Miller OE1 User manual

Herman Miller Setu Lounge Chair Installation instructions

Herman Miller

Herman Miller Setu Lounge Chair Installation instructions

Herman Miller Nelson Bench User manual

Herman Miller

Herman Miller Nelson Bench User manual

Herman Miller Aeron Chair User manual

Herman Miller

Herman Miller Aeron Chair User manual

Herman Miller Celle User manual

Herman Miller

Herman Miller Celle User manual

Herman Miller Motia Sit-to-Stand Table Installation instructions

Herman Miller

Herman Miller Motia Sit-to-Stand Table Installation instructions

Herman Miller 1BNX5K - J User manual

Herman Miller

Herman Miller 1BNX5K - J User manual

Herman Miller Mora Installation instructions

Herman Miller

Herman Miller Mora Installation instructions

Herman Miller Celle Installation instructions

Herman Miller

Herman Miller Celle Installation instructions

Herman Miller Cosm Installation instructions

Herman Miller

Herman Miller Cosm Installation instructions

Herman Miller Nevi Height Adjustment Table User manual

Herman Miller

Herman Miller Nevi Height Adjustment Table User manual

Herman Miller Eames CTM User manual

Herman Miller

Herman Miller Eames CTM User manual

Herman Miller Lino Installation instructions

Herman Miller

Herman Miller Lino Installation instructions

Herman Miller Aeron User manual

Herman Miller

Herman Miller Aeron User manual

Herman Miller Vantum Installation instructions

Herman Miller

Herman Miller Vantum Installation instructions

Herman Miller Nelson Bench User manual

Herman Miller

Herman Miller Nelson Bench User manual

Herman Miller Motia Sit-to-Stand Tables Guide

Herman Miller

Herman Miller Motia Sit-to-Stand Tables Guide

Herman Miller Headway Installation instructions

Herman Miller

Herman Miller Headway Installation instructions

Herman Miller Canvas Channel Finished End Installation instructions

Herman Miller

Herman Miller Canvas Channel Finished End Installation instructions

Herman Miller X LOGITECH G EMBODY Guide

Herman Miller

Herman Miller X LOGITECH G EMBODY Guide

Herman Miller Mirra 2 Guide

Herman Miller

Herman Miller Mirra 2 Guide

Herman Miller Renew Link User manual

Herman Miller

Herman Miller Renew Link User manual

Herman Miller Verus User manual

Herman Miller

Herman Miller Verus User manual

Herman Miller Setu Maintenance manual

Herman Miller

Herman Miller Setu Maintenance manual

Popular Indoor Furnishing manuals by other brands

TIMBER ART DESIGN 1000 Assembly instructions

TIMBER ART DESIGN

TIMBER ART DESIGN 1000 Assembly instructions

pottery barn kids REESE CRIB Assembly manual

pottery barn kids

pottery barn kids REESE CRIB Assembly manual

Forte Rayong RXGS82511 Assembling Instruction

Forte

Forte Rayong RXGS82511 Assembling Instruction

VivAmore 12370 instruction manual

VivAmore

VivAmore 12370 instruction manual

Safavieh MED9600 manual

Safavieh

Safavieh MED9600 manual

Iron Age Office FORTIS SINGLE Assembly instructions

Iron Age Office

Iron Age Office FORTIS SINGLE Assembly instructions

Till-Hilft 87024.731 Assembly instructions

Till-Hilft

Till-Hilft 87024.731 Assembly instructions

Whittier Wood 2900AFGAC Assembly instructions

Whittier Wood

Whittier Wood 2900AFGAC Assembly instructions

Multimo A 235 Assembly instructions

Multimo

Multimo A 235 Assembly instructions

Homelegance 9488BR-3PW Assembly instruction

Homelegance

Homelegance 9488BR-3PW Assembly instruction

Otto WF318095AAA Assembly instruction

Otto

Otto WF318095AAA Assembly instruction

Astonica 50105597 instruction manual

Astonica

Astonica 50105597 instruction manual

Sauder 416091 manual

Sauder

Sauder 416091 manual

VIPACK SCPC201 Assembly instructions

VIPACK

VIPACK SCPC201 Assembly instructions

BRW LARGO Classic LUS/11/8 Assembly manual

BRW

BRW LARGO Classic LUS/11/8 Assembly manual

Sauder 408726 manual

Sauder

Sauder 408726 manual

eku Combino 65 H FS OL 2T Mounting instructions

eku

eku Combino 65 H FS OL 2T Mounting instructions

Keller K1167 manual

Keller

Keller K1167 manual

manuals.online logo
manuals.online logoBrands
  • About & Mission
  • Contact us
  • Privacy Policy
  • Terms and Conditions

Copyright 2025 Manuals.Online. All Rights Reserved.