manuals.online logo
Brands
  1. Home
  2. •
  3. Brands
  4. •
  5. Herman Miller
  6. •
  7. Indoor Furnishing
  8. •
  9. Herman Miller OE1 User manual

Herman Miller OE1 User manual

HermanMiller
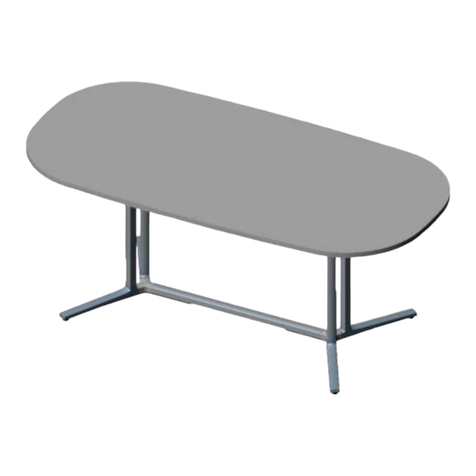
OE1 Rectangular Table Assembly Instructions
1BSSGX rev A
Tools Required
HermanMiller
Rectangular table assembly Instructions
How to assemble Rectangular table
5mm Allen KeyPower Driver Phillips Bit
Parts Included
# Flat Head
Tapping Screw
# Pan Head
Tapping Screw
Stiffener (for 1500 wide table only) Stiener End Cap
M8 Flat Head Screw
Leg
Plate
Work surface
Rectangular table
Step 1
. Attach top plate to the leg, with two M flat head machine screws.
Tighten screws until snug plus / turn.
. There are  ways to mount the plate to the leg :
A. Creased edge facing outward.
B. Round edge facing outward.
A.
B.
OR
HermanMiller Assembly Instructions1
Plate (x)
Work surface (x) Stiener* (x)
Leg (x)M8 Flat Head Screw
(x)
# Pan Head
Tapping Screw (x)
# Flat Head
Tapping Screw (x)
Stiener End Cap* (x)
1BSSGX rev A
Tools Required
HermanMiller
Rectangular table assembly Instructions
How to assemble Rectangular table
5mm Allen KeyPower Driver Phillips Bit
Parts Included
# Flat Head
Tapping Screw
# Pan Head
Tapping Screw
Stiffener (for 1500 wide table only) Stiener End Cap
M8 Flat Head Screw
Leg
Plate
Work surface
Rectangular table
Step 1
. Attach top plate to the leg, with two M flat head machine screws.
Tighten screws until snug plus / turn.
. There are  ways to mount the plate to the leg :
A. Creased edge facing outward.
B. Round edge facing outward.
A.
B.
OR
HermanMiller Assembly Instructions1
IMPORTANT!
PLEASE READ THIS GUIDE THOROUGHLY BEFORE
BEGINNING INSTALLATION.
IT IS STRONGLY RECOMMENDED THAT INSTALLATION BE
PERFORMED BY AT LEAST 2 ADULTS. FAILURE TO DO SO MAY
RESULT IN PRODUCT DAMAGE AND/OR PERSONAL INJURY.
PLEASE SAVE THESE INSTRUCTIONS FOR DISASSEMBLY
OR RECONFIGURATION.
A
C
F G H
D E
B
Assembly Instructions2HermanMiller 1BSSGX rev A
Step 3 (for 1500 wide table only)
To attach the stiffener to worksurface follow the below procedure.
A. Locate stiffener with pilot holes on the ends. Place end cap over
the end holes and install together with pan head screws.
B. Install remaining pan head screws in an alternating pattern.
A
B
B
Disassembly for Recycling:
Materials Identication and Segregation:
Where possible, plastic components are marked with ASTM recycling codes. Use these codes to identify
material type for recycling. Non marked components should be treated as mixed plastic. Ferrous
metals can be identied using a small magnet for recycling. Non-ferrous metals should be separated
andrecycled separately. To disassemble product, reverse the above installation steps
© 2009 Herman Miller, Inc., Zeeland, Michigan Printed in U.S.A.
® YHermanMiller, Abak, Action Oce, Avive, Co/Struc, Ethospace, Intersect, Meridian, Passage,
Prospects, Quadrant, Resolve, Scooter, Vivo interiors, Lifework, Teneo, and V-Wall are among the
registered trademarks of Herman Miller Inc.
TM Burdick Group, CLT, Flex-Edge, My Studio Environments, and Q system, are among the trademarks of
Herman Miller Inc.
Illustrations and specications are based on the latest product information available at the time of
publication. The right is reserved to make changes in design and specications at any time, without
notice, and also to discontinue products.
ABB
Step 2
To attach legs to the worksurface follow the below procedure.
A. Screw two flat head screws into marked two piloted holes first to locate
the leg.
B. Finish by installing additional flat head screws in marked locations that
are NOT piloted. These screws are field drilled.
Note: Attach legs with worksurface upside down
Assembly Instructions
2HermanMiller
1BSSGX rev A
Step 3 (for 1500 wide table only)
To attach the stiffener to worksurface follow the below procedure.
A. Locate stiffener with pilot holes on the ends. Place end cap over
the end holes and install together with pan head screws.
B. Install remaining pan head screws in an alternating pattern.
A
B
B
Disassembly for Recycling:
Materials Identication and Segregation:
Where possible, plastic components are marked with ASTM recycling codes. Use these codes to identify
material type for recycling. Non marked components should be treated as mixed plastic. Ferrous
metals can be identied using a small magnet for recycling. Non-ferrous metals should be separated
andrecycled separately. To disassemble product, reverse the above installation steps
© 2009 Herman Miller, Inc., Zeeland, Michigan Printed in U.S.A.
® YHermanMiller, Abak, Action Oce, Avive, Co/Struc, Ethospace, Intersect, Meridian, Passage,
Prospects, Quadrant, Resolve, Scooter, Vivo interiors, Lifework, Teneo, and V-Wall are among the
registered trademarks of Herman Miller Inc.
TM Burdick Group, CLT, Flex-Edge, My Studio Environments, and Q system, are among the trademarks of
Herman Miller Inc.
Illustrations and specications are based on the latest product information available at the time of
publication. The right is reserved to make changes in design and specications at any time, without
notice, and also to discontinue products.
ABB
Step 2
To attach legs to the worksurface follow the below procedure.
A. Screw two flat head screws into marked two piloted holes first to locate
the leg.
B. Finish by installing additional flat head screws in marked locations that
are NOT piloted. These screws are field drilled.
Note: Attach legs with worksurface upside down
BTFR Rev A
* wide table only
Assembly Instructions2HermanMiller 1BSSGX rev A
Step 3 (for 1500 wide table only)
To attach the stiffener to worksurface follow the below procedure.
A. Locate stiffener with pilot holes on the ends. Place end cap over
the end holes and install together with pan head screws.
B. Install remaining pan head screws in an alternating pattern.
A
B
B
Disassembly for Recycling:
Materials Identication and Segregation:
Where possible, plastic components are marked with ASTM recycling codes. Use these codes to identify
material type for recycling. Non marked components should be treated as mixed plastic. Ferrous
metals can be identied using a small magnet for recycling. Non-ferrous metals should be separated
andrecycled separately. To disassemble product, reverse the above installation steps
© 2009 Herman Miller, Inc., Zeeland, Michigan Printed in U.S.A.
® YHermanMiller, Abak, Action Oce, Avive, Co/Struc, Ethospace, Intersect, Meridian, Passage,
Prospects, Quadrant, Resolve, Scooter, Vivo interiors, Lifework, Teneo, and V-Wall are among the
registered trademarks of Herman Miller Inc.
TM Burdick Group, CLT, Flex-Edge, My Studio Environments, and Q system, are among the trademarks of
Herman Miller Inc.
Illustrations and specications are based on the latest product information available at the time of
publication. The right is reserved to make changes in design and specications at any time, without
notice, and also to discontinue products.
ABB
Step 2
To attach legs to the worksurface follow the below procedure.
A. Screw two flat head screws into marked two piloted holes first to locate
the leg.
B. Finish by installing additional flat head screws in marked locations that
are NOT piloted. These screws are field drilled.
Note: Attach legs with worksurface upside down
1BSSGX rev A
Tools Required
HermanMiller
Rectangular table assembly Instructions
How to assemble Rectangular table
5mm Allen KeyPower Driver Phillips Bit
Parts Included
# Flat Head
Tapping Screw
# Pan Head
Tapping Screw
Stiffener (for 1500 wide table only) Stiener End Cap
M8 Flat Head Screw
Leg
Plate
Work surface
Rectangular table
Step 1
. Attach top plate to the leg, with two M flat head machine screws.
Tighten screws until snug plus / turn.
. There are  ways to mount the plate to the leg :
A. Creased edge facing outward.
B. Round edge facing outward.
A.
B.
OR
HermanMiller Assembly Instructions1
1.
3*. 4.
2.
x4
A
F
G
H
D
D
E
B
B
B
CCC
Assembly Instructions2HermanMiller 1BSSGX rev A
Step 3 (for 1500 wide table only)
To attach the stiffener to worksurface follow the below procedure.
A. Locate stiffener with pilot holes on the ends. Place end cap over
the end holes and install together with pan head screws.
B. Install remaining pan head screws in an alternating pattern.
A
B
B
Disassembly for Recycling:
Materials Identication and Segregation:
Where possible, plastic components are marked with ASTM recycling codes. Use these codes to identify
material type for recycling. Non marked components should be treated as mixed plastic. Ferrous
metals can be identied using a small magnet for recycling. Non-ferrous metals should be separated
andrecycled separately. To disassemble product, reverse the above installation steps
© 2009 Herman Miller, Inc., Zeeland, Michigan Printed in U.S.A.
® YHermanMiller, Abak, Action Oce, Avive, Co/Struc, Ethospace, Intersect, Meridian, Passage,
Prospects, Quadrant, Resolve, Scooter, Vivo interiors, Lifework, Teneo, and V-Wall are among the
registered trademarks of Herman Miller Inc.
TM Burdick Group, CLT, Flex-Edge, My Studio Environments, and Q system, are among the trademarks of
Herman Miller Inc.
Illustrations and specications are based on the latest product information available at the time of
publication. The right is reserved to make changes in design and specications at any time, without
notice, and also to discontinue products.
ABB
Step 2
To attach legs to the worksurface follow the below procedure.
A. Screw two flat head screws into marked two piloted holes first to locate
the leg.
B. Finish by installing additional flat head screws in marked locations that
are NOT piloted. These screws are field drilled.
Note: Attach legs with worksurface upside down
Assembly Instructions
2HermanMiller
1BSSGX rev A
Step 3 (for 1500 wide table only)
To attach the stiffener to worksurface follow the below procedure.
A. Locate stiffener with pilot holes on the ends. Place end cap over
the end holes and install together with pan head screws.
B. Install remaining pan head screws in an alternating pattern.
A
B
B
Disassembly for Recycling:
Materials Identication and Segregation:
Where possible, plastic components are marked with ASTM recycling codes. Use these codes to identify
material type for recycling. Non marked components should be treated as mixed plastic. Ferrous
metals can be identied using a small magnet for recycling. Non-ferrous metals should be separated
andrecycled separately. To disassemble product, reverse the above installation steps
© 2009 Herman Miller, Inc., Zeeland, Michigan Printed in U.S.A.
® YHermanMiller, Abak, Action Oce, Avive, Co/Struc, Ethospace, Intersect, Meridian, Passage,
Prospects, Quadrant, Resolve, Scooter, Vivo interiors, Lifework, Teneo, and V-Wall are among the
registered trademarks of Herman Miller Inc.
TM Burdick Group, CLT, Flex-Edge, My Studio Environments, and Q system, are among the trademarks of
Herman Miller Inc.
Illustrations and specications are based on the latest product information available at the time of
publication. The right is reserved to make changes in design and specications at any time, without
notice, and also to discontinue products.
ABB
Step 2
To attach legs to the worksurface follow the below procedure.
A. Screw two flat head screws into marked two piloted holes first to locate
the leg.
B. Finish by installing additional flat head screws in marked locations that
are NOT piloted. These screws are field drilled.
Note: Attach legs with worksurface upside down
BTFR Rev A
OR
* wide table only

Other Herman Miller Indoor Furnishing manuals

Herman Miller Renew User manual

Herman Miller

Herman Miller Renew User manual

Herman Miller Locale T-Desk User manual

Herman Miller

Herman Miller Locale T-Desk User manual

Herman Miller Verus User manual

Herman Miller

Herman Miller Verus User manual

Herman Miller Mirra 2 Guide

Herman Miller

Herman Miller Mirra 2 Guide

Herman Miller Sayl User manual

Herman Miller

Herman Miller Sayl User manual

Herman Miller Distil Table User manual

Herman Miller

Herman Miller Distil Table User manual

Herman Miller Cosm Guide

Herman Miller

Herman Miller Cosm Guide

Herman Miller Aeron User manual

Herman Miller

Herman Miller Aeron User manual

Herman Miller Envelop User manual

Herman Miller

Herman Miller Envelop User manual

Herman Miller Mirra 2 Installation instructions

Herman Miller

Herman Miller Mirra 2 Installation instructions

Herman Miller Mirra 2 Instruction sheet

Herman Miller

Herman Miller Mirra 2 Instruction sheet

Herman Miller Sayl User manual

Herman Miller

Herman Miller Sayl User manual

Herman Miller Nelson User manual

Herman Miller

Herman Miller Nelson User manual

Herman Miller Sayl User manual

Herman Miller

Herman Miller Sayl User manual

Herman Miller Embody 100210688 User manual

Herman Miller

Herman Miller Embody 100210688 User manual

Herman Miller Setu Table Installation instructions

Herman Miller

Herman Miller Setu Table Installation instructions

Herman Miller Mode Desk User manual

Herman Miller

Herman Miller Mode Desk User manual

Herman Miller Canvas Office Landscape Installation instructions

Herman Miller

Herman Miller Canvas Office Landscape Installation instructions

Herman Miller Renew User manual

Herman Miller

Herman Miller Renew User manual

Herman Miller Celle User manual

Herman Miller

Herman Miller Celle User manual

Herman Miller Nevi User manual

Herman Miller

Herman Miller Nevi User manual

Herman Miller Ergon 3 User manual

Herman Miller

Herman Miller Ergon 3 User manual

Herman Miller Ergon 3 chair User manual

Herman Miller

Herman Miller Ergon 3 chair User manual

Herman Miller Everywhere Tables DTW1DG User manual

Herman Miller

Herman Miller Everywhere Tables DTW1DG User manual

Popular Indoor Furnishing manuals by other brands

Sjobergs 701232 Assembly instructions
Sjobergs

Sjobergs 701232 Assembly instructions
URBAN OUTFITTERS JULIETTE COFFEE TABLE Assembly instructions

URBAN OUTFITTERS

URBAN OUTFITTERS JULIETTE COFFEE TABLE Assembly instructions

Case Bridge Care Instructions

Case

Case Bridge Care Instructions

Forma Ideale LEONA 180 Assembling Instruction

Forma Ideale

Forma Ideale LEONA 180 Assembling Instruction

Furniture of America CM7966-EK Assembly instructions

Furniture of America

Furniture of America CM7966-EK Assembly instructions

HJH office ERNESTO Assembly instructions

HJH office

HJH office ERNESTO Assembly instructions

NOA & NANI OTT-SM-SD-GY Assembly instructions

NOA & NANI

NOA & NANI OTT-SM-SD-GY Assembly instructions

Alice's Home CAMARGUE quick start guide

Alice's Home

Alice's Home CAMARGUE quick start guide

Pedrali GLISS 920 instructions

Pedrali

Pedrali GLISS 920 instructions

Eisys iMove-C Assembly manual

Eisys

Eisys iMove-C Assembly manual

BITO Shelving L Instructions for assembly and use

BITO

BITO Shelving L Instructions for assembly and use

Next 388553 Assembly instructions

Next

Next 388553 Assembly instructions

Sven Sv16 Assembly instructions

Sven

Sven Sv16 Assembly instructions

emob TOULON 01 Assembly instructions

emob

emob TOULON 01 Assembly instructions

DITALIA MP-300 Assembly manual

DITALIA

DITALIA MP-300 Assembly manual

Whittier Wood Furniture Catalina 3342SANa Assembly instructions

Whittier Wood Furniture

Whittier Wood Furniture Catalina 3342SANa Assembly instructions

TRINITY Pro TBFLNA-1408 owner's manual

TRINITY Pro

TRINITY Pro TBFLNA-1408 owner's manual

aspenhome I215-360T Assembly instructions

aspenhome

aspenhome I215-360T Assembly instructions

manuals.online logo
manuals.online logoBrands
  • About & Mission
  • Contact us
  • Privacy Policy
  • Terms and Conditions

Copyright 2025 Manuals.Online. All Rights Reserved.