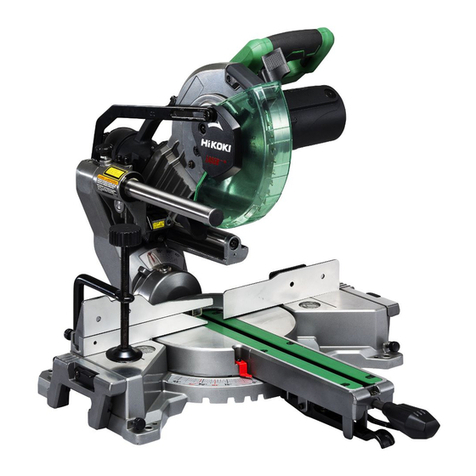
HIKOKI C 8FSHG User manual

C 8FSHG
Handling instructions
Bedienungsanleitung
Mode d’emploi
Istruzioni per l’uso
Gebruiksaanwijzing
Instrucciones de manejo
Instruções de uso
Bruksanvisning
Brugsanvisning
Bruksanvisning
Käyttöohjeet
Οδηγίες χειρισμού
en
de
fr
it
nl
es
pt
sv
da
no
fi
el
en
de
fr
it
nl
es
pt
sv
da
no
fi
el
pl
hu
cs
tr
ro
sl
sk
bg
sr
hr
00BookC8FSHGWE,NE.indb100BookC8FSHGWE,NE.indb1 2019/08/0510:37:582019/08/0510:37:58

2
1
q
!
5
%
3
e
#
7
&
9
(
w
@
6
^
4
$
8
1
2
*
0
)
r
s
a
t
;
h
f
u
k
od
y
j
g
i
l
p
00BookC8FSHGWE,NE.indb200BookC8FSHGWE,NE.indb2 2019/08/0510:37:592019/08/0510:37:59

3
23
h
2
c
v
zx
^
214 mm
4 – ø9 mm
214 mm
230 mm
4
n
b
m
5
.
j
,
/
*
6
8¡
00BookC8FSHGWE,NE.indb300BookC8FSHGWE,NE.indb3 2019/08/0510:37:592019/08/0510:37:59

4
7
™
j
£
8
o
¢&
(
9
bs
§
∞
l
as
∞
l
10
a
q
i
¶
b
q
i
¶
11 !
#
@
12
6
00BookC8FSHGWE,NE.indb400BookC8FSHGWE,NE.indb4 2019/08/0510:37:592019/08/0510:37:59

5
13 14
(
)o
15 16
i
ª
ª
º
•
•
⁄
ee
¤
¤
‹‹
17 18
e
e
e›
›
00BookC8FSHGWE,NE.indb500BookC8FSHGWE,NE.indb5 2019/08/0510:37:592019/08/0510:37:59

6
19
flfl
fifi
20 21
t
‡
y
$
0
‚
·
°
#
22
ⓐⓑ
´
ⓐ
ⓐ
ⓑ
ⓑ
„ŒŒ
i
00BookC8FSHGWE,NE.indb600BookC8FSHGWE,NE.indb6 2019/08/0510:37:592019/08/0510:37:59

7
23 ‰2
Áˇ
º
1
32
24
Ü
j
25
Ø
î
(
o
*)
26
ⓐ
ⓑ
∏
27
∞s
§
l
ⓑ
*
Å
28
a
Î
Î
Í
#
0
b
Î
Î
Ï
Í
0
00BookC8FSHGWE,NE.indb700BookC8FSHGWE,NE.indb7 2019/08/0510:37:592019/08/0510:37:59

8
29
b
Ó
˝
1
c
Ô
Ò
d
Ú
Ô
Ò
i
a
u
p
30
˛
¸
6 mm
17 mm
˛
110V 463
230V C Ç
◊
a
31
1
;
ı
00BookC8FSHGWE,NE.indb800BookC8FSHGWE,NE.indb8 2019/08/0510:37:592019/08/0510:37:59

9
English Deutsch Français Italiano
1Lower guard Unterer Schutz Carénage inférieur Protezione inferiore
2Switch handle SchaltergriffPoignée de contacteur Manico di commutazione
3Motor head Motorkopf Tête du moteur Testa del motore
4Gear case Getriebegehäuse Carter d'engrenage Cassa ingranaggi
5Dust bag Staubbeutel Sac à poussière Sacca per la polvere
6Slide securing knob Führungssicherungsknopf Bouton de fixation
coulissant Manopola di fissaggio slitta
7Slide carriage Führungsträger Chariot coulissant Carrello slitta
8Bevel pointer Schrägschnittanzeiger Pointe de biseau Puntatore smussatura
9Holder (A) Halter (A) Support (A) Supporto (A)
0Vise assembly Schraubstocksatz Ensemble de l'étau Gruppo morsa
!Sub fence Hilfsgitter Butée secondaire Guida secondaria
@Lock knob Sperrknopf Bouton de verrouillage Manopola di blocco
#Fence (A) Gitter (A) Butée (A) Guida di appoggio (A)
$Vise lock knob Schraubstocksperrknopf Bouton de verrouillage de
l'étau Manopola di blocco morsa
%Left extention table Linker Anbautisch Plateau de rallonge
gauche Tavola di estensione
sinistra
^Base Basis Base Base
&Miter pointer Gehrungsanzeiger Pointe d'onglet Puntatore quartabuono
*Turntable Drehscheibe Plateau tournant Piatto girevole
(Positive stop locking lever Sperrhebel für den
Festanschlag Levier de verrouillage
d'arrêt positif Leva di blocco arresto
positivo
)Miter handle GehrungsgriffPoignée d'onglet Manico per quartabuono
qTable insert Tischeinsatz Plaque d'insertion Inserimento tavola
wFence (B) Gitter (B) Butée (B) Guida di appoggio (B)
eLaser marker Lasermarker Marqueur laser Marcatore laser
rRotation direction Drehrichtung Sens de rotation Direzione di rotazione
tLaser marker switch Schalter für Lasermarker Contacteur de marqueur
laser Interruttore marcatore laser
yTrigger switch Auslöseschalter Interrupteur à détente Interruttore a grilletto
uBlade guard locking lever Sperrhebel für den
Sägeblattschutz Levier de verrouillage du
protège-lame Leva di blocco protezione
lama
iBlade Sägeblatt Lame Lama
oQuick-cam locking lever Schnellspannhebel Levier de verrouillage à
came rapide Leva di blocco camma
rapida
pSpindle lock Spindelsperre Verrouillage de broche Blocco dell’alberino
aMotor Motor Moteur Motore
sAnchor plate Ankerplatte Plaque d'ancrage Piastra di ancoraggio
dExtention wing lock knob Verriegelungsknopf für den
Anbauflügel Bouton de blocage de la
rallonge Manopola di blocco ala di
estensione
fRight extention table Rechter Anbautisch Plateau de rallonge droit Tavola di estensione
destra
gMounting hole Montagebohrung Trou de montage Foro di montaggio
hLocking pin Sicherungsstift Goupille de verrouillage Perno di bloccaggio
jBevel lock knob Schrägschnitt-
Verriegelungsknopf Bouton de blocage de
biseau Manopola di blocco
smussatura
kHinge Scharnier Charnière Cardine
00BookC8FSHGWE,NE.indb900BookC8FSHGWE,NE.indb9 2019/08/0510:38:002019/08/0510:38:00
10
English Deutsch Français Italiano
lStop knob Anschlagknopf Bouton d'arrêt Manopola di arresto
;Dust port Anschluss für
Staubabsaugung Sortie d'évacuation de
poussière Porta per la polvere
zWork bench Werkbank Établi Banco di lavoro
x8 mm nut 8-mm-Mutter Écrou de 8 mm Dado da 8 mm
c25 mm thick work bench 25 mm dicke Werkbank Établi de 25 mm
d'épaisseur Banco di lavoro da 25 mm
di spessore
v8 mm nut 8-mm-Mutter Écrou de 8 mm Dado da 8 mm
bHolder Halter Support Supporto
nHole Loch Trou Foro
mScrew Schraube Vis Vite
,Combination square Kombi-Winkelmaß Équerre combinée Squadra universale
.Lock nut Sicherungsmutter Contre-écrou Controdado
/Adjustment bolt Einstellschraube Boulon de réglage Bullone di regolazione
¡Bevel pointer screw
Schrägschnittzeigerschraube
Vis à pointe biseautée Vite puntatore smussatura
™Lock nut Sicherungsmutter Contre-écrou Controdado
£Bolt Schraube Boulon Bullone
¢Screw Schraube Vis Vite
∞Stop block Anschlagblock Bloc d'arrêt Blocco di arresto
§Stop seat Anschlagsitz Butée du siège Sede di arresto
¶4 mm machine screw 4-mm-Maschinenschraube Vis à métaux de 4 mm Vite da macchina da 4 mm
•Laser line Laserlinie Ligne de laser Linea laser
ªCutting line Schnittlinie Ligne de coupe Linea di taglio
ºWorkpiece Werkstück Pièce à usiner Pezzo da lavorare
⁄Top view Draufsicht Vue de dessus Vista superiore
¤Rivet Stift Rivet Rivet
‹Laser housing Lasergehäuse Boîtier laser Alloggiamento laser
›Set screw Einstellschraube Vis de réglage Vite di fissaggio
fiLine Linie Ligne Linea
flWarning sign Warnschild Signe d'avertissement Segnale di avvertenza
‡Hole Loch Trou Foro
°Knob Knopf Bouton Manopola
·Vise plate Schraubstockplatte Plaque d'étau Piastra della morsa
‚Workpiece Werkstück Pièce à usiner Pezzo da lavorare
ŒMarking (pre-marked) Markierung (vormarkiert) Marquage (pré-marqué) Marcatura (pre-marcata)
„(Front view) (Vorderansicht) (vue de face) (Vista anteriore)
´Adjusting line Einstelllinie Ligne de réglage Linea di regolazione
‰Pull forward Nach vorn ziehen Tirer vers l'avant Tirare in avanti
ˇPress down Herunterdrücken Appuyer vers le bas Premere in basso
ÁPush backward Nach hinten drücken Pousser en arrière Spingere indietro
¨Bevel scale Schrägschnittskala Échelle de biseau Scala di smussatura
îMiter scale Gehrungsskala Échelle à onglets Scala di quartabuono
ØTurn the turntable Drehen Sie die
Drehscheibe Tourner le plateau tournant Ruotare il piatto girevole
∏Cut grooves with saw
blade Nuten mit dem Sägeblatt
schneiden Couper les rainures avec
une lame de scie Tagliare le scanalature con
la lama sega
00BookC8FSHGWE,NE.indb1000BookC8FSHGWE,NE.indb10 2019/08/0510:38:002019/08/0510:38:00
11
English Deutsch Français Italiano
ÅBottom line of the groove Untere Linie der Nut Ligne inférieure de la
rainure Linea inferiore della
scanalatura
ÍAluminum sash Aluminiumrahmen Cadre en aluminium Telaio in alluminio
ÎWood plate Holzplatte Plaque en bois Piastra di legno
ÏClamp Klemme Dispositif de serrage Morsetto
˝Cover plate screw Schraube für die
Abdeckplatte Vis de couvercle Vite piastra coperchio
ÓCover plate Abdeckplatte Couvercle Piastra coperchio
Ô8 mm bolt 8-mm-Schraube Boulon de 8 mm Bullone da 8 mm
Blade spanner Sägeblattschlüssel Clé à lame Chiave per lama
ÒWasher (B) Unterlegscheibe (B) Rondelle (B) Rondella (B)
ÚWasher (A) Unterlegscheibe (A) Rondelle (A) Rondella (A)
¸Wear limit line Verschleißgrenzlinie Ligne de limite d'usure Linea limite di usura
˛No. of carbon brush Nr. der Kohlebürste N° de brosse en fibres de
carbone N. di spazzola di carbone
ÇBrush cap Bürstenkappe Capuchon de la brosse Tappo spazzola
◊Carbon brush Kohlebürste Brosse en carbone Spazzola al carbonio
ıAir gun Druckluftpistole Pistolet à air Pistola ad aria compressa
00BookC8FSHGWE,NE.indb1100BookC8FSHGWE,NE.indb11 2019/08/0510:38:002019/08/0510:38:00
12
Nederlands Español Português Svenska
1Onderste afscherming Protección inferior Guarda inferior Undre skydd
2Schakelaarhendel Manecilla del interruptor Punho de comutação Brytarhandtag
3Motorkop Cabezal del motor Cabeça do motor Motorhuvud
4Versnellingsbak Caja de engranajes Caixa de engrenagens Växellåda
5Stofzak Bolsa para el polvo Saco de pó Dammpåse
6Schuifvastzetknop Perilla de fijación del
pasador Botão de segurança da
corrediça Glidande säkringsratt
7Schuifwagen Carro deslizante Carro da corrediça Glidvagn
8Schuine wijzer Puntero del bisel Ponteiro do bisel Faspekare
9Houder (A) Soporte (A) Suporte (A) Hållare (A)
0Bankschroefmontage Conjunto del tornillo de
carpintero Conjunto do torno Skruvstäd
!Geleider Guía secundaria Guia secundária Subanslag
@Vergrendelknop Perilla de bloqueo Botão de bloqueio Låsvred
#Geleider (A) Guía (A) Guia (A) Anslag (A)
$Bankschroef
vergrendelknop Perilla de bloqueo del
tornillo de carpintero Botão de bloqueio de torno Skruvstädslåsknapp
%Linker verlengingstafel Mesa de extensión
izquierda Mesa de extensão
esquerda Vänster förlängningsbord
^Basis Base Base Bas
&Verstekwijzer Puntero del inglete Ponteiro de esquadria Geringspekare
*Draaischijf Mesa giratoria Plataforma giratória Vridplatta
(Vergrendelhendel
positieve stop Palanca de bloqueo de
parada positiva Alavanca de bloqueio de
paragem positiva Positiva stoppets låsspak
)Verstekhandvat Mango del inglete Pega de esquadria Geringshandtag
qTafelinzetstuk Inserto de mesa Calço da mesa Bordinsats
wGeleider (B) Guía (B) Guia (B) Anslag (B)
eLasermarkering Marcador láser Marcador a laser Lasermarkör
rRotatierichting Dirección de rotación Direção de rotação Rotationsriktning
tLasermarkerschakelaar Interruptor del marcador
láser Interruptor de marcador
a laser Lasermarkörbrytare
yTrekschakelaar Interruptor de disparo Gatilho Avtryckare
uVergrendelingshendel
mesbeschermer Palanca de bloqueo del
protector de la cuchilla Alavanca de bloqueio da
proteção da lâmina Klingskyddets låsspak
iBlad Hoja Lâmina Blad
oSnelle-
nokvergrendelingshendel Palanca de bloqueo de la
leva rápida Alavanca de bloqueio de
came rápida Snabbkam-låsspak
pSpil vergrendelen Bloqueo del husillo Bloqueio do fuso Spindellås
aMotor Motor Motor Motor
sAnkerplaat Placa de anclaje Placa de ancoragem Förankringsplatta
dUitbreidingsvleugel
vergrendelknop Perilla de bloqueo del ala
de extensión Botão de bloqueio da asa
de extensão Förlängningsvingens
låsratt
fRechter verlengingstafel Mesa de extensión
derecha Mesa de extensão direita Höger förlängningsbord
gBevestigingsgat Orificio de montaje Orifício de montagem Monteringshål
hBorgpen Pasador de bloqueo Pino de bloqueio Låsstift
jSchuine
vergrendelingsknop Perilla de bloqueo del bisel Botão de bloqueio do bisel Faslåsratt
kScharnier Bisagra Dobradiça Gångjärn
00BookC8FSHGWE,NE.indb1200BookC8FSHGWE,NE.indb12 2019/08/0510:38:002019/08/0510:38:00
13
Nederlands Español Português Svenska
lStopknop Perilla de parada Botão de paragem Stoppvred
;Stofpoort Puerto del polvo Orifício do pó Dammutsläpp
zWerkbank Banco de trabajo Bancada de trabalho Arbetsbänk
x8 mm moer Tuerca de 8 mm Porca de 8 mm 8 mm mutter
c25 mm dikke werkbank Banco de trabajo de 25
mm de grosor Bancada com 25 mm de
espessura 25 mm tjock arbetsbänk
v8 mm moer Tuerca de 8 mm Porca de 8 mm 8 mm mutter
bHouder Soporte Suporte Hållare
nGat Agujero Orifício Hål
mSchroef Tornillo Parafuso Skruv
,Combinatievierkant Cuadrado de combinación Quadrado de combinação Kombinationsvinkel
.Borgmoer Tuerca de bloqueo Contraporca Låsmutter
/Stelbout Perno de ajuste Parafuso de ajuste Justerbult
¡Schuine aanwijzerschroef Tornillo del puntero
biselado Parafuso de ponteiro de
inclinação Fasningsskruv
™Borgmoer Tuerca de bloqueo Contraporca Låsmutter
£Bout Perno Perno Bult
¢Schroef Tornillo Parafuso Skruv
∞Stopblok Bloque de parada Bloco de paragem Stoppblock
§Stopknop Asiento de parada Assento de paragem Stoppsäte
¶4 mm machineschroef Tornillo de la máquina de
4 mm Parafuso de 4 mm para
máquina 4 mm maskinskruv
•Laserlijn Línea láser Linha de laser Laserlinje
ªZaaglijn Línea de corte Linha de corte Skärlinje
ºWerkstuk Pieza de trabajo Peça de trabalho Arbetsstycke
⁄Bovenaanzicht Vista superior Vista do topo Sedd uppifrån
¤Klinknagel Remache Rebite Nitarna
‹Laserbehuizing Carcasa del láser Carcaça do laser Laserhus
›Stelschroef Tornillo de ajuste Parafuso de ajuste Inställningsskruven
fiLijn Línea Linha Linje
flWaarschuwingsbord Señal de advertencia Sinal de aviso Varningsskylt
‡Gat Agujero Orifício Hål
°Knop Perilla Alavanca Knapp
·Bankschroefplaat Placa del tornillo de
carpintero Placa de torno Skruvstädsplatta
‚Werkstuk Pieza de trabajo Peça de trabalho Arbetsstycke
ŒMarkering (vooraf
gemarkeerd) Marcado (marcado
previamente) Marcação (pré-marcada) Märkning (förkodad)
„(Vooraanzicht) (Vista frontal) (Vista frontal) (Vy framifrån)
´Stellijn Línea de ajuste Linha de ajuste Justeringslinje
‰Vooruit trekken Empujar hacia delante Puxar para a frente Dra framåt
ˇDuw naar beneden Presionar Pressionar para baixo Tryck ned
ÁDuw naar achteren Empujar hacia atrás Empurrar para trás Tryck bakåt
¨Schuine schaal Escala del bisel Escala do bisel Fasskala
îVerstekschaal Escala del inglete Escala de esquadria Geringsskala
ØDraai aan de draaitafel Gire la mesa giratoria Rode a plataforma giratória Vrid vridplattan
00BookC8FSHGWE,NE.indb1300BookC8FSHGWE,NE.indb13 2019/08/0510:38:002019/08/0510:38:00
14
Nederlands Español Português Svenska
∏Snijd groeven met
zaagblad Corte surcos con la
cuchilla de la sierra Cortar entalhes com
lâmina de serra Skära spår med sågblad
ÅOnderste lijn van de groef Línea inferior de la ranura Linha de fundo do entalhe Spårets bottenlinje
ÍAluminium raamwerk Marco de aluminio Faixa de alumínio Lösramar av aluminium
ÎHouten plaat Placa de madera Placa de madeira Träplatta
ÏKlem Abrazadera Grampo Tving
˝Afdekplaatschroef Tornillo de la placa de
cubierta Parafuso da placa de
cobertura Täckplattskruv
ÓAfdekplaat Placa de cubierta Placa de cobertura Täckplatta
Ô8 mm bout Perno de 8 mm Perno de 8 mm 8 mm bult
Steekringsleutel Llave de la cuchilla Chave de lâmina Bladnyckel
ÒTussenring (B) Arandela (B) Anilha (B) Bricka (B)
ÚTussenring (A) Arandela (A) Anilha (A) Bricka (A)
¸Lijn slijtagelimiet Línea límite de desgaste Linha limite de desgaste Slitagegränslinje
˛Aantal koolborstels Núm. de cepillo de carbón N.º da escova de carvão Antal kolborstar
ÇBorstelkap Tapa del cepillo Tampa da escova Borstskydd
◊Koolborstel Escobilla de carbón Escova de carbono Kolborste
ıPersluchtspuit Pistola de aire Pistola de ar Tryckluftspistol
00BookC8FSHGWE,NE.indb1400BookC8FSHGWE,NE.indb14 2019/08/0510:38:002019/08/0510:38:00
15
Dansk Norsk Suomi Ελληνικά
1Nedre afskærmning Nedre vern Alasuojus Κάτω προφυλακτήρας
2Skiftehåndtag Bytt håndtak Kytkinkahva Λαβή διακόπτη
3Motorhoved Motorhode Moottoripää Κεφαλή μοτέρ
4Gearkasse Girkasse Vaihdelaatikko Θήκη ταχυτήτων
5Støvpose Støvpose Pölypussi Σακούλα σκόνης
6Glidesikringsgreb Skyv sikringsbryteren Liukukiinnitysnuppi Λαβή ασφάλισης
ολίσθησης
7Skydervogn Skyvevogn Liukuteräkelkka Φορείο ολίσθησης
8Skråmarkør Skråviser Kaltevuudenosoitin Δείκτης κλίσης
9Holder (A) Holder (A) Pidike (A) Στήριγμα (A)
0Skruestik Skrustikkemontering Ruuvipenkkiyhdistelmä Μέγγενη
συναρμολόγησης
!Under-anlægsflade Føringshjelp Apusuojus Δευτερεύων οδηγός
@Låsegreb Låseknapp Lukitusnuppi Λαβή ασφάλισης
#Hegn (A) Fører (A) Suojus (A) Οδηγός (A)
$Låsegreb til skruestik Låseknapp for skrustikke Ruuvipuristimen
lukitusnuppi Κουμπί ασφάλισης
μέγγενης
%Venstre forlængerplade Venstre forlengelsesbord Vasemmanpuoleinen
jatkotaso Επιφάνεια εργασίας
επέκτασης στα αριστερά
^Base Base Jalusta Βάση
&Geringsmarkør Gjæringsviser Viistekulman osoitin Δείκτης λοξοτομής
*Drejeplade Dreieskive Tasauspöytä Περιστροφική πλάκα
(Låsehåndtag for positivt
stop Positiv stopp-låsespak Positiivisen pysähdyksen
lukitusvipu Μοχλός ασφάλισης
θετικού στοπ
)Geringshåndtag Gjæringshåndtak Viistekulman lukituskahva Λαβή λοξοτομής
qMaskinbordsindsats Bordinnsats Pöydän pisto-osa Τεμάχιο τροφοδοσίας
wHegn (B) Fører (B) Suojus (B) Οδηγός (B)
eLaserindikator Lasermarkør Lasermerkitsijä Δείκτης λέιζερ
rRotationsretning Rotasjonsretning Pyörimissuunta Κατεύθυνση περιστροφής
tLaserindikatorkontakt Lasermarkørbryter Lasermerkitsimen kytkin Διακόπτης δείκτη λέιζερ
yAftrækker-kontakt Bryterknapp Liipaisukytkin Πληκτροδιακόπτης
uLåsehåndtag til
klingeafskærmning Sperrehåndtak til
sagbladvern Teränsuojuksen lukitusvipu Μοχλός ασφάλισης
προστατευτικού λεπίδας
iKlinge Blad Terä Λεπίδα
oLåsehåndtag for hurtig
knast Hurtiglåsespak Pikalukitusvipu Μοχλός ασφάλισης
quick-cam
pSpindellås Spindellås Karan lukitus Ασφάλεια άξονα
aMotor Motor Moottori Μοτέρ
sAnkerplade Ankerplate Ankkurilevy Πλάκα αγκύρωσης
dLåseknap til
forlængelsesvinge Vingelåseknapp til
forlengelse Jatkotason lukitusnuppi Κουμπί ασφάλισης
πτερυγίου επέκτασης
fHøjre forlængerplade Høyre forlengelsesbord Oikeanpuoleinen jatkotaso Επιφάνεια εργασίας
επέκτασης στα δεξιά
gMonteringshul Monteringshull Kiinnitysreikä Οπή συναρμολόγησης
hLåsestift Låsestift Lukitustappi Περόνη ασφαλείας
jSkrålåseknap Skrålåseknapp Kaltevuuskulman
lukitusnuppi Κουμπί ασφάλισης κλίσης
kHængsel Hengsel Sarana Μεντεσές
00BookC8FSHGWE,NE.indb1500BookC8FSHGWE,NE.indb15 2019/08/0510:38:002019/08/0510:38:00
16
Dansk Norsk Suomi Ελληνικά
lStophåndtag Stoppeknott Pysäytysnuppi Λαβή τερματισμού
;Støvport Støvåpning Pölyportti Θύρα σκόνης
zArbejdsbænk Arbeidsbenk Työstöpöytä Πάγκος εργασίας
x8 mm-møtrik 8 mm mutter 8 mm:n mutteri Παξιμάδι 8 mm
c25 mm tyk arbejdsbænk 25 mm tykk arbeidsbenk 25 mm paksu työstöpenkki Πάγκος εργασίας πάχους
25 mm
v8 mm-møtrik 8 mm mutter 8 mm:n mutteri Παξιμάδι 8 mm
bHolder Holder Pidike Στήριγμα
nHul Hull Reikä Οπή
mSkrue Skrue Ruuvi Βίδα
,Kombinationsfirkant Kombinasjonsfirkant Yhdistelmäkulmamittain Γνώμονας συνδυασμού
.Låsemøtrik Låsemutter Lukkomutteri Παξιμάδι ασφάλισης
/Justeringsbolt Justeringsbolt Säätöpultti Μπουλόνι ρύθμισης
¡Skråindikatorskrue Skråskrue Kaltevuuden osoitinruuvi Βίδα δείκτη κλίσης
™Låsemøtrik Låsemutter Lukkomutteri Παξιμάδι ασφάλισης
£Bolt Bolt Pultti Μπουλόνι
¢Skrue Skrue Ruuvi Βίδα
∞Stopblok Stoppeblokk Pysäytyslohko Μπλοκ τερματισμού
§Stopsæde Stoppesete Pysäytyspaikka Έδρα τερματισμού
¶4 mm-maskinskrue 4 mm maskinskrue 4 mm:n koneruuvi Μηχανική βίδα 4 mm
•Laserlinje Laserlinje Laserlinja Γραμμή λέιζερ
ªSkærelinje Skjærelinje Leikkauslinja Γραμμή κοπής
ºArbejdsstykke Arbeidsstykke Työkappale Προς κατεργασία κομμάτι
⁄Set ovenfra Grunnriss Ylhäältä Κατοψη
¤Nitte Nagle Niitti Πριτσίνι
‹Laserkabinet Laserhus Laserkotelo Περίβλημα λέιζερ
›Indstillingsskrue Setteskrue Kiristysruuvi Σετ βιδών
fiLinje Linje Linja Γραμμή
flAdvarselsskilt Varselskilt Varoitusmerkki Προειδοποιητική πινακίδα
‡Hul Hull Reikä Οπή
°Greb Knapp Nuppi Λαβή
·Skruetvingeplade Skrustikkplate Ruuvipuristin levy Πλάκα διάταξης
‚Arbejdsstykke Arbeidsstykke Työkappale Προς κατεργασία κομμάτι
ŒMærkning
(forhåndsmærket) Merking (pre-merket) Merkintä (ennalta merkitty) Σημάδι (προσημειωμένο)
„(Set forfra) (Forfra) (Edestä) (Μπροστινή όψη)
´Justeringslinje Justeringslinje Säätölinja Γραμμή ρύθμισης
‰Træk fremad Dra fremover Vedä eteenpäin Τραβήξτε προς τα εμπρός
ˇTryk ned Trykk ned Paina alas Πιέστε προς τα κάτω
ÁSkub baglæns Skyv bakover Työnnä taaksepäin Σπρώξτε προς τα πίσω
¨Skråningsskala Skråskala Kaltevuusasteikko Κλίμακα κλίσης
îGeringsskala Gjæringsskala Viistekulman asteikko Κλίμακα λοξοτομής
ØDrej drejebordet Drei på dreieskiven Käännä tasauspöytää Γυρίστε την περιστροφική
πλάκα
∏Skær riller med savklinge Kutte riller med sagblad Leikkaa urat sahanterällä Κόψτε αυλακώσεις με την
οδοντωτή λεπίδα
00BookC8FSHGWE,NE.indb1600BookC8FSHGWE,NE.indb16 2019/08/0510:38:002019/08/0510:38:00
17
Dansk Norsk Suomi Ελληνικά
ÅBundlinje for rillen Bunnlinjen av sporet Uran alalinja Κάτω γραμμή της
αυλάκωσης
ÍAluminiumsramme Aluminiumramme Alumiinikehys Αψίδα αλουμινίου
ÎTræplade Treplate Puulevy Πλάκα ξύλου
ÏLåseanordning Klemme Kiinnike Σφιγκτήρας
˝Skrue til dækselplade Dekkplateskrue Suojalevyn ruuvi Βίδα πλάκας κάλυψης
ÓDækselplade Dekkplate Suojalevy Πλάκα κάλυψης
Ô8 mm-bolt 8 mm bolt 8 mm:n pultti Μπουλόνι 8 mm
Klingeskive Bladnøkkel Terän avain Κλειδί λεπίδας
ÒSpændeskive (B) Skive (B) Aluslevy (B) Ροδέλα (B)
ÚSpændeskive (A) Skive (A) Aluslevy (A) Ροδέλα (A)
¸Linje for slidgrænse Linje for slitasjegrense Kulumisrajan merkki Γραμμή ορίου φθοράς
˛Antal kulstofbørster Antall kullbørster Hiiliharjan nro Αρ. ανθρακικής ψήκτρας
ÇBørstehætte Børstehette Harjan suojus Καπάκι βούρτσας
◊Kulstofbørste Kullbørste Hiiliharja Ανθρακική ψήκτρα
ıTrykluftpistol Luftpistol Ilmapyssy Αεροπίστολο
00BookC8FSHGWE,NE.indb1700BookC8FSHGWE,NE.indb17 2019/08/0510:38:002019/08/0510:38:00
English
18
(Original instructions)
GENERAL POWER TOOL SAFETY
WARNINGS
WARNING
Read all safety warnings, instructions, illustrations and
specifications provided with this power tool.
Failure to follow all instructions listed below may result in
electric shock, fire and/or serious injury.
Save all warnings and instructions for future reference.
The term “power tool” in the warnings refers to your mains-
operated (corded) power tool.
1) Work area safety
a) Keep work area clean and well lit.
Cluttered or dark areas invite accidents.
b) Do not operate power tools in explosive
atmospheres, such as in the presence of
flammable liquids, gases or dust.
Power tools create sparks which may ignite the dust
or fumes.
c) Keep children and bystanders away while
operating a power tool.
Distractions can cause you to lose control.
2) Electrical safety
a) Power tool plugs must match the outlet. Never
modify the plug in any way. Do not use any
adapter plugs with earthed (grounded) power
tools.
Unmodified plugs and matching outlets will reduce
risk of electric shock.
b) Avoid body contact with earthed or grounded
surfaces, such as pipes, radiators, ranges and
refrigerators.
There is an increased risk of electric shock if your
body is earthed or grounded.
c) Do not expose power tools to rain or wet
conditions.
Water entering a power tool will increase the risk of
electric shock.
d) Do not abuse the cord. Never use the cord for
carrying, pulling or unplugging the power tool.
Keep cord away from heat, oil, sharp edges or
moving parts.
Damaged or entangled cords increase the risk of
electric shock.
e) When operating a power tool outdoors, use an
extension cord suitable for outdoor use.
Use of a cord suitable for outdoor use reduces the
risk of electric shock.
f) If operating a power tool in a damp location
is unavoidable, use a residual current device
(RCD) protected supply.
Use of an RCD reduces the risk of electric shock.
3) Personal safety
a) Stay alert, watch what you are doing and use
common sense when operating a power tool.
Do not use a power tool while you are tired
or under the influence of drugs, alcohol or
medication.
A moment of inattention while operating power tools
may result in serious personal injury.
b) Use personal protective equipment. Always
wear eye protection.
Protective equipment such as a dust mask, non-skid
safety shoes, hard hat or hearing protection used for
appropriate conditions will reduce personal injuries.
c) Prevent unintentional starting. Ensure the
switch is in the off-position before connecting
to power source and/or battery pack, picking up
or carrying the tool.
Carrying power tools with your finger on the switch
or energising power tools that have the switch on
invites accidents.
d) Remove any adjusting key or wrench before
turning the power tool on.
A wrench or a key left attached to a rotating part of
the power tool may result in personal injury.
e) Do not overreach. Keep proper footing and
balance at all times.
This enables better control of the power tool in
unexpected situations.
f) Dress properly. Do not wear loose clothing or
jewellery. Keep your hair and clothing away
from moving parts.
Loose clothes, jewellery or long hair can be caught in
moving parts.
g) If devices are provided for the connection of
dust extraction and collection facilities, ensure
these are connected and properly used.
Use of dust collection can reduce dust-related
hazards.
h) Do not let familiarity gained from frequent use
of tools allow you to become complacent and
ignore tool safety principles.
A careless action can cause severe injury within a
fraction of a second.
4) Power tool use and care
a) Do not force the power tool. Use the correct
power tool for your application.
The correct power tool will do the job better and safer
at the rate for which it was designed.
b) Do not use the power tool if the switch does not
turn it on and off.
Any power tool that cannot be controlled with the
switch is dangerous and must be repaired.
c) Disconnect the plug from the power source and/
or remove the battery pack, if detachable, from
the power tool before making any adjustments,
changing accessories, or storing power tools.
Such preventive safety measures reduce the risk of
starting the power tool accidentally.
d) Store idle power tools out of the reach of
children and do not allow persons unfamiliar
with the power tool or these instructions to
operate the power tool.
Power tools are dangerous in the hands of untrained
users.
e) Maintain power tools and accessories. Check
for misalignment or binding of moving parts,
breakage of parts and any other condition
that may affect the power toolʼs operation. If
damaged, have the power tool repaired before
use.
Many accidents are caused by poorly maintained
power tools.
f) Keep cutting tools sharp and clean.
Properly maintained cutting tools with sharp cutting
edges are less likely to bind and are easier to control.
g) Use the power tool, accessories and tool bits
etc. in accordance with these instructions,
taking into account the working conditions and
the work to be performed.
Use of the power tool for operations different from
those intended could result in a hazardous situation.
h) Keep handles and grasping surfaces dry, clean
and free from oil and grease.
00BookC8FSHGWE,NE.indb1800BookC8FSHGWE,NE.indb18 2019/08/0510:38:002019/08/0510:38:00
English
19
Slippery handles and grasping surfaces do not
allow for safe handling and control of the tool in
unexpected situations.
5) Service
a) Have your power tool serviced by a qualified
repair person using only identical replacement
parts.
This will ensure that the safety of the power tool is
maintained.
PRECAUTION
Keep children and infirm persons away.
When not in use, tools should be stored out of reach of
children and infirm persons.
SAFETY INSTRUCTIONS FOR MITER
SAW
a) Miter saws are intended to cut wood or wood-like
products, they cannot be used with abrasive cut-
offwheels for cutting ferrous material such as bars,
rods, studs, etc.
Abrasive dust causes moving parts such as the lower
guard to jam. Sparks from abrasive cutting will burn the
lower guard, the kerf insert and other plastic parts.
b) Use clamps to support the workpiece whenever
possible. If supporting the workpiece by hand, you
must always keep your hand at least 100 mm from
either side of the saw blade. Do not use this saw to
cut pieces that are too small to be securely clamped
or held by hand.
If your hand is placed too close to the saw blade, there is
an increased risk of injury from blade contact.
c) The workpiece must be stationary and clamped or
held against both the fence and the table. Do not
feed the workpiece into the blade or cut "freehand"
in any way.
Unrestrained or moving workpieces could be thrown at
high speeds, causing injury.
d) Push the saw through the workpiece. Do not pull
the saw through the workpiece. To make a cut, raise
the saw head and pull it out over the workpiece
without cutting, start the motor, press the saw head
down and push the saw through the workpiece.
Cutting on the pull stroke is likely to cause the saw blade
to climb on top of the workpiece and violently throw the
blade assembly towards the operator.
e) Never cross your hand over the intended line of
cutting either in front or behind the saw blade.
Supporting the workpiece “cross handed” i.e. holding
the workpiece to the right of the saw blade with your left
hand or vice versa is very dangerous.
f) Do not reach behind the fence with either hand
closer than 100 mm from either side of the saw
blade, to remove wood scraps, or for any other
reason while the blade is spinning.
The proximity of the spinning saw blade to your hand
may not be obvious and you may be seriously injured.
g) Inspect your workpiece before cutting. If the
workpiece is bowed or warped, clamp it with the
outside bowed face toward the fence. Always make
certain that there is no gap between the workpiece,
fence and table along the line of the cut.
Bent or warped workpieces can twist or shift and may
cause binding on tile spinning saw blade while cutting.
There should be no nails or foreign objects in the
workpiece.
h) Do not use the saw until the table is clear of all
tools, wood scraps, etc., except for the workpiece.
Small debris or loose pieces of wood or other objects
that contact the revolving blade can be thrown with high
speed.
i) Cut only one workpiece at a time.
Stacked multiple workpieces cannot be adequately
clamped or braced and may bind on the blade or shift
during cutting.
j) Ensure the miter saw is mounted or placed on a
level, firm work surface before use.
A level and firm work surface reduces the risk of the miter
saw becoming unstable.
k) Plan your work. Every time you change the bevel or
miter angle setting, make sure the adjustable fence
is set correctly to support the workpiece and will
not interfere with the blade or the guarding system.
Without turning the tool “ON” and with no workpiece
on the table, move the saw blade through a complete
simulated cut to assure there will be no interference or
danger of cutting the fence.
I) Provide adequate support such as table extensions,
saw horses, etc. for a workpiece that is wider or
longer than the table top.
Workpieces longer or wider than the miter saw table
can tip if not securely supported. If the cut-offpiece or
workpiece tips, it can lift the lower guard or be thrown by
the spinning blade.
m) Do not use another person as a substitute for a
table extension or as additional support.
Unstable support for the workpiece can cause the
blade to bind or the workpiece to shift during the cutting
operation pulling you and the helper into the spinning
blade.
n) The cut-offpiece must not be jammed or pressed
by any means against the spinning saw blade.
If confined, i.e. using length stops, the cut-offpiece could
get wedged against the blade and thrown violently.
o) Always use a clamp or a fixture designed to properly
support round material such as rods or tubing.
Rods have a tendency to roll while being cut, causing the
blade to "bite" and pull the work with your hand into the
blade.
p) Let the blade reach full speed before contacting the
workpiece.
This will reduce the risk of the workpiece being thrown.
q) If the workpiece or blade becomes jammed, turn the
miter saw off. Wait for all moving parts to stop and
disconnect the plug from the power source and/
or remove the battery pack. Then work to free the
jammed material.
Continued sawing with a jammed workpiece could cause
lass of control or damage to the miter saw.
r) After finishing the cut, release the switch, hold
the saw head down and wait for the blade to stop
before removing the cut-offpiece.
Reaching with your hand near the coasting blade is
dangerous.
s) Hold the handle firmly when making an incomplete
cut or when releasing the switch before the saw
head is completely in the down position.
The braking action of the saw may cause the saw head
to be suddenly pulled downward, causing a risk of injury.
00BookC8FSHGWE,NE.indb1900BookC8FSHGWE,NE.indb19 2019/08/0510:38:002019/08/0510:38:00
English
20
PRECAUTIONS ON USING SLIDE
COMPOUND MITER SAW
1. Keep the floor area around the machine level. Well
maintained and free of loose materials e.g. chips and
cut-offs.
2. Provide adequate general or localized lighting.
3. Do not use power tools for applications other than those
specified in the handling instructions.
4. Repairing must be done only by authorized service
facility. Manufacturer is not responsible for any damages
and injuries due to the repair by the unauthorized
persons as well as the mishandling of the tool.
5. To ensure the designed operational integrity of power
tools, do not remove installed covers or screws.
6. Do not touch movable parts or accessories unless the
power source has been disconnected.
7. Use your tool at lower input than specified on the
nameplate; otherwise, the finish may be spoiled and
working efficiency reduced due to motor overload.
8. Do not wipe plastic parts with solvent. Solvents such as
gasoline, thinner, benzine, carbon tetrachloride, alcohol,
may damage and crack plastic parts. Do not wipe them
with such solvent. Clean plastic parts with a soft cloth
lightly dampened with soapy water.
9. Use only original HiKOKI replacement parts.
10. This tool should only be disassembled for replacement
of carbon brushes.
11. The exploded assembly drawing on this handling
instructions should be used only for authorized service
facility.
12. Never cut ferrous metals or masonry.
13. Adequate general or localized lighting is provided.
Stock and finished workpieces are located close to the
operators normal working position.
14. Wear suitable personal protective equipment when
necessary, this could include:
Hearing protection to reduce the risk of induced hearing
loss.
Eye protection to reduce the risk of injuring an eye.
Respiratory protection to reduce the risk of inhalation of
harmful dust.
Gloves for handling saw blades (saw blades shall be
carried in a holder wherever practicable) and rough
material.
15. The operator is adequately trained in the use, adjustment
and operation of the machine.
16. Refrain from removing any cut-offs or other parts of the
workpiece from the cutting area whilst the machine is
running and the saw head is not in the rest position.
17. Never use the slide compound miter saw with its lower
guard locked in the open position.
18. Ensure that the lower guard moves smoothly.
19. Do not use the saw without guards in position, in good
working order and properly maintained.
20. Use correctly sharpened saw blades. Observe the
maximum speed marked on the saw blade.
21. Do not use saw blades which are damaged or deformed.
22. Do not use saw blades manufactured from high speed
steel.
23. Use only saw blades recommended by HiKOKI.
Use of saw blade comply with EN847-1.
24. The saw blades should be from 210 mm to 216 mm
external diameter ranges.
25. Select the correct saw blade for the material to be cut.
26. Never operate the slide compound miter saw with the
saw blade turned upward or to the side.
27. Ensure that the workpiece is free of foreign matter such
as nails.
28. Replace the table insert when worn.
29. Do not use the saw to cut other than aluminium, wood or
similar materials.
30. Do not use the saw to cut other materials than those
recommended by the manufacturer.
31. Blade replacement procedure, including the method for
repositioning and a warning that this must be carried out
correctly.
32. Connect the slide compound miter saw to a dust
collecting device when sawing wood.
33. Take care when slotting.
34. When transporting or carrying the tool, do not grasp the
holder. Grasp the handle instead of the holder.
35. There is the danger of the holder slipping out of the base.
Grasp the handle instead of the holder.
36. Start cutting only after motor revolution reaches
maximum speed.
37. Promptly cut OFF the switch when abnormality observed.
38. Shut offpower and wait for saw blade to stop before
servicing or adjusting tool.
39. During a miter or bevel cut the blade should not be lifted
until it has stopped rotation completely.
40. During slide cutting operation, the saw must be pushed
and slided away from the operator.
41. Take all the possibility of residual risks in cutting
operation into your consideration, such as the laser
radiation to your eyes, the inadvertent access to moving
parts on slide mechanical parts on machine and so on.
42. Ensure before each cut that the machine is stable.
Use only saw blades whose maximum permitted speed
is higher than the no-load speed of the power tool.
Do not replace the laser with a different type.
43. Do not stand in a line with the saw blade In front of the
machine. Always stand aside of the saw blade. This
protects your body against possible kickback. Keep
hands, fingers and arms away from the rotating saw
blade.
Do not cross your arms when operating the tool arm.
44. If the saw blade should become jammed, switch the
machine offand hold the workpiece until the saw blade
comes to a complete stop. To prevent kickback, the
workpiece may not be moved until after the machine has
come to a complete stop.
Correct the cause for the jamming of the saw blade
before restarting the machine.
00BookC8FSHGWE,NE.indb2000BookC8FSHGWE,NE.indb20 2019/08/0510:38:002019/08/0510:38:00
Other manuals for C 8FSHG
1
Table of contents
Languages:
Other HIKOKI Saw manuals

HIKOKI
HIKOKI C 12RSH2 User manual

HIKOKI
HIKOKI CD 3605DA User manual

HIKOKI
HIKOKI CR 13VC User manual

HIKOKI
HIKOKI C1806DB User manual

HIKOKI
HIKOKI CR13V2NSZ User manual

HIKOKI
HIKOKI CR 13VC User manual

HIKOKI
HIKOKI C 3612DRA User manual

HIKOKI
HIKOKI C 3605DA User manual

HIKOKI
HIKOKI C8FSHE User manual

HIKOKI
HIKOKI C 1806DA User manual

HIKOKI
HIKOKI C 12RSH2 User manual

HIKOKI
HIKOKI C3610DRJW4Z User manual

HIKOKI
HIKOKI C 6U3 User manual

HIKOKI
HIKOKI C1806DB User manual

HIKOKI
HIKOKI CB12-ST2 User manual

HIKOKI
HIKOKI CR18DBL User manual

HIKOKI
HIKOKI C10FSH User manual

HIKOKI
HIKOKI CR 13V2 User manual

HIKOKI
HIKOKI C 3612DRA User manual

HIKOKI
HIKOKI C 7SS User manual