manuals.online logo
Brands
  1. Home
  2. •
  3. Brands
  4. •
  5. Hilleberg
  6. •
  7. Camping Equipment
  8. •
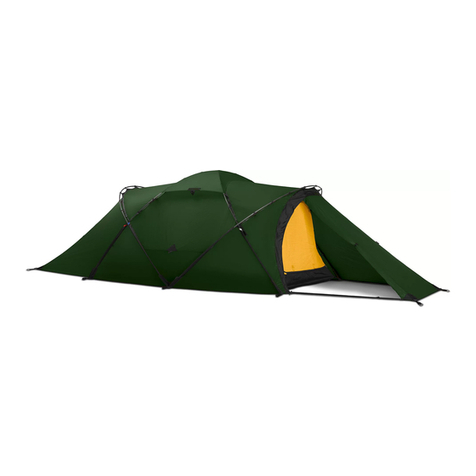
  9. Hilleberg SOULO User manual

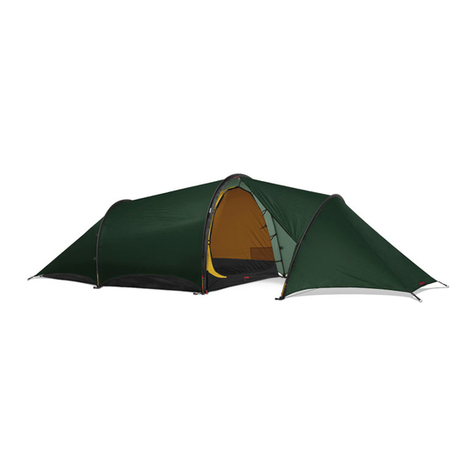
Hilleberg SOULO User manual

cm 10560
220
95cm
cm
inch 4224 38
inch
inch
87
SOULO
EUROPE
Hilleberg the Tentmaker AB
Önevägen 34
S-832 51 Frösön, Sweden
tel: +46 (0)63 57 15 50
fax: +46 (0)63 57 15 65
[email protected]
OUTSIDE OF EUROPE
Hilleberg the Tentmaker, Inc.
14790 NE 95th Street
Redmond, WA 98052 USA
tel: +1 (425) 883 0101
fax: +1 (425) 869 6632
toll free: 1 (866) 848 8368 (n. america only)
[email protected]
WWW.HILLEBERG.COM
All product features and measurement values, including tent weight and pole length, may vary somewhat
from what is shown in our catalog, other printed items, and on our web site. Such differences can occur
because of alterations in the design and production process and/or natural variations in the materials.
SOULO
Bo Hilleberg Bo Hilleberg
sv sv
en en
de de
Hilleberg Soulo
|3
2 |
Willkommen zu Deinem neuen Hilleberg Soulo!
Du hast mit diesem Zelt ein hoch qualitatives Produkt erworben und solltest es auch
dementsprechend handhaben. Wir empfehlen Dir, diese Anleitung vor dem ersten Aufbau
Deines Zeltes gründlich durchzulesen und den Aufbau zu üben, bevor Du mit Deinem neuen
Zelt die erste Tour unternimmst. Trotz seines geringen Gewichts ist das Soulo bei korrekter
Anwendung extrem belastbar. Um optimal zu funktionieren, bedarf es jedoch sorgfältiger Pflege
und Handhabung. Folge allen Anleitungen, so wirst Du an diesem Zelt lange Freude haben.
Soulo Inhalt
Ein Außenzelt mit Lüfterhaube aus Kerlon-1200-Gewebe mit fertig montiertem Innenzelt;
12 Zeltleinen mit Spannern; zwei 9 mm starke und 344 cm Zeltstangen und eine 285 cm
lange Stange, jede mit zwei vorgebogenen Segmenten; 12 Heringe; Packbeutel für Zelt,
Gestänge und Heringe; ein Ersatz-Stangensegment; eine Stangen-Reparaturhülse und
eine Aufbauanleitung.
Die Suche eines geeigneten Zeltplatzes
Wähle einen Platz, der möglichst windgeschützt, eben und frei von Gegenständen ist,
die Dein Zelt beschädigen könnten. Eine leicht konvex gewölbte Stelle gibt dem Zelt eine
bessere Spannung und Stabilität, und minimiert Nässeansammlung unter der Zeltfläche.
Benutzung des Gestänges
Unsere Gestänge sind von bester Qualität. Sie sind auf Leichtigkeit konzipiert und müssen
korrekt gehandhabt werden. Bei unsachgemäßer Verwendung können sie brechen und Deine
Sicherheit gefährden. Werfe nie das Gestänge zum Zusammenbauen aus, es könnten
dadurch Risse oder andere Schäden entstehen! Entfalte jede Stange und setze sorgfältig
ein Segment nach dem anderen zusammen. Achte darauf, dass die Teile beim Aufbau nicht
auseinanderrutschen. Die dabei entstehenden Spalten können einen Stangenbruch verursachen.
Welcome to your new Hilleberg Soulo!
You have invested in a truly high-end, high quality tent, so take care of your investment. We
strongly recommend that you read these instructions completely before setting up your tent,
and that you practice setting up your tent at home before taking it on a backcountry trip.
Despite its light weight, the Soulo is exceptionally strong if used correctly, but it does require
proper care and handling to function at its full potential. Follow ALL directions in this booklet.
Doing this will ensure the greatest longevity of your tent and the maximum benefit to you.
What’s included with the Soulo
One outer tent and attached vent cover in Kerlon 1200 connected to one inner tent; 12
attached guy lines with line runners; two 9 mm x 344 cm (135.4 in) and one 9 mm x 285
cm (112.2 in) poles, each with two pre-bent sections ; 12 pegs; stuff bags for tent, poles
and pegs; one spare pole section; one pole repair sleeve; and an instruction booklet.
Choosing a tent site
Find a spot that is as protected as possible from the wind, and that is even, level and free
of anything that might damage your tent. A slightly convex site will create better stretch in
the pitching and minimize moisture collecting under the tent.
Important note about pole usage
Our tent poles are the best available, but they are still lightweight aluminum. Incorrectly
handled, a pole can break, which could be potentially dangerous. Never extend a pole by
flinging it open, since the sections hitting each other can cause damage. Unfold each
pole carefully, seat each section into place, and ensure that pole sections do not pull apart
during pitching, as the resulting gaps can lead to breakage.
Välkommen till ditt nya Hilleberg Soulo!
Du har investerat i ett högkvalitetstält, så tag väl hand om det. Vi rekommenderar att du
läser instruktionshäftet noggrant innan du sätter upp ditt tält och att du tränar ordentligt
på att sätta upp och ta ner det innan du går ut på din första tur. Trots sin låga vikt är Soulo
mycket starkt om det används korrekt, men det kräver noggrann skötsel och handhavande
för att fungera optimalt. Följ alla anvisningarna i detta häfte så kommer Soulo att fungera
väl för dig under många år.
Soulo innehåller följande
Ett yttertält med ventilskydd i Kerlon 1200, hopmonterat med innertält och 12 st staglinor
med linsträckare. två 9mm x 344 cm stänger och en 9 mm x 285 cm stång med två förböjda
stångdelar per stång, 12 markpinnar, packpåsar för tält, stänger och markpinnar, en extra
stångdel, reparationshylsa och instruktionsbok.
Att välja tältplats
Välj en så vindskyddad och jämn plats som möjligt, och fri från sådant som kan skada ditt
tält. En konvex yta ger bättre spänning och minskar risken för vatten under tältet.
Viktigt om hantering av tältstängerna
Våra tältstänger är av högsta kvalitet, men de är en lättviktsprodukt som kräver korrekt
hantering annars kan stången knäckas och i värsta fall leda till fara. Kasta aldrig ut en
stång för ihopsättning eftersom stångdelarna kan få sprickor eller andra skador när
de slår ihop. Vik ut och sätt ihop en sektion i taget. Se till att delarna går ihop ordentligt
och att de inte glider isär eftersom en glipa kan orsaka stångbrott.
sv
en
de
Hilleberg Soulo
|5
4 |
4
3
1
2
1Breite das Zelt auf dem Boden aus. 2Bei starkem Wind ist es ratsam, das Zelt
gleich an den 6 Ecken mit Heringen auf dem Boden zu fixieren. Setze die Stangen
zusammen. Kontrolliere dass alle Stangenteile richtig zusammengesteckt sind.
3Setze die Stangen zuerst in die kurzen Stangenkanäle an den Ecken. Achte
darauf, dass sie ganz in den Kanälen sitzen. Die beiden längeren Stangen werden
in der Längsrichtung eingeführt. Danach wird die kurze Stange quer über das
Zelt montiert. 4Achte auf die Farbmarkierungen an den Stangenkanälen. Jede
Stange benutzt Kanäle mit derselben Farbmarkierung. Bei starkem Wind empfiehlt
es sich, jetzt bereits die Zeltleinen mit Heringen abzuspannen.
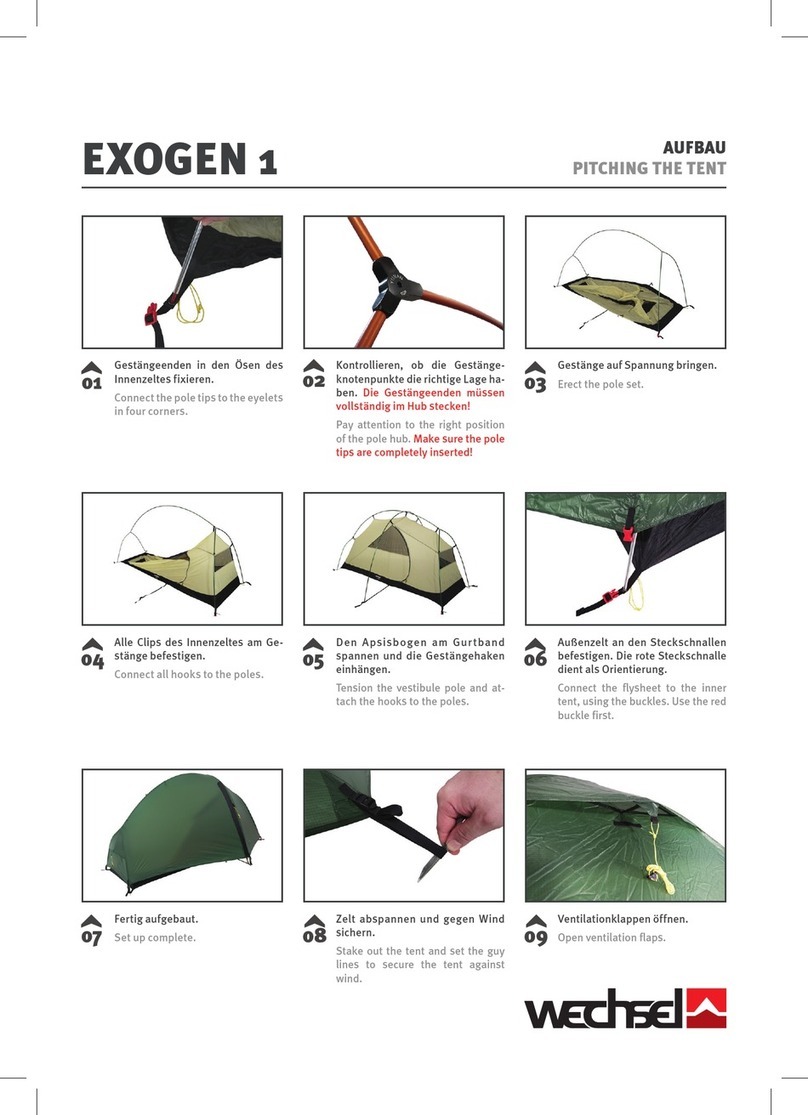
Pitching the Soulo
1Lay the tent out on the ground. 2If the wind is blowing, it is a good idea to
peg out the six corner loops (where the pole sleeves are) before putting the poles
in. Extend the poles, making sure that each pole section rests firmly against the
neighboring sections.
3Put the pole ends into the short pole sleeves, making sure the pole ends are
seated completely into the sleeves. The two equal-length longer poles go the
length of the tent, while the shorter pole goes across the width of the tent, and
should be put in last. 4Observe the color coded tabs on the open end of all the
sleeves, and make sure that both ends of each pole go into matching colored
sleeves. In extreme conditions, peg the guy lines out before putting the poles in.
Uppsättning av Soulo
1Lägg ut tältet på marken. 2Om det blåser är det bäst att först fästa de sex
hörnen med markpinnar. Sätt ihop stängerna. Kontrollera att alla stångdelar
sitter ihop ordentligt.
3Sätt in stängerna i de korta kanalerna i hörnen. Kontrollera att de är inskjutna
till botten i kanalerna. De två längre stängerna sätts in i tältets längdriktning.
Därefter monteras den kortare stången tvärs över tältet. 4Observera färg-
märkningarna på kanalerna och se till att bägge ändarna av varje stång går in i
kanaler med matchande färgmärkning. I hård vind kan det vara klokt att redan
efter detta moment, dra ut och fästa staglinorna i marken.
sv
en
de
Hilleberg Soulo
|7
6 |
4
5
3
1
2
Aufbau des Soulos (Fortsetzung)
1Hänge das Außenzelt nun von unten beginnend mit den Haken am Gestänge
ein. Bei starkem Wind ist es ratsam, die Haken reihum zu montieren, so dass
das Zelt gleichmässig eingehängt wird. Bei gutem Wetter ist diese Vorsichts-
maßnahme nicht erforderlich.
2& 3Befestige die Lüfterhaube, indem Du die Haken mit den dafür vorge-
sehenen Ringen verbindest. Die beiden Knebelbindungen sollten niemals gelöst
werden.
4& 5Die Lüfterhaube sollte immer mit den Spannriemen gespannt werden.
Pitching the Soulo, continued
1Clip the hooks to the poles. In windy conditions, it is often best to build
the tent from the ground up: clip the hooks in a spiral pattern around the tent
keeping the height of the walls the same on all sides. In good weather this is
not as important.
2& 3Attach the vent cover by clipping the hooks to the matching rings on
the tent. Leave the toggle points connected at all times.
4& 5Adjust the vent cover by tightening the webbing straps on the attachment
points. The vent cover should be taut.
Uppsättning av Soulo, fortsättning
1Häng upp tältet i stängerna genom att fästa krokarna i stängerna. I hård vind
är det en fördel att gå runt tältet och fästa krokarna så att tältet “byggs upp”
med samma höjd hela tiden. I bra väder är inte detta nödvändigt.
2& 3Montera ventilskyddet genom att fästa krokarna i motsvarande ringar.
De fästen som är försedda med toggles skall alltid lämnas monterade.
4& 5Spänn ventilskyddet genom att dra åt banden vid fästpunktena. Skyddet
skall alltid vara spänt.
SV
EN
dE
Hilleberg Soulo
|9
8 |
1
Claes Grundsten
Pål Dufva
2
Aufbau des Soulos (Fortsetzung)
1An windgeschützen Stellen muss man das Soulo theoretisch nicht mit Heringen
oder Zeltleinen befestigen, da es völlig freistehend ist. Dennoch ist es ratsam, es
wenigstens an zwei Ecken zu fixieren. Auf windexponierten Stellen sollten jedoch
immer alle Ecken und die Zeltleinen im Boden verankert sein.
2Auf See gilt: „Bei Sturm soll man vor Anker gehen.” Diese Regel gilt auch
für Zelte, insbesondere in exponierten Lagen. Sonst kann man böse überrascht
werden. Aber auch schon bei geringen Windstärken bleibt das Zelt ruhiger, wenn
man es mit den Leinen abspannt.
Pitching the Soulo, continued
1In protected areas you do not need to use the pegs or guy lines, since the
Soulo is fully freestanding. It is, however, always prudent to peg down at least
two corners. In exposed areas, the six corners of the tent should always be
pegged down at this point if you did not do it earlier.
2The basic rule for boats is to always anchor for a storm. This wisdom
also applies to tents, especially in exposed terrain, since the alternative can be
surprising! Using the guy lines not only adds extra stability, but also makes for
a quieter sleeping experience, even in very light winds.
Uppsättning av Soulo, fortsättning
1I skyddad terräng behöver du inte använda markpinnar och linor eftersom
Soulo är totalt fristående. Men trots det kan det vara klokt att åtminstone fästa
några hörn så att inte tältet blåser iväg. I vindutsatta lägen skall alltid alla
hörnfästen och linor vara förankrade i marken.
2Grundregeln på sjön är “att alltid ankra för storm”. Detta gäller även för
tält, eftersom alternativet ibland kan bli både överraskande och farligt. Även i
måttlig vind kan det bli lugnare inne i tältet då linorna är spända.

Other manuals for SOULO

2

Other Hilleberg Camping Equipment manuals

Hilleberg Staika User manual

Hilleberg

Hilleberg Staika User manual

Hilleberg Windsack User manual

Hilleberg

Hilleberg Windsack User manual

Hilleberg NALLO User manual

Hilleberg

Hilleberg NALLO User manual

Hilleberg ANJAN GT User manual

Hilleberg

Hilleberg ANJAN GT User manual

Hilleberg Muddus User manual

Hilleberg

Hilleberg Muddus User manual

Hilleberg UNNA User manual

Hilleberg

Hilleberg UNNA User manual

Hilleberg ANJAN User manual

Hilleberg

Hilleberg ANJAN User manual

Hilleberg ALLAK User manual

Hilleberg

Hilleberg ALLAK User manual

Hilleberg MESH BOX User manual

Hilleberg

Hilleberg MESH BOX User manual

Hilleberg ALTAI User manual

Hilleberg

Hilleberg ALTAI User manual

Hilleberg NAMMATJ User manual

Hilleberg

Hilleberg NAMMATJ User manual

Hilleberg ROGEN User manual

Hilleberg

Hilleberg ROGEN User manual

Hilleberg SOULO User manual

Hilleberg

Hilleberg SOULO User manual

Hilleberg MESH RIDGE User manual

Hilleberg

Hilleberg MESH RIDGE User manual

Hilleberg Jannu Configuration guide

Hilleberg

Hilleberg Jannu Configuration guide

Hilleberg ROGEN User manual

Hilleberg

Hilleberg ROGEN User manual

Hilleberg SAIVO User manual

Hilleberg

Hilleberg SAIVO User manual

Hilleberg Akto User manual

Hilleberg

Hilleberg Akto User manual

Hilleberg TARRA User manual

Hilleberg

Hilleberg TARRA User manual

Hilleberg SAITARIS User manual

Hilleberg

Hilleberg SAITARIS User manual

Hilleberg Stalon Combi User manual

Hilleberg

Hilleberg Stalon Combi User manual

Popular Camping Equipment manuals by other brands

Marabut NOMADA 3 user manual

Marabut

Marabut NOMADA 3 user manual

Petromax Fire Bridge frk1 user manual

Petromax

Petromax Fire Bridge frk1 user manual

Hatteras Hammock Caddy instructions

Hatteras

Hatteras Hammock Caddy instructions

GSI Outdoors JAVAPRESS manual

GSI Outdoors

GSI Outdoors JAVAPRESS manual

Osprey MANTA Series owner's manual

Osprey

Osprey MANTA Series owner's manual

Illuminator 5 Bar Camp Light Kit user manual

Illuminator

Illuminator 5 Bar Camp Light Kit user manual

Ozark Trail WMT-8859 instructions

Ozark Trail

Ozark Trail WMT-8859 instructions

Buck Flashpoint 770 operating instructions

Buck

Buck Flashpoint 770 operating instructions

Travel Lite 690FD owner's manual

Travel Lite

Travel Lite 690FD owner's manual

Quick Pitch RTT Mini Max Operating and maintenance instructions

Quick Pitch

Quick Pitch RTT Mini Max Operating and maintenance instructions

RACLET TAMARIS Instruction and maintenance

RACLET

RACLET TAMARIS Instruction and maintenance

Coleman 5177 Series user guide

Coleman

Coleman 5177 Series user guide

Ozark Trail WMT-530NQ user manual

Ozark Trail

Ozark Trail WMT-530NQ user manual

Asaklitt 31-1360-1 manual

Asaklitt

Asaklitt 31-1360-1 manual

VEVOR AP-SS-005 user manual

VEVOR

VEVOR AP-SS-005 user manual

Alpkit ELAN quick start guide

Alpkit

Alpkit ELAN quick start guide

Harbor Freight Tools 92654 Assembly and operating instructions

Harbor Freight Tools

Harbor Freight Tools 92654 Assembly and operating instructions

Outwell DREAMBOAT instruction manual

Outwell

Outwell DREAMBOAT instruction manual

manuals.online logo
manuals.online logoBrands
  • About & Mission
  • Contact us
  • Privacy Policy
  • Terms and Conditions

Copyright 2025 Manuals.Online. All Rights Reserved.