manuals.online logo
Brands
  1. Home
  2. •
  3. Brands
  4. •
  5. Hilleberg
  6. •
  7. Camping Equipment
  8. •
  9. Hilleberg NAMMATJ User manual

Hilleberg NAMMATJ User manual

130 cm
160 cm
220
*
cm
cm
52 in
64 in
*
inch
inch
87
* = 95 cm/38 in
Nammatj 2
* = 105 cm/42 in
Nammatj 3
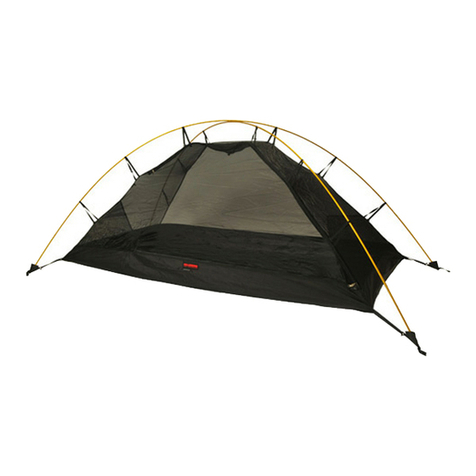
NAMMATJ MESH INNER TENT
EUROPE
Hilleberg the Tentmaker AB
Önevägen 34
S-832 51 Frösön, Sweden
tel: +46 (0)63 57 15 50
fax: +46 (0)63 57 15 65
[email protected]
OUTSIDE OF EUROPE
Hilleberg the Tentmaker, Inc.
14790 NE 95th Street
Redmond, WA 98052 USA
tel: +1 (425) 883 0101
fax: +1 (425) 869 6632
toll free: 1 (866) 848 8368 (n. america only)
[email protected]
WWW.HILLEBERG.COM
Stuart Craig
NAMMATJ MESH INNER TENT
Stuart Craig
All product features and measurement values, including tent weight and pole length, may vary somewhat
from what is shown in our catalog, other printed items, and on our web site. Such differences can occur
because of alterations in the design and production process and/or natural variations in the materials.
| 3
2 |
Hilleberg Nammatj Mesh Inner Tent
sv sv
en en
de de
Nammatj 3: 2 x 328 cm* Nammatj 2: 2 x 293 cm
Willkommen zu Deinem neuen Hilleberg Nammatj Mesh-Innenzelt!
Wir empfehlen Dir, diese Anleitung vor der ersten Tour gründlich durchzulesen und den
Aufbau zu üben.
Das Nammatj Mesh-Innenzelt besteht aus dem Mesh-Innenzelt für 2 oder 3 Personen, 2
Abspannleinen, 4 Gestängehaltern, 1 Packsack und einer Anleitung. hinweis: Das Nammatj
Mesh-Innenzelt benötigt zwei Gestänge* und 6 Heringe, die mit dem Nammatj Zelt geliefert
wurden oder separat erworben werden müssen.
Das Nammatj Mesh-Innenzelt kann für sich alleine oder als Innenzelt in einem Hilleberg
Nammatj oder Nammatj GT verwendet werden (unteres Foto). Mit dem Mesh-Innenzelt wird
die Ventilation gesteigert und ein 4-Jahreszeitenzelt zu einem 3-Saisonzelt umgerüstet.
Pflege & Wartung Deines Nammatj Mesh-Innenzeltes
Lagere Dein Zelt niemals ohne es vorher zu trocknen. Nach jedem Gebrauch sollte es zum
Trocknen aufgehängt werden – am besten mit eingebautem Gestänge, damit die Zeltwände
nicht aufeinander liegen. Bürste Sand und Staub ab. Entferne Schmutzflecken mit lauwarmem
Wasser. Kontrolliere Dein Zelt auf Schäden und repariere sie. Überprüfe alle Reißverschlüsse
und bürste sie vor allem nach Touren in sandigen und schmutzigen Verhältnissen sauber.
Mangelnde Pflege der Reißverschlüsse verkürzt deren Lebensdauer! Reinige die Heringe und
ersetze verlorene oder beschädigte Heringe. Überprüfe das Gestänge auf Schäden. Nach dem
Trocknen und der Kontrolle des Zeltes kann alles wieder in die Packsäcke verstaut werden.
Schütze Dein Zelt vor direkter, langfristiger Sonneneinstrahlung, da UV-Strahlung dem
Gewebe schadet.
Välkommen till ditt nya Hilleberg Nammatj Mesh Innertält
Vi rekommenderar att du läser instruktionshäftet noggrant innan du sätter upp ditt tält och
att du tränar på att sätta upp och ta ner det innan du går ut på din första tur.
Nammatj Mesh Innertält innehåller ett 2- eller 3-personerstält, 4 stånghållare, 2 tältlinor,
packpåse och instruktionshäfte. obs: För uppsättning krävs dessutom två stänger* och
vi rekommenderar även 6 markpinnar. Stänger och markpinnar är standard i ett komplett
Nammatj och Nammatj GT tält, men de kan också köpas separat.
Nammatj Mesh Innertält är designat för att användas separat men det kan även användas
som innertält i ett standard Nammatj eller Nammatj GT (se nedersta fotot på omslaget). Med
ett meshinnertält ökar ventilationen men Nammatj och Nammatj GT blir då ett 3-säsongers
tält istället för ett normalt åretrunttält.
Skötsel av ditt Nammatj Mesh Innertält
Förvara aldrig tältet en längre tid utan att torka det först. Häng upp det i ett väl ventilerat
utrymme efter varje användning, helst med stängerna i så att vävarna inte ligger mot varandra.
Städa ur tältet ordentligt innan det torkas och packas. Om det behöver rengöras använd en
trasa med ljummet vatten. Kontrollera hela tältet och laga vid behov. Kontrollera blixtlåsen
och borsta ur dem med en hård borste, det är extra viktigt om tältet har använts i sandiga
eller smutsiga områden. Om blixtlåsen inte hålls rena, minskar deras livslängd! Rengör och
kontrollera markpinnarna och ersätt trasiga eller borttappade. Kontrollera stängerna. Packa
tältet i sin packpåse när det är torrt och allt är kontrollerat.
När du använder tältet, försök att sätta upp det i skugga eftersom UV-strålning skadar
alla vävar.
Welcome to your new Hilleberg Nammatj Mesh Inner Tent!
We strongly recommend that you read these instructions completely before setting up
your Nammatj Mesh Inner Tent, and that you practice setting it up at home before taking
it on a backcountry trip.
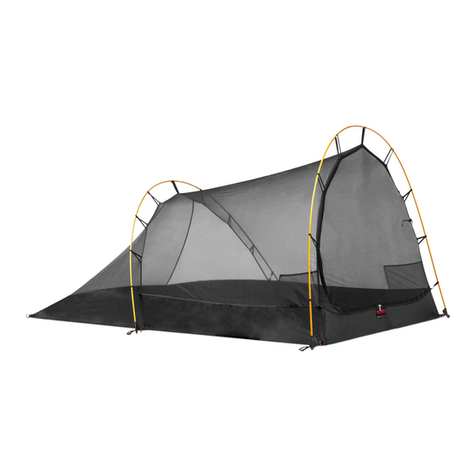
The Nammatj Mesh Inner includes either the 2 or 3 person Inner Tent itself; 4 attached pole
holders; two guy lines; stuff bag; and an instruction booklet. note: The Nammatj Mesh Inner
Tent requires two poles* and 6 pegs. Both poles and pegs come standard with the complete
Nammatj & Nammatj GT tent models, but they are also sold separately.
While designed to be used on its own, the Nammatj 2 & 3 Mesh Inner Tents can also be used
as the inner tent in a Hilleberg Nammatj 2 or 2 GT or 3 or 3 GT (as shown in the bottom cover
photo). Doing so will add more ventilation, but it will also make your Nammatj or Nammatj
GT a 3-season tent, rather than an all-season one.
Care & maintenance of your Nammatj Mesh Inner Tent
Do not store your tent for any length of time without drying it first. After each use, hang
it in a dry and well-vented place, preferably so that the walls do not touch. Before drying
and packing your tent, brush off any dirt. If it needs cleaning, use only lukewarm water
and a sponge. Check the entire tent for damage and make repairs if necessary. Check the
zippers and brush these with a small, stiff brush. This is especially important if you have
been using your tent in a sandy or dusty environment. If the zippers are not kept clean their
life expectancy will decrease! Clean the pegs, and replace damaged or lost ones. Check
the poles for potential damage. After your tent is dry and you have checked it completely,
pack it into its stuff bag.
Whenever possible, try and pitch your tent out of direct sunlight, since UV exposure dam-
ages all fabrics.
| 5
4 |
Hilleberg Nammatj Mesh Inner Tent
sv
en
de
1 2
3 4
5 6
7 8
Vorbereitung zum Aufbau des Nammatj Mesh-Innenzeltes
1& 2Befestige vor dem Aufbau die Gestängehalter am Mesh-Innenzelt.
Kopple dazu die Ringe der Gestängehalter an die Knebel der Eck-Schlaufen im
Eingangsbereich und seitlich der Zeltmitte.
Wähle eine ebene und windgeschützte Stelle aus. Breite das Mesh-Innenzelt aus
und setze das Gestänge zusammen.
3– 5Schiebe eine Stange durch die Reihe der Gummibänder über dem Eingang
und setze ein Stangen-Ende in den Stangenhalter.
6– 8Biege die Stange, bis sie den Eingang vollständig aufwölbt, und setze das
freie Stangenende in den Gestängehalter.
Lägg ut och förbered Nammatj Mesh Innertält
1& 2Innan uppsättning av tältet, montera stånghållarna på toggles på gavel-
hörnen och stånginfästningens ändar på mitten av tältet.
Välj en plats som är så vindskyddad och jämn som möjligt. Lägg ut tältet och
montera ihop stängerna.
3– 5Trä den första stången genom resårbanden över tältets ingång och placera
stångänden i stånghållaren.
6– 8Böj stången och sätt den andra änden i stånghållaren.
Lay out and prepare the Nammatj Mesh Inner Tent for pitching
1& 2Before pitching, make sure the pole holders are attached to the webbing
attachment points at the 2 front corners and on either end of the line of elastic
loops near the middle of the tent. To attach them, insert the toggle on the webbing
into the rings on the pole holders.
Find a spot that is as protected as possible from the wind, and that is even and
level, and lay out the tent and extend the poles.
3– 5Thread one of the two poles into the line of elastic loops over the tent
entrance and seat the end into the pole holder.
6– 8Arch the pole to bring up the roof, and set its end into the pole holder.
| 7
6 |
Hilleberg Nammatj Mesh Inner Tent
sv
en
de
1 2
3
4
Abschluss der Stangenmontage
1& 2Führe die zweite Stange durch die Reihe der Gummibänder neben der
Innenzeltmitte und setze ein Stangen-Ende in den Stangenhalter.
3& 4Biege die Stange, bis sie das Innenzelt vollständig aufwölbt, und setze das
freie Stangenende in den Gestängehalter.
Avsluta stångmonteringen
1& 2Skjut in den andra stången genom resårbanden på mitten av tältet och
placera stångänden i stånghållaren.
3& 4Böj stången och sätt in den andra änden i stånghållaren.
Finish threading the poles
1& 2Thread the other of the two poles into the line of elastic loops near the
middle of the tent and seat the pole end into the pole holder.
3& 4Arch the pole to bring up the roof, and set its end into the pole holder.
| 9
8 |
Hilleberg Nammatj Mesh Inner Tent
sv
en
de
1 2
3 4
8
9
7
5
6
Heringe setzen
1– 4Sichere das Fußende mit Heringen. Ziehe das Innenzelt straff, bis der
Zeltboden ausgestreckt ist, und sichere die vorderen Ecken.
Richtiges Setzen der Heringe
5Presse die Heringe vollständig und im 45°-Winkel in den Boden.
6Sollte dies nicht möglich sein, ist ein flacherer Winkel besser, als dass ein Teil
des Herings nicht im Boden steckt.
7– 9Benutze einen harten Gegenstand, wenn es schwierig ist, den Hering ganz
in den Boden zu schlagen.
Fäst markpinnarna
1– 4Fäst de bakre markpinnarna. Drag därefter ut den främre delen så att golvet
är sträckt och fäst markpinnarna i hörnen.
Korrekt fastsättning av markpinnarna
5Tryck ner alla pinnar i hela sin längd cirka 45 graders vinkel ner i marken.
6Om det inte går att få ner dem i rätt vinkel är det bättre att ha en flackare vinkel
än att låta en del av pinnen sticka upp.
7– 9Om det är svårt att trycka ner pinnen helt, pressa eller slå ned den med
hjälp av en sten.
Peg the corners
1– 4Peg down the two back corners, then pull the front corners taut. After
ensuring that the floor lies straight, peg down the corners.
A note about peg usage
5Press in all pegs completely at about a 45° angle to the surface of the ground.
6It is better to use a shallower angle (closer to parallel to the surface) than it is
to leave a peg sticking up from the ground.
7– 9If it is hard to get the pegs in, use a rock or other hard object to press – or
if necessary, to lightly hammer – them in fully.
| 11
10 |
Hilleberg Nammatj Mesh Inner Tent
sv
en
de
1 2
3 4
5 6
87
Montage der Abspannleinen um den Aufbau abzuschließen
1Wickle das Ende der Abspannleine mit der geknoteten Öse um eine Aufhängung
des Mesh-Innenzeltes seitlich oben am vorderen Gestängebogen.
2– 4Führe das Ende der Abspannleine mit dem Leinenspanner durch die geknotete
Öse und ziehe sie straff.
5Strecke die Abspannleine so lang als möglich aus und verankere sie mit einem Hering.
6Befestige ebenso die zweite Abspannleine an der anderen Seite des vorderen
Gestängebogens und verankere sie mit einem Hering.
7& 8Stelle die Abspannleinen ein, bis das Innenzelt perfekt steht. Sie sollten nur
so stark gespannt werden, dass sie nicht die Form des Zeltes verändern. Setze ggf.
die Heringe um.
Fäst tältlinorna för att slutföra uppsättningen
1För tältlinans ände med den knutna öglan över den främre stången och runt
det ena resårbandet på sidan av tältets gavel.
2– 4För den andra änden av linan genom den knutna öglan och dra åt.
5Justera linsträckaren så linan är så lång som möjligt och fäst den i marken.
6Montera den andra linan på andra sidan av gaveln och fäst den i marken.
7& 8Justera spänningen med linsträckarna och/eller genom att ändra placer-
ingen av markpinnarna.
Attach the guy lines to finish the set up
1Pass the knotted loop end of one of the guy lines over the front pole and around
one of the elastic loops on either side of the center loop.
2– 4Pass the line runner loop end through the knotted loop and pull tight.
5Adjust the line runner so the guy line is as long as possible, then peg down
the guy line.
6Attach the other guy line to the other side and peg it down.
7& 8Adjust the pitch with line runners on the guy line, and/or by adjusting the
placement of the pegs.
| 13
12 |
Hilleberg Nammatj Mesh Inner Tent
SV
EN
DE
1 2
3 4
5Aufbau des Nammatj Mesh-Innenzelts mit einem Hilleberg Tarp
1& 2Stelle alle Abspannleinen am Tarp auf ihre maximale Länge ein. Lege das Tarp
der Länge nach mittig über das aufgebaute Mesh-Innenzelt, sodass die Mittelnaht des
Tarps die Mitte der Zeltstangen kreuzt. Sichere alle Abspannleinen lose mit Heringen.
3& 4Fixiere die Abspannleinen der Mittelnaht in ausreichender Höhe an Bäume
oder Stöcke und spanne einen Giebel ab. Fahre verstellbare Trekkingstöcke maximal
aus, damit Tarp und Innenzelt sich nicht berühren. Stecke die Spitzen durch die Ringe
an den kurzen Seiten des Tarps. Stelle die Stockgriffe am Boden ab und straffe die
Abspannleinen an, damit die Stöcke sicher stehen. Die Konstruktion ist stabiler, wenn
die Stöcke oben leicht nach außen zeigen.
5Straffe die restlichen Abspannleinen an und versetze ggf. die Heringe, bis das
Tarp perfekt steht.
Kombinera ett Nammatj Mesh Innertält med en Hilleberg Tarp
1& 2Lägg ut tarpen på längden över meshinnertältet, centrera den över stän-
gernas mitt och fäst linorna löst med markpinnar.
3& 4Forma en ås med de mellersta linorna på tarpen, antingen genom att fästa
dem i träd eller liknande, eller, som på bilden, med stavar. Förläng stavarna så
att tarpen inte ligger på någon del av tältet. Fäst stavarnas spetsar i ringarna på
mitten av tarpens kortsidor. Placera den andra änden av staven på marken så att
den lutar svagt utåt. Justera linorna så att stavarna står stabilt.
5Justera linorna i hörnen och på långsidorna genom att spänna linsträckarna
och/eller ändra markpinnarnas placering.
Using the Nammatj Mesh Inner Tent with a Hilleberg Tarp
1& 2Lay the Tarp over the Nammatj Mesh Inner Tent lengthwise, center the Tarp’s
middle over the top of the arch in the poles, and peg out all the guy lines loosely.
3& 4Create a “ridge” with the Tarp’s middle guy lines, either by suspending
them from trees, or, as shown, with trekking poles. Extend the poles high enough
so the Tarp does not touch the Mesh Inner, and insert the poles’ tips into the
middle attachment point rings on the Tarp’s sides. Position the poles’ handles on
the ground so the poles have a slight outward angle. Adjust the guy lines to keep
tension on the poles so that they stay upright.
5Adjust the Tarp pitch with the line runners on the guy lines, and/or by adjusting
the placement of the pegs.
| 15
14 |
Hilleberg Nammatj Mesh Inner Tent
sv sv
en en
de de
www.hilleberg.com
Auf unserer Website kannst Du unser gesamtes Sortiment entdecken. Hier findest
Du auch Zubehör – wie Zeltunterlagen, Schnee- und Sandheringe – sowie alle
Ersatzteile – wie Zeltleinen, Gestänge – und vieles mehr.
Erfahre mehr über uns – Hilleberg the Tentmaker – unsere Firmengeschichte,
Philosophie und die Herstellung hochklassiger Zelte. Lese spannende Erfahrungs-
berichte von Expeditionen, die unsere Zelte verwenden, und finde Händler in Deiner
nächsten Umgebung. Wir bieten Dir Informationen, Ausrüstungslisten und prak-
tische Ratschläge, die Dir bei der Planung Deiner nächsten Zelttour helfen können.
Garantie und Reparaturen
Hilleberg the Tentmaker stellt Produkte höchster Qualität her, sowohl im Material
als auch in der Verarbeitung. Alle unsere Produkte haben Garantie auf Produktions-
und Materialfehler. Für genaue Informationen setze Dich bitte mit Deinem Händler
oder Hilleberg the Tentmaker direkt in Verbindung, da sich die Garantiebedingungen
wegenverschiedener Gesetze von Land zu Land unterscheiden können.
achtung! Die Garantie deckt keine Schäden, die durch unsachgemäße Handhabung,
Unglücke, Unachtsamkeit, mangelnde Produktpflege, natürliche Abnutzung, UV-
Strahlung oder anders entstanden sind.
Reparaturen, die nicht unter die Garantie fallen, werden zum Selbstkostenpreis
durchgeführt. Wende Dich hierfür an Deinen Händler oder direkt an Hilleberg the
Tentmaker.
www.hilleberg.com
Välkommen till vår websida där du kan se hela Hillebergs kollektion inklusive till-
behör, exempelvis skyddsgolv, snö- och sandpinnar och reservdelar som tältlinor,
stänger mm.
Dessutom kan du se mer om Hilleberg the Tentmaker, inklusive vår historia, var
du hittar våra återförsäljare och expeditioner som använder Hillebergtält. Du hit-
tar dessutom information, utrustningslistor och praktiska råd som kan hjälpa dig
i planeringen av dina turer.
Garantier och Service
Hilleberg the Tentmaker gör produkter av högsta kvalitet i material och tillverkning. I
våra produkter ingår garanti mot felaktigheter i tillverkning och material. För detaljer
kontakta din butik eller Hilleberg direkt då garantierna kan skilja mellan olika länder
beroende på lagar och bestämmelser.
observera: Garantin gäller ej för skador uppkomna på grund av oaktsamhet, olyckor,
felaktig hantering eller bristande utrustningsvård. Effekter av normalt slitage eller
exponering för UV-strålning och liknande täcks inte heller av garantin.
Reparationer som ej täcks av garantin utför vi till en rimlig kostnad. Kontakta den
butik där du köpt tältet eller Hilleberg direkt.
www.hilleberg.com
Please visit our website to see details of the entire Hilleberg collection as well as
available accessories, such as extra poles, pegs, Snow & Sand Pegs, and guy line
and line runners.
In addition, you can learn more about Hilleberg the Tentmaker, including our his-
tory, dealer locations, and expeditions that use Hilleberg tents. You will also find a
wealth of information to help you better enjoy your outdoor adventures, including
practical advice and equipment lists.
Warranty and Repair
Hilleberg the Tentmaker prides itself on making products with the highest quality
materials and workmanship. We offer a comprehensive warranty against material
and manufacturing defects. Since laws and regulations sometimes differ, warranty
coverage may vary from country to country. For the specific details of our warranty in
your region or country, please contact your dealer or the appropriate Hilleberg office.
please note: Our warranty does not cover damages from ordinary wear and tear,
the effects of UV exposure, accidents, inappropriate use or handling, or damages
resulting from the user’s failure to care properly for the product.
For any repairs not covered by the warranty, we will charge a reasonable rate. Please
contact your region or country’s appropriate Hilleberg office.

Other Hilleberg Camping Equipment manuals

Hilleberg MESH BOX User manual

Hilleberg

Hilleberg MESH BOX User manual

Hilleberg ALLAK User manual

Hilleberg

Hilleberg ALLAK User manual

Hilleberg SOULO User manual

Hilleberg

Hilleberg SOULO User manual

Hilleberg SAIVO User manual

Hilleberg

Hilleberg SAIVO User manual

Hilleberg Muddus User manual

Hilleberg

Hilleberg Muddus User manual

Hilleberg ANJAN GT User manual

Hilleberg

Hilleberg ANJAN GT User manual

Hilleberg ROGEN User manual

Hilleberg

Hilleberg ROGEN User manual

Hilleberg MESH RIDGE User manual

Hilleberg

Hilleberg MESH RIDGE User manual

Hilleberg Akto User manual

Hilleberg

Hilleberg Akto User manual

Hilleberg Stalon Combi User manual

Hilleberg

Hilleberg Stalon Combi User manual

Hilleberg Jannu Configuration guide

Hilleberg

Hilleberg Jannu Configuration guide

Hilleberg UNNA User manual

Hilleberg

Hilleberg UNNA User manual

Hilleberg ALTAI User manual

Hilleberg

Hilleberg ALTAI User manual

Hilleberg ROGEN User manual

Hilleberg

Hilleberg ROGEN User manual

Hilleberg ANJAN User manual

Hilleberg

Hilleberg ANJAN User manual

Hilleberg Staika User manual

Hilleberg

Hilleberg Staika User manual

Hilleberg TARRA User manual

Hilleberg

Hilleberg TARRA User manual

Hilleberg SOULO User manual

Hilleberg

Hilleberg SOULO User manual

Hilleberg NALLO User manual

Hilleberg

Hilleberg NALLO User manual

Hilleberg SAITARIS User manual

Hilleberg

Hilleberg SAITARIS User manual

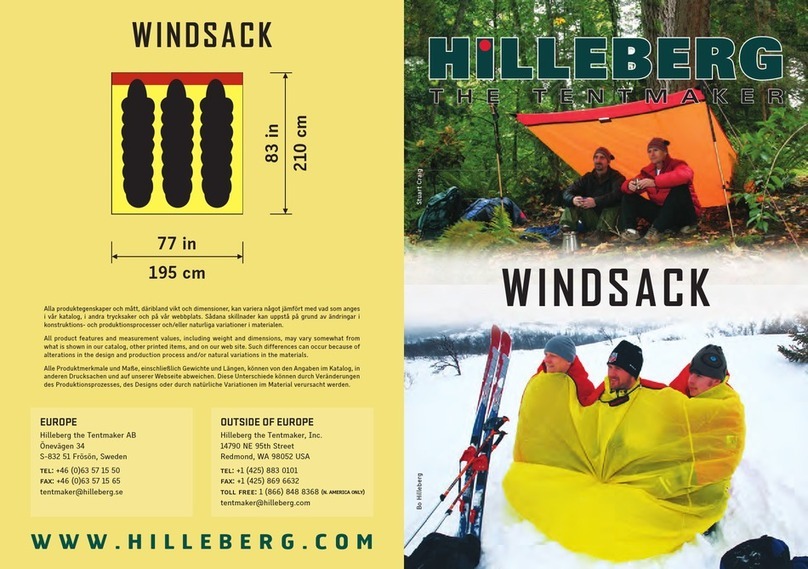
Hilleberg Windsack User manual

Hilleberg

Hilleberg Windsack User manual

Popular Camping Equipment manuals by other brands

GOAL ZERO Light-A-Life 350 user manual

GOAL ZERO

GOAL ZERO Light-A-Life 350 user manual

FLORABEST 278116 Instructions for use

FLORABEST

FLORABEST 278116 Instructions for use

Rainier KESTREL Assembly

Rainier

Rainier KESTREL Assembly

Cadac CAMP CHEF LP 6530L1 User instructions

Cadac

Cadac CAMP CHEF LP 6530L1 User instructions

Zempire AEROBASE 3 instructions

Zempire

Zempire AEROBASE 3 instructions

Primus II Series quick start guide

Primus

Primus II Series quick start guide

Oypla leisure 4811 user manual

Oypla

Oypla leisure 4811 user manual

Clam Corp Fish Trap Guide 8060 instruction manual

Clam Corp

Clam Corp Fish Trap Guide 8060 instruction manual

LACAL FC-04-100 manual

LACAL

LACAL FC-04-100 manual

Vango ODYSSEY HUB Pitching instructions

Vango

Vango ODYSSEY HUB Pitching instructions

Regatta ATLIN 6 manual

Regatta

Regatta ATLIN 6 manual

Pyle Sports PSDNL22 Manual guide

Pyle Sports

Pyle Sports PSDNL22 Manual guide

Hatteras Hammock Caddy instructions

Hatteras

Hatteras Hammock Caddy instructions

GSI Outdoors JAVAPRESS manual

GSI Outdoors

GSI Outdoors JAVAPRESS manual

Coleman Bayside 9277A151 instructions

Coleman

Coleman Bayside 9277A151 instructions

Snow Peak CK-226 instruction manual

Snow Peak

Snow Peak CK-226 instruction manual

NEIL CAMPER 2023 Use and installation  manual

NEIL

NEIL CAMPER 2023 Use and installation manual

OZtrail DTMENSPU-B owner's manual

OZtrail

OZtrail DTMENSPU-B owner's manual

manuals.online logo
manuals.online logoBrands
  • About & Mission
  • Contact us
  • Privacy Policy
  • Terms and Conditions

Copyright 2025 Manuals.Online. All Rights Reserved.