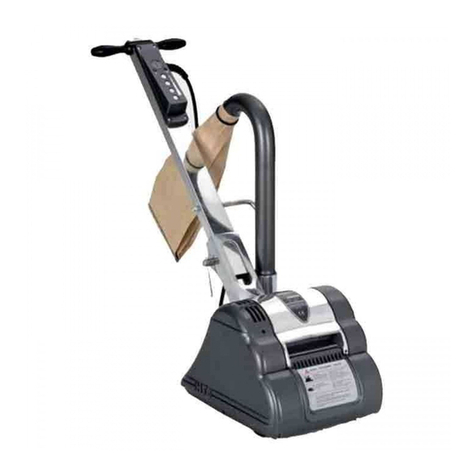
HireTech HTF System manual

2016/11 © Hiretech Part # 031390
OWNERS MANUAL & OPERATING INSTRUCTIONS
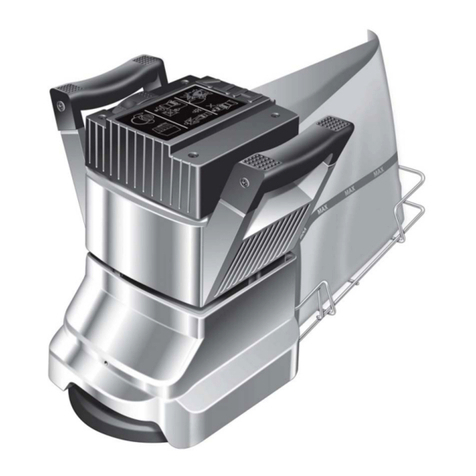
HTF ORBITAL FLOOR & DECK SANDER
From Serial Number
01407 (240/240 Volt) & 01181 (110/120 Volt)

WARNING
For safe operation of this machine, read and understand all
instructions. Look for the ‘warning/caution’ symbol.
This symbol means that if you do not follow the instructions
injury can occur to the operator and damage to the
machine and floor may result.
WARNING: Risk of explosion.
Floor sanding can result in an explosive mixture of fine
dust and air. Use this floor-sanding machine only in a well-
ventilated area free from any flame, match or source of
ignition.
WARNING: Risk of fire.
Never leave the floor sander unattended with dust in the
dust bag.
WARNING: Risk of potential injury.
Moving Parts - to reduce the risk of injury, unplug the
machine before replacing abrasive sheets or carrying out
any form of adjustment or servicing.
NORTH AMERICAN SAFETY INSTRUCTIONS
WARNING: This floor sanding machine must be grounded.
This floor-sanding machine shall be grounded while in use to protect
the operator from electric shock. The machine is provided with a
three-conductor cord and a moulded three-contact grounding
type attachment plug to fit the proper grounding type receptacle.
The Green (or Green and Yellow) conductor in the cord is the
grounding wire. Never connect this wire to any pin other than the
grounding pin of the attachment plug.
This floor-sanding machine is provided with an attachment plug
as shown in sketch A. It is intended for use on a nominal 120 volt
circuit. If a properly grounded receptacle as shown in sketch A
is not available, an adaptor as shown in sketch ‘C’ should be
installed as shown in sketch B if the outlet box that houses the
receptacle is grounded. Be sure to fasten the grounding tab with a
metal faceplate screw.
MAINS CABLE WIRING - PLUG
USE & APPLICATION
This machine is intended for commercial use connected with the
laying and maintaining of wooden floors and decks.
These types of surfaces may be found both in commercial and
household environments.
SPARE PARTS
Use Hiretech genuine spare parts only for service and repair.
Use of non-approved parts will void the product warranty. See
the back cover of this manual for the terms and conditions of the
Hiretech Limited Warranty.
Hiretech reserves the right to make changes or improvements to it’s
products without prior notice.
For the latest product news and updates, spare parts, downloads
and service information visit www.hiretech.biz.
ATTACHMENT PLUG SKETCH ‘C’
METAL
SCREW
COVER OF GROUNDED
OUTLET BOX SKETCH ‘B’
ADAPTER
GROUNDING
MEANS
COVER OF GROUNDED
OUTLET BOX SKETCH ‘A’
GROUNDING PIN
CONTENTS
WARNING 1
NORTH AMERICAN SAFETY INSTRUCTIONS 1
MAINS CABLE WIRING - PLUG 1
USE & APPLICATION 1
SPARE PARTS 1
SPECIFICATION 2
SAFETY 2
ASSEMBLY & TRANSPORT 2
INSTALLING ABRASIVE 3
PREPARATION 3
OPERATION 3
HTF SANDING WEIGHT 4
SET UP 4
HOW TO USE 4
WHEN TO USE 4
FLOOR SANDING TECHNIQUE 5
FLOOR TYPES 5
FLOOR SANDING TECHNIQUE 6
FLOOR SANDING ABRASIVE GUIDE 6
SERVICE & ROUTINE MAINTENANCE 7
ELECTRICAL TESTING 8
FAULT FINDING 8
PARTS DIAGRAM 9
PARTS DIAGRAM 10
PARTS LIST 11
CIRCUIT DIAGRAM 12
1© Hiretech

SPECIFICATION
The HTF Orbital Floor & Deck Sander will sand wood floors and
most types of decking, including fine parquet, engineered and pre-
finished wood flooring systems, cork and composition floors to a
fine finish. Ideal for sanding between coats of floor varnish and
lacquers were a very high quality, score free finish is required. The
finally balanced orbital action will not leave swirl marks in the floor
surface which may be highlighted when varnished. Designed for
sanding floors that are level and in generally good condition were
the existing varnish has worn and requires re-finishing. Completely
self contained with a powerful dust pickup the HTF-2 is a high
performance floor sander suitable for professional and home
owner use.
Power Supply 110/120 V 50/60 Hz
220/240 V 50/60 Hz
Off Load Current 110/120 V 8A
220/250 V 5A
Average Load Current 110/120 V 15A
220/250 V 8A
Noise 95dBa at 1metre (3’ 3”)
Vibration 8.89 m/s² r.m.s.
Switch Bias Off, double pole.
Motor Continuous heavy duty AC/
DC self cooling 4 brush.
Motor RPM 10,000
Sanding Pad RPM 3,000
Sanding Pad 400mm (15¾”) x 115mm
(4½”) MDF back with hook
and loop face.
Drive Non-slip toothed timing belt
and toughened steel pinion
and drive gear.
Moving Parts Sealed for life ball bearings.
Dust Pickup Seated oversize vacuum fan,
disposable paper dust or cloth
bag
Abrasive 400mm (15¾”) x 115mm
(4½”) random fibre abrasive
pad 280 grit and backing
pad.
400mm (15¾”) x 115mm
(4½”) anti-clog adhesive
backed sheet 40 to 180 grit
Power Cable 7m (23’) Non-marking outer
insulation.
Weight Net 45.0kg (94.8lbs) excluding
HTF weight.
Shipping Weight 52.0kg (110.3lbs)
Shipping Dimensions 77 x 39 x 57cm
(30.3” x 15.4” x 22.4”)
Warranty 2 years
Read the following Safety and Operational notes before
using your Hiretech Floor Sander.
SAFETY
1. For safety it is recommended that a residual current circuit
breaker (ground fault interrupter) is used with this machine.
2. Check the operating voltage is correct and that the machine is
switched OFF (O) before connecting to the power supply.
3. Never attempt to lock the switch in the ON (I) position with
tape or by any other means.
4. Always disconnect from the power supply when changing the
abrasive, servicing the floor sander, replacing the dust bag or
leaving the machine unattended.
5. Always replace the dust bag when the dust in the bag reaches
the ‘MAX’ line or when the machine is left unattended.
6. Never dispose of or empty the contents of the dust bag into a
fire or incinerator.
7. Never reuse the paper dust bag or use a non standard bag.
8. Always wear a dust mask when using the floor sander,
handling the dust bag or cleaning the machine after use.
9. Wear ear protection when using the floor sander.
10. Ensure adequate ventilation of the work area to avoid the
formation of a combustible mixture of flying dust and air.
11. Never smoke when using or servicing the floor sander or when
handling the dust bag. Make sure that all possible sources of
ignition are removed from the work area.
12. Never expose the machine to rain or damp. Always store in a
dry place.
13. Stop the floor sander immediately if damage to the machine
or abrasive is suspected.
14. Never allow the power cable to come into contact with the
sanding pad when the floor sander is in operation. If the
power cable becomes damaged and the inner conductors
are exposed switch the power OFF (O) and remove the plug
before attempting to move the machine. The cable must be
replaced by an authorized agent or qualified electrician using
genuine Hiretech© pare parts only.
15. Keep hands, feet and loose clothing away from all moving
parts of the machine.
16. Punch down or remove all nails, screws, tacks and other
fixings from the floor before sanding to prevent contact with
the sanding pad.
17. Keep children and pets clear at all times.
18. If the machine should fail to operate refer to the fault finding
guide on page 8.
ASSEMBLY & TRANSPORT
1. The HTF-2 breaks down into two component parts, the main
body and handle assembly for easy handling and transport.
To assemble loosen the Handle Clamp Handle and fit the
handle assembly to the Handle Yoke which should be locked
in the upright position. Tighten the Handle Clamp firmly.
2. Pull the Dust Bag Frame down to its operating position.
Connect the Handle Cable to the Body Twist Lock at the rear
left hand side of the floor sander body. Align the plug with the
pins, push in and twist clockwise to lock.
3. Fit a Hiretech disposable paper dust bag following the
instructions printed on the bag.
4. Tip the floor sander back so that it rests on the Dust Bag Frame
to fit the selected abrasive. Remove the power cable from the
handle assembly. Check that the cable is in good condition
2© Hiretech

and the strain relief and plug are secure. The floor sander is
now ready to connect to the power supply and start sanding.
5. To dismantle the floor sander reverse the procedure 1 to 4
above.
6. Always carry the floor sander by the front hand grip and the
handle yoke which must be locked in the upright position with
the handle detached. The dust bag frame should be stowed in
the up position.
HTF Main Components
WARNING: Never carry the floor sander by the handle
assembly and body or with the handle assembly attached.
Failure to observe this rule may result in personal injury
and/or damage to the floor sander.
7. Transport the sander with the sanding block and abrasive
pad in place this will help maintain the dust brushes in good
condition. Always ensure that the floor sander is secure and
cannot move when being transported in a vehicle. The floor
sander is heavy. Take care when lifting and carrying the
machine.
INSTALLING ABRASIVE
1. Ensure the power cable is disconnected from the power
supply.
2. Lock the handle in the upright position and tip the floor sander
backwards so that it rests on the dust bag frame. If a sanding
block is already fitted the abrasive may be fitted with the
sanding block left in place or it may be removed if required.
To remove the sanding block take hold of each end of the
block and pull it off its mounting posts. Take care to pull the
block off evenly and avoid trapping your fingers between the
block and the body of the floor sander.
3. Refer to the Abrasive Guide on page 6 for the correct abrasive
to use.
4. Abrasive Pad - fit an abrasive pad to the sanding block.
Carefully line the pad up with the face of the sanding block
and push down. The pad is both a fine abrasive and a
backing pad for the coated abrasive sheets. It is important
that the pad is maintained in good condition and not used
beyond its useful working life.
CAUTION: Do not use any other type of abrasive pad
or backing material as this may damage the floor and/or
floor sander.
5. Abrasive Sheets - peel off the backing to exposure the adhesive
back and carefully fix the abrasive to the face of the abrasive
pad making sure it is in line. When changing abrasive sheets
peel off carefully so as not to destroy the face of the abrasive
pad.
6. With the abrasive fixed to the sanding block re-fit the block (if
removed) to the floor sander.
7. Stand the floor sander up, it is now ready to use.
8. Periodically check that the abrasive pad is still in line with
the sanding block. If the machine is tipped back when in
operation the abrasive pad may become misaligned.
PREPARATION
1. Where possible remove all furniture from the room. The HTF-2
Floor Sander features an efficient dust pick-up, however, some
dust will escape. Protect all vulnerable furnishings with dust
sheets, masking films and tape.
2. Remove all tacks, staples and other unwanted fixings from the
floor. Failure to do so will result in damage to the sanding pad
and abrasive sheet or pad.
3. Punch all nails below the surface of the floor using a suitable
nail punch and hammer. Any screws used to fix boards should
be counter sunk below the surface. During sanding, any nails
or screws that become exposed must be punched or counter
sunk further.
4. Firmly fix all loose boards or blocks.
5. Remove heavy wax, grease and dirt deposits by hand.
6. Sweep and vacuum the floor thoroughly to remove dirt and
discarded fixings.
7. Ensure good ventilation by opening windows.
OPERATION
1. Move the floor sander to the location of your work.
2. Make sure the switch is in the OFF (O) position then connect
the main cable to a suitable power supply ideally located
behind or to one side of the machine and work area.
3. Wear a dust mask and ear defenders.
4. Hold the handle with both hands and depress foot pedal with
your right foot. This will release the handle.
5. Switch ON by pushing the ON/OFF switch down using the
thumbs of one hand to ON (I) position and hold in place.
Start moving immediately. To switch OFF (O), release the
pressure on the switch and it will automatically return to the
OFF position.
CAUTION: the HTF-2 Floor Sander is a powerful machine
always ensure you have a firm grip before switching on.
6. Follow the instructions carefully for sanding and re-finishing a
floor. Walk slowly forward and back, working progressively
across the floor. Do not dwell in one place. The floor sander
will glide easily across the surface of the floor.
7. When the dust in the dust bag reaches the ‘MAX’ line stop
sanding. Switch OFF, disconnect the power cable from the
power supply and remove the paper dust bag. Turn the top
of the paper dust bag over to stop the escape of dust and
3© Hiretech

dispose of into a suitable container. Fit a new paper dust bag.
Reconnect to the power supply and continue sanding. Never
reuse the paper dust bag or attempt to empty it.
6. Change the abrasive when the quality of the sanding is
reduced or the abrasive becomes clogged.
7.. When taking a break from work switch OFF (O) and
disconnect the power cable from the power supply, remove
and dispose of the paper dust bag.
9. On completion disconnect the power cable from the power
supply. Remove and dispose of the paper dust bag. Lock the
handle in the upright position and stow the power cable. Lock
the dust bag frame in its up position. Leave the old abrasive pad
in-place to protect the dust brushes. Carry out maintenance as
recommended in Maintenance and Servicing.
DANGER: never leave the floor sander unattended with
dust in the dust bag. Always remove the dust bag and
dispose of into a suitable container.
CAUTION: to prevent damage to the floor surface, work
piece or machine follow these rules.
i. Always ensure that the floor sander is moving when in
operation and the sanding pad is in contact with the
floor.
ii. Never lift the back or front of the machine when sanding.
iii. Never apply pressure to try and increase the rate of
sanding. Damage to the floor will occur.
iv. Never bounce or drop the floor sander on to the floor,
always lower the machine gently.
v. Never dwell in one place, move steadily at all times.
vi. Never allow the power cable to come into contact with
the sanding pad.
HTF SANDING WEIGHT
The HTF is a high performance orbital floor sander designed for the
sanding and refinishing of all types of wood flooring and decking.
Wood floors and decks come in a wide range of soft and hard
woods with many different types of stains and finishes. Productive
sanding means getting the abrasive to cut at its optimal speed
and pressure for the type of wood and surface finish that is being
sanded.
The HTF Sanding Weight allows the operator to add weight to
the HTF via a simple ‘clip on clip off’ system to optimize sanding
performance when needed.
SET UP
The HTF Sanding Weight is supplied ‘empty’ and must be filled to
add weight. Use builders sand as detailed below.
1. Remove the cap.
2. Fill the HTF Sanding Weight with dry builders sand, also
known as sharp sand or concreting sand, using a hand trowel.
As you fill the weight with the first few trowel full’s shake the
weight to help settle the sand into the corners.
Do not use coarse sand or aggregates with stones. Use dry
sand only. Do not fill with water or any other fluid.
3. When the weight is approximately half full fit the weight to the
HTF (see below ‘How to Use’). Place the HTF on a wooden
board that you can sand. Fit an abrasive backing pad and a
HTF sanding sheet of any grit. If you have a used abrasive
backing pad and sanding sheet use these.
4. Run the HTF for two (2) minutes to vibrate the sand down into
the weight, Remove the weight and continue to fill with sand.
5. Repeat operation 3 and 4 above until the weight is full and
the sand is approximately 2.5cm (1”) from the top of the cap.
Refit the cap.
Do not over fill. Take care that any spilt sand is brushed off the
weight before fitting to the HTF. Do not allow sand to enter the
HTF motor or any other working parts.
When full the weight will be approximately 27kg (63lbs). As
the HTF is used the sand will settle and become more compact
within the body of the weight. Additional sand can be added
if required. Do not exceed the recommended maximum weight
of 30kg (66lbs).
Note the actual weight will vary depending on the grade and type
off sand used.
MAXIMUM WEIGHT : 30kg (66lbs)
HOW TO USE
1. The HTF Sanding Weight is simply clipped onto the HTF. Use
both hands to lift the weight, holding the weight as illustrated
below.
2. Stand in front of the HTF and rest the front edge of the weight
onto the HTF base. Then tip the weight back so that the back
lugs fit over the back edge of the HTF base. Take care not to
trap your fingers between the weight and the HTF handle.
3. To remove the weight reverse the procedure as detailed in 2
above.
WHEN TO USE
Use on hard wood floors and engineered floors with hard surface
finishes. Use with 40 grit and 60 grit abrasives for rapid stock
removal.
Note that to much weight will increase friction and reduce the life
of the abrasive. The abrasive will only ‘cut’ as deep as the abrasive
grit size. Always test sand first before using the HTF Sanding
Weight.
4© Hiretech

FLOOR SANDING TECHNIQUE
HT8 Drum Floor Sander - a powerful floor sander designed for the
rapid levelling and sanding of all types of wood flooring excluding
thin laminated or veneered floors. Load the sander with abrasive
making sure that it is skin tight around the drum. Loose sheets
will tear. Place the sander on the right hand wall (unless you are
making an angled cut on uneven floors) with about two thirds of
the floor in front of you. Start the sander with the drum off the floor
then walk forward at an even pace and ease the drum on to the
floor. As you near the end of the pass, gradually raise the drum
off the floor. Practice this technique before turning on the sander.
Cover the same path you made on the forward cut by pulling the
machine backwards and easing the drum to the floor as you begin
the backward pass until you reach the original starting point, then
ease the drum off the floor.
When two thirds of the floor is sanded, turn the floor sander around
and sand the remaining third in the same way. Overlap the one
third area by 0.6 to 0.9 meters (2 to 3 feet ) with the two thirds
area to blend the two areas together.
WARNING: never bounce the sanding drum or dwell
in one place as this will sand dips and hollows in the floor.
HT7 Disc Floor Sander (Edger) - a powerful disc floor sander
designed for sanding along the edges of a floor without damaging
the baseboards or mouldings. Also suitable for smaller areas
where the HT8-1.2 Floor Sander will not reach like stair treads and
closets load the abrasive disc making sure the retaining bolt is tight.
Start the edger with the disc off the floor then lower the disc to
the floor as you move the sander. Work progressively moving the
sander in a sweeping motion from side to side.
HTF Orbital Floor Sander - a orbital action floor sander designed
for re-finishing, sanding between coats of varnish and re-surfacing
floors in good condition. Load the abrasive sheet, pad or strip.
Start the sander, move immediately and sand in the direction of
the grain using the same technique as the drum floor sander. For
difficult to reach areas use the disc floor sander with a fine grit
abrasive, or sand by hand.
Hand Sanding - to sand difficult to reach areas scrape and sand
the floor by hand. Use a scraper to remove old finishes, always
scraping in the direction of the grain, and then sand by hand using
the same grit abrasive as you finished with when machine sanding.
See Floor Sanding Technique diagrams on page 6.
FLOOR TYPES
Plank & Strip Floors
Old floors in good condition - when the floor is in good condition
- no uneven edges, cupping or crowning of planks and strips - and
you want to re-surface the floor, sanding back to new wood, start
sanding in the direction of the planks or strips - with the wood grain.
Start with a medium grit abrasive. Complete the first cut with the
HT8-1.2 Floor Sander then sand up to the baseboards and door
thresholds with the HT7-2 Disc Floor Sander, using a medium grit
abrasive, blending the edges in with the main floor area. Sweep
the floor. Using a medium/fine grit abrasive, sand the main floor
area with the drum sander and then complete the floor with the
edger using a fine grit abrasive. Sweep the floor. Finish sanding
the main floor area with the drum floor sander using a fine grit
abrasive. If the floor is in particularly good condition (level with no
deep scratches or blemishes) you may re-surface the floor using the
HTF-2 Floor Sander, however, as the sanding action of this machine
is less aggressive than the HT81.2 Floor Sander the job will take
more time.
Uneven floors - when the floor is uneven sand diagonally at 45o
across the room in both directions using the HT8-1.2 Floor Sander
with a coarse grit abrasive. Only make one cut on both diagonals,
this will achieve a basic level. Now complete the floor as for a
level strip or plank floor. Use the same grit abrasive as was used
on the 45o cut for the first cut parallel to the planks or strips.
Floors with an existing finish - when re-finishing a floor remove as
little of the existing surface as possible. If the old finish is worn and
the floor is generally in good condition use the HTF-2 Floor Sander
with Hiretech abrasive pads and strips which have been especially
designed for re-finishing floors. These will maintain the integrity of
any stain used to colour the wood and prepare the surface for a
new coat of finish. If the floor is badly marked and scratched and
has to be sanded back to new wood use the HT8-1.2 Floor Sander
and HT7-2 Disc Floor Sander. Always try a medium grit paper first,
particularly on a diagonal cut. If 90% of the old finish is removed
and the floor is generally levelled, you do not need to use a coarse
grit abrasive.
Engineered and Thin Floors
Use the HTF-2 Floor Sander for engineered or thinner floors that
may have been subjected to repeated sanding. The HTF-2 will
remove old surface finishes and prepare the floor for re-finishing.
Sand the floor using the same method as a strip, plank, or parquet
floor. If the floor has deeper scratches or marks these should be
sanded out by hand and blended in with the main floor. To check
the wood depth in the floor remove a baseboard or moulding from
around the edge of the floor. This should provide access to the
edge of the floor for inspection.
Parquet & Block Floors
The grain of the wood will run in a number of directions so sand
the floor in the direction of the main source of natural light in the
room. If there is no source of natural light sand in the direction of
the longest side of the room or, if the room is square, in the direction
the furniture is laid out and how people normally use and view the
room.
This technique will help mask any imperfections in the floor.
Complete the sanding operation as detailed for plank or strip
floors.
Between Coats of Finish (varnish)
Use the HTF-2 Floor Sander to sand between coats of floor finish,
particularly when using water based varnishes. These types of
finishes tend to raise the wood grain when first applied to raw
wood. Allow each coat of varnish to dry completely following
the manufactures directions. Use Hiretech abrasive pads to sand
between each coat of varnish. The fine abrasive pads will remove
light brush/applicator marks and raised grain while maintaining
the integrity of the coat of varnish applied.
5© Hiretech

6
DO NOT OVER-SAND USE ONLY AS HEAVY GRADE ABRASIVE AS IT TAKES TO DO THE JOB. PROGRESS
FROM FIRST GRADE USED THROUGH FOLLOWING GRADES TO REMOVE ALL VISIBLE SANDING MARKS.
DO NOT MISS A GRADE.
Abrasive Grade Floor Type and Condition
Grit P24 Open Coat
(Very Coarse non-glogging)
For removing surface coatings from old floors such as varnish, stains and wax
polishes. For the rapid sanding and removal of scratches and marks. Sanding
level the joints of sub-flooring like particle board and masonite.
Grit P24
(Very Coarse)
For the rapid sanding and removal of scratches and marks. Sanding level the
joints of sub-flooring like particle board and masonite.
Grit P36 to P50
(Coarse/Medium)
For removing surface coatings from old floors such as varnish, stains and wax
polishes. For the rapid sanding and removal of scratches and light marks.
Sanding level the joints of sub-flooring like particle board and masonite.
Grit P60 to P80
(Medium)
For the rapid sanding and removal of scratches and light marks. Sanding level
the joints of sub-flooring like particle board and masonite.
Grit P100 to P120
(Medium/Fine)
Intermediate sanding of all types of wood floor. For final sanding of all types
of wood floor.
Grit P150 - P180
(Fine/Very Fine)
For final sanding of all types of wood floor. First sanding of cork or
composition floors. For sanding between coats of solvent based and 2 pack
varnishes.
FLOOR SANDING TECHNIQUE
Hiretech Abrasives
HT8/DU8
FLOOR SANDER
SHEET
20 & 50/CASE
HT8 EX
FLOOR SANDER
BELTS
5/CASE
HT7/SUPER 7
EDGER DISC
FIBRE BACKED
25/CASE
HT7/SUPER 7
EDGER DISC
PAPER BACKED
25 & 50/CASE
HTF FLOOR
SANDER SHEET
ADHESIVE
BACKED
HTF ABASRIVE
PAD
20/CASE
Hiretech recommend
the following abrasive
range which are suitable
for all floor types and
P16 - - 01025 - - -
P24 Grit Open Coat 01001 - - 01044 - -
P24 Grit 01002 01010 01026 - - -
P36 Grit -01011 ----
P40 Grit 01003 01012 -0104501750-
P50 Grit -01013 01027---
P60 Grit -01014 --01751-
P80 Grit 01004 01015 01028 01046 01752 -
P100 Grit -01016 ----
P120 Grit 01005 01017 01030 01048 01754 -
P150 Grit -01018 ----
P180Grit ----01756-
P280 Grit/Backing Pad -----01769
FLOOR SANDING ABRASIVE GUIDE
© Hiretech

SERVICE & ROUTINE MAINTENANCE
CAUTION: maintenance and repairs must be carried out
by authorized personnel only. To prevent injury, always
remove the power cable from the power supply before
undertaking any work on the machine. Do not operate this
machine unless it is fully assembled and all guards are in
place. Use Hiretech genuine spare parts only.
General
1. Always make a list when first examining the machine, to
remind you of parts or action needed on completion of routine
maintenance.
2. The HTF-2 Floor Sander is subject to high speeds and
vibration, all screws should be fitted using a suitable thread
lock compound.
3. The HTF-2 Floor Sander needs no lubrication during routine
servicing.
4. Always ensure that the electrical supply is disconnected
before starting any routine servicing or repair.
5. Follow a regular schedule of routine maintenance to keep
your HTF-2 Floor Sander in good working.
Visual Inspection
1. To clean the machine and remove dust, use a vacuum cleaner
to avoid damage and prevent inhalation of dust.
2. Examine all external parts of the floor sander making sure
there is no damage. Check the condition of the Dust Brush
and Bumper around the base of the floor sander, both of
which should be undamaged and in good condition. Check
that the Handle Yoke unlocks and moves freely in its operating
position.
3. Examine the sanding pads. These should be undamaged and
in good condition. They should fit firmly to the fixing posts and
pivot slightly forward and back.
4. Examine the power cable for damage. If the outer insulation
shows the slightest of abrasions or the inner conductors are
exposed then the cable must be replaced. The cable must not
be repaired with tape or insulation sleeve.
5. Ensure all labels are sound, readable and secure.
6. Check that the rear wheels are sound and moving freely. If a
wheel is found to be loose or damaged then the floor sander
will not sand or handle properly. Check and reset the wheels
(see Setting the Wheels on page 8). Replace damaged
wheels.
7. Check the condition of the Dust Bag Frame making sure that
it hinges down in to its operating position and locks securely
when stowed.
Dust Control
1. Remove the handle and lay the floor sander on its face.
Remove the sanding pad if fitted and inspect the underside for
the build up of dust or pieces of abrasive. Clean as required.
2. Inspect the condition of the Dust Brush. The brush should be
replaced if damaged or badly worn.
Drive
1. The dive gears and drive belt do not require maintenance
under normal operating conditions.
Lubrication
1. The HTF-2 Floor Sander features sealed for life bearings
which do not require any lubrication. In the unlikely event that
a bearing has to be replaced use a Hiretech genuine spare
part only as the grease contained in the bearings is special.
A standard bearing is not suitable and may result in further
damage.
Care of Motor
1. The motor must be kept clean and free from grease and dust.
2. The motor brushes must be checked regularly. Replace
ALL FOUR motor brushes when any one brush has worn to
12mm (1/2”) or less in length. Brushes MUST slide freely in
the brush holders.
There is no need to remove or disconnect any internal leads
when changing the brushes, only the small braided shunt
(pigtail) connected to the motor brush is disconnected to
release the brush.
3. To replace the motor Brushes ;
i. Remove the four screws from the Motor Cover and lift the
cover off.
ii. Remove the four Spring Brushes and set to one side. The
springs are removed by pushing the spring tag in towards
the brush and lifting out.
iii. Using a cross recess screwdriver remove the four brush
shunt (pigtail) retaining screws and lock washers.
iv. Remove the four brushes.
v. Thoroughly clean the brush assembly and housing using
a soft brush and a suitable vacuum cleaner.
vi. Inspect the four brushes for damage or wear and if any
one brush is found to be damaged or worn to a length
of 12mm (1/2””) or less in length then replace all four
brushes. Always replace all four brushes together.
Motor Brush
vii. When replacing brushes ensure that each brush moves
freely in each brush holder and fit the brush with the shunt
(pigtail) in such a position as to allow free movement
throughout the brushes life. Ensure that each brush shunt is
connected securely with the screw and lock washer (two
spare screws and washers are provided with each pack
of brushes). The brush should be fitted so that the brush
shunt (pigtail) is at the bottom of the brush.
viii. Refit the brush springs by inserting into the holder with the
coil spring over the brush then push in until
the tag comes into contact with the holder, slide the tag
away from the brush and release. The brush spring will
clip into position. Check the springs and brushes for
correct alignment and free movement.
ix. Finally check that all leads and cables are clear of
moving parts and will not be trapped when refitting the
cover motor.
Minimum Brush Length
12mm ( /” )
1
2
7© Hiretech

x. Refit the cover motor and secure with the four screws.
Setting the Wheels
CAUTION: under normal operating conditions the
wheels should not have to be adjusted. However, should
you suspect the wheels have gone out of adjustment follow
the procedure below to check and reset the wheels.
1. Remove the handle and turn the floor sander upside down so
that it rests on the motor cover. Take care, the floor sander is
heavy and can easily over balance. Make sure that it is well
supported.
2. Fit the sanding block to the floor sander, making sure that it is
firmly seated.
3. Place a block of wood or other solid material on the face of
the sanding block 16mm (5/8“) high by 114mm (4½”) wide
across the full width of the sanding block.
4. Place a straight edge, a steel rule is best, across the centre of
one wheel and the block of wood. If the wheels are adjusted
correctly there will be no gap across the whole width of the
block. If you see a gap the wheels need adjustment.
If the gap is at the rear of the block toward the back of the
floor sander, the wheels are too low. If the gap is at the front
of the block, toward the front of the floor sander the wheels
are too high.
5. If the wheels need adjustment. Loosen the Axle Clamp screws
located under the axle which will be facing you when the floor
sander is upside down resting on the motor cover.
6. Rotate the axle via the socket head screw located in the centre
of the wheels. As you rotate the axle via the socket head
screw the wheels will rise or fall . Adjust the wheels so that the
straight edge rests on the centre of the wheels and the wood
block so that there is no gap across the whole width of the
block.
8
7. When the wheels are correctly adjusted tighten the axle
clamp screws. Check the socket head screws in the centre of
the wheels are tight.
ELECTRICAL TESTING
CAUTION: testing for electrical safety should only be
undertaken by a competent person and all results recorded.
Do not exceed 1250 volt insulation test duration of 3
seconds
1. Examine the power cable for damage. If the outer insulation
shows the slightest of abrasions or the inner conductors are
exposed then the cable must be replaced. The cable must not
be repaired with tape or insulation sleeve.
2. Open and check the mains plug for condition, loose
connections, damaged wires etc. Ensure that the strain relief of
the plug is correctly secured to the outer cable insulation. This
does not apply if the plug is moulded on to the power cable.
3. Remove the question switch housing screws and lift separate
the switch housing. Check the switch, connections, leads
etc. Pay special attention to any gaskets, ‘O’ rings and seals
intended to exclude dust from the switch and switch housing
area. These must be maintained in good condition.
Carefully brush and vacuum clean the switch housing.
4. Refit the switch housing taking care not to trap any leads.
5. Using a piece of insulation tape or a small soft wedge lock the
bias off switch in the ‘ON’ position.
6. Use the standard procedure test for electrical safety. Do not
exceed 1250 volt insulation test duration of 3 seconds.
5. Record the test results.
6. Complete a functional (run) test and record results.
CAUTION:whenundertakingafunctionalruntestmakesure
the machine is secure. Remember the sanding pad will rotate.
FAULT FINDING
FAULT CAUSE ACTION
The machine does not run. The power cable is not connected to
the power supply.
The motor brushes are worn.
The voltage is too low.
Connect the power cable to the power supply.
Replace the motor brushes.
Check the main power complies with the
machine’s serial plate data.
The machine will not pickup dust. The dust bag is full.
There is an obstruction in the dust
pick-up.
Replace the paper dust bag or empty the cloth
dust bag.
Disconnect the machine from the power supply,
tip the machine back and remove the
sanding pad, check for obstruction.
The machine does not sand The
sanding pad is damaged. Check
and replace the sanding
evenly.
The sanding pad is damaged.
The wheels are out of adjustment.
Check and replace the sanding pad.
Check and adjust the wheels.
The sander does not glide easily in a
straight line.
The machine is not being operated
properly.
The wheels are out of adjustment.
The Abrasive Pad is worn
Read the instructions, do not apply pressure
when sanding.
Check and adjust the wheels.
Replace the Abrasive Pad
The machine runs slow. The voltage is low.
A motor brush is not making contact.
Check the supply voltage.
If an extension lead is beingused, is it undersize
and/or is it coiled.
Check and refit or replace the motor brushes.
© Hiretech

9
PARTS DIAGRAM
HTF Orbital Floor & Deck Sander
© Hiretech

10
PARTS DIAGRAM
HTF Orbital Floor & Deck Sander
© Hiretech

11
PARTS LIST
Ref PSTK Pack Qty Description
1 011600 1 Switch 220/240 Volt (Bias Off)
1 011610 1 Switch 110/120 Volt (Bias Off)
2 030425 1 Housing Switch Assembly
3 030630 1 Stop Rubber
4 030920 7 Screw
5 031870 2 Grip Hand
6 010270 5 Washer Lock
7 031950 1 Plug Blanking
9 101206 1 Nut Lock
10 101205 1 Strain Relief
11 030660 1 Cable Main Assembly 110Vt (NA)
11 030670 1 Cable Main Assembly 220/240V (UK)
11 030680 1 Cable Main Assembly 110V (UK)
11 030690 1 Cable Main Assembly 220V (EEC)
11 030700 1 Cable Main Assembly 220/240V (AUS)
12 030910 1 Tube Handle Assembly
13 962345 10 Screw
15 164508 1 Hook Cable
16 980197 1 Washer
17 920148 1 Nut
18 030930 1 Handle Cable (NA)
18 030940 1 Handle Cable
18 031000 1 Handle Cable 110 Volt (UK)
19 101220 1 Strain Relief Handle Cable
19 163804 1 Strain Relief Handle Cable (NA)
20 911046 1 Body Twist Lock
21 010210 4 Screw
22 911045 1 Base Twist Lock
23 031910 1 Nut
24 030450 1 Clamp Handle
25 030042 1 Handle Frame
26 031790 2 Pin Pivot
27 031160 2 Screw
28 031900 1 Bolt
29 031800 2 Bush Bearing
30 030222 1 Latch
31 031810 1 Screw
32 031890 1 Washer
33 031880 1 Spacer Latch Pivot
34 031820 1 Screw
35 031840 1 Spring Latch Return
36 031830 1 Cover Screw
37 031850 2 Screw
39 030550 2 Washer
46 030030 1 Housing Motor
47 030022 1 Housing Gear
48 030010 1 Housing Lower
49 031090 6 Screw
50 030270 1 Cover
51 031130 16 Nut
52 031120 16 Screw
53 030360 1 Brush Set
54 030350 1 Bumper
55 030300 1 Support Bag (check Serial No.)
56 031010 4 Bolt
57 031020 4 Wing Nut
58 030390 2 Clamp Abrasive
59 030400 2 Bush
60 030370 1 Sanding Block
61 030380 1 Sanding Block Abrasive Pad
62 030790 4 Screw
63 030060 1 Retainer Wheel
64 030320 1 Housing Eccentric
65 030070 2 Wheel
67 031420 1 Exhaust Guard
68 031430 1 Ring Retainer
70 031310 1 Cap Weight
Ref PSTK Pack Qty Description
71 031320 1 Sanding Weight HTF
80 030990 1 Lead Motor
81 010750 2 Brush Shunt
82 010170 1 Brush Block Assembly
83 010190 4 Screw Pack of 4
84 010200 4 Washer
86 010220 4 Screw and Washer Set
88 010180 4 Brush Motor
89 010230 4 Brush Spring
90 032000 1 Field 110/120 Volt HTF
90 032010 1 Field 220/240 Volt HTF
91 010290 1 Baffle
92 010300 3 Screw
93 010260 2 Washer Clamp
94 010280 2 Screw
95 010600 1 Spring Load
96 010320 2 Bearing
97 010330 1 Armature 110/120 Volt
97 010340 1 Armature 220/240 Volt
98 010350 3 Key
99 010360 1 Fan Motor
100 010370 1 Gasket
101 010380 1 Plate Exhaust
102 010390 1 Fan Intake
103 010400 1 Ring Retainer
104 010410 1 Spacer Bearing
105 010420 1 Seal
106 010430 1 Ring Retainer
107 031520 1 Spacer Pulley
108 030180 1 Pulley Drive
110 010010 4 Screw
111 030090 1 Cover Motor
112 011840 1 Insert Bearing
113 031280 1 Bush Insulator
114 031070 1 Lead Ground (Earth)
123 030760 3 Screw
125 030740 2 Screw
126 031450 4 Screw
127 030820 7 Screw
128 031300 1 Plug Bearing
129 030480 2 Clip
130 030490 2 Clip
131 030470 1 Bearing
132 030130 1 Shaft Drive
133 030510 1 Key
134 030150 1 Belt Drive
135 030170 1 Bush Pulley
136 030190 1 Pulley Driven
137 031170 2 Screw
138 030460 3 Bearing
139 030500 1 Clip
140 030120 1 Balance Weight
141 030080 1 Holder Sanding Pad
142 030410 1 Plate Cover
143 030110 1 Bush Eccentric
144 030440 1 Cap Retaining
145 030780 1 Screw
146 030520 2 Spring Sanding Pad
147 980629 1 Washer
148 030830 2 Screw
149 010680 1 Pin Cotter
150 030850 2 Nut
151 030860 3 Washer
152 030100 2 Pin
153 030600 2 Spring Plunger
154 030840 2 Screw
156 031650 1 Knob Assembly
157 031370 1 Hook and Loop Pad
160 01769 20 Floor Sander Backing/Abrasive Pad HTF
© Hiretech

Ref PSTK Pack Qty Description
170 07038 25 Disposable Paper Dust Bag HT7/HTF
Pack 2
170 07040 50 Disposable Paper Dust Bag HT7/HTF
180 031390 1 Owners Manual & Operating Instructions
Special Tools (not illustrated)
250 011740 1 Service Tool - Pinion & Pulley
Fitting/Removal
250 031490 1 Service Tool - Lever Block Holder HTF
250 031610 1 Service Tool - Jacking Bolts HTF
CIRCUIT DIAGRAM
HTF Orbital Floor & Deck Sander
12 © Hiretech

HIRETECH LIMITED WARRANTY
Hiretech warrants to the original purchaser that the Hiretech machine covered by this warranty is free from defects
in workmanship and materials. Should any part fail in the period of two years from the date of the original purchase
as a result of a defect, Hiretech will (at it’s option) either repair or replace the part without charge provided that the
machine has been operated in accordance with the Owners Manual and Operating Instructions.
Should any such defect arise, please contact your nearest authorised repair agent. Standard service over land
mainland freight costs will be refunded on warranty repairs at the sole discretion of Hiretech or the authorised repair
agent. If the repair is non-warranty, the customer will be advised before any work is undertaken.
This warranty is the sole warranty by Hiretech and is in lieu of all other warranties express or implied and releases
Hiretech from all other obligations and liabilities.
This warranty does not apply to normal wear and tear to the machine, and in particular does not cover normal wear
parts such as mains cable, wheels, switches, relays, brushes, rubber parts, hoses and bearings. This warranty also
does not cover, and Hiretech will not be liable for, excessive wear caused by abnormal use.
Hiretech will under no circumstances be liable for alterations to the machine or for damage caused by third persons,
or for misuse or abuse of the machine, or damage caused during transportation. Repairs of the machine made
or attempted by persons other than those specifically authorised by Hiretech shall render this warranty void and
Hiretech will not be liable for such repairs, the cost of such repairs, or the consequences of such repairs. Where
spare parts are used on the machine and they do not conform to Hiretech specifications, this warranty will be
rendered void and Hiretech will not be liable.
Hiretech will not be liable for any indirect or consequential loss, damage, cost or expense of any kind whatever and
however caused whether arising under contract, tort (including negligence) or otherwise including (without limitation)
loss of production, loss of profits or contracts or of operating time or goodwill or anticipated savings.
Every effort has been made to present all information in this publication accurately, however no liability
is accepted for any inclusions or advice given or for omissions from this publication. Hiretech reserves
the right to make changes or improvements to its products without prior notice. Hiretech®is a registered
trademark of Hire Technicians Group Ltd., all other trademarks are the property of their respective owners.
© Hire Technicians Group Ltd.
MANUFACTURED BY
HIRE TECHNICIANS GROUP LIMITED
CHALK HILL HOUSE, 8 CHALK HILL, WATFORD,
HERTS, WD19 4BH. UNITED KINGDOM
TEL: +44 (0)1923 332424 FAX: +44 (0)1923 332425
© Hiretech
Table of contents
Other HireTech Sander manuals

HireTech
HireTech HT7 User manual

HireTech
HireTech HT8-1.2 System manual

HireTech
HireTech HT8 System manual

HireTech
HireTech HTF-2 System manual

HireTech
HireTech HT7 System manual

HireTech
HireTech HT8 EX User manual

HireTech
HireTech HT8 EX User manual
HireTech
HireTech HT7-2 User manual
HireTech
HireTech HT7-2 System manual

HireTech
HireTech HT8 EX System manual
