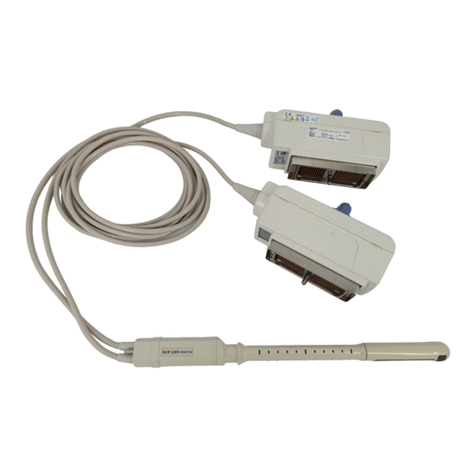
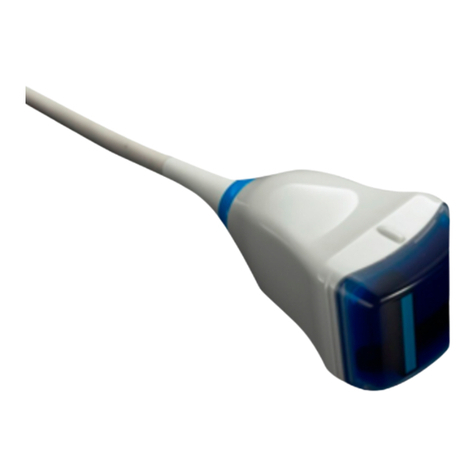
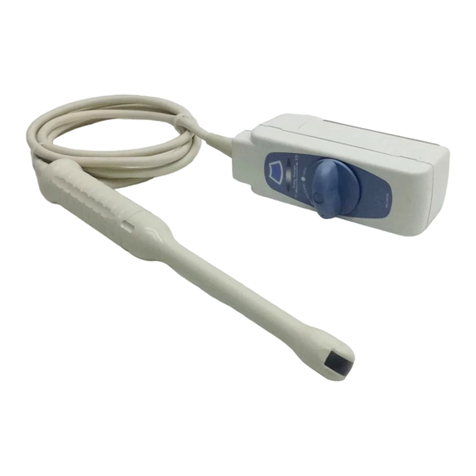
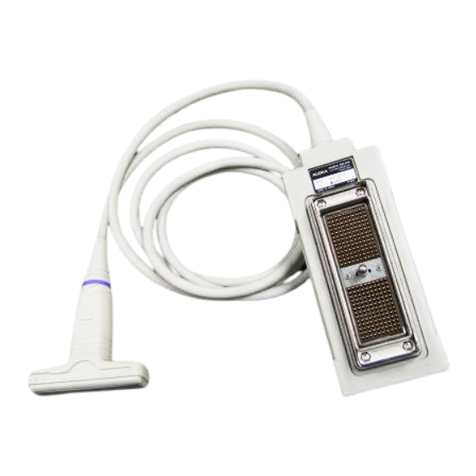
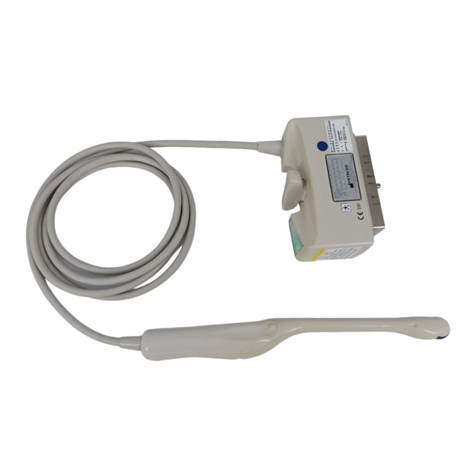
Hitachi EUP-B712 User manual

BiopsyProbe
EUP‐B712
INSTRUCTIONMANUAL
Notesforoperatorsandresponsiblemaintenancepersonnel
★PleasereadthroughthisInstructionManualcarefullypriortouse.
★KeepthisInstructionManualtogetherwiththesystemwithcareto
makeitavailableanytime.
Tokyo,Japan
Q1E‐EP1412‐4
©Hitachi,Ltd.2013,2017.Allrightsreserved.
0123

(1) Q1E-EP1412
Manufacturer: Hitachi,Ltd.
2-16-1, Higashi-Ueno,Taito-ku,
Tokyo,110-0015,Japan
+81-3-6284-3668
http://www.hitachi.com/businesses/healthcare/
index.html
European
Representative: Hitachi Medical Systems GmbH
Otto-von-Guericke-Ring 3 D-65205 Wiesbaden,
Germany
EU Importer: Hitachi Medical Systems Europe Holding AG
Address: Sumpfstrasse 13 CH-6300 Zug, Switzerland
Local Distributor:

(2) Q1E-EP1412
About this manual
This instruction manual shall provide instructions for using, cleaning,
and disinfecting and/or sterilizing the HITACHI ultrasound probes.
It also describes safety considerations, maintenance.
For instructions for operating the ultrasound diagnostic scanner, refer
to the operation manual for it.
Before using the probe, thoroughly read this manual and keep this book
for future reference.
If you have any questions concerning the manual, please contact a service
support.
The following conventions are used throughout the manual to denote
information of special emphasis.
WARNING: “Warning” is used to indicate the presence of a hazard which
can cause severe personal injury, death, or substantial
property damage if the warning is ignored.
CAUTION: “Caution” is used to
i
ndicate the presence of a hazard which
will or can cause minor personal injury or property damage if
the caution is ignored.
NOTICE: “Notice” is used to notify people of installation, operation,
or maintenance information which is important, but not haza
r
d
related.

(3) Q1E-EP1412
Graphical Symbols for Use in Labeling of Hitachi Ultrasound Probes
Some graphical symbols that are used in labeling of Hitachi Ultrasound
Probes are compliant with EN980:2008 standard. Refer to the following
table about the meanings of them.
Explanation of
Symbol Symbol Descriptive Content
Manufacturer
Company Name and
Address
Hitachi,Ltd.
2-16-1,Higashi-Ueno,Taito-ku,
Tokyo,110-0015,Japan
+81-3-6284-3668
http://www.hitachi.com/businesses
/healthcare/index.html
Authorized
Representative
in The European
Community
Hitachi Medical Systems GmbH
Otto-von-Guericke-Ring 3 D-65205
Wiesbaden, Germany
Keep away from
Sunlight
S
tore the probe in a cool place and keep
away from high temperature, high
humidity, or direct sunlight.

(4) Q1E-EP1412
Definition of symbol
The following symbol is also used for HITACHI Ultrasound Probes.
Location Symbol Definition
Probe
connector
This instrument complies with Directive 93/42/EEC
relating to Medical Device and Directive
2011/65/EU relating to RoHS
Probe
connector
IPX7
IPX7 mark
See section 1.6.
Probe
connector Type BF APPLIED PART
Probe
connector General warning sign
Probe
connector Warning; dangerous voltage
Probe
connector
Caution; Biohazard
Probe
connector
Follow the instruction manual to operate this
instrument. If not avoided, may result in injury,
property damage, or the equipment trouble.
Probe
connector
STERRAD sterilization compatibility mark
Probe
connector
Upper Limit of Temperature;
The probes
t
hat are applicable to Ethylene Oxide
Gas Sterilization use symbol of “Upper Limit of
Temperature: 55 degrees”.
Probe
connector
Do not waste the instrument as general waste.
Comply with a local regulation.
Probe
connector
Rx Only
By prescription
o
nly. U.S. Federal Law restricts
this device to sale on order of a physician only.

(5) Q1E-EP1412
CONTENTS
Page
1. General ······················································ 1
1.1 Features ·················································· 1
1.2 Principles of operation ··································· 1
1.3 Intended Use ·············································· 2
1.4 Components ················································ 2
1.5 Option ···················································· 3
1.6 External View ············································· 4
2. Inspection before Use ········································ 5
2.1 Inspection for Appropriate Connection ····················· 5
2.2 Inspection for Material Surface ··························· 5
3. Operation Procedure ·········································· 7
3.1 Probe ····················································· 7
3.2 Needle Guide Bracket EZU-PA7C2 ···························· 8
3.3 Magnetic Sensor Attachment ······························· 16
4. Reprocessing Procedure ······································ 21
4.1 Point of use (Pre-cleaning) ······························ 23
4.2 Containment and transportation ··························· 23
4.3 Manual Cleaning and disinfection ························· 23
4.4 Drying ··················································· 26
4.5 Inspection ··············································· 26
4.6 Packaging ················································ 26
4.7 Sterilization ············································ 26
4.8 Storage ·················································· 28
5. Cleaning and Disinfection of EZU-PA7C2 ······················ 29
5.1 Point of use (Pre-cleaning) ······························ 31
5.2 Containment and transportation ··························· 31
5.3 Manual Cleaning and disinfection ························· 32
5.4 Automated cleaning and disinfection ······················ 35
5.5 Drying ··················································· 36
5.6 Packaging ················································ 36
5.7 Assembly and Inspection ·································· 36
5.8 Storage ·················································· 36
6. Maintenance and Safety Inspection ··························· 37
7. Safety Precautions ·········································· 38
8. Specifications ·············································· 39
8.1 Probe ···················································· 39
8.2 Suppliers List of the Probe ······························ 40
8.3 Needle Guide Bracket EZU-PA7C2 ··························· 41
8.4 Suppliers list of the Needle Guide Bracket EZU-PA7C2 ····· 41
9. Disposal of the probe ······································· 41
-1- Q1E-EP1412
1. General
1.1 Features
EUP-B712 Probe is a Convex Array type. The acoustic output of this probe
when connected to ultrasound diagnostic scanner was measured according
to the IEC60601-2-37 standard.
The table of measured acoustic output data is contained in the operation
manual of each ultrasound diagnostic scanner. This probe is
categorized in class IIa according to Directive 93/42/EEC. According
to IEC60601-1 the probe is classified as type BF.
1.2 Principles of operation
This probe and the ultrasound diagnostic scanner enable image diagnosis
using ultrasonic waves. This system operates under the principles
described below.
1) When an electric pulse signal is applied from the transmitter to
the transducer of the probe, the transducer converts electric signals
into mechanical vibration energy for emitting pulse-shaped
ultrasonic waves into the body part, liquid or other medium
contacting the transducer.
2) The emitted ultrasonic waves are reflected by boundaries with
different acoustic characteristics (acoustic impedance) within the
body.
3) The transducer is also used to receive reflected ultrasonic waves.
The transducer vibrates mechanically due to the received ultrasonic
waves and converts mechanical vibrations into electric energy.
Electric signals are converted to shades of brightness by brightness
modulation to obtain an image.

-2- Q1E-EP1412
WARNING
1.3 Intended Use
The Biopsy Probe EUP-B712 is designed for observation and diagnosis
mainly of the following regions by connecting with the HITACHI
ultrasound diagnostic scanner.
Biopsy (with Biopsy Attachment)
General abdominal organs
Never use the probe for following applications.
1) Direct contact to the heart.
2) Biopsy to the heart.
3) Direct contact to the eye
1.4 Components
The probe components of EUP-B712 are as follows:
1) Probe ························ 1 piece
2) Magnetic Sensor Attachment ··· 1 piece
3) Spacer for EZU-RV2S ·········· 3 pieces
4) Instruction Manual ··········· 1 copy
WARNING

-3- Q1E-EP1412
CAUTION
1.5 Option
1.5.1 Magnetic Sensor Attachment
1.5.2 Spacer for EZU-RV2S
1.5.3 Needle Guide Bracket EZU-PA7C2
1) Needle guide bracket ········· 1 piece
2) Brush ························ 1 piece
3) Spring (Spare) ··············· 2 pieces
4) Instruction manual ··········· 1 copy
5) Case ························· 1 piece
1.5.4 GENERAL PURPOSE Ultra-Pro II™DISPOSABLE STERILE ULTRASOUND
NEEDLE GUIDE/COVER KIT (610-579 or 610-608).
Purchase the Ultra-Pro II™NEEDLE GUIDE/COVER KIT (610-579 or 610-608)
directly from CIVCO MEDICAL INSTRUMENTS or an authorized CIVCO
distributor.
1.5.5 GENERAL PURPOSE Ultra-Pro 3™DISPOSABLE STERILE ULTRASOUND
NEEDLE GUIDE/COVER KIT (610-901) (Option).
Purchase the Ultra-Pro 3™NEEDLE GUIDE/COVER KIT (610-901) directly
from CIVCO MEDICAL INSTRUMENTS or an authorized CIVCO distributor.
1) Sterilization has not been made to the probe, the Needle guide bracket,
the Magnetic sensor attachment and the Spacer for EZU-RV2S shipped
from the factory. Prior to use of them, be sure to clean, disinfect
and if necessary sterilize them following this instruction manual.
2) Do not attach the devices except for the Ultra-Pro II ™or the
Ultra-Pro 3™NEEDLE GUIDE/COVER KIT to the Needle guide bracket
EZU-PA7C2.
3) A biopsy should be performed only by a well-trained physician.
CAUTION

-4- Q1E-EP1412
1.6 External View
The external view of EUP-B712 is shown in Fig.1.
Fig. 1
E
xternal View
Immersible part: This part can be immersed
i
n disinfectant
solution and also can be cleaned by water.
Un-immersible part: This part should not be
i
mmersed in
disinfectant solution and also cannot be
cleaned by water.
C
able
Immersible part (IPX7)
Option:
Magnetic Sensor Attachment
Option:
Spacer for EZU-RV2S
Applied part
Option:
Needle Guide Bracket EZU-PA7C2
C
onnector
Scan head
Un-immersible part

-5- Q1E-EP1412
2. Inspection before Use
Prior to use, the probe and accessories must be carefully inspected
that they are appropriate for use. If you find any damage, do not use
the probe and immediately contact a service support.
2.1 Inspection for Appropriate Connection
1) Confirm that the system is correctly operating. Refer to the
instruction manual for the ultrasound diagnostic scanner.
2) Do not attach or connect unauthorized devices or instruments on the
probe, such as unauthorized biopsy attachments.
2.2 Inspection for Material Surface
2.2.1 Probe
Visually check the surface of the probe head, housing and cable for
any crack, scratch or denaturalization. If you find any damage, do not
use the probe and contact a service support immediately.
2.2.2 Needle Guide Bracket EZU-PA7C2
1) Visually check the surface of the needle guide bracket for any crack,
scratch, denaturalization or deformation.
2) Fill sterile water into a bucket and confirm that a biopsy guide
line and an echo image of test needle are overlapped correctly at
all selectable angles. (See Fig. 2)
9°
Test needle
Sterile water
Biopsy guide line
(a dotted line)
Right-left
orientation mark
N
eedle echo (a
solid line)
Fig. 2 Echo image of the test needle

-6- Q1E-EP1412
CAUTION
CAUTION
Before use, make sure there is no damage to the surface to which the
needle cannula is attached, and the needle guide works properly.
3) Confirm that the needle guide angle corresponds to the angle
indicated on the monitor. The needle guide angle is engraved on
bracket. (See Fig. 3)
4) Visually inspect the cover to ensure that there are no defects or
holes. Do not use the cover if it has any holes and tears.
2.2.3 Magnetic sensor attachment and Spacer for EZU-RV2S
Visually inspect that the surface of the Magnetic sensor attachment
and the Spacer for EZU-RV2S for any crack, deformation or
denaturalization.
Because the Spacer for EZU-RV2S is small, please do not lose the spacer.
21°
Needle guide angle
is engraved
Needle guide
angle
Fig. 3 Needle guide angle
CAUTION
CAUTION

-7- Q1E-EP1412
3. Operation Procedure
3.1 Probe
1) Confirm that the probe, the Magnetic Sensor Attachment and the Spacer
for EZU-RV2S are cleaned, disinfected and if necessary sterilized.
2) Connect the probe to the ultrasound diagnostic scanner, operate the
scanner, and adjust the image, all according to the instructions
given in the operation manual for the ultrasound diagnostic scanner
with which the probe is used as connected.
3) Relationship between direction of the probe and the image is shown
in Fig. 4. The right-left orientation mark on the image indicates
the index mark on the probe.
I
ndex mark
Right-Left
orientation mark
Probe
Image
Fig. 4
R
elationship between the directions of the
probe and the Right-
l
eft orientation mark

-8- Q1E-EP1412
4) Use a sterile probe cover to protect the probe. The probe cover
should be allergy free material to avoid allergic reaction. Between
the probe and the probe cover, acoustic coupling gel is required
as a couplant.
5) Place the probe and the Magnetic Sensor Attachment on the examination
site and adjust the probe’s position for a clear view of the desire
image.
6) After using the probe, perform the reprocessing procedure in
accordance with the procedure stated in “4. Reprocessing Procedure”
every time immediately after completing the ultrasound examination.
7) Store the probe, the Magnetic Sensor Attachment and the Spacer for
EZU-RV2S in the environment indicated in “5. Maintenance and Safety
Inspection”.
3.2 Needle Guide Bracket EZU-PA7C2
1) Confirm that the needle guide bracket is cleaned and disinfected,
and the probe is cleaned and disinfected/ sterilized.
2) Fit the needle guide bracket to the probe following “3.2.1 Fitting
the needle guide bracket to the probe”. Never apply excessive force
to attach the needle guide bracket to the wrong position. It may
cause a hazard due to unstable biopsy.
3) Fit the CIV-Flex™ cover to the probe following “3.2.2 Placing the
probe and bracket into a transducer cover”.
4) Attach the needle guide to the bracket following “3.2.3 Attaching
the needle guide to the bracket”.
5) Fit the needle insert corresponding to the gauge number of the needle
to be used to the needle guide following “3.2.3 Attaching the needle
guide to the bracket”.
6) Confirm that the needle guide angle corresponds to the angle
indicated on the monitor. The needle guide angle is engraved on
bracket following “3.2.4 Setting the needle guide angle”.
7) In the case of the CIVCO Ultra Pro II, when the needle is released
quickly from probe, press the tab on the needle insert toward the
bracket. Move bracket and needle guide away from the needle. (See
Fig.5)
8) After the use of the needle guide bracket, it should be cleaned and
disinfected, then store it in an adequate place.

-9- Q1E-EP1412
CAUTION
In the case of the CIVCO Ultra Pro 3™, push the green quick release
lever of the needle guide toward the bracket to open the needle insert,
and then remove the needle.
For details of the removing procedure of the needle, refer to the
Reference Guide each of the Ultra Pro II™ and Ultra Pro 3™.
1) Since the acoustic jelly accessory to the ultrasound scanner is not
a sterilized one, never use it.
2) In order to make the dead angle of the needle as short as possible,
perform the biopsy operation with full display width. Regarding how
to adjust the display width refer to the operating manual of the
scanner.
3) Do not hold the needle cannula of the electrosurgical unit with metal
tweezers, forceps, and the like.
[Doing so may damage the insulation section of the needle cannula,
and may cause a burn to a non-treated area.]
Tab on the
needle insert
Push
Needle
Fig.
5
R
elease the needle
CAUTION

-10- Q1E-EP1412
WARNING
1) Warning in case of using probe covers which latex is contained to.
The latex may cause such allergic reactions as itching, rubor,
urticaria, swelling, fever, anhelation, wheezing, depression of
blood pressure, shock and so on.
For the patients suspected of latex allergy, do not use the
latex-containing medical devices. If you observe any of above
mentioned symptoms in your patient during the operation, stop the
use of the latex-containing medical devices immediately and take
an appropriate treatment to the patient.
2) The Ultra-Pro II ™ or the Ultra-Pro3 ™ NEEDLE GUIDE/COVER KIT is
disposable and must not be reused.
3) Sterilize/disinfect the probe and disinfect the needle guide bracket
when a cover tears.
4) Confirm that the needle guide angle corresponds to the angle
indicated on the monitor. The needle guide angle is engraved on
bracket. Otherwise, the biopsy guide line becomes inconsistent with
the inserting position of the biopsy needle.
5) When using the needle cannula of the electrosurgical unit while using
the needle guide bracket as a guide, be careful not to damage the
insulation coating of the needle cannula.
[When inserting or removing the needle cannula into or from the needle
guide, you may damage the insulation coating of the needle cannula,
which may cause a burn to tissue contacting the exposed section of
the insulation coating.]
WARNING

-11- Q1E-EP1412
CAUTION
3.2.1 Fitting the needle guide bracket to the probe
1) Insert the recess of needle guide bracket to the needle guide bracket
mount part. (See Fig. 6)
2) Fit the recess of the bracket to the thumbscrew 1 and tighten the
thumbscrew 1. (See Fig. 7) At this time, be sure to attach the needle
guide bracket so that the needle guide attachment area is positioned
in the same direction as that of the needle guide bracket mount part
side.
Never attach the needle guide attachment area at the reverse side of
the needle guide bracket mount part. Otherwise, the biopsy guide line
becomes inconsistent with the inserting position of the biopsy needle.
Needle guide
bracket
Needle guide
bracket mount part
Needle guide
attachment area
Fig. 6 Position for mounting the needle guide bracket
Thumbscrew 1
Fig. 7 Fitting the needle guide bracket
CAUTION

-12- Q1E-EP1412
CAUTION
3.2.2 Placing the probe and bracket into a transducer cover
1) Place an appropriate amount of gel inside the cover and/or on the
Probe head. (See Fig. 8)
2) Insert the probe into the cover.
3) Pull the cover tightly over the probe face to remove wrinkles and
air bubbles, taking care to avoid puncturing the cover.
4) Secure cover to the probe housing and cable strain relief with bands
as needed.
5) Visually inspect the cover to ensure that there are no defects or
holes. Do not uses cover if it has any holes.
1) Never use the acoustic gel that is enclosed in the main ultrasound
system unit because it is not sterilized. Use only sterile acoustic
gel that is enclosed in CIVCO Ultra-Pro II™, or Ultra-Pro 3 ™
Disposable Sterile Ultrasound Needle Guide/Cover Kit. If sterile
acoustic gel is not enclosed in the Kit, please use any sterile
acoustic gel.
2) Since the acoustic jelly accessory to the ultrasound scanner is not
a sterilized one, never use it.
CIV-FLEX cover
P
robe head
Sterilized gel
Fig. 8
P
lacing the gel
CAUTION

-13- Q1E-EP1412
3.2.3 Attaching the needle guide to the bracket (Example: In the case
of CIVCO Ultra-Pro II™)
1) Place an appropriate amount of gel inside the cover and/or on the
Probe head. (See Fig. 9)
2) Push the lock toward the bracket to secure the lock. Make sure the
needle guide is firmly attached to the bracket. (See Fig. 10)
Needle guide
Needle guide
attachment area
Lock
Fig. 9 Attaching the needle guide
Lock
N
eedle guide
Fig. 10 Attaching the needle guide

-14- Q1E-EP1412
CAUTION
3) Select a needle insert to correspond with the needle size intended
to be used in the procedure.
4) Slide the needle insert into the needle guide by aligning the arrow
tips. (See Fig. 11) Inspect the guide and cover assembly to ensure
the needle path is clear of obstructions.
In case of bore a hole in the probe cover with a biopsy needle, perform
the cleaning and sterilization of the Probe, the Magnetic Sensor
Attachment and Spacer for EZU-RV2S, and perform the cleaning and high
level disinfection of the needle guide bracket
N
eedle guide
Needle insert
Fig. 11 Attaching the needle insert
CAUTION
Table of contents
Other Hitachi Medical Equipment manuals

Hitachi
Hitachi C251 User manual

Hitachi
Hitachi AP 720S User manual

Hitachi
Hitachi EUP-L74M User manual

Hitachi
Hitachi EUP-VV531 User manual

Hitachi
Hitachi EUP-C524 User manual

Hitachi
Hitachi UST-5412 User manual

Hitachi
Hitachi EUP-CC531S User manual

Hitachi
Hitachi EUP-C715 User manual

Hitachi
Hitachi S211 User manual

Hitachi
Hitachi EUP-OL334 User manual

Hitachi
Hitachi C22P User manual

Hitachi
Hitachi UST-5417 User manual

Hitachi
Hitachi C42T User manual

Hitachi
Hitachi S12 User manual

Hitachi
Hitachi L43K User manual

Hitachi
Hitachi SCENARIA User manual

Hitachi
Hitachi L441 User manual

Hitachi
Hitachi CC41R1 User manual

Hitachi
Hitachi UST-5710-7.5 User manual

Hitachi
Hitachi EUP-V73W User manual