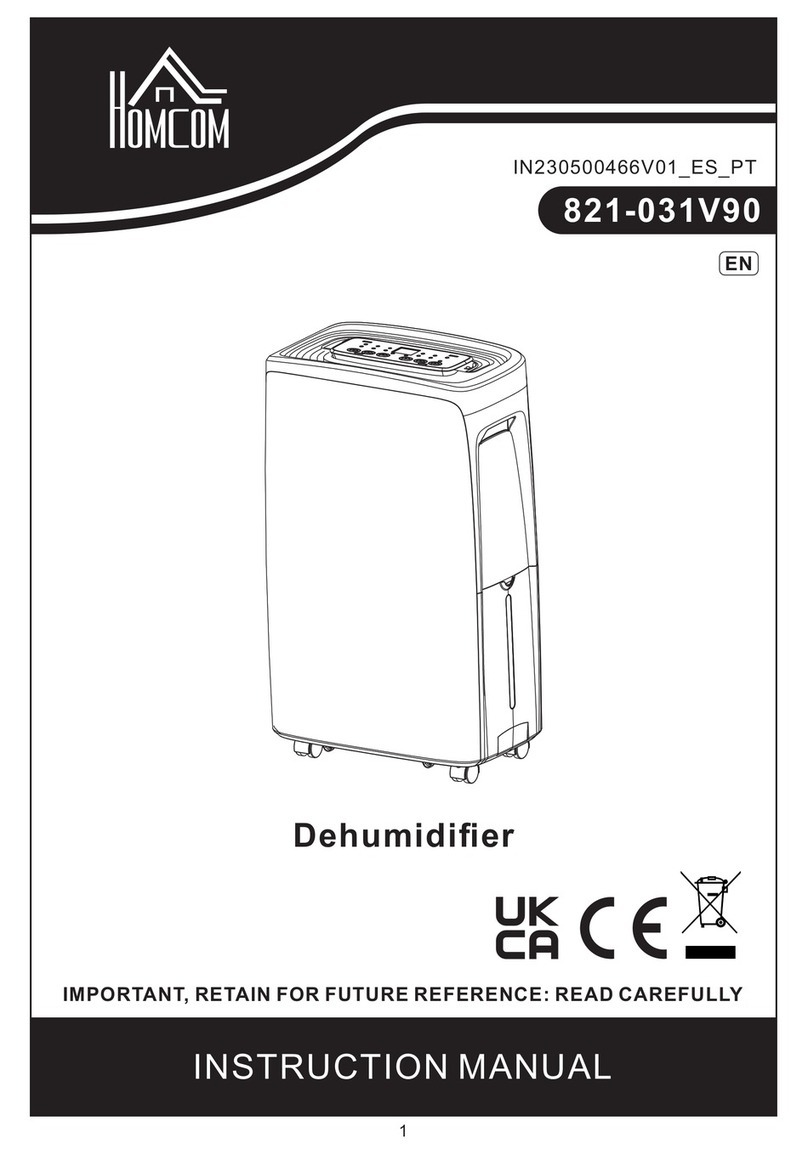
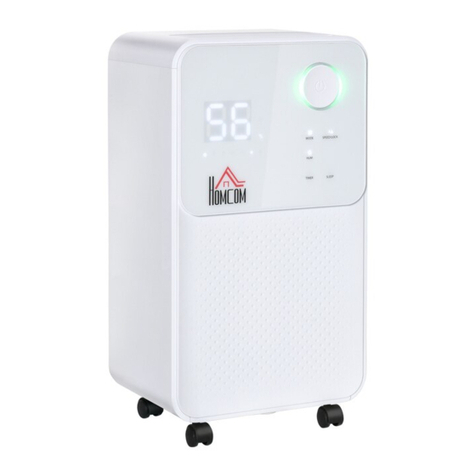
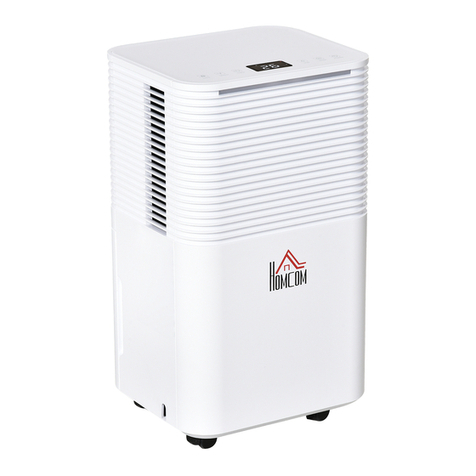
HOMCOM 821-030V70 User manual

1
Instruction Manual
IN230500462V01_UK
821-030V70
IMPORTANT, RETAIN FOR FUTURE REFERENCE: READ CAREFULLY
Dehumidifier

2
CONTENTS
SECURITY WARNINGS………………………………………………………………………...3
FUNCTION INTRODUCTION…………………………………………………………………..5
PRODUCT PARTS……………………………………………………………………………….5
CONTROL PANEL ………………………………………………………………………….……6
OPERATION………………………………………………………………………………….......7
DRAINAGE………………………………………………………………………………………..8
FILTER CLEANING………………………………………………………………………….......9
MAINTENANCE…………………………………………………………………………………10
TROUBLESHOOTING………………………………………………………………………….11
APPENDIX…………………………………………………………………………………….…15

3
Thank you for choosing this dehumidifier. Please read this instruction manual carefully
before installing this appliance. Keep this manual safe for future reference.
Read all instructions carefully before using or repairing this dehumidifier.
The refrigerant used in this dehumidifier is the environmentally friendly hydrocarbon
R290, which is odourless and ozone-free.
Note: Drawings provided in the manual may differ from the actual appliance, so please
refer to the actual appliance for accurate information.
SECURITY WARNINGS
● Do not use any methods, which are not recommended by the manufacturer, to speed
up defrosting or cleaning.
● Store the appliance in a room WITHOUT continuous ignition sources, such as open
flames, operating gas appliances or electric heaters.
● Do not puncture or burn the appliance.
● Note that refrigerants may not have an odour.
● Ensure the appliance is installed, operated and stored in a room with a floor area
larger than 2m².
● Do not obstruct any required ventilation openings.
● Only service the appliance as recommended by the manufacturer.
● Store the appliance in a properly ventilated area, where the room size corresponds to
the specified operation area.
● Anyone working on breaking into a refrigerant circuit should have a currently valid
certificate from an industry-accredited assessment authority, which authorises their
competence to handle refrigerants safely.
● Maintenance and repair requiring the assistance of other skilled personnel should be
supervised by someone competent in the use of flammable refrigerants.
● All work affecting safety equipment must be carried out by competent individuals.
● When moving the appliance, be careful to avoid bumping and causing leakage in the
refrigeration line.
Flammable material.
This appliance
contains R290/
Propane a
flammable
refrigerant
Refer
operators
manual
Read
technical
manual
Read
operators
manual
Notes:
● This dehumidifier is suitable for indoor use only. Do not use outdoors.
● When installing the dehumidifier, follow local grid interconnection rules and ensure
that it is properly grounded. For any questions on electrical installation, refer to the
manufacturer's instructions or consult with a professional electrician. If necessary,
hire a professional electrician to install it for you.
● Place the appliance on a flat, dry surface. Ensure there is at least 30cm of space
between the appliance and surrounding objects (walls, furniture, curtains, etc).

4
● After the dehumidifier is installed, ensure the power plug is intact and firmly plugged
into the power outlet. Place the power cord neatly to prevent someone from tripping
over it or pulling it out of the socket.
● Do not put any object into the air inlet and outlet of the dehumidifier. Keep the air inlet
and outlet free from obstruction.
● When installing drainage pipes, ensure they are properly connected and are not
twisted or bent.
● When moving the appliance, keep it in an upright position.
● Keep the appliance away from gasoline, flammable gas, stoves and other heat
sources.
● Do not disassemble, overhaul or modify the appliance on your own. This can cause
the machine to malfunction and may harm individuals or property. For damages or
failure to the appliance, get the manufacturer or a professional to repair it. Attempting
to repair the machine yourself can be dangerous.
● Do not pull the cord to turn off the appliance.
● To prevent water or other liquids from spilling into the air conditioning, do not place
cups or other objects on the appliance.
● Do not use insecticide sprays or other flammable substances near the dehumidifier.
● Do not clean this appliance with chemical solvents, such as gasoline or alcohol. To
clean the appliance, you must disconnect it from the power supply first, then clean it
with a slightly damp cloth. If it is really dirty, scrub the appliance with a mild detergent.
● Under guided supervision, this appliance can be used by children aged eight years
and above, provided they understand the potential risks and hazards. Under guided
supervision, this appliance can be used with persons with disabilities or persons
without experience, provided they understand the potential risks and hazards.
● Damaged supply cords must be replaced by the manufacturer, its service agent or
similarly qualified personnel to avoid hazards.
● Install this appliance following national wiring regulations.
Transportation, marking and storage for units
● Transport: Comply with all transport regulations when transporting equipment
containing flammable refrigerants.
● Marking: Comply with local regulations for marking equipment with signs, which
indicate the presence of flammable refrigerants.
● Disposal: Comply with national regulations for the safe disposal of equipment
containing flammable refrigerants.
● Storage: Store equipment following manufacturer's instructions, ensuring safe and
effective operation.
● Storage of packed equipment: Protect the equipment inside the package from
mechanical damage, so it does not leak.
5
FUNCTION INTRODUCTION
This dehumidifier has three modes: dehumidify, air supply and clothes dryer. The fan
has two adjustable wind speeds. The set humidity range is 35-85%RH. The ambient
humidity display range is 30-90%RH (When the ambient humidity is below 30%, it
displays 30%; when the ambient humidity is above 90%, it displays 90%).
The dehumidifier also features a 0-24 hour timing on/off function, a sensor that
automatically detects ambient temperature and a 'water full' automatic protection
function. The appliance operates within a working temperature range of 5-32°C . The
working environment humidity range is 10-95%RH.
PRODUCT PARTS
1. Top cover
2. Vane
3. Front shell
4. Chassis
5. Wheels
6. Control panel
7. Back shell
8. Filter
9. Water tank
10. Drain port
NOTE:
All the pictures in the manual are for explanatory purposes only. The actual shape of the
unit you purchased may be slightly different, but the operations and functions are the
same.

6
CONTROL PANEL
BUTTONS
1. POWER button
After the power is turned on, the indicator light will turn green.
2. MODE button
There are three working modes: Dehum, fan and laundry.
3. DOWN button
Reduce the humidity or timing.
Hold this button for three seconds to activate the mould removal function. The 'DRY
INSIDE' light will be on. This function only works when the power is on. If the function is
on and the appliance is turned off later, the fan motor will stop working after a five-
minute delay (only the power indicator will be on during this process). This feature is off
by default and needs to be manually activated.
4. UP button
Increase the humidity or timing.
5. FAN SPEED button
Press to select the high or low fan speed.
6. TIMER button
Press the timing key to set timer, query timer and to cancel the timer.
7. CHILD-LOCK
Press 'TIMER' and 'FAN SPEED' at the same time to start and stop the child-lock
function.
8. Compound key
Press 'UP and 'DOWN' at the same time to start and stop the viewing temperature
function. When turned on, the temperature indicator light is on, the digital tube displays
the ambient temperature, then it automatically switches to the humidify display after
displaying for 10 seconds.

7
OPERATIONS
* Ensure the unit’s power matches the local power grid.
* Press both sides of the swing to manually adjust the swing leaf to
the desired angle.
WORKING MODES
DEHUMIDIFY MODE
When turned on for the first time, its default mode is the dehumidify mode - this can also
be selected through the mode selection. The default humidity setting is 40% - this will
be shown on the display. The high wind setting will also be activated.
● When the relative humidity (Hr) exceeds the set humidity (Hs) by 3% or more, the
compressor starts and the fan operates at the set wind speed. When Hr is lower than
Hs by 3% or more, the compressor stops and the fan automatically switches to low
wind speed (the wind speed can be adjusted at any time). When Hr is within 3% of Hs,
the dehumidifier remains in its current operating state.
● The set humidity (CO-35-85%RHY) is displayed. You can adjust the setting by
pressing 'UP' and 'DOWN'.
● The fan speed is adjustable.
● Child-lock and timer functions can be set.
● When the ambient humidity is below the set humidity, the red 'OK' indicator light on
the display panel will be off. When the ambient humidity reaches the set humidity, the
red 'OK' light on the display panel will be on.
● When the humidity is set to 'CO', the compressor runs continuously without being
limited by the set humidity (ensuring a three-minute delay protection for the
compressor). The fan speed is adjustable - the display will show 'CO'. Child-lock and
timer functions can be set in this mode.
FAN SPEED
● Enter the air supply mode through the mode conversion (the compressor will not
operate). The default fan speed is low, but it can be adjusted. The display will show
the ambient humidity range of 30-90%RH.
LAUNDRY MODE
● Enter the drying mode through the mode conversion (the dehumidifier runs
continuously without being limited by the set humidity). The default fan speed is high,
which cannot be adjusted. The display will show the ambient humidity.

8
FUNCTIONS
TIMER FUNCTION
● Press the timer button to start this function. You can set the timer and query timer.
Press again to cancel the timer.
● When entering this function, the timer light will be on and the digital tube will flash five
times to display the timer. During the flashing, press 'UP' or 'DOWN' to set the timer
between 0-24 hours. The selected time will be confirmed after the display flashes five
times.
● When in this function, press the TIMER button for the query timer. The digital tube will
flash five times to display the timer. Press the TIMER button again during the flashing
period to cancel the timer.
● When the timer is set, the timer indicator light will be on. After the time is up, the
indicator will turn off.
● Setting the on/off timer will not affect the current on/off state of the dehumidifier. The
timer function is only valid for the next scheduled operation and can only be set once.
If you manually turn the appliance on/off, all timer settings will be cleared.
CHILD LOCK FUNCTION
● Press the 'TIMER' and 'FAN SPEED' buttons simultaneously to activate the child-lock
function. The child-lock indicator light will be on and all buttons will be disabled. Press
'TIMER' and 'FAN SPEED' again to deactivate the function. The indicator light will turn
off.
WATER FULL ALARM FUNCTION
When the water tank is full (detected by the water switch being disconnected) for five
seconds, the dehumidifier will turn off completely. The alarm will sound five times, the
'water full' light will be on and 'FL' will flash on the display. This will continue until the
water is emptied from the tank.
DRAINAGE
To empty the water tank, place your hand on the depression at the bottom of the tank
and gently remove it. Tilt the tank and pour out the water through the drain.
After emptying the tank, carefully push it back into its correct position. Then, turn on the
dehumidifier again.
NOTE: Ensure the tank is emptied before placing it back into the appliance. Ensure the
cover and tank are securely installed and the handle is back in its original position.
Gently push the tank into its correct position using both hands.

9
For continuous drainage:
● Connect a continuous drainage pipe (inner diameter: 10mm).
● This pipe does not come with the appliance. It must be purchased separately.
● This is ideal if you do not want to drain the tank frequently.
Step 1: Locate the drain at the back of the appliance.
Step 2: Use a drain pipe that is a suitable length to firmly connect it to the drain port.
Step 3: Before use, ensure the water pipe is firmly connected to prevent water
leakage.
FILTER CLEANING
Note: The machine is equipped with a removable and washable filter. Remove the filter,
put it in water to clean or rinse, then place it back. It is recommended to clean at least
once every two weeks.
If the filter is only slightly dirty, it can be cleaned with a vacuum cleaner.

10
O
If the filter is very dirty, wash it with warm water that does not exceed 40 C.
Note: The filter needs to dry naturally to prevent deformation. Never use a dryer.
Keep the filter away from alcohol, gasoline, benzene and other chemical solvents.
MAINTENANCE
● Before cleaning and maintenance, unplug the appliance to avoid electric shock.
● If not in use for long periods, unplug the appliance.
● Do not use alcohol, gasoline, benzene and other chemical solvents to clean the
appliance.
Cleaning the appliance:
For cleaning the water tank, use cold or warm water to rinse out any remaining water to
prevent mould. If the appliance is really dirty, use a mild detergent to clean it.
Nylon filter cleaning
The filter should be cleaned once every two weeks, using water that does not exceed
40℃.
Storage
After drained and cleaned, place the power cord in the water tank. Pack the unit inside a
plastic bag to avoid dust and other debris.

11
TROUBLE SHOOTING
If the following problems occur with the dehumidifier, please check the machine and
solve the problem as follows.
Trouble Cause Remedy
The appliance produces
hot air. Dehumidifier's cold air turns hot by
absorbing heat in the compressor.
This normal. No action needs
to be taken.
The unit does not turn on.
Unit is not connected to the mains.
Water tank is full. Water tank is
incorrectly installed.
Connect the unit to the mains.
Empty the water tank. Ensure
the tank is properly installed.
Dehumidification does
not work.
The room is already dry and cool.
The air outlet or intake is blocked.
During the dryer seasons, the
capacity of the dehumidifier
will be reduced
Clear the outlet or intake.
There is no wind. Air filter is blocked. Clean the filter as described in
this manual.
The appliance is noisy.
The appliance is titled or unstable. Put the unit upright on a flat
and stable surface.
Filter is blocked. Clean the filter as described in
this manual.
NOTE:
Do not attempt to disassemble or repair the appliance yourself. Improper repairs can
cause injury to persons and property damage. If there is a problem that is not listed or
the solution did not work, please contact the manufacturer, its service agent or similarly
qualified personnel.
Information on servicing:
Before working on flammable refrigerants, safety checks are necessary to minimise
ignition risk.
The following precautions must be taken before repairing the refrigerating system.
To reduce the risk of flammable gas or vapour during work, a controlled procedure must
be followed:
● Ensure all maintenance staff and others working in the area are aware of the work
being carried out. Avoid working in confined spaces, section off the area around the
workspace and ensure conditions within the area are safe.
● To detect potentially flammable atmospheres, check the area with an appropriate
refrigerant detector (non-sparking and tightly sealed) before and during work.
● Have appropriate fire extinguishing equipment available if any hot work is being
conducted.
● Keep all possible ignition sources, including cigarette smoking, sufficiently far away
from the site of installation, repair, removal and disposal, as flammable refrigerant
could be released into the surrounding space. Before work, check the area around the
equipment to ensure there are no flammable hazards or ignition risks. 'No Smoking'
signs must be displayed in the working area.
● Before breaking into the system or conducting hot work, ensure the area is in the open
and properly ventilated, so any released refrigerant can be safely dispersed.

12
● When changing electrical components, ensure they are fit for purpose and have the
correct specification.
● Follow the below maintenance and service guidelines. If in doubt, contact the
manufacturer's technical department for assistance.
● Charge size must be appropriate for the room size where refrigerant-containing parts
are installed.
● Ventilation machinery and outlets must be functioning properly and not be obstructed.
● If an indirect refrigerating circuit is used, check the secondary circuit for refrigerants.
● Equipment markings should be visible and legible. Illegible markings and signs must
be corrected.
● Refrigeration pipes or components must be installed in a way that minimises exposure
to corrosive substances.
During repairs and maintenance for electrical components, initial safety checks and
inspections must be performed. If there is a fault that could compromise safety, the
electrical supply must not be connected until the issue is resolved. If the fault cannot be
fixed immediately, an adequate temporary solution should be used - the owner of the
equipment must be informed.
Initial safety checks include:
● Refrigeration pipes or components must be installed in a way that minimises exposure
to corrosive substances.
● During repairs and maintenance for electrical components, initial safety checks and
inspections must be performed. If there is a fault that could compromise safety, the
electrical supply must not be connected until the issue is resolved. If the fault cannot
be fixed immediately, an adequate temporary solution should be used - the owner of
the equipment must be informed.
Initial safety checks include:
a) Ensuring capacitors are safely discharged to avoid sparking.
b) Ensuring no live electrical components and wiring are exposed while charging,
recovering or purging the system.
c) Ensuring there is continuity of earth bonding.
Repairs to sealed components:
● When repairing sealed components, all electrical supplies must be disconnected from
the equipment before removing sealed covers, etc. If it is absolutely necessary to
have an electrical supply connected during servicing, then a permanent leak
detection must be located at the most critical point to warn of any hazardous
situations.
● When working on electrical components, ensure the casing is not altered in any way.
This includes damage to cables, an excessive number of connections, terminals not
matching original specifications, damage to seals and incorrect fitting of glands. This
is to ensure the level of protection is not affected. Ensure the apparatus is mounted
securely.
● Ensure the seals or sealing materials have not deteriorated to the point where they no
longer stop flammable gases from getting inside.
● Replacement parts must match the manufacturer's specifications.
NOTE: Using silicon sealant can interfere with some types of leak detection equipment.
Intrinsically safe components do not need to be isolated before maintenance.

13
● Repairing intrinsically safe components can be done while they are live in the
presence of a flammable atmosphere.
However, before applying any permanent inductive or capacitance loads to the circuit,
ensure this will not exceed the permitted voltage and current for the equipment in use.
Also, ensure the test apparatus is rated correctly. Do not work on non-intrinsically safe
components in the presence of a flammable atmosphere.
● Only replace components with parts specified by the manufacturer. Non-specified
parts could release flammable components into the atmosphere.
● Keep cabling away from sharp edges, vibrations and excessive pressure. Check for
damages and wear and tear to the cabling.
● Never use sources of ignition (halide torches or other naked flames) to search for
refrigerant leaks. It is acceptable to use the following leak detection methods for
systems containing flammable refrigerants:
- Electronic leak detectors: Be aware, the sensitivity of electronic detectors may need to
be recalibrated. Ensure the equipment is not a potential source of ignition. Equipment
must be calibrated in a refrigerant-free area and set at a percentage of the LFL of the
refrigerant, with a maximum of 25% gas.
- Leak detection fluids: These can be used, but detergents with chlorine should be
avoided to prevent corrosion of copper pipework.
- If a leak is suspected, all naked flames must be removed and extinguished. If a
refrigerant leakage is found that requires brazing, it must be removed from the system
or isolated using shut-off valves in a remote part of the system. Oxygen-free nitrogen
(OFN) should then be purged through the system before and during the brazing
process.
● When accessing the refrigerant circuit for repairs or any other purpose, it is crucial to
follow proper procedures with safety in mind. To ensure the safety of the personnel
involved, the following steps must be taken:
1) Remove refrigerant.
2) Purge the circuit with inert gas.
3) Evacuate the circuit.
4) Purge again with inert gas.
Open the circuit by cutting or brazing.
The refrigerant must be removed and collected in the correct cylinders. The system then
needs to be flushed with oxygen-free nitrogen (OGN) until no refrigerant remains. This
is done by filling the system with OFN, venting into the atmosphere and repeating until
no refrigerant is left. Do not use compressed air or oxygen. This flushing process must
be repeated several times and the charge of OFN must be vented into the atmosphere.
It is important to make sure the vacuum pump outlet is not near any ignition sources and
that there is enough ventilation available. Flushing is crucial before brazing the
pipework.
Charging procedures
When charging a refrigeration system, it is important to follow these additional
requirements:
● Use charging equipment that prevents contamination of different refrigerants. Keep
hoses or lis as short as possible, minimising the amount of refrigerant they contain.
● Keep cylinders upright.
● Before charging the system with refrigerant, ensure the refrigeration system is
properly grounded.

14
● Label the system after charging is complete (if it wasn't labelled already).
● Be careful not to overfill the refrigeration system.
● Before charging the system, it should be pressure tested with OFN, ensuring it is safe
and leak-free. After charging is complete but before commissioning, the system
should be leak tested again. A final follow-up leak test should be conducted before
leaving the site.
Decommissioning
Before performing this procedure, the technician must have a thorough understanding of
the equipment and its specifications. All refrigerants must be recovered safely. Before
starting the task, take samples of oil and refrigerant for analysis, in case further
examination is needed before reusing the reclaimed refrigerant. It is important to ensure
that electrical power is available before beginning the task.
● Become familiar with the equipment and its operation.
● Isolate system electrically.
● Before attempting the procedure ensure that:
a) Mechanical handling equipment is available, if required, for handling refrigerant
cylinders.
b) All personal protective equipment is available and being used correctly.
c) The recovery process is supervised at all times by a competent person.
d) Recovery equipment and cylinders conform to the appropriate standards.
● Using a pump, remove as much refrigerant as you can from the system.
● If a vacuum is not possible, create a manifold that allows you to remove refrigerant
from different parts of the system.
● Before starting the recovery process, ensure the cylinder is placed on the scales.
● Following the manufacturer's instructions, start and operate the recovery machine.
● Do not overfill the cylinders (no more than 80 % of the cylinder's volume).
● Do not exceed the maximum working pressure of the cylinder, even temporarily.
● Once the cylinders are correctly filled and the process is complete, remove the
cylinders and equipment from the site. Ensure all isolation valves on the equipment
are closed.
● Do not use recovered refrigerant in another refrigeration system, unless it has been
thoroughly cleaned and checked.
Labelling
Label all equipment stating that it has been decommissioned and emptied of refrigerant.
The label must be dated and signed.
Recovery
● Ensure refrigerants are removed from a system in a safe manner.
● When transferring refrigerant into cylinders, use appropriate refrigerant recovery
cylinders, which are specifically designated for that purpose.
● Ensure you have the correct number of cylinders to hold the total system charge.
● Cylinders must be labelled for the specific refrigerant being recovered. Cylinders must
be equipped with a pressure relief valve and working shut-off valves.
● Before recovery, empty cylinders should be evacuated and, if possible, cooled.
● Recovery equipment must be in good working condition, suitable for handling
flammable refrigerants. It must come with proper instructions.
● Calibrated weighing skills and hoses with leak-free disconnect couplings must be
available and in good condition.

15
● Before using the recovery machine, ensure it is in good working condition, properly
maintained and electrical components are sealed to prevent ignition in case of a
refrigerant release.
● If you have any doubts, consult the manufacturer.
● Return the recovered refrigerant to the refrigerant supplier in the appropriate cylinder.
A Waste Transfer Note should be arranged accordingly.
● Never mix refrigerants in recovery units or cylinders.
● To remove compressors or compressor oils, ensure they have been properly
evacuated to remove any remaining flammable refrigerant from the lubricant. This
should be done before returning the compressor to the supplier.
● When draining oil from a system, it must be done safely and following proper
procedures.
APPENDIX
Schematic diagram of the dehumidifier
For specific technical parameters of the model, refer to rating label on the product.
Correct Disposal of this product
Waste electrical products should not be disposed of with household waste.
Please recycle where facilities exist. Check with your local authority or retailer
for recycling advise.
If you have any questions, please contact our customer care center.
Our contact details are below:
0044-800-240-4004
enquiries@mhstar.co.uk
IMPORTER ADDRESS:
MH STAR UK LTD
Unit 27, Perivale Park,
Horsenden lane South
Perivale, UB6 7RH
MADE IN CHINA

16
Manual de instrucciones
IN230500462V01_ES
821-030V90
IMPORTANTE, LEA Y GUARDE PARA FUTURAS REFERENCIAS.
Deshumidificador

17
CONTENIDO
ADVERTENCIAS DE SECGURIDAD.........................................................................18
INTRODUCCIÓN......................................................................................................20
PARTES DEL PRODUCTO........................................................................................20
PANEL DE CONTROL...............................................................................................21
FUNCIONAMIENTO..................................................................................................22
DRENAJE.................................................................................................................23
LIMPIEZA DEL FILTRO.............................................................................................24
MANTENIMIENTO....................................................................................................25
RESOLUCIÓN DE PROBLEMAS...............................................................................26
APÉNDICE...............................................................................................................30

18
Gracias por elegir este deshumidificador. Lea atentamente este manual de
instrucciones antes de instalar este aparato. Guarde este manual para futuras
consultas.
Lea atentamente todas las instrucciones antes de utilizar o reparar este
deshumidificador.
El refrigerante utilizado en este deshumidificador es el hidrocarburo ecológico R290,
inodoro y libre de ozono.
Nota: Los dibujos proporcionados en el manual pueden diferir del aparato real, por lo
que debe consultar el aparato real para obtener información precisa.
ADVERTENCIAS DE SECURIDAD
● No utilice métodos no recomendados por el fabricante para acelerar la
descongelación o la limpieza.
● Guarde el aparato en una habitación SIN fuentes de ignición continuas, como llamas
abiertas, aparatos de gas en funcionamiento o calefactores eléctricos.
● No perfore ni queme el aparato.
● Tenga en cuenta que los refrigerantes pueden no tener olor.
● Asegúrese de que el aparato se instala, utiliza y almacena en una habitación con una
superficie superior a 2 m².
● No obstruya las aberturas de ventilación necesarias.
● Realice el mantenimiento del aparato únicamente según las recomendaciones del
fabricante.
● Almacene el aparato en un lugar bien ventilado, donde el tamaño de la habitación se
corresponda con el área de funcionamiento especificada.
● Cualquier persona que trabaje en la apertura de un circuito de refrigerante debe
disponer de un certificado actualmente válido de una autoridad de evaluación
acreditada por la industria, que autorice su competencia para manipular refrigerantes
de forma segura.
● Las tareas de mantenimiento y reparación que requieran la asistencia de otro
personal cualificado deben ser supervisadas por una persona competente en el uso
de refrigerantes inflamables.
● Todos los trabajos que afecten a los equipos de seguridad deben ser realizados por
personas competentes.
● Al mover el aparato, tenga cuidado para evitar golpes y provocar fugas en la línea de
refrigeración.
Material inflamable.
Este aparato
contiene
R290/Propano, un
refrigerante
inflamable.
Consulte el
manual del
operador
Lea el
manual
técnico
Lea el
manual del
operador
Notes:
● Este deshumidificador es adecuado sólo para uso en interiores. No lo utilice al aire
libre.

19
● Cuando instale el deshumidificador, siga las normas locales de interconexión a la red
y asegúrese de que está correctamente conectado a tierra. Para cualquier duda
sobre la instalación eléctrica, consulte las instrucciones del fabricante o a un
electricista profesional. si es necesario, contrate a un electricista profesional para
que se lo instale.
● Coloque el aparato sobre una superficie plana y seca. Asegúrese de que haya al
menos 30 cm de espacio entre el aparato y los objetos circundantes (paredes,
muebles, cortinas, etc.).
● Una vez instalado el deshumidificador, asegúrese de que el enchufe esté intacto y
firmemente conectado a la toma de corriente. toma de corriente. Coloque el cable de
alimentación de forma ordenada para evitar que alguien tropiece con él o lo saque de
la toma de corriente.
● No coloque ningún objeto en la entrada y salida de aire del deshumidificador.
Mantenga la entrada y la salida de aire libres de obstrucciones.
● Cuando instale los tubos de desagüe, asegúrese de que estén bien conectados y de
que no estén retorcidos ni doblados.
● Mantenga el aparato en posición vertical cuando lo mueva.
● Mantenga el aparato alejado de gasolina, gas inflamable, estufas y otras fuentes de
calor.
● No desmonte, revise ni modifique el aparato por su cuenta. Esto puede provocar un
mal funcionamiento del aparato y causar daños personales o materiales. En caso de
daños o averías en el aparato, acuda al fabricante o a un profesional para que lo
repare. Intentar reparar la máquina usted mismo puede ser peligroso.
● No tire del cable para apagar el aparato.
● Para evitar que el agua u otros líquidos se derramen en el aire acondicionado, no
coloque tazas ni otros objetos sobre el aparato.
● No utilice insecticidas en aerosol ni otras sustancias inflamables cerca del
deshumidificador.
● No limpie este aparato con disolventes químicos, como gasolina o alcohol. Para
limpiar el aparato, desconéctelo primero de la red eléctrica y, a continuación, límpielo
con un paño ligeramente humedecido. Si está muy sucio, frótelo con un detergente
suave.
● Bajo supervisión guiada, este aparato puede ser utilizado por niños a partir de ocho
años, siempre que comprendan los riesgos y peligros potenciales. Bajo supervisión,
este aparato puede ser utilizado por personas discapacitadas o sin experiencia,
siempre que comprendan los riesgos y peligros potenciales.
● Los cables de alimentación dañados deben ser sustituidos por el fabricante, su
agente de servicio o personal cualificado similar para evitar riesgos.
● Instale este aparato siguiendo la normativa nacional sobre cableado.
Transporte, marcado y almacenamiento de las unidades
● Transporte: Cumpla todas las normas de transporte cuando transporte equipos que
contengan refrigerantes inflamables.
● Marcado: Cumpla la normativa local para marcar los equipos con señales que
indiquen la presencia de refrigerantes inflamables.
● Eliminación: Cumplir la normativa nacional para la eliminación segura de equipos
que contengan refrigerantes inflamables.
● Almacenamiento: Almacenar los equipos siguiendo las instrucciones del fabricante,
garantizando un funcionamiento seguro y eficaz.
● Almacenamiento de equipos embalados: Proteger el equipo dentro del embalaje
de daños mecánicos, para que no tenga fugas.

20
INTRODUCCIÓN
Este deshumidificador tiene tres modos: deshumidificar, suministro de aire y secadora
de ropa. El ventilador tiene dos velocidades de viento ajustables. El rango de humedad
ajustado es de 35-85%RH. El rango de visualización de la humedad ambiente es de 30-
90%RH (cuando la humedad ambiente es inferior al 30%, muestra 30%; cuando la
humedad ambiente es superior al 90%, muestra 90%).
El deshumidificador también dispone de una función de encendido/apagado
temporizado de 0 a 24 horas, un sensor que detecta automáticamente la temperatura
ambiente y una función de protección automática contra "agua llena". El aparato
funciona en un rango de temperatura de trabajo de 5-32°C. El rango de humedad
ambiente de trabajo es de 10-95%RH.
PARTES DEL PRODUCTO
1. Cubierta superior
2. Pala
3. Carcasa frontal
4. Chasis
5. Ruedas
6. Panel de mandos
7. Carcasa trasera
8. Filtro
9. Depósito de agua
10. Desagüe
NOTA:
Todas las imágenes del manual son meramente explicativas. La forma real de la unidad
que ha adquirido puede ser ligeramente diferente, pero las operaciones y funciones son
las mismas.
Table of contents
Languages:
Other HOMCOM Dehumidifier manuals

HOMCOM
HOMCOM 821-028V70 User manual

HOMCOM
HOMCOM 821-020V80 Installation guide

HOMCOM
HOMCOM 821-022V70 User manual

HOMCOM
HOMCOM 821-017V70 Installation guide

HOMCOM
HOMCOM 821-023V70 User manual

HOMCOM
HOMCOM 821-018V70 Installation guide

HOMCOM
HOMCOM 821-010V70 User manual

HOMCOM
HOMCOM 821-031V90 User manual

HOMCOM
HOMCOM 821-029V90 User manual

HOMCOM
HOMCOM 821-017V90 User manual