manuals.online logo
Brands
  1. Home
  2. •
  3. Brands
  4. •
  5. Home Styles
  6. •
  7. Indoor Furnishing
  8. •
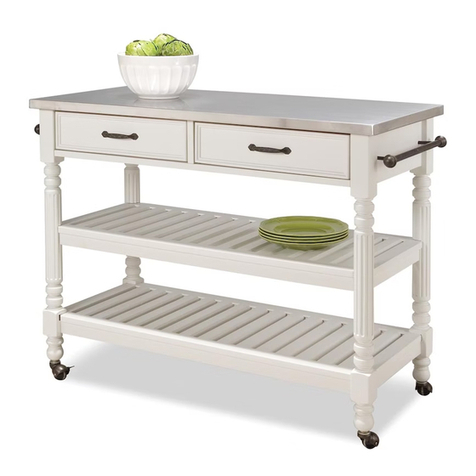
  9. Home Styles 450 95 User manual

Home Styles 450 95 User manual

Part List
Tool(s) required for assembly: Phillips screwdriver
M6x50
Head Cap Bolt (long)
4 pcs. (+1 extra)
Cross Dowel
4 pcs. (+1 extra)
I.
Back Panel
2 pcs.
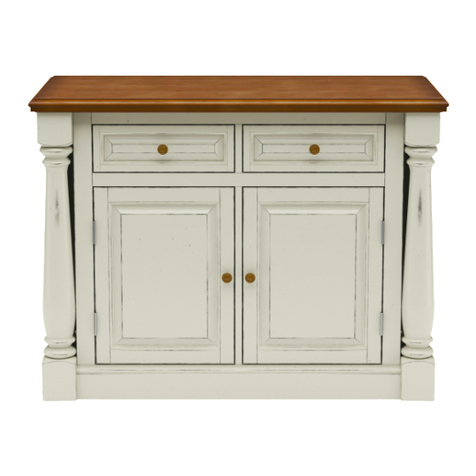
450 959-
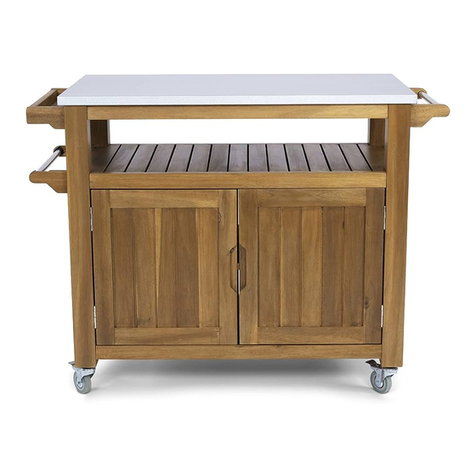
Kitchen Cart
IMPORTANT
Carefully remove all the parts from the carton and
place them individually on a soft cloth to prevent
scratches or other damage.
Carefully and strictly follow these assembly instructions
to ensure a completed product as designed.
Do not use power tools above 8 volts to assemble.
Small Hex Wrench
1 pc.
Hex Wrench
1 pc.
M6x35
Head Cap Bolt
16 pcs. (+1 extra)
M3.5x25
Wood Screw (long)
16 pcs. (+1 extra)
M3.5x13
Wood Screw (short)
12 pcs. (+1 extra)
M4x16
Wood Screw
for Towel Bar
4 pcs. (+1 extra)
Handle
2 pcs.
M4x25
Machine Screw
6 pcs.
Knob
2 pcs.
A.
Top
1 pc.
D.
Back Rail
2 pcs.
E.
Front Rail
1 pc.
F.
Front Rail
1 pc.
O.
Drawer
2 pcs.
K.
Post
4 pcs.
L.
Towel Bar
2 pcs.
M.
Door
1 pc.
N.
Door
1 pc.
Cam Lock Screw
4 pcs. (+1 extra)
Cam Lock
4 pcs. (+2 extra)
G.
Front Rail
1 pc.
Caster
2 Locking
2 Non-Locking
4 pcs.
Refer to later page(s) of these
instructions for drawer assembly.
H.
Back Upright
1 pc.
J.
Base
1 pc.
C.
Side Panel
1 pc.
B.
Side Panel
1 pc.
styles Customer Service: www.homestylesfurniture.com,home
[email protected], 888-680-7460
Hardware List
Assembly Instructions 2/5
IMPORTANT
Use a soft cloth between these parts and the floor.
Do not use power tools above 8 volts to assemble.
Do not tighten all the bolts until each part is properly assembled.
Keep Hex Wrench as the bolts may need to be tightened in the future.
STEP 1
Attach Back Rail (D) to
Side Panel (B) with
Head Cap Bolt.
(See Figure 1)
Attach Back Upright (H)
to Back Rail (D).
Slide Back Panels (I) into position.
Attach Back Rail (D) to unit
with Head Cap Bolt.
BD
D
II
Head Cap Bolt
STEP 2
Attach Base (J) to unit
with Cross Dowels and
Head Cap Bolts (long).
(See Figure 2)
Attach Front Rails (E) and (G)
to unit with Head Cap Bolts.
Attach Front Rail (F) to unit.
Figure 2
Figure 1
E
G
J
Head Cap Bolt
Cross Dowel
Head Cap Bolt (long)
H
F
Assembly Instructions 3/5
STEP 3
Attach Side Panel (C) to
unit with Head Cap Bolts,
Cross Dowels and
Head Cap Bolts (long).
Cross Dowel
Head Cap Bolt (long)
Head Cap Bolt
C
Non-Locking Caster
Locking Caster
Head Cap Bolt
K
K
K
K
Figure 3
STEP 4
Turn unit upside down.
Attach Posts (K) to
unit with Head Cap Bolts.
Attach Casters to
bottom of posts,
with Locking Casters at front.
(See Figure )3
Part List
Assembly Instructions 4/5
Drawer (O)
O2.
Drawer Back
2 pcs.
O5.
Drawer Bottom
2 pcs.
O1.
Drawer Front
2 pcs.
O3.
Drawer Side
2 pcs.
O4.
Drawer Side
2 pcs.
STEP 7
Attach Handle with Machine Screws.
STEP 6
Slide Drawer Bottom (O5) into groove.
Attach Drawer Bottom (O5) to
unit with Wood Screws (short).
STEP 5
Attach Drawer Front (O1) and Drawer
Back (O2) to Drawer Side (O3)
with Wood Screws (long).
Attach Drawer Side (O4) to unit
with Wood Screws (long).
Wood Screw (short)
Wood Screw (long)
Bottom
O5
Roller at back
Machine Screw
Handle
BottomBottom
BottomBottom
O1
O4
O3
O2
Assembly Instructions 5/5
STEP 8
Place Top (A) upside down
on a soft cloth.
Attach Towel Bars (L) to
Top (A) with Wood Screws
for Towel Bar into pre-drilled holes.
Insert Cam Lock Screws into pre-drilled holes in
Top (A), then tighten. (See Figure )4
A
L
L
Cam Lock Screw
Wood Screw for Towel Bar
STEP 9
Turn unit to its upright position.
Attach Top (A) to unit
with Cam Locks.
Attach Doors (M) and (N) to unit
by sliding door hinges into
side panel hinges.
(See Figure )5
Attach Knobs to Doors (M) and (N)
with Machine Screws.
(See Figure )6
Slide Drawers (O) into position.
O
O
A
Cam Lock
Knob
Machine Screw
Figure 6Figure 5
M
N
Figure 4
NEVER
use glass cleaners on
finished furniture. Ammonia
chemically attacks the finish.
allow liquids to remain on furniture.
Absorption causes parts to warp
and split and finishes to delaminate.
NEVER
CARE INSTRUCTIONS
Do not use rubber
based placemats.
PREVENT
DISCOLORING
Do not use commercial
waxes and polishes.
PREVENT
YELLOWING
Do not place hot
objects on surface.
PREVENT
FINISH DAMAGE
Do not write
directly on surface.
PREVENT
MARKING
Do not use power tools
above 8 volts to assemble.
PREVENT
CRACKING
Do not place
in direct sunlight.
PREVENT
FADING
with a soft cloth moistened
in lukewarm soap and water.
Buff with a dry clean cloth.
CLEAN
homestyles will provide replacements free of charge for missing or damaged parts within 30 days of purchase.
Digital images of the defective parts may be required. If the product was not purchased from an authorized retailer,
homestyles is under no obligation to provide replacement parts. Parts are not available for fully assembled items nor
are parts available for sale. Replacements for missing or damaged parts may be requested via contact info below.
styles Customer Service: www.homestylesfurniture.com,home
[email protected], 888-680-7460

This manual suits for next models

1

Other Home Styles Indoor Furnishing manuals
Home Styles 88 5523 942 User manual

Home Styles

Home Styles 88 5523 942 User manual

Home Styles 20 05064 0088 User manual

Home Styles

Home Styles 20 05064 0088 User manual

Home Styles 5170 692 User manual

Home Styles

Home Styles 5170 692 User manual

Home Styles Floral Blossom 88 5558 83 User manual

Home Styles

Home Styles Floral Blossom 88 5558 83 User manual

Home Styles 88521695 C User manual

Home Styles

Home Styles 88521695 C User manual

Home Styles 20 05520 0761 User manual

Home Styles

Home Styles 20 05520 0761 User manual

Home Styles 88 5516 991 User manual

Home Styles

Home Styles 88 5516 991 User manual

Home Styles 88556933 User manual

Home Styles

Home Styles 88556933 User manual

Home Styles 20 06659 0053 User manual

Home Styles

Home Styles 20 06659 0053 User manual

Home Styles 2001-08-FB02 User manual

Home Styles

Home Styles 2001-08-FB02 User manual

Home Styles Sedona 20 05420 0080 User manual

Home Styles

Home Styles Sedona 20 05420 0080 User manual

Home Styles 88 5636 88C User manual

Home Styles

Home Styles 88 5636 88C User manual

Home Styles 88 5053 23 User manual

Home Styles

Home Styles 88 5053 23 User manual

Home Styles Xcel 88 5079 15 User manual

Home Styles

Home Styles Xcel 88 5079 15 User manual

Home Styles 20 05010 0942 User manual

Home Styles

Home Styles 20 05010 0942 User manual

Home Styles BD547-FS User manual

Home Styles

Home Styles BD547-FS User manual

Home Styles Modern Craftsman Media Console 88 5050 06 User manual

Home Styles

Home Styles Modern Craftsman Media Console 88 5050 06 User manual

Home Styles 20 05186 0004 User manual

Home Styles

Home Styles 20 05186 0004 User manual

Home Styles 20 06654 0083 User manual

Home Styles

Home Styles 20 06654 0083 User manual

Home Styles 88 5531 752 User manual

Home Styles

Home Styles 88 5531 752 User manual

Home Styles 6658-80 User manual

Home Styles

Home Styles 6658-80 User manual

Home Styles Ponderosa 88 5534 101 User manual

Home Styles

Home Styles Ponderosa 88 5534 101 User manual

Home Styles 88 5523 31 User manual

Home Styles

Home Styles 88 5523 31 User manual

Home Styles 88 5575 941 User manual

Home Styles

Home Styles 88 5575 941 User manual

Popular Indoor Furnishing manuals by other brands

Sunnydaze Decor JVA-415 manual

Sunnydaze Decor

Sunnydaze Decor JVA-415 manual

Costway HW63960 user manual

Costway

Costway HW63960 user manual

Bobe CMP installation instructions

Bobe

Bobe CMP installation instructions

Uberhaus 68635092 Operator's manual

Uberhaus

Uberhaus 68635092 Operator's manual

Uberhaus 77705075 Operator's manual

Uberhaus

Uberhaus 77705075 Operator's manual

Walker Edison IVYM3F Assembly instructions

Walker Edison

Walker Edison IVYM3F Assembly instructions

ErgoCentric upCentric owner's manual

ErgoCentric

ErgoCentric upCentric owner's manual

fantastic furniture Dawn Bedhead Queen quick start guide

fantastic furniture

fantastic furniture Dawn Bedhead Queen quick start guide

Sanus JFV60 Assembly manual

Sanus

Sanus JFV60 Assembly manual

Adeko DMP Assembly manual

Adeko

Adeko DMP Assembly manual

Clearlight Designs Halo installation guide

Clearlight Designs

Clearlight Designs Halo installation guide

LDI Spaces SAFCO Horizon 3961 Assembly instructions

LDI Spaces

LDI Spaces SAFCO Horizon 3961 Assembly instructions

ACME 51041 Assembly instruction

ACME

ACME 51041 Assembly instruction

Furniture of America Christie CM7540Q Assembly instructions

Furniture of America

Furniture of America Christie CM7540Q Assembly instructions

BEST EXPERIENCE Springs Window Fashions  Cordless Pull Shade How to install

BEST EXPERIENCE

BEST EXPERIENCE Springs Window Fashions Cordless Pull Shade How to install

Lightolier SL201A specification

Lightolier

Lightolier SL201A specification

SEI HZ108200TX Assembly instructions

SEI

SEI HZ108200TX Assembly instructions

CALICO DESIGNS GLADSTONE 52000 Assembly instructions

CALICO DESIGNS

CALICO DESIGNS GLADSTONE 52000 Assembly instructions

manuals.online logo
manuals.online logoBrands
  • About & Mission
  • Contact us
  • Privacy Policy
  • Terms and Conditions

Copyright 2025 Manuals.Online. All Rights Reserved.