manuals.online logo
Brands
  1. Home
  2. •
  3. Brands
  4. •
  5. Home Styles
  6. •
  7. Indoor Furnishing
  8. •
  9. Home Styles KF868 User manual

Home Styles KF868 User manual

IMPORTANT NOTE
Carefully remove all the parts from the carton and put
them individually on a soft cloth to prevent scratches
or other damages occuring to the wood parts.
We have taken great care in the design of this
product and request that you carefully and strictly
follow our assembly instructions to ensure a
completed product as it was designed. Casual Attire For Today's Home
Hutch Unit
Thai Patent Pending Numbers 0602000973
88 5001
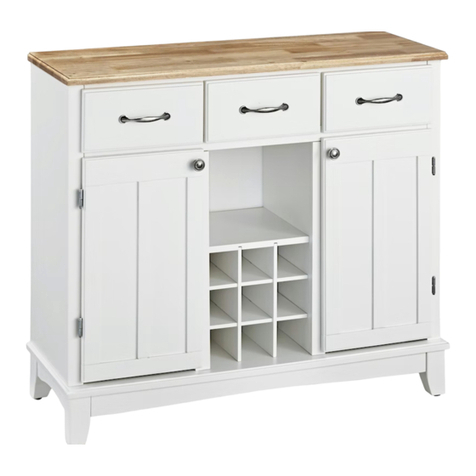
Buffet and Hutch
Hutch Unit Part List
Hardware List
B.
Side Panel
1 pc.
I.
Fixed Shelf
1 pc.
J.
Shelf
1 pc.
D.
Back Panel
2 pcs.
E.
Back Piece
1 pc.
C.
Side Panel
1 pc.
H.
Front Piece
1 pc.
K.
Door
1 pc.
A.
Top
1 pc.
Wood Screw
for Steel Plate
Connector
8 pcs. (1 extra)
Wood Screw
for Back Panel
8 pcs. (1 extra)
Cam Lock
14 pcs.(+1 extra)
Cam Lock Screw
14 pcs.(+1 extra)
L.
Door
1 pc.
Adjustable Pin
4 pcs.(+1 extra)
Steel Plate
Connector
2 pcs.
Machine Screw
2 pcs.
Door
Pull Handle
2 pcs.
F.
Back Stretcher
1 pc.
G.
Back Stretcher
1 pc.
Tools Required For Assembly : Phillips screwdriver
Cam Lock
Assembly Instructions 2/3
STEP 1
STEP 2
Insert Cam Lock Screws into the
pre-drilled holes at Side Panel (B) and
(C) and tighten up.
Attach Back Piece (E) in between
Back Stretcher (F) and (G).
Slide Back Panel (D) into place.
Attach Side Panel (C) to the unit with
Cam Locks.
Attach Front Piece (H) and Fixed
Shelf (I) to Side Panel (C)
with Cam Locks.
Attach Side Panel (B) to the
unit with Cam Locks.
Turn the unit back to its normal
position.
Cam Lock Screw
A
Cam Lock
Adjustable Pin
holes at the Top (A). (See figure 1)
Attach Top (A) onto the unit with Cam Locks.
Insert Adjustable Pins into both side panels at
the desired level. Slide Shelf (J) into place.
Assemble Pull Handles to Door (K) and (L).
(See figure 2)
Attach Door (K) and (L) to
the side panels, slide the
door lift hinges into the
side panel lift hinges.
(See figure 3)
Insert Cam Lock Screws into the pre-drilled
STEP 3 Cam Lock
Cam Lock Screw
(Figure 3)
(Figure 1)
(Figure 2)
C
A
L
J
K
A
C
D
D
H
I
F
G
E
C
B
B
Assembly Instructions 3/3
STEP 5
Place the Hutch unit onto the Buffet unit.
To hold firmly the Hutch and Buffet,
attach Steel Plate Connectors,
insert Wood Screws and tighten up.
(See figure 4)
.
Insert Wood Screws from the back
and tighten up.
STEP 4
Wood Screw
Wood Screw
Steel Plate
Connector
(Figure 3)
HARDWARE LIST
Attention !
For safety reasons, we recommended you strictly follow this
additional instructions as to prevent this Buffet & Hutch Unit
from tipping over.
Steel Bracket
at the wall
Steel Bracket
at the top of
cabinet
Wood
Screw
Wall Screw
Plastic Belt
(figure 12)
Wood Screw (short)
2 pcs.(+1 extra)
Wall Screw (long)
2 pcs.(+1 extra)
Anchor (A)
2 pcs.(+1 extra)
Anchor (B)
2 pcs.(+1 extra)
Steel Bracket
4 pcs.(+1 extra)
Plastic Belt
2 pcs.(+1 extra)
Assembly Instructions
Place the Buffet & Hutch
unit at the wall.
(Please note that the Anchor (A) is
for hollow wall and Anchor (B) is
for concrete wall.)
Use the electric drill at the drilling positions
on the wall. Insert the selected Anchors into
the wall holes and put the Steel Brackets on.
Put in wall screws and tighten up.
Put Steel Brackets at the pre-drilled holes
on the top of the unit.
Put in wood screws and tighten up.
Use the Plastic Belt to secure the
Steel Brackets at the unit and the
Steel Brackets at the wall (See figure 12).
Put the belt end into its socket and tie up.

This manual suits for next models

1

Other Home Styles Indoor Furnishing manuals
Home Styles 88 5134 30 User manual

Home Styles

Home Styles 88 5134 30 User manual

Home Styles 88 5300 006 User manual

Home Styles

Home Styles 88 5300 006 User manual

Home Styles 20 05507 0503 User manual

Home Styles

Home Styles 20 05507 0503 User manual

Home Styles 88 5662 89 User manual

Home Styles

Home Styles 88 5662 89 User manual

Home Styles 88 5100 307 User manual

Home Styles

Home Styles 88 5100 307 User manual

Home Styles 88 5670 332 User manual

Home Styles

Home Styles 88 5670 332 User manual

Home Styles Bedford Entertainment Credenza 88 5531 101 User manual

Home Styles

Home Styles Bedford Entertainment Credenza 88 5531 101 User manual

Home Styles 88 5527 101 User manual

Home Styles

Home Styles 88 5527 101 User manual

Home Styles 88 5530 181 User manual

Home Styles

Home Styles 88 5530 181 User manual

Home Styles 88 5531 752 User manual

Home Styles

Home Styles 88 5531 752 User manual

Home Styles 88 5053 15 User manual

Home Styles

Home Styles 88 5053 15 User manual

Home Styles Ottoman 2000-08-FB80 User manual

Home Styles

Home Styles Ottoman 2000-08-FB80 User manual

Home Styles 20 05186 0015 User manual

Home Styles

Home Styles 20 05186 0015 User manual

Home Styles 4528-95 User manual

Home Styles

Home Styles 4528-95 User manual

Home Styles Arts & Crafts 88 5180 04 Quick start guide

Home Styles

Home Styles Arts & Crafts 88 5180 04 Quick start guide

Home Styles 88 4511 95 User manual

Home Styles

Home Styles 88 4511 95 User manual

Home Styles 551 -80 8 User manual

Home Styles

Home Styles 551 -80 8 User manual

Home Styles 5180 80 User manual

Home Styles

Home Styles 5180 80 User manual

Home Styles 88 5120 89C User manual

Home Styles

Home Styles 88 5120 89C User manual

Home Styles 20 08002 0691 User manual

Home Styles

Home Styles 20 08002 0691 User manual

Home Styles 88 5053 30 User manual

Home Styles

Home Styles 88 5053 30 User manual

Home Styles 88 5562 80 User manual

Home Styles

Home Styles 88 5562 80 User manual

Home Styles Easy Pro User manual

Home Styles

Home Styles Easy Pro User manual

Home Styles 20 05664 0026 User manual

Home Styles

Home Styles 20 05664 0026 User manual

Popular Indoor Furnishing manuals by other brands

Balt 89964 Assembly instructions

Balt

Balt 89964 Assembly instructions

RSA Lighting Microgem MLV3801 specification

RSA Lighting

RSA Lighting Microgem MLV3801 specification

IKEA SKRUVSTA manual

IKEA

IKEA SKRUVSTA manual

HULALA HOME CHM0010 Assembly instructions

HULALA HOME

HULALA HOME CHM0010 Assembly instructions

BDI SEQUEL 6051 owner's manual

BDI

BDI SEQUEL 6051 owner's manual

Mocka Neva Change Table Assembly instructions

Mocka

Mocka Neva Change Table Assembly instructions

Pearl District 290-2WAY-MP Assembly instructions

Pearl District

Pearl District 290-2WAY-MP Assembly instructions

BOPITA HOME Assembly instructions

BOPITA

BOPITA HOME Assembly instructions

Craft+Main CHP09226CW Assembly instructions

Craft+Main

Craft+Main CHP09226CW Assembly instructions

Rauch MZ210 Assembly instructions

Rauch

Rauch MZ210 Assembly instructions

Core Products Boston BT215 Assembly instructions

Core Products

Core Products Boston BT215 Assembly instructions

Living Spaces Sedona 7030-01270 KIT Assembly instructions

Living Spaces

Living Spaces Sedona 7030-01270 KIT Assembly instructions

Furniture of America Gatria CM6982 Assembly instructions

Furniture of America

Furniture of America Gatria CM6982 Assembly instructions

Weltevree SHEEPSCOAT product manual

Weltevree

Weltevree SHEEPSCOAT product manual

Trendteam TTB03 1637.401.01 Installation instruction

Trendteam

Trendteam TTB03 1637.401.01 Installation instruction

Hillsdale Furniture 2874-500 Assembly instruction

Hillsdale Furniture

Hillsdale Furniture 2874-500 Assembly instruction

LDI SAFCO Xpressions 1936 Assembly instructions

LDI

LDI SAFCO Xpressions 1936 Assembly instructions

dobue MOVELARIA 1.03 TURIM 200500 Assembly instruction

dobue MOVELARIA

dobue MOVELARIA 1.03 TURIM 200500 Assembly instruction

manuals.online logo
manuals.online logoBrands
  • About & Mission
  • Contact us
  • Privacy Policy
  • Terms and Conditions

Copyright 2025 Manuals.Online. All Rights Reserved.