Installationsanleitung
Elektronikmodule Handmelder (PAM)
Installation Instruction
Electronic Module Manual Call Point (IFD)
(Art.-Nr. / Part No. 8044xx)
798837 Technische Änderungen vorbehalten!
Technical changes reserved!
09.2008 DGB © 2008 Honeywell International Inc.
Novar GmbH a Honeywell Company
Dieselstraße 2, D-41469 Neuss
Internet: www.esser-systems.de
D
Bei dem Einsatz des Melders als Handfeuermelder muss
zwingend ein rotes Gehäuse und die normenkonforme
Symbolik verwendet werden.
Andere Gehäusefarben und Beschriftungen gelten nicht als
Handfeuermelder sondern als manuelle Auslösevorrichtung.
Verdrahtungsfolge der Analog-Ringleitung beachten X1,
Klemmen -UL(IN) (Eingang) ⇒-UL(OUT) .(Ausgang).
Fernmeldekabel I-Y (St) Y n x 2 x 0,8 mm mit besonderer
Kennzeichnung oder Brandmeldekabel verwenden!
Durch den Anschluss der Kabelabschirmung werden die
Signalleitungen gegen Störeinflüsse geschützt.
Bei Servicearbeiten an dem Hand(feuer)melder ist eine
evtl. vorhandene Alarmweiterleitung, wie zum Beispiel die
unbeabsichtigte Auslösung einer Übertragungseinrichtung
(ÜE) zu beachten.
Ergänzende und aktuelle Informationen
Die Produktangaben entsprechen dem Stand der
Drucklegung und können durch Produktänderungen,
geänderte Normen/Richtlinien ggf. von den hier genannten
Informationen abweichen.
Aktualisierte Informationen, Konformitätserklärungen und
Instandhaltungsvorgaben siehe www.esser-systems.de.
Handmelder und automatische Brandmelder dürfen gemäß
den VdS-Richtlinien nicht auf einer gemeinsamen
Meldergruppe betrieben werden (max. 10 Handmelder/
Gruppe).
GB
When the MCP is used as a MCP it must be installed in a
red housing with an identification label showing the correct
symbol.
When housings with different colours and identification
labels are used the unit is classed as a manual activation
device and not as a MCP.
Observe the analog loop wiring sequence X1,
terminal -UL(IN) (input) ⇒-UL(OUT).(output).
Use communication cable I-Y (St) Y n x 2 x 0,8 mm with
appropriate specification or fire detection cable!
The shielding is used to prevent EMI.
The alarm activation and triggering of notifying systems
e.g. manned centre link (Master box) must be observed
during any Service of the MCP.
Additional and updated Informations
The product specification relate to the date of issue and
may differ due to modifications and/or amended Standards
and Regulations from the given informations.
For updated informations, declaration of conformity and
maintenance specifications refer to www.esser-systems.de.
Pursuant to the VdS guidelines MCPs and automatic fire
detectors may not be operated in the same detector zone
(max. 10 MCP per detector zone).
D
Achtung!
Diese Installationsanleitung ist vor der Inbetriebnahme genau
durchzulesen. Bei Schäden die durch Nichtbeachtung der
Installationsanleitung verursacht werden, erlischt der
Garantieanspruch. Für Folgeschäden, die daraus resultieren, wird
keine Haftung übernommen.
Sicherheitshinweise
•Der Handmelder darf nur an dem Brandmeldesystem 8000 /
IQ8Control betrieben werden.
•Der Betrieb des Handmelders ist nur in Innenräumen zulässig.
•Der Handfeuermelder darf NICHT an 230 V AC Netzspannung
angeschlossen werden.
•Der Handfeuermelder darf nur im vorgesehenen Temperatur-
bereich betrieben werden.
•Die Wartung und Reparatur des Handfeuermelders darf nur
durch eine Fachkraft erfolgen, die mit den damit verbundenen
Gefahren und Vorschriften vertraut ist.
•Die Veränderung oder ein Umbau des Melders ist nicht zulässig.
Allgemein
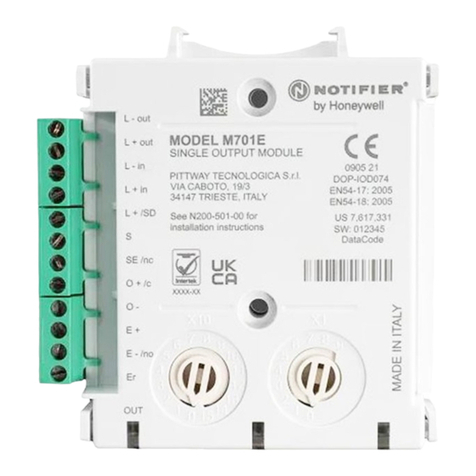
Das Elektronikmodul (PAM) mit entsprechendem Gehäuse wird als
Handmelder zur manuellen Auslösung eines Brandalarmes bzw. einer
Gefahrenmeldung in trockenen, nicht explosionsgefährdeten
Betriebsstätten eingesetzt. Der Anschluss erfolgt an die Analog-
Ringleitung des Brandmeldesystems 8000 / IQ8Control.
Die verschiedenen Ausführungen der Melder sind durch die ersten
drei Ziffern ihrer Seriennummer auf dem Barcode-Etikett
gekennzeichnet (siehe Tabelle Seite 2).
Bedienung
Auslösung: Glasscheibe einschlagen und Druckknopf bis zum
Einrasten tief drücken. Die Auslösung wird durch
die Leuchtdiode angezeigt.
Melder-Reset: Die Rückstellung erfolgt durch manuelle Betätigung
des Arretierhebels.
Testbetrieb: Gehäusetür mit dem Schlüssel öffnen und den
Druckknopf bis zum Einrasten tief drücken.
Anschaltung für alle Elektronikmodule (Abb. 1)
Die Anschaltung der Melder erfolgt grundsätzlich über die Analog-
Ringleitung des Brandmeldesystems 8000 / IQ8Control. Handmelder
müssen auf der Analog-Ringleitung in eigenen Meldergruppen
zusammengefasst werden.
Elektronikmodul mit Optokoppler, Art.-Nr. 804472 / 804472.10 (Abb. 4)
Über den Optokoppler-Eingang kann ein potentialfreier, externer
Alarmkontakt angeschlossen werden (z.B. Schalter). Der Eingang ist
nicht überwacht.
Elektronikmodul mit Gruppentrenner, Art.-Nr. 804473.10
Die Gruppentrenner gewährleisten die Funktionstüchtigkeit der
Anlage, falls ein Segment der Ringleitung durch Kurzschluss ausfällt.
Bei einem Kurzschluss der Ringleitung öffnen die Gruppentrenner vor
und hinter dem Kurzschluss und schalten den Teil der Ringleitung
zwischen den Gruppentrennern ab. Ein einfacher Drahtbruch
beeinträchtigt die Funktionstüchtigkeit der Ringleitung nicht.
Elektronikmodul mit Relais, Art.-Nr. 804475 / 804475.10 (Abb. 2)
Über die Anschlüsse NC/C (Öffner), oder NO/C (Schließer) stehen die
Kontakte eines Wechslers zur Verfügung. Der Wechsler wird mit dem
Auslösen dieses Melders oder der externen D-Linie betätigt. Der
Relaisausgang kann in den Kundendaten der Brandmelderzentrale
als Steuergruppe programmiert werden.
Elektronikmodul mit 2. Mikroschalter, Art.-Nr. 804474 / 804474.10
Über die Anschlüsse NC/C (Öffner), oder NO/C (Schließer) steht ein
potentialfreier Kontakt zur Verfügung. Der Kontakt des Mikroschalters
wird mit dem Auslösen des Elektronikmoduls betätigt.
Max. Kontaktbelastung 30 V DC / 1 A des Schalters S2
beachten!
Melderparallelanzeige (Abb. 3)
Die Melderparallelanzeige ermöglicht die abgesetzte, optische
Anzeige einer Störung, eines Brandalarmes oder einer
Gefahrenmeldung. Die maximale Leitungslänge zur Melderparallel-
anzeige darf 100 Meter nicht überschreiten!
Zum Anschluss sind folgende Melderparallelanzeigen zulässig:
Art.-Nr. 781804, 781814 und 801824.
Anschluss einer externen Meldergruppe (Abb. 5 / 6)
An alle Elektronikmodul Typen kann eine externe Meldergruppe
(D-Linie) mit maximal zehn Standard-Handmeldern (interner
Alarmwiderstand jeweils 1 KOhm) angeschlossen werden (nicht VdS
gemäß). Bei einer Auslösung wird die Adresse und der programmierte
Zusatztext des Handmelders (PAM) angezeigt, an dem die
Standardgruppe angeschlossen ist. Die maximale Leitungslänge der
externen D-Linie darf 500 Meter nicht überschreiten! Der letzte Melder
der ext. D-Linie ist mit einem 10 KOhm Abschlusswiderstand zu
beschalten.
Wird keine ext. D-Linie angeschlossen, so bleibt der werkseitig (ab
Leiterplatten-Index D) eingesetzte 10 KOhm Widerstand in Funktion
(siehe Abb. 5).
Technische Daten
Betriebsspannung : 8 V DC bis 42 V DC
Kontaktbelastung : max. 30 V DC / 1 A
Optokoppler : 2,4 V DC bis 24 V DC / 0,4 bis 15 mA
Ruhestrom : ca. 45 μA @ 19 V DC
Alarmstrom : typ. 9 mA @ 19 V DC
Melderzahl / Gruppe : 10 Melder pro Gruppe /
127 Melder pro Ring
Alarmanzeige : LED, rot
Anschlussklemmen : max. 1,5 mm²
Umgebungstemperatur : -20 °C bis +70 °C
Lagertemperatur : -30 °C bis +75 °C
Schutzart : IP 43 (mit Alu-Druckgussgehäuse)
IP 54 (mit Alu-Druckgussgehäuse
und Bausatz Art.-Nr. 704070)
Gewicht ohne Gehäuse : ca. 100 g
Maße (B x H x T) : 95 x 95 x 25 (mm)
Spezifikation : prEN 54-11, Typ B
CE-Zertifikat : 0786-CPD-20480 / -20481
GB
Warning!
These instructions must be studied carefully before commissioning.
Claims under warranty will be invalidated in the event of damage
caused by non-compliance with the installation instructions. No liability
is accepted for any resulting consequential loss.
Safety information
•The Manual Call Point must only be connected to Fire Alarm
System 8000/ IQ8Control.
•The MCP must be installed indoors.
•The detector must NOT be connected to the 230 V AC main supply.
•Do not operate the Call point outside the permitted temperature
range.
•Maintenance and repairs may only be performed by properly
qualified personnel familiar with the hazards and applicable
regulations.
•Do not modify the call point unit in any way. Doing so voids the
warranty.
General
The Electronic Module (IFD) with appropriate housing is used for a
Manual Call Point with manual release of a fire alarm or a hazard
alarm in dry, non hazardous areas. The Detector must be connected
to the analog loop of the fire alarm control system 8000 / IQ8Control.
The various types of Manual Call Points can be differentiated by the
first three digits of the serial number on the bar code label
(refer to table, page 2).
Operation
Activation: Break lass and press the button until it engages. The
Activation will be confirmed by the red LED.
Reset: To reset the MCP release the locking lever manually.
Test: Use key to open the housing door and press the
button until it engages.
Basic wiring of all electronic Module types (Fig.1)
Manual Call Points must be connected to the analog loop of the fire
alarm system 8000 / IQ8Control. Manual Call Points must be
combined in separate detector zones on the analog loop.
Electronic Module with optocoupler, Part No. 804472.10 (Fig. 4)
It is possible to connect an external floating alarm contact (e.g.
switch) to the intelligent Manual Call Point. The input is not monitored.
Electronic Module with isolator, Part No. 804423
The loop isolators ensure that the system operates even if a segment
of the analog loop fails due to a short circuit. When a short occurs the
isolators before and after the short open, disconnecting the section of
the loop between the isolators. A single wire break do not affect the
functionality of the analog loop.
Electronic Module with relay, Part No. 804425 (Fig. 2)
The terminals of the relay NC/C (normally closed) and NO/C (normally
open) can be used to connect external devices. The relay is activated
when the intelligent Manual Call Point or an external call point zone is
released. The relay can also be assigned to a control zone via the
customer data programming.
Remote LED indicator (Fig. 3)
A remote LED indicator is used for an optical indication of a fault, fire
or hazard alarm condition. The maximum cable length for the remote
LED indicator must not exceed 100 m!
The following remote LED indicators can be connected:
Part No. 781804, 781814 and 801824.
Connection of an external detector zone (Fig. 5 / 6)
The MCP (IFD) provides the connection of an external detector zone
(D-Line) with up to 10 conventional Manual call points and an internal
alarm 1 KOhm resistor per MCP (not according to VdS). If activated
the address and the programmed additional text of the MCP (IFD),
where the external zone is connected to, will be displayed. The
maximum length of the cable for the external D-Line must not exceed
500 meters! The last detector of the external zone must be terminated
with a 10 KOhm End-of-line resistor.
If no external D-Line is connected the 10 KOhm terminating resistor
(factory default from Hardware index D) must be connected directly to
the terminals (refer to Fig. 5).
Specifications
Operating voltage : 8 V DC to 42 V DC
Contact rating : max. 30 V DC / 1 A
Optocoupler : 2.4 V DC to 24 V DC / 0.4 to 15 mA
Quiescent current : ca. 45 μA @ 19 V DC
Alarm current : typ. 9 mA @ 19 V DC
Number of detectors/zone : 10 detectors per zone /
127 detectors per analog loop
Alarm indicator : LED, red
Terminals : max. 1.5 mm²
Ambient temperature : -20 °C to +70 °C
Storage temperature : -30 °C to +75 °C
Protection rating : IP 43 (with die cast aluminium housing)
IP 54 (with die cast aluminium housing
and kit Part No. 704070)
Weight without housing : approx. 100 g
Dimensions (w x h x d) : 95 x 95 x 25 (mm)
Specification : prEN 54-11, type B
CE certificate : 0786-CPD-20480 / -20481


