manuals.online logo
Brands
  1. Home
  2. •
  3. Brands
  4. •
  5. Honeywell
  6. •
  7. Other
  8. •
  9. Honeywell 2040W Quick start guide

Honeywell 2040W Quick start guide

THE MEDIA
PROTECTORTM
with Key Lock
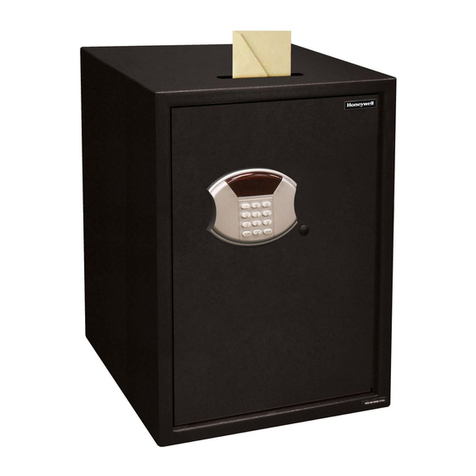
Home and Office Security Safes
Opening Your Honeywell Safe
1. Insert the key and turn left.
2. Push the large button and the locking
latch will open and spring forward.
3. Once the latch has cleared the lip it was
secured to, you can open the Firesafe lid.
4. Remove the interior top tray.
Closing Your Honeywell Safe
1. Install the interior top tray. The safe will not
function properly during a fire if the tray is not
installed. Do not place media you want to
protect on top of the tray.
2. Flip the lock assembly up and over the clasp.
3. Press the bar down to lock the clasp.
4. Insert the key and turn right.
5. Remove the key.
Assembling Wheels (Model 2040W only)
If your safe includes Easy Roller™ Wheels, follow the assembly
instructions included in the box. For your safety, the Maximum
Weight Warning printed on the wheel cart should be upright and
facing outward.
After assembly, carefully place the safe onto the wheel cart.
Do not sit or stand on the Easy Roller™ Wheels. The maximum
weight supported is 85 lbs (38.6 kg).
Operation & Installation Guide
Model 2040 / 2040W
Model 2040E / 2040WE
Read These Instructions Very Carefully!
HME-HMS-MDE
ENGLISH
Limited Warranty
LIFETIME AFTER FIRE REPLACEMENT GUARANTEE
If your Honeywell Firesafe is ever damaged by a fire, SISCO will replace it
with a comparable model at no charge to the consumer. A photo of the
damaged safe and a Fire Department report will be required as proof of
loss. Freight on the replacement unit is not included in the guarantee and
must be paid by the user.
LIMITED WARRANTY
If your Honeywell safe fails to operate because of a manufacturing defect,
any time up to five (5) years from the date of original purchase, we will, at
our discretion, repair or replace the unit at no charge to the original owner
provided you return the product, shipping prepaid, to SISCO, or to a service
center or locksmith of our choice. Prior authorization must be obtained
from Sisco in advance.
WHAT IS NOT COVERED
This warranty does not apply if the product has been damaged by
improper installation, neglect, accident, misuse, exposure to extremes
of heat or humidity, terrorism, war, acts of God, or as a result of service
or modification by other than an authorized service center. Sisco is not
responsible for any costs associated with removing or installing this
product. SISCO is also not responsible for damage or loss of the contents of
the safe nor for the unauthorized removal of contents.
This warranty does not apply to the finish of any metal portions of the
product. No other expressed warranty is given. The repair or replacement
of the product is your exclusive remedy. Any implied warranty of salability
or fitness is limited to the duration of this written warranty. Some states
do not allow limitations on how long an implied warranty lasts, so the
above limitations may not apply to you. In no event shall SISCO be liable
for consequential or incidental damages. Some states do not allow the
exclusion or limitation of incidental or consequential damages, so the
above limitation or exclusion may not apply to you. This warranty gives you
specific rights and you may also have other rights which vary from state to
state.
The Honeywell trademark for Home/ Office Safes is used with permission.
Honeywell Safes are distributed exclusively by SISCO. Honeywell makes no
representations or warranties with respect to this product or service, The
Honeywell Trademark is used under license from Honeywell Intellectual
Properties Inc. by SISCO.
Opening & Closing Your Firesafe
Home and Office Security Safes
THE MEDIA
PROTECTORTM
Home and Office Security Safes
Package Contents
1 Honeywell Media/Data Safe
1 Operation & Installation Guide
2 Entry Keys
Model 2040W Only
1 Set of Easy Roller™ Wheels
1 Easy Roller™ Wheels Assembly Instructions
Proper Use of Your Safe
• The Media Protector™ prevents damage to film, photographs,
CD-ROMs, DVD-ROMs, computer & video tapes, and other media, which
start to deteriorate at 150°F (65°C). It withstands 1700°F (926°C) for 1 hour
while maintaining an interior temperature below 125°F (52°C).
For the safe to perform properly:
• Store the safe on a flat surface (or, if provided, the wheeled cart).
• Do not store or place the safe upside-down or on its side.
• Store the safe on a ground floor, in a location free of potential hazards
and falling objects.
For Your Protection
• Always store keys away from (AND NEVER INSIDE) safe.
• Save this manual and NEVER keep it inside the safe.
How to Contact Us
Phone: 1-800-223-8566
Monday through Friday, 8:00 am to 4:00 pm Pacific Standard Time
Email: [email protected].
In addition to the required information regarding your safe, you must
include the best time and proper telephone number to reach you during
our normal Customer Service hours. You should receive a reply response via
e-mail or phone within 24 business hours or the following business day.
Mail: Attn: Customer Service Dept.
SISCO
2835 E. Ana Street
Rancho Dominguez, CA 90221
Internet: www.HoneywellSafes.com
Ordering Replacement Keys
If a key becomes misplaced or you would like additional keys for your
safe, you may conveniently purchase them from our Customer Service
department.
Payment and Delivery
In the US, replacement keys are available for $6.95 each and credit card
orders are accepted by telephone and through our website. Checks or
money orders are required for orders received by mail and should be
made payable to “SISCO”. Orders paid via money order or credit card
typically ship within 72 hours. Orders placed with a personal or business
check typically ship within 14 days.
You must supply the following information to assure accurate and
prompt processing:
• Name / Address / Telephone
• Safe model number
• Number of keys requested
• Key number (located on the lock)
• Email (If available)
Terms subject to change without notice
Your Safe’s Unique Identification #’s
When contacting Customer Service, you should be prepared to supply some
important information that specifically identifies your safe. This information
is extremely important to assuring prompt and accurate assistance.
It is strongly recommended that you identify and record the following
information in the “Identification Record” form located on the bottom of this
page.
Model #
The Honeywell Home and Office Security Safes product line consists of
many different models, each identified by a specific Model #. Every model is
manufactured with unique capabilities and features that may require specific
solutions to a variety of difficulties that occasionally occur.
Key #
The Key # is necessary to identify the specific configuration of the key
and lock cylinder components of your safe. If a key becomes damaged
or misplaced, the Key # is absolutely required to provide you with a
replacement key.
Locating Key #
The Key numbers are engraved on the keys and around the lock cylinder.
Your Safe Identification Record
Record all Safe Identification #’s below:
Customer SupportSafe Identification Record
Congratulations!
Your new Honeywell Firesafe will provide years of safe and secure storage for
valuables and important documents. Your safe has been built with the highest
manufacturing standards to ensure maximum user satisfaction under a variety
of conditions.
Model #
Key #
Home and Office Security Safes Home and Office Security Safes
Important: DO NOT RETURN SAFE TO STORE
If you have any questions pertaining to proper use,
DO NOT RETURN safe to the store. Please Contact
Customer Service at 1-800-223-8566 (USA & Canada).
Important: ALWAYS STORE SAFE FLAT
Always store your safe in a flat horizontal
position so that the contents remain
protected during a fire. Storing the unit
on the sides or ends WILL NOT PROTECT
CONTENTS during a fire.
AUSTRALIA
c/o: Customer Service Dept.
Master Distributors
11 Howleys Rd.
Notting Hill VIC 3168
03-9538-9200
EUROPE
c/o: Freightways Distriservices B.V.
P.O. Box 3077
2220 CB Katwij
The Netherlands
+31(0) 71.409.0721
This manual suits for next models

2

Other Honeywell Other manuals

Honeywell HD3 equIP Series User manual

Honeywell

Honeywell HD3 equIP Series User manual

Honeywell BFW112 Operating instructions

Honeywell

Honeywell BFW112 Operating instructions

Honeywell IH21 User manual
Honeywell

Honeywell IH21 User manual
Honeywell Titan SCBA Installation guide

Honeywell

Honeywell Titan SCBA Installation guide

Honeywell LonWorks User manual

Honeywell

Honeywell LonWorks User manual

Honeywell T7560H User manual

Honeywell

Honeywell T7560H User manual

Honeywell QRAE 3 User manual

Honeywell

Honeywell QRAE 3 User manual

Honeywell IH21 User manual

Honeywell

Honeywell IH21 User manual

Honeywell 5103S-5107S How to use

Honeywell

Honeywell 5103S-5107S How to use

Honeywell Sensepoint XCL User manual

Honeywell

Honeywell Sensepoint XCL User manual

Honeywell CD3000S-1PH User manual

Honeywell

Honeywell CD3000S-1PH User manual

Honeywell 26480.10 Service manual

Honeywell

Honeywell 26480.10 Service manual

Honeywell IF2 User manual

Honeywell

Honeywell IF2 User manual

Honeywell GasAlertQuattro User manual

Honeywell

Honeywell GasAlertQuattro User manual

Honeywell RA889A User manual

Honeywell

Honeywell RA889A User manual

Honeywell Sensepoint XRL User manual

Honeywell

Honeywell Sensepoint XRL User manual

Honeywell Searchline Excel User manual

Honeywell

Honeywell Searchline Excel User manual

Honeywell BDR91 User manual

Honeywell

Honeywell BDR91 User manual

Honeywell 2201 User manual

Honeywell

Honeywell 2201 User manual

Honeywell r7284 User manual

Honeywell

Honeywell r7284 User manual

Honeywell RM7895A1014 User manual

Honeywell

Honeywell RM7895A1014 User manual

Honeywell BW Clip4 User manual

Honeywell

Honeywell BW Clip4 User manual

Honeywell BW Clip4 User manual

Honeywell

Honeywell BW Clip4 User manual

Honeywell POL-200-TS User manual

Honeywell

Honeywell POL-200-TS User manual

Popular Other manuals by other brands

King Long XMQ6127J series operating manual

King Long

King Long XMQ6127J series operating manual

Razor RAZORX CRUISER manual

Razor

Razor RAZORX CRUISER manual

Jacuzzi Primo Installation and operation manual

Jacuzzi

Jacuzzi Primo Installation and operation manual

Tilton 6000-Series installation instructions

Tilton

Tilton 6000-Series installation instructions

Omron V750-BA50C04-US user manual

Omron

Omron V750-BA50C04-US user manual

EMG X Series Installation information

EMG

EMG X Series Installation information

Aeroqual AQY 1 user guide

Aeroqual

Aeroqual AQY 1 user guide

Danfoss KP 1 installation guide

Danfoss

Danfoss KP 1 installation guide

7STAR Digital Set Top Box user manual

7STAR

7STAR Digital Set Top Box user manual

TESTO 184 instruction manual

TESTO

TESTO 184 instruction manual

sanowell ComfortTherm Series Operation manual

sanowell

sanowell ComfortTherm Series Operation manual

California Air Tools auX05 owner's manual

California Air Tools

California Air Tools auX05 owner's manual

Fishman MATRIX PICKUP installation guide

Fishman

Fishman MATRIX PICKUP installation guide

Breville Cli-Mate CLI-DH10C Instruction book

Breville

Breville Cli-Mate CLI-DH10C Instruction book

Zinco BLAZE user guide

Zinco

Zinco BLAZE user guide

Beauty Works Mini Microdermabrasion Instructions for use

Beauty Works

Beauty Works Mini Microdermabrasion Instructions for use

Essence WeR@Home ES800HDO-M01 Getting started

Essence

Essence WeR@Home ES800HDO-M01 Getting started

BFT Maxima Ultra 36 Installation and user manual

BFT

BFT Maxima Ultra 36 Installation and user manual

manuals.online logo
manuals.online logoBrands
  • About & Mission
  • Contact us
  • Privacy Policy
  • Terms and Conditions

Copyright 2025 Manuals.Online. All Rights Reserved.