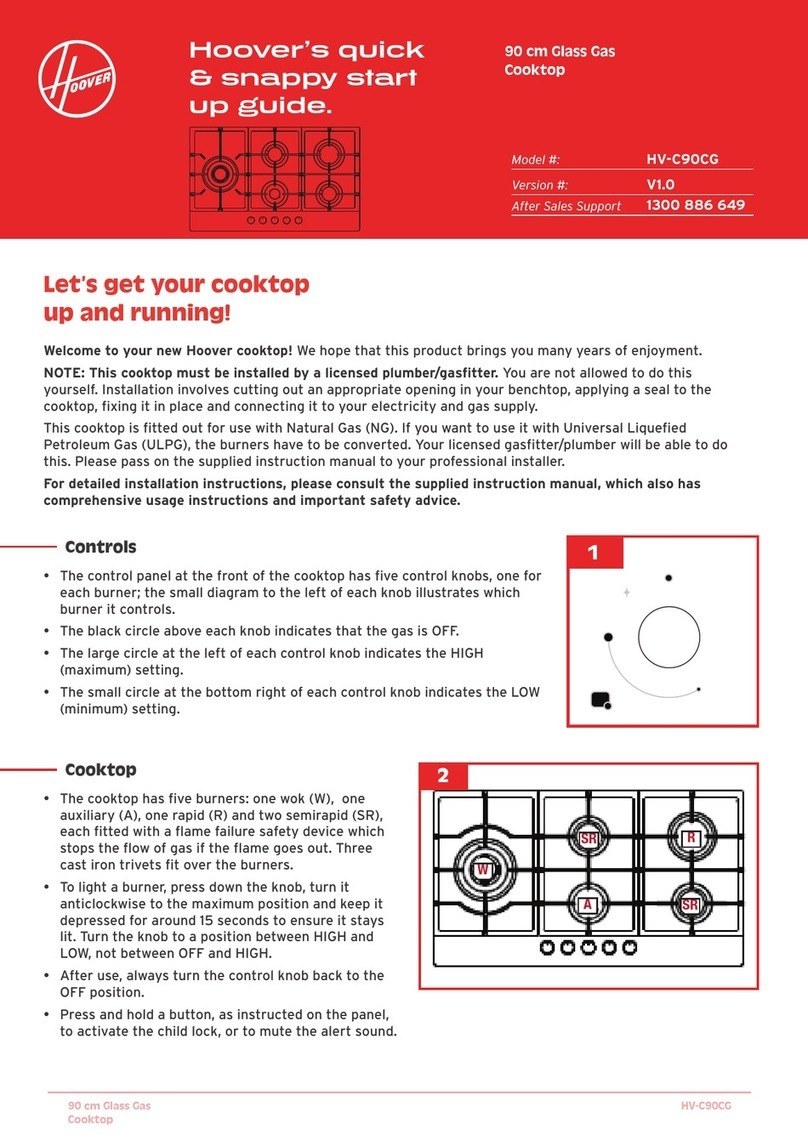
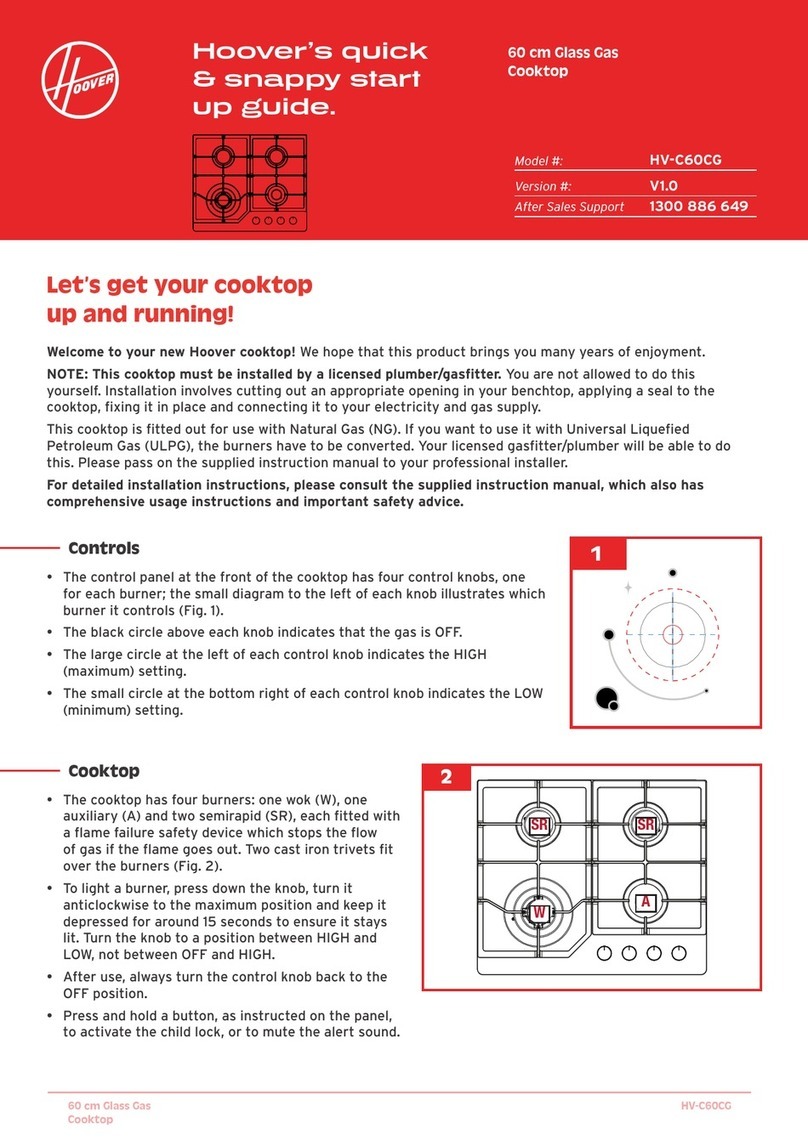
Hoover HV-C60CG User manual

60 cm Glass Gas Cooktop
Model Number HV-C60CG
E209
AFTER SALES SUPPORT
(AU) 1300 886 649 (NZ) 0800 836 761
INSTRUCTION MANUAL

2After Sales Support
(AU) 1300 886 649 (NZ) 0800 836 761 | tempo.org/support
Contents
03 General Safety Instructions
07 Product Overview
09 Installation
22 Instructions
28 FAQs & Troubleshooting Guide
29 Other Useful Information

3
After Sales Support
(AU) 1300 886 649 (NZ) 0800 836 761 | tempo.org/support
General Safety Instructions
IMPORTANT SAFETY INSTRUCTIONS
READ CAREFULLY AND KEEP FOR FUTURE REFERENCE
Read this manual thoroughly before first use, even if you are familiar with this
type of product. The safety precautions enclosed herein reduce the risk of fire,
electric shock and injury when correctly adhered to. Make sure you understand
all instructions and warnings. Keep the manual in a safe place for future
reference, along with the completed warranty card and purchase receipt. If you
sell or transfer ownership of this product, please pass on these instructions to
the new owner.
Always follow basic safety precautions and accident prevention measures
when using an electrical appliance, including the following:
Pay particular attention to safety advice following the words DANGER,
WARNING and CAUTION. These words are used to alert you to a potential
hazard that can seriously injure you and others. The instructions will
tell you how to reduce the chance of injury and let you know what can
happen if the instructions are not followed.
• DANGER or WARNING means that failure to read this safety statement
may result in severe personal injury or death.
• CAUTION means that failure to read this safety statement may result in
minor or moderate personal injury or property damage.
DANGER!
In case of a gas leak, or if you suspect gas is leaking,* take the following
actions:
DO NOT turn on the light.
DO NOT switch on/off any electrical appliance.
DO NOT touch any electric plug.
DO NOT use a telephone.
1. Stop using the product and close the middle valve.
2. Open a window to ventilate.
3. Contact our after sales support centre by using a phone outside.
*The fuel gas contains mercaptan, which smells like rotten garlic or egg, so you
can smell the gas leak, even only very small amounts.

4After Sales Support
(AU) 1300 886 649 (NZ) 0800 836 761 | tempo.org/support
General Safety Instructions (Cont.)
WARNING!
• Professional installation only: This cooktop must be installed by a licensed
plumber/gasfitter in accordance with all instructions in this manual and all
applicable rules and regulations. Any electrical work required for installation
must be carried out by a licensed electrician. Comprehensive installation
instruction follow on pages 9 to 21 of this manual.
• Electric shock hazard: This appliance must be connected to a good earth
wiring system. Before carrying out any work on the electrical section of
the appliance, or any maintenance work or repairs, the appliance must be
disconnected from the mains. If accessible, always switch off the cooktop
at the wall before cleaning the appliance. Failure to follow this advice may
result in death or electric shock.
• Hot surface hazard: While in use, direct contact with the cooktop surface
may cause burns! Take utmost care when the equipment is in use. Do not
touch the cooktop components (base, burners, caps, enamelled trivets)
when hot. We recommend using oven gloves when handling cookware.
• Fire hazard: Never leave items on top of the cooktop as this can be a fire
hazard when switched on. Do not use large cloths, tea towels or similar in
place of pot holders as the ends could touch the flames and catch fire. In
case of a fire, never try to extinguish it with water. Switch off the burner and
cover the flame(s) with a lid or fire blanket.
• Explosion hazard: DO NOT USE OR STORE FLAMMABLE MATERIALS
IN THE APPLIANCE STORAGE DRAWER (IF PRESENT) OR NEAR THIS
APPLIANCE.
• DO NOT SPRAY AEROSOLS IN THE VICINITY OF THIS APPLIANCE
WHILE IT IS IN OPERATION.
• DO NOT MODIFY THIS APPLIANCE.
• DO NOT USE THIS APPLIANCE AS A SPACE HEATER.
Failure to adhere to the above warnings may result in death or serious injury.

5
After Sales Support
(AU) 1300 886 649 (NZ) 0800 836 761 | tempo.org/support
General Safety Instructions (Cont.)
General usage conditions and restrictions
• Domestic use only: This cooktop is designed for indoor domestic use only;
commercial catering may invalidate the warranty. The cooktop can be built
into a standard kitchen cabinet or housing unit.
• Intended purpose: Only use this cooktop for its intended purpose
(preparing food), in its intended environment and as described in this
manual. Any other use may cause fire, electric shock or injury, and
invalidate the warranty. Do not modify this appliance.
• Ventilation: Heat, steam and moisture will be created during use. Take care
to avoid injury and ensure that the kitchen is adequately ventilated.
• Instructions: Make sure to observe all rules and provisions in this
instruction manual. Do not allow anybody who is not familiar with the
contents of this manual to operate the cooktop. These instructions are
not intended to cover every possible condition and situation. As with any
electrical household appliance, use common sense and caution when
installing, operating and maintaining the cooktop.
• Power cord: Do not allow the power cord to come into contact with areas
on the cooktop that get hot. Check the cord regularly for damage. Do
not use the appliance if the cord, or any other part of the appliance, has
been damaged. If the supply cord is damaged, it must be replaced by the
manufacturer or its service agent or a similarly qualified person in order to
avoid a hazard.
• Usage restriction: This appliance is not intended for use by persons
(including children) with reduced physical, sensory or mental capabilities, or
lack of experience and knowledge, unless they have been given supervision
or instruction concerning the use of the appliance by a person responsible
for their safety.
• CAUTION! Children and pets: Cooking appliances become very hot in
use, therefore ensure children and pets are kept away. If it is necessary
for younger family members to be in the kitchen, ensure that they are kept
under close supervision at all times.Do not allow children to operate or play
with any part of the appliance. It is designed to be operated by adults.
• Health issues: If you have any mechanical parts in your body (e.g. an
artificial heart), consult a doctor before using the appliance.
• WARNING! Fire risk: Never leave the cooktop unattended during use,
as this is a fire risk. Oils and fats in pots and pans may catch fire due to
overheating. Do not cover the cooktop or place combustible materials on or
near the surface even when the cooktop is not in use.

6After Sales Support
(AU) 1300 886 649 (NZ) 0800 836 761 | tempo.org/support
General Safety Instructions (Cont.)
• Winding the cord: If winding the power cord, avoid tight bends as this could
damage the cord.
• Marine craft, leisure vehicles: Where this appliance is installed for use with
ULPG in marine craft or in caravans, it shall not be used as a space heater.
• Pots and pans: Do not use misshapen or unstable or plastic cookware, or
aluminium foil containers on the cooktop. Do not let large cookware overlap
the bench as this could deflect heat onto the benchtop, which could damage
the surface. Pot and pan handles may become hot during use; position
handles away from the edge of the cooktop and out of children’s reach.
• No timer: The appliance is not intended to be operated by means of an
external timer or separate remote control system.
• No work surface: Do not store any items on the cooktop or use it as a
work surface.
• Frying food: When frying food on the cooktop, check constantly and
ensure the oil is not overheating and becoming a fire hazard. Do not fill
deep frypans more than one third full of oil. Do not leave unattended.
• Cleaning: In the interests of safety and hygiene, ensure the cooktop is kept
clean as a build-up of grease could cause a fire hazard. Switch off all controls
and allow the cooktop surface to cool before cleaning.
• Cleaning precautions: Disconnect the appliance from the mains before
cleaning, if your setup allows and the plug is accessible. Do not immerse the
appliance or power cord in water or any other liquid. Do not use a steam jet
or other high pressure cleaning equipment for cleaning the cooktop. Do not
use scourers or any other harsh abrasive cleaning agents, as these can
scratch the finish. Do not use caustic cleaning agents.
• Handle with care: Do not place or drop heavy objects on your cooktop.
• Disconnection: Do not operate or disconnect the appliance with wet
hands. Grip by the plug, do not pull by the cord when disconnecting.
• Damage/repair: Do not use the cooktop if any part has been damaged
or does not work properly. Only have it repaired by authorised service
personnel and only original spare parts should be used. Incorrect repair
could expose you to the risk of electric shock, fire or injury. Prolonged use
of the unit in such conditions could cause fire or electrocution. In case of
damage, contact our after sales support centre.
• No faulty use: Do not use the cooktop in the event of a technical fault. Any
faults must be fixed by an appropriately qualified and authorised person.
Contact our after sales support centre for advice.
• Misuse: We accept no liability for any eventual damages or injury to persons
caused by misuse of the product or noncompliance with these instructions.

7
After Sales Support
(AU) 1300 886 649 (NZ) 0800 836 761 | tempo.org/support
Scope of delivery
Gas cooktop
A Wok burner (13.5 MJ/h)
B Semi-rapid gas burner (2x 6.3 MJ/h)
C Auxiliary gas burner (4.3 MJ/h)
D Cast iron trivets (2)
E Safety temperature glass surface
F Control panel
From left to right:
Front left burner control (wok)
Rear left burner control (semirapid)
Rear right burner control (semirapid)
Front right burner control (auxillary)
Product Overview
A
F
D
E
C
B B

8After Sales Support
(AU) 1300 886 649 (NZ) 0800 836 761 | tempo.org/support
Product Overview (Cont.)
Installation hardware
As illustrated below:
NOTE:
Due to continued product improvement, images and illustrations in this manual may
vary slightly from the product purchased. All images in this manual are for reference
purposes only. Parts are not necessarily pictured to scale.
* The cooktop is configured for use with NG (Natural Gas). The injectors are
for conversion to ULPG (Universal Liquefied Petroleum Gas).
Documentation (not shown)
Instruction manual
Quick start guide
Warranty certificate
Mounting brackets (4) Foam sealing tape (4) Natural gas regulator valve (1)
ULPG Injectors * (4) Brass test point adaptor (1) Screws (4)
Elbow (1) Wok cradle (1)

9
After Sales Support
(AU) 1300 886 649 (NZ) 0800 836 761 | tempo.org/support
Installation
Unpacking the appliance
• This product has been packaged to protect it against transportation
damage. Unpack the appliance but keep all packaging materials until
you have made sure your new gas cooktop is undamaged and in perfect
condition.
• If parts of the appliance are protected by a plastic film, please remove
the film, and any stickers that may be present on the hob surface, before
using the appliance.
• The carton is recyclable. Whenever possible, reuse the carton and recycle
it when disposing of the packaging materials.
• Plastic wrapping can be a suffocation hazard for babies and young
children, so ensure all packaging materials are out of their reach and
disposed of safely.
WARNING: Professional installation only!
This cooktop must be correctly installed by an authorised, licensed
gasfitter/plumber only, in accordance with Gas Installation Code AS/NZS
5601, all other applicable rules and regulations and all instructions in this
manual. It is in your interest and that of your safety to ensure compliance.
Do not try to install the cooktop yourself! Doing so will expose you to
danger and void the warranty. Improper installation, adjustment, alteration or
service can cause injury or damage. We decline any responsibility for injury
or damage, to persons or property, as a result of improper use or installation.
This appliance is not connected to a flue for discharge of the combustion
products; therefore, it must be connected in compliance with the above
mentioned installation rules. Particular attention must be paid to the
instructions given on the next page for ventilation.
Any adjustments, conversions and maintenance of this product may only
be carried out by an appropriately authorised person, as mentioned above.
The safety and automatic adjustment devices of the appliance may only
be modified by an authorised service agent.

10 After Sales Support
(AU) 1300 886 649 (NZ) 0800 836 761 | tempo.org/support
Installation (Cont.)
Important installation advice
NG / ULPG: The cooktop is configured for use with NG (Natural
Gas). If it is to be used with ULPG (Universal Liquefied
Petroleum Gas), it must be converted using the ULPG
injectors provided and following the conversion
instructions on page 19. Such a conversion must only
be carried out by a licensed plumber/gasfitter.
Prior to installation, make sure that the location
distribution conditions (type of gas and gas pressure)
and the adjustment of the appliance are compatible.
Adjustment conditions are stated on the rating label.
Also ensure that prior to installation the gas and
electricity supply to the appliance are turned off.
Location: The cooktop may be located in a kitchen, kitchen/dining
room or a bed-sitting room, but not in a room containing
a bath or shower. The cooktop must not be installed in a
bed-sitting room of less than 20 m3. If used with ULPG,
the cooktop shall not be installed in a room or space
below ground level, such as in a basement.
Heat resistance of Wall and bench surfaces must be capable of sustaining
surrounding surfaces: temperatures of 85°C above the ambient room
temperature while in use and be resistant to heat, steam
and condensation. All laminates, fixing adhesive and
surfacing materials must be certified suitable for this
temperature. We accept no liability for any damage
caused if the appliance is installed contrary to this
advice. Do not install the cooktop near curtains or other
flammable materials.
Ventilation The appliance must only be used in rooms equipped
requirements: with adequate ventilation. The use of a gas cooking
appliance results in the production of heat and moisture
in the room in which it is installed. Always ensure that
the kitchen is well ventilated; keep natural ventilation
holes open or install a rangehood.
Prolonged intensive use of the appliance may require
additional or more effective ventilation, for example,
opening of a window or increasing the level of
mechanical ventilation, where present.

11
After Sales Support
(AU) 1300 886 649 (NZ) 0800 836 761 | tempo.org/support
Clearances
The clearances listed below are required when installing the appliance into a
kitchen unit (depending on size) or 600 mm worktop (Fig. 1):
• The edges of the cooktop must be a minimum distance of 60 mm from a
side or rear wall.
• The highest point of the cooktop surface (including the burners and trivets)
must be a minimum distance of:
– 700 mm to the underside of any horizontal surface directly above it
– 400 mm to the underside of any horizontal surface if it is in line with the
outer edge of the cooktop (if the underside of the horizontal
surface is lower than 400mm, then it must be at least 50 mm
away from the outer edges of the cooktop)
• There must be a 50 mm clearance around the appliance and between the
cooktop surface and any combustible materials.
• Fire resistant materials (such as ceramic tiles) are required up to 450 mm
above the burner top.
• If installing above an oven, the oven must have forced ventilation. Check
the necessary clearances and cut-out requirements in the oven installation
manual.
Installation (Cont.)
Fig. 1: Clearances required when fitting
the cooktop with a rangehood above
200 mm
min
.
560 mm
480 mm
60 mm
400 mm
700 mm
600 mm
400 mm

12 After Sales Support
(AU) 1300 886 649 (NZ) 0800 836 761 | tempo.org/support
Benchtop preparation
Make sure the kitchen area is dry and there is sufficient ventilation and easy
access to all control elements.
Do not install the cooktop near curtains or other flammable materials.
If you have (or plan to have) a rangehood fitted above the cooktop, check in
the rangehood instructions that you will have the required clearance before
starting with the installation.
To install the cooktop in your benchtop, make an opening with the
dimensions (in mm) given below (Fig. 2).
The required clearances for the cooktop are illustrated on page 11 (Fig. 1).
Installation (Cont.)
IMPORTANT: You must have a gap of at least 25mm and at most 74mm
between the underside of the appliance and any surface underneath it (Fig. 3).
Fig. 3
45 mm
25 mm (min.)
Fig. 2
560
480
60 (min.)

13
After Sales Support
(AU) 1300 886 649 (NZ) 0800 836 761 | tempo.org/support
Installation (Cont.)
Applying the seal
The installation hardware includes a length of sealing tape, which when
applied around the cooktop prevents liquid from entering the cabinet. Before
installing the cooktop, please apply this sealing tape follow the instructions
below.
Remove the trivets (pan supports) and put aside.
Remove the burner caps and flame spreaders (Fig. 4), then turn the cooktop
upside down and place it on a cushioned mat, taking care not to damage the
ignition plugs and thermocouples.
The supplied sealing tape is 3mm thick and 10mm wide. Detach the backing
strip from the tape but ensure that the transparent adhesive still adheres to
the seal itself.
Correctly position the sealing tape under the edge (Fig. 5), ensuring that the
outer part of the seal perfectly matches the outer edge of the cooktop. The
ends of the strips must fit together without overlapping. Then press the seal
firmly in place at the underside of the cooktop.
Burner cap
Flame spreader
Fig. 4
Fig. 5
IMPORTANT: Do not use a silicon sealant to seal the appliance against the
aperture. This will make it difficult to remove the cooktop from the aperture in
future if it needs to be serviced.

14 After Sales Support
(AU) 1300 886 649 (NZ) 0800 836 761 | tempo.org/support
Fig. 6
Sealing tape
Screw (A) Mounting
bracket (B)
Installation (Cont.)
Installation options
When fitting a gas cooktop above a drawer or standard housing unit, suitable
precautions must be taken to prevent contact with the cooktop hob and base,
which become very hot during operation. The recommended method for over-
coming this problem is to fix a wooden panel within the cabinet at a minimum
distance of 25 mm below the underside of the cooktop (see Fig. 3, page 12).
NOTE: The panel below the hob must be easily removable to enable servicing if
and when required.
Affixing the cooktop
Once the sealing tape has been installed around the underside of the
cooktop, carefully turn it back over and gently lower it into the aperture hole
that has been cut out. Push it down gently so that the cooktop is resting
firmly on the cabinet/benchtop surface.
Now secure the cooktop in position using the mounting brackets supplied.
Place a mounting bracket over the hole that matches the size of the screws—
there are appropriate screw holes in each corner of the hob.
Insert a screw (A) through
the mounting bracket (B) and
slightly tighten it so that the
bracket is attached to the
cooktop, but you can still adjust
its position (Fig. 6).
On the underside of the
cooktop, adjust the mounting
brackets into a position that
is suitable for your benchtop.
Then fully tighten the screws
(A) to secure the cooktop into
position.

15
After Sales Support
(AU) 1300 886 649 (NZ) 0800 836 761 | tempo.org/support
Installation (Cont.)
Electrical connection
Electrical work
Should any electrical work be required associated with the electrical outlet
that is to be used for the cooktop, all such work must be carried out by an
appropriately qualified, licensed electrician in accordance with all applicable
rules and regulations.
Wall socket
The electric wall outlet must be properly earthed, accessible and suitable for
the power drawn by the appliance. The outlet voltage and circuit frequency
must correspond to the voltage stated on the appliance rating label.
Power cord
When installing the appliance, make sure that the power supply cord does not
come into contact with any parts of the cooktop that get hot during use, or
with hot cookware. If the supply cord is damaged, it must be replaced by the
manufacturer or a similarly qualified person in order to avoid a hazard.
The wires in the power cord are coloured in accordance with the following
code: green/yellow = earth, blue = neutral, brown = live.
IMPORTANT: : The green/
yellow coloured wire must be
connected to the terminal which
is marked with the letter E or by
the earth symbol (Fig. 7).
Connection
The appliance is equipped with
an electrical cord and power
plug, which must be connected
to a 220–240 V~, 50–60 Hz
electricity supply in order for the
ignition to work.
After the appliance has been
installed and connected to the
gas supply, insert the power plug
firmly into an appropriate earthed
electrical outlet and switch on
the power at the outlet.
Fig. 7: Wiring diagram

16 After Sales Support
(AU) 1300 886 649 (NZ) 0800 836 761 | tempo.org/support
Installation (Cont.)
Gas connection
Statutory requirements
This cooktop must be correctly installed by an authorised, licensed
gasfitter/plumber only.
The appliance must be installed in accordance with local gas fitting
regulations, municipal building codes, Gas Installation Code AS/NZS
5601.1, S.A.A. Wiring Code, all other applicable rules and regulations and
all instructions in this manual. It is in your interest and that of your safety
to ensure compliance. Failure to have the cooktop installed correctly could
invalidate the warranty, liability claims and lead to prosecution.
For piping size details, please refer to AS/NZS 5601.1.
Before connecting the gas
Tools required: screwdriver, tubing wrench, 7mm box spanner (for
assembling/disassembling the injector nozzles), protective gloves (for
installing the appliance)
Turn off the power for safety and appliance protection. Close the middle valve
to prevent gas leakage.
Make sure that it is possible to run gas lines to the gas connection point of
the appliance. The gas connection point must be accessible without having to
remove the hob.
If a flexible hose is used, the connection point must also be accessible
without having to remove the hob. The hose must be fitted in such a way that it
cannot come into contact with a movable part of the housing unit and does not
pass through any space susceptible to becoming congested.
Replacement of gas-type fitting
Using a wrench, disassemble the
gas-type fittings from the main gas
tube.
When you disassemble/assemble
the gas connection, use two
spanners: one for fixing the gas
connection elbow, the other for
tightening the gas hose (Fig. 8).
Fig. 8
1
2

17
After Sales Support
(AU) 1300 886 649 (NZ) 0800 836 761 | tempo.org/support
Installation (Cont.)
Installing the gas regulator
Connect the elbow fitting to the appliance gas manifold connection. Check
and ensure that the seals between the elbow and manifold connection are in
place and in good condition.
• NG: If connecting the appliance to a Natural Gas (NG) outlet, connect the
supplied Natural Gas regulator valve with the integral test point to the elbow
fitting (Fig. 9-A).
• ULPG: If connecting the appliance to a ULPG outlet, connect the supplied
brass test point adaptor to the elbow fitting (Fig. 9-B).
When making the connection, ensure that the gas regulator valve outlet thread
matches the thread of the gas connector. Use an approved gas thread tape or
compound around the threads.
Ensure that the gas regulator valve installation location is perpendicular.
Ensure that the supply connection point, test point and NG regulator
adjustment screw (for NG installation) are accessible for testing and/or
adjustment with the hotplate in the installed position.
After installation, open the gas source switch and check the valve body
connections with soap and water for leaks.
WARNING:
• The regulator valve outlet pressure is set at the factory, please do not
adjust it in order to avoid the occurrence of safety accidents.
• If you find any abnormality of the regulator valve, stop using the appliance
and contact our after sales support centre for advice. Do not attempt any
maintenance yourself.
Fig. 9-A Natural Gas connection Fig. 9-B ULPG connection
Pressure
test point
Pressure
test point

18 After Sales Support
(AU) 1300 886 649 (NZ) 0800 836 761 | tempo.org/support
Installation (Cont.)
Hose assembly
The final gas connection shall be made using a flexible hose or annealed
copper tubing of sufficient length to permit the insertion and removal of the
appliance.
For gas appliances connected using a flexible hose, install with a hose
assembly that complies with AS/NZ 1869 (AGA approved), 10 mm ID class B or
D, and in accordance with AS/NZS 5601.1. This hose must not exceed 1.2 m in
length.
Ensure that the hose does not contact the hot surfaces of the hotplate, oven,
dishwasher or any other appliance that may be installed underneath or next
to the cooktop. The hose should be positioned so that it does not interfere
with drawers or other moving parts, and so that it is not subjected to abrasion,
kinking, or permanent deformation. The hose should be able to be inspected
along its entire length. Unions
compatible with the fittings must be
used and all connections must be
tested for gas leaks.
WARNING: Ensure that the hose
assembly is restrained from accidental
contact with the flue outlet of an
underbench oven.
This hose assembly is suitable for
connection to a fixed consumer piping
outlet located at 800–850 mm above
the floor (hotplates), and outside the
width of the appliance to a distance of
250 mm (Fig. 10).
A restraining wire or chain of adequate strength is to be fixed to the appliance
and the wall within 50 mm of each connection point. The length of the chain or
wire is not to exceed 80% of the length of the hose assembly.
It is recommended that a manual shut-off valve be installed in the gas supply
line, in an accessible position external to the appliance, so that the gas supply
to the appliance can be shut off in the event of an emergency or for servicing
without having to remove the appliance.
Fig. 10

19
After Sales Support
(AU) 1300 886 649 (NZ) 0800 836 761 | tempo.org/support
Installation (Cont.)
Gas adjustment (conversion for use with ULPG)
This cooktop is fitted out for use with Natural Gas (NG). If it is to be used with
Universal Liquefied Petroleum Gas (ULPG), the burners have to be converted.
IMPORTANT: Before starting the conversion, make sure all gas is
switched off (and preferably disconnected from the appliance) and the
electrical power has been disconnected.
Changing the injectors of the burners
1. Remove the pan supports, burner caps
and flame spreaders (Fig. 11).
2. Unscrew the injector (Fig. 11) using a
7 mm box spanner and replace it with the
stipulated injector for the new gas supply
(see Table 1 below).
3. Carefully reassemble all the components;
in particular make sure that the burner
crown is correctly placed on the burner.
4. After the injectors are replaced, tighten the
injector firmly in place.
IMPORTANT: The minimum flow adjustment
process must be completed before the appliance is next used (see page 20).
Fig. 11
Table 1: Gas Specification
Burner
Regulated for NATURAL GAS Regulated for ULPG
Injection
∅(mm) MJ/h Gas
Pressure
Injection
∅(mm) MJ/h Gas
Pressure
Wok (1x) 1.72 13.5
1.0 kPa
1.00 13.5
2.75 kPa
Semirapid (2x) 1.15 6.3 0.68 6.3
Auxiliary (1x) 0.93 4.3 0.58 4.3
Total 30.4 30.4

20 After Sales Support
(AU) 1300 886 649 (NZ) 0800 836 761 | tempo.org/support
Installation (Cont.)
Adjusting the minimum level of the flame
IMPORTANT: Before adjusting the minimum level of the flame, make sure
all gas is switched off (and preferably disconnected from the appliance)
and the electrical power has been disconnected.
1. Turn the tabs down to minimum.
2. Remove the knob (control handle)
from the tap (Fig. 12) and place a
small-bladed screwdriver in the
centre of the tap shaft.
3. The correct adjustment is obtained
when the flame has a length
of about 3–4 mm. (For butane/
propane gas, the adjustment
screw must be tightly screwed in.)
4. Refit the control knob.
5. Make sure that the flame does not
go out by quickly turning the knob
from maximum flow to minimum
flow. If the flame goes out, then
remove the control knob and make
further adjustments to the gas
flow, testing it again once the adjustment has been made.
6. Repeat this process for each one of the gas taps.
7. Attach the ULPG sticker to the cooker, near the gas supply inlet, covering
the factory-fitted NG label.
CAUTION!
• Do not dismantle the tap shaft. In the event of a malfunction, change the
whole tap.
• Before placing the burners back on the top plate, make sure that the
injector is not blocked.
• A full operational test and a test for possible leakages must be carried out
after gas conversion; see page 21 for details.
• After completion of the conversion, a qualified technician or installer has
to mark “V” on the right gas category to match with the setting on the
rating plate. They will also have to remove the previous setting “V” mark.
Fig. 12
Other manuals for HV-C60CG
1
Table of contents
Other Hoover Cooktop manuals

Hoover
Hoover HIS4BC Operating instructions

Hoover
Hoover DOMINO PC DVI 2/1 PN User manual

Hoover
Hoover HV-C60CI User manual

Hoover
Hoover HV-C90CG User manual

Hoover
Hoover Domino User manual

Hoover
Hoover DOMINO HVE32 User manual

Hoover
Hoover HV-C60CG User manual

Hoover
Hoover HGL60AM X User manual

Hoover
Hoover HGL60ASXGH User manual

Hoover
Hoover HVG31 User manual