manuals.online logo
Brands
  1. Home
  2. •
  3. Brands
  4. •
  5. Horizont
  6. •
  7. Power Supply
  8. •
  9. Horizont hobbygard B User manual

Horizont hobbygard B User manual

BETRIEBSANLEITUNG
Elektrozaungerät
de
OPERATING INSTRUCTION
Electric Fencer
en
MODE D‘EMPLOI
Électrificateur de Clôture
fr
85757J - 06/12
hobbygard B
Type 10448
6V DC
horizont group gmbh
Division agrartechnik
Postfach 13 29
34483 Korbach
Homberger Weg 4-6
34497 Korbach
GERMANY
Telefon: +49 (0) 56 31 / 5 65-1 00
Telefax: +49 (0) 56 31 / 5 65-1 20
[email protected]
www.horizont.com
2 3
(S1)
(S2)
(L)
(A) (X)
89429
94856D
90963
90961
Batterie
battery / pile
6V EG 4R25
94585
94860
94933
Batterie / battery / pile
4 x 1,5 V
94892
Fig. 5Fig. 5
Fig. 3
Fig. 2
Fig. 4
Fig. 4a
4 5
Betriebsanleitung des Elektrozaungerätes hobbygard B
in Verbindung mit den Errichtungs- und Sicherheitshinweisen
für Elektrozaungeräte SECURA (www.horizont.com)
Aufstellen und Anschluss: Standpfahl an einer möglichst feuchten Stelle mit intakter
Grasnarbe bis an den Bügelrahmen in den Boden stecken (Fig.1). Batterie einsetzen, siehe
Batteriewechsel. Erd - und Zaunanschlusskabel am Gerät aufstecken (Fig.2). Das Gerät
von der Seite her auf das T-Profil des Standbügels bis zum Anschlag ( A ) schieben (Fig.3).
Zaun und Erdkabel anschließen (Fig. 4), dabei die Krokodilklemme wie in Fig.4a anklemmen.
Inbetriebnahme und Kontrolle: (Fig.2) Schalter ( S1 ) 1-0 drücken:
Nach einigen Sekunden hört man ein leichtes Ticken des Gerätes.
Die Zaunkontrollampe ( L ) leuchtet im Rhythmus der Impulse auf. Sie erlischt, wenn eine
Zaunspannung von 2000V unterschritten wird.
Mögliche Ursachen: - Batterie leer
- starker Bewuchs
- schlechte Zaunisolation, Durchschlag am Isolator
- Zaun zu lang
Monatlich den optischen Zustand der Batterien prüfen.
Bei Nichtgebrauch die Batterien entfernen !
Schalter ( S2 ) :
Stellung für das Gewöhnen von Tieren oder bei kritischen Schutzanwendungen
Stellung (Stromersparnis): für ruhige Tiere oder für Schutzanwendungen ohne
Probleme
Batteriewechsel: Gerät von Ständer nehmen, Boden des
Gerätes mit Geldstück oder ähnlichem Gegenstand durch
Druck gegen Bodenteil entriegeln und Boden abziehen.
Batterie wechseln. Die Lage der Kontaktfedern ist beliebig.
Boden wieder bis zum Einrasten eindrücken.
Einsetzbare Batterietypen: 6V- Blockbatterie EG 4R25
oder 4 x 1,5 V - Monozellen R20 / LR20 mit Adapterhalter
94892 (Fig.5)
Service: Der komplette Generator besteht aus einem Modul. Zum Ausbau wird die Batterie
entnommen. Die nun sichtbare Leiterplatte hat rechts und links einen Durchbruch durch
die jeweils ein Rastnocken (Fig.5 / X) sichtbar ist. Durch gleichzeitiges Drücken der beiden
Nocken wird die Arretierung gelöst und man kann das Modul herausziehen.
Technische Änderungen vorbehalten !
Operating instruction for electric fence controller
hobbygard B in connection with SECURA safety hints (www.horizont.com)
Mounting and connections: Tread the earth spike and support bracket into the ground as
far as it will go, preferably in a damp place (fig.1). Insert battery into the fencer and attach
the earth and fence connection leads (fig.2). Slide the fencer on the support bracket right
to the end (fig. 3). Connect the earth lead to the metal part of the earth spike and the fence
lead to the fence line (fig.4) ensuring that the crocodile clips grip firmly (fig.4a).
Operation and control: (fig.2) Press switch ( S1 ) 1-0:
After a few seconds a slight ticking should br heard. The indicator light ( L ) flashes with the
rhythm of the pulses. It will cease flashing if the fence voltage falls below 2000V.
Possible reasons for low fence voltage include:
- Flat battery
- Excessive vegetation growth on the fence line
- Poor fence insulation, insulator flashover
- Fence line too long for this fencer
Check the battery and fence line on a regular basis
Please check the appearance of batteries monthly !
Remove batteries, when unit shall not be used !
Switch ( S2 ):
This allows switching from fast pulse to slow
Use the „fast“ position for training animals or for additional security in unpredictable condi-
tions. Use the „slow“ position for well trained animals or when security is not too important
and conditions are more normal.
Changingthebattery:Removethe fencer fromit‘s mounting
bracket and open the bottom by using a srewdrive. Remove
the base of the fencer and change the battery. Ensure the
contacts are at the top. The battery will make contact with
the correct terminals regadless of its rotation. Finally press
the base back into position until it snaps closed.
Suitable battery types include: 6V lantern type IEC 4R25
(single) or 1,5V D cells R20 /LR 20 (4 required) and use with
enclosedadapter (part.no.94892) orrechargeabletype(fig.5).
Service: All of the electronic components are on a single module. To remove this, first take
out the battery. The module which then becomes visible, has slots on both sides with a
„snap“ connector on both ( fig.5 / X). Pressing both snap connectors simultaneously enables
the module to be removed.
Subject to technical alterations without notice !
de en
6 7
CEE: max. Zaunlänge - max. fence line length - longueur électrifée
Technische Daten - technical data - données techniques
max. 1,5 km max. 1,5 km
3
~ 6000V ~ 5000V ~ 1000V ~ 2000V ~ 800V
Gewicht - mit Batterie / weight - with battery / poids - avec pile : ~ 1,5 kg
Mode d’emploi de l’électrificateur hobbygard B
en complément de la Notice d’Informations sur l’Installation
et la Sécurité des Electrificateurs SECURA (www.horizont.com)
Montage et branchements: Enfoncer Ie piquet-support «étrier» jusqu’à son cadre dans un
endroit plutôt humide (fig.1). Ouvrir le fond de l’appareil avec une pièce de monnaie ou un
tournevis plat en utilisant les encoches prévues de chaque côté du boîtier. Sortir le boîtier-pile
noir et insérer 4 piles alcalines de type LR 20 dans le boîtier en respectant Ies polarités (ou
1 pile 6 V type EG 4R25 directement dans l’appareil). Replacer le boîtier-pile dans l’appareil,
les deux ressorts étant en contact avec le circuit imprimé. Vérifier après quelques secondes
que l’appareil est bien hors tension (le voyant de contrôle ne doit pas s’éclairer). Le cas
échéant, mettre le commutateur sur position «Arrêt». Refermer le couvercle de l’appareil et
connecter les fils de terre et de ligne à l’appareil (fig.2). Glisser à fond l’appareil sur le haut
du support-étrier à l’aide des encoches situées de chaque côté du boîtier (fig.3).
Raccorder les fils de terre (fig.4) et de ligne (fig.4a).
Mise en route et fonctionnement: Enfoncer l’interrupteur sur position 1/marche (fig.2 / S1)
: après quelques secondes, l’appareil émet un léger «tic-tac», le voyant de contrôle clignote à
chaque impulsion. Si la tension descend en-dessous de 2000 V, le voyant s’arrête de clignoter:
soit les piles sont déchargées, soit la végétation est trop importante au contact de la ligne
Contrôlez les batteries - chaque mois !
Eliminez les batteries, s’ils ne sont pas utilisés.
Position de L’interrupteur: (fig.2 / S2)
Position «fort» : pour le dressage des animaux ou en cas de conditions de gar-

diennage difficiles (clôture supérieure à 3000 m, terre très sèche, animal très turbulent, . . .).
Dans ce cas, ajouter un piquet de terre de 1 m et le relier avec un fil conducteur (2,5 mm2)
au piquet-support de l’appareil.
Position «normal» (consommation réduite): pour des animaux déjà dressés ou
des conditions de gardiennage normales
Changement des piles: Mettre l’appareil sur position Arrêt.
Enlever l’appareil de son support et débrancher les fils.
Ouvrir le fond de l’appareil avec une pièce de monnaie,
un tournevis ou autre en utilisant les encoches prévues de
chaque côté du boîtier. Sortir les piles usagées et insérer
les piles neuves en respectant les polarités. Replacer le

boîtier-pile dans l’appareil, les deux ressorts étant en contact
avec le circuit imprimé vers le haut du boîtier. Une fois les
piles en place, replacer le fond du boîtier dans son loge-
ment. Remettre l’appareil sur position «Marche» et vérifier
le fonctionnement après quelques secondes.
Types de piles utilisees: 1 pile 6 V EG 4R25 (type «cam-
ping») ou 4 piles 1,5 V LR 20 (boîtier-adaptateur pile réf.
94892 inclus) - fig.5
Service apres vente: Toute intervention sur cet appareil doit être réalisée par un distributeur
agréé.
Sous réserve de changement techniques !
fr
Operation hours
Battery: 4x R20 1x 4R25 1x4R25 4x LR20
7 Ah 7 Ah 50 Ah 15 Ah
~ 875 h ~ 875 h ~ 5000 h ~ 1667 h
~ 500 h ~ 500 h ~ 2500 h ~ 938 h
10-18 mA 10-18 mA 10-18 mA 10-18 mA 10-18 mA
8

This manual suits for next models

1

Other Horizont Power Supply manuals

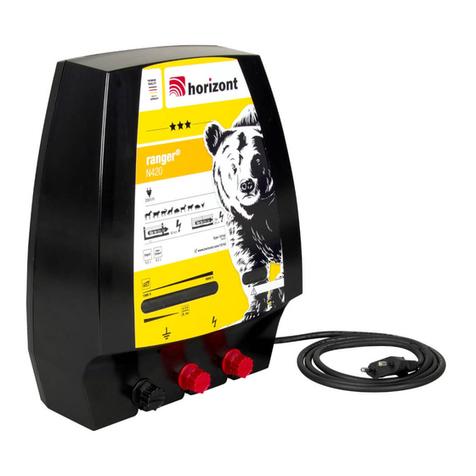
Horizont ranger N420 User manual

Horizont

Horizont ranger N420 User manual

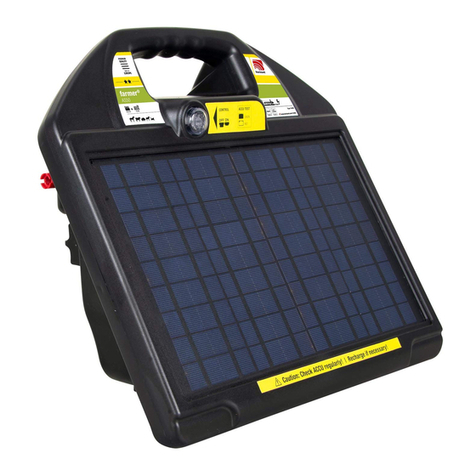
Horizont farmer ABN30 User manual

Horizont

Horizont farmer ABN30 User manual

Horizont Hotline Hobby Operating and maintenance manual

Horizont

Horizont Hotline Hobby Operating and maintenance manual

Horizont intelliSTOP N40 User manual

Horizont

Horizont intelliSTOP N40 User manual

Horizont TRAPPER AN8 User manual

Horizont

Horizont TRAPPER AN8 User manual

Horizont hotShock A90 User manual

Horizont

Horizont hotShock A90 User manual

Horizont Hotline 47HLM100S User manual

Horizont

Horizont Hotline 47HLM100S User manual

Horizont hotSHOCK N50 User manual

Horizont

Horizont hotSHOCK N50 User manual

Horizont FARMER AN15 User manual

Horizont

Horizont FARMER AN15 User manual

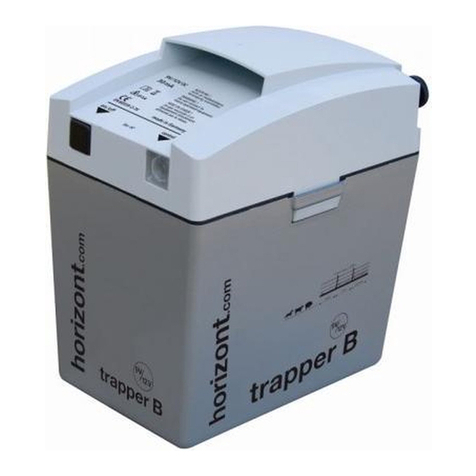
Horizont trapper B User manual

Horizont

Horizont trapper B User manual

Horizont SECURA User manual

Horizont

Horizont SECURA User manual

Horizont farmer AS50 User manual

Horizont

Horizont farmer AS50 User manual

Horizont farmer AN100 User manual

Horizont

Horizont farmer AN100 User manual

Horizont S40 User manual

Horizont

Horizont S40 User manual

Horizont intelliSTOP AN25 User manual

Horizont

Horizont intelliSTOP AN25 User manual

Horizont ranger AN2000 User manual

Horizont

Horizont ranger AN2000 User manual

Horizont FARMER AS70 User manual

Horizont

Horizont FARMER AS70 User manual

Horizont trapper AS25 User manual

Horizont

Horizont trapper AS25 User manual

Horizont trapper AN45 User manual

Horizont

Horizont trapper AN45 User manual

Horizont ranger AN3000 User manual

Horizont

Horizont ranger AN3000 User manual

Horizont Hotline Fire Drake HLS18 Operating and maintenance manual

Horizont

Horizont Hotline Fire Drake HLS18 Operating and maintenance manual

Horizont PIKO A100 User manual

Horizont

Horizont PIKO A100 User manual

Horizont Hotshock A300 User manual

Horizont

Horizont Hotshock A300 User manual

Horizont birdy A User manual

Horizont

Horizont birdy A User manual

Popular Power Supply manuals by other brands

Valcom VP-12124 Technical specifications

Valcom

Valcom VP-12124 Technical specifications

Akyga AK-EV-04 user manual

Akyga

Akyga AK-EV-04 user manual

Speedotron 4803CX instruction manual

Speedotron

Speedotron 4803CX instruction manual

GW Instek PPH-1503D user manual

GW Instek

GW Instek PPH-1503D user manual

THERMACUT EX-TRAFIRE 75SD Operator's manual

THERMACUT

THERMACUT EX-TRAFIRE 75SD Operator's manual

Exel Orbital EPS-2000 Operation manual

Exel Orbital

Exel Orbital EPS-2000 Operation manual

Thiele SI48-1U-16 user manual

Thiele

Thiele SI48-1U-16 user manual

Forte Autronic ACR Series instruction manual

Forte

Forte Autronic ACR Series instruction manual

Pulsar HPSBOC 5524C manual

Pulsar

Pulsar HPSBOC 5524C manual

Teledyne 913 Installation and operation guide

Teledyne

Teledyne 913 Installation and operation guide

Altronix OLS120 manual

Altronix

Altronix OLS120 manual

Abitana ABI-PS1001S14 quick start guide

Abitana

Abitana ABI-PS1001S14 quick start guide

Altronix LPS3C24X220 installation instructions

Altronix

Altronix LPS3C24X220 installation instructions

Matsusada Precision DRS Series Basic instruction manual

Matsusada Precision

Matsusada Precision DRS Series Basic instruction manual

Pulsar PSD12006 quick start guide

Pulsar

Pulsar PSD12006 quick start guide

Pulsar PSBSEP04124 manual

Pulsar

Pulsar PSBSEP04124 manual

Varian CP-4900 Micro-GC user manual

Varian

Varian CP-4900 Micro-GC user manual

Altronix Maximal11FDV installation guide

Altronix

Altronix Maximal11FDV installation guide

manuals.online logo
manuals.online logoBrands
  • About & Mission
  • Contact us
  • Privacy Policy
  • Terms and Conditions

Copyright 2025 Manuals.Online. All Rights Reserved.