HP 2624 User manual


2624A
Display
Station
Fli-;'
HEWLETT
~~
PACKARD

NOTICE
The information contained
in
this
document is subject to
change
without
notice.
HEWLETT-PACKARD MAKES
NO
WARRANTY OF ANY
KIND
WITH REGARD TO
THIS
MATER-
IAL, INCLUDING,
BUT
NOT LIMITED TO,
THE
IMPLIED WARRANTIES OF MERCHANTABILITY
AND FITNESS FOR A PARTICULAR PURPOSE.
Hewlett-Packard
shall
not
be liable for
errors
contained
herein
or for incidental or consequential
damages
in
connection with
the
furnishing, perfor-
mance or use of this
material.
Hewlett-Packard
assumes
no responsibility for
the
use or
reliability
of
its
software on
equipment
that
is
not furnished by Hewlett-Packard.
This document contains
proprietary
information which is protected by copyright. All
rights
are
reserved.
No
part
of this document
may
be photocopied, reproduced or
translated
to
another
program
language
without
the
prior
written
consent of
Hewlett-Packard
Company.
HEWLETT·PACKARD COMPANY
974
EAST ARQUES
AVENUE
SUNNYVALE,
CALIFORNIA,
94086
Copyright © 1980 by
HEWLETT·
PACKARD COMPANY
Printed in U.S.A.
10/80
(
(
c

Table
of
Contents
Section I
Page
Section
III
(Continued)
Page
INTRODUCING THE
HP
2624A Bell
.............................................
3-12
The
Keyboard
....................................
1-1
Wait
............................................
3-12
The
Function
Keys
................................
1-2 Modem Disconnect
...............................
3-12
The
Display
Screen
................................
1-3
Display
Memory
..................................
1-4
Configuring
the
Terminal
..........................
1-5
The
Integral
Printer
..............................
1-5
Data
Communications
.............................
1-6
Self-Test
.........................................
1-6
Section IV
DISPLAY CONTROL
Page
Introduction
......................................
4-1
Cursor
Control
....................................
4-1
Home
Up
......................................
4-1
Section
II
CONFIGURING THE TERMINAL
Introduction
......................................
2-1
The
Configuration
Function
Keys
................
2-1
The
Configuration
Menus
.......................
2-1
The
Terminal
Configuration
Menu
.................
2-1
Programmatic
Configuration
......................
2-9
Lock/Unlock
Configuration
Menus
...............
2-9
Terminal
Configuration
Menu
...................
2-9
Page
Home Down
....................................
4-1
Move
Cursor
Up
................................
4-2
Move
Cursor
Down
.............................
4-2
Move
Cursor
Right
.............................
4-2
Move
Cursor
Left
...............................
4-2
Roll Text
Up
...................................
4-3
Roll Text Down
.................................
4-3
Next
Page/Previous
Page
.......................
4-3
Screen
Relative
Addressing
.....................
4-4
Absolute Addressing
............................
4-4
Cursor
Relative
Addressing
.....................
4-4
Section
III
KEYBOARD CONTROL
Page
Introduction
......................................
3-1
Selecting
Modes
..................................
3-1
Remote/Local Modes
............................
3-1
Character/Block
Modes
.........................
3-2
Format
Mode
..................................
3-2
Line
Modify Mode
..............................
3-2
Modify All Mode
...............................
3-3
Auto
Line
Feed
Mode
...........................
3-3
Memory
Lock Mode
.............................
3-3
Display
Functions
Mode
........................
3-4
Caps
Mode
.....................................
3-4
Combining
Absolute
and
Relative
Addressing
.....
4-5
Edit
Operations
...................................
4-5
Insert
Line
.....................................
4-5
Delete
Line
....................................
4-5
Insert
Character
...............................
4-5
Delete
Character
...............................
4-6
Clear
Display
..................................
4-7
Clear
Line
.....................................
4-7
Setting
and
Clearing
Margins
......................
4-7
Setting
and
Clearing
Tabs
.........................
4-8
Tab
..............................................
4-8
Back
Tab
.........................................
4-8
Display
Enhancements
............................
4-8
Caps
Lock Mode
................................
3-4
User-Definable
Keys
..............................
3-5
Defining
Keys
Locally
..........................
3-5 Section V
Page
Defining
Keys
Programmatically
................
3-6 DESIGNING AND USING FORMS
Controlling
the
User
Keys
Menu
Drawing
Forms
...................................
5-1
Programmatically
...........................
3-6
Defining
Fields
...................................
5-4
Triggering
the
User
Keys
Programmatically
......
3-6
Protected
Data
.................................
5-4
Controlling
the
Function
Key
Labels
Unprotected
Fields
.............................
5-4
Programmatically
...........................
3-7
Transmit-Only
Fields
...........................
5-4
The
ENTER
Key
..................................
3-7
Field
Attributes
................................
5-4
Send
Display
«ESC)d)
.........................
3-10
Defining
Fields
From
the
Keyboard
..............
5-7
Enable/Disable
Keyboard
.........................
3-11
Defining
Fields
Programmatically
...............
5-9
Soft
Reset
.......................................
3-11
Transmit
Modified Fields
.......................
5-9
Hard
Reset
......................................
3-11
Transferring
Form
Structures
from
the
Break
...........................................
3-12
Screen
to a
Host
Computer
......................
5-9
iii
Section VI
Page
Section VIII
Page
DEVICE
CONTROL
Introduction
......................................
6-1
Display to
Printer
Data
Transfers
..................
6-1
~~~~~~ion
......................................
8-1
~
Interpreting
Status
...............................
8-1'
Copy Line
......................................
6-1 Terminal ID
Status
...............................
8-1
Copy Page
.....................................
6-1 Terminal
Status
..................................
8-2
Copy All
.......................................
6-2
Primary
Terminal
Status
..........................
8-2
Copy All ofDisplay Memory
.....................
6-2 Secondary Terminal
Status
........................
8-4
Copy
Menu
....................................
6-2 Device
Status
.....................................
8-6
Skip Line
......................................
6-2
Skip
Page
......................................
6-2
Device Control Completion Codes
................
6-2
Computer to Terminal
Data
Transfers
..............
6-3 Section IX
Page
Selecting
Printer
Modes
...........................
6-4
ERROR
MESSAGES
AND
SELF-TESTS
Expanded
Characters
...........................
6-4 Introduction
......................................
9-1
Compressed
Characters
.........................
6-4
Error
Messages
...................................
9-1
Report
Format
.................................
6-5 Terminal Self-Tests
................................
9-2
Metric
Format
.................................
6-5 Power-On Test
.................................
9-2
Data
Logging
..................................
6-5 Terminal Test
..................................
9-2
Printer
Self-Test
..................................
6-6
User
Data
Comm Test
..........................
9-3
Printer
Test
....................................
9-4
Manufacturing
Test
............................
9-4
Section VII
Page
Identify ROMs
.................................
9-5
DATA
COMMUNICATIONS
Introduction
......................................
7-1
Selecting
Equipment
and
Cables
...................
7-1
Hardwired Connections
.........................
7-2 Section X
Page
MODEM Connections
...........................
7-2
TERMINAL
MAINTENANCE
PROCEDURES
Installing
a Point-to-Point Configuration
...........
7-4 Cleaning
the
Screen
and
Keyboard
................
10-1
Port
# 1 Cabling
................................
7-4
Port
#2
Cabling
................................
7-6
Configuring
the
Terminal
.......................
7-6
Battery
Maintenance
.............................
10-1 (
Thermal
Printer
Paper
...........................
10-2
Paper
Loading
................................
10-2
Point-to-Point
Programming
Information
..........
7-12
Character
Mode
...............................
7-12
Multicharacter
Transfers
......................
7-12
Start
and
Stop Bits
............................
7-13 Appendix A
Data
Bits
(Character
Length)
..................
7-13
SUMMARY
OF
ESCAPE
SEQUENCES
Parity
Checking
...............................
7-13
Receive Buffer
................................
7-13
Receive
Errors
................................
7-14
Transmit
State
................................
7-14 Appendix B
Receive
State
.................................
7-14
KEYBOARDS
AND
CHARACTER
SETS
Local/Remote Modes
...........................
7-14
Full
Duplex Operation
.........................
7-14
Half
Duplex
Operation
.........................
7-14
Pacing
Mechanisms
...........................
7-15 Index
IV

Illustrations
Title
Page
Title Page
HP
2624A Display Terminal
.......................
1-1
Character
Sizes
and
Enhanc.ements
as
HP
2624A Keyboard
..............................
1-2
Printed
on
the
Integral
Printer
..................
6-4
Function
Keys
and
Screen Labels
..................
1-3 Report
and
Metric
Formats
........................
6-5
Mode Selection Key Labels
........................
1-3
Integral
Printer
Self-Test
Output
...................
6-6
HP
2624A
Function
Key
Hierarchy
.................
1-3
Integral
Printer
Mechanism
.......................
6-7
User
Keys Definition
Menu
........................
1-4 Point-to-Point Decision Tree
.......................
7-2
Default
User
Key Labels
...........................
1-4
HP
2624A Display Terminal,
Rear
View
............
7-5
Sample User-Supplied
User
Key Labels
.............
1-4
Port
#1
Cabling (HP 13222 Cables)
.................
7-5
Alphanumeric
Character
Generation
...............
1-4
Port
# 1 Cabling (HP 13265A Modem or
'lYPical Configuration
Menu
.......................
1-5
HP
13266A
Current
Loop Converter)
.............
7-6
Terminal
Configuration
Menu
.....................
2-1
Port
#2
Cabling (HP 13242 Cables)
.................
7-7
Screen-Labeled
Function
Keys
.....................
3-1
Full
Duplex Hardwired Configuration Menu
........
7-7
User
Keys Definition
Menu
........................
3-5
Full
Duplex Modem Configuration Menu
...........
7-7
The
"Roll"
Data
Functions
.........................
4-2
Half
Duplex
Main
Channel
Configuration Menu
.....
7-8
Previous
Page
and
Next
Page
Concepts
.............
4-3
Half
Duplex Reverse
Channel
Configuration
Menu
..
7-8
Character
Insert
With
Margins
....................
4-6
Primary
Terminal
Status
Example
.................
8-2
Character
Delete
With
Margins
....................
4-7 Secondary Terminal
Status
Example
...............
8-4
Line
Drawing
Set
Elements
........................
5-1 Device
Status
Example
............................
8-6
Sample
Data
Entry
Form
..........................
5-2 Screen Test
Pattern
...............................
9-3
Completed
Data
Entry
Form
.......................
5-3
Integral
Printer
Self-Test
Output
...................
9-4
Base
Set
Equivalents
For
ROM Identification
Listing
........................
9-5
Sample
Data
Entry
Form
.......................
5-3
Battery
Location,
Rear
Panel
.....................
10-1
Use
ofShift-In
and
Shift-Out
Codes
.................
5-4 Removing
the
Battery
............................
10-2
Field
Definition
Menu
.............................
5-7
Printer
Mechanism
..............................
10-3
FORMIO Source
Listing
..........................
5-10
Tables
Title
Page
Title
Page
Summary
ofHP
2624A Configuration Menus
........
2-1
Port
#1
Data
Communications Cables
..............
7-2
Terminal
Configuration
Menu
Fields
...............
2-2
Port
#2
Data
Communications Cables
..............
7-3
Terminal
Configuration
Function
Keys
.............
2-9 Modems
..........................................
7-4
ENTER
Key
Operation
............................
3-8 Point-to-Point Configuration Menu Fields
...........
7-8
Attributes
by
Field
'lYPe
...........................
5-5
Por
t 1
and
Port2
Conf
igurat
ion
Function Keys
...
7-12
"define
field!!"
Function
Keys
....................
5-8 ASCII
Status
Characters
..........................
8-1
v

(I
(

Introducing
the
HP
2624A
I
'UI'",,,I
.\
I \
~----------------~--------------------------------------------------------~
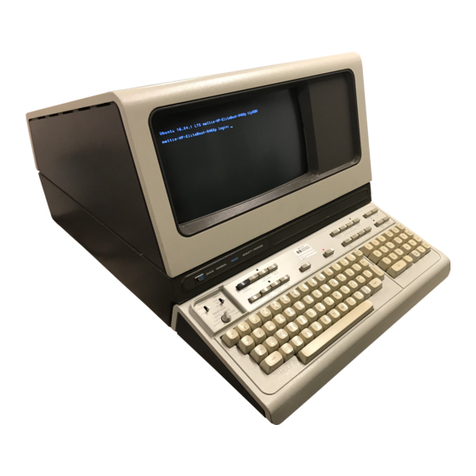
The
HP
2624A Display Terminal (figure 1-1)
is
a
versatile
alphanumerics
CRT
terminal
that
offers
the
following
features:
•
'lWo
Separate
Data
Communications
Ports
(one for
the
host
computer
and
one for
an
external
printer)
•
Full
Duplex MODEM,
Full
Duplex Hardwired,
Half
Duplex
Main
Channel,
and
Half
Duplex Reverse Chan-
nel
Point-to-Point Operation
With
Full
Pacing
Mech-
anisms
•
Programmable
Record
Separator
and
Unit
Separator
Codes.
• Optional
Forms
Copy
Integral
Printer
(includes
both
compressed
and
expanded
print
modes)
•
Eight
User-Definable
Function
Keys (with 16-character
user-supplied screen labels)
• User-Definable _ Key
• Extensive
Forms
DesignCapability(fielddefinition,dis-
play enhancements, line
drawing
set)
• Seven
National
Keyboards
• Line
Drawing
Character
Set
• Optional
Math
Symbol
and
Large
Character
Sets
• Screen Labeled System
Function
Keys (for selecting
modes
and
performing
other
terminal
controlfunctions)
•
Menu-Driven
Terminal
Configuration
(no
physical
straps;
all
configurationperformed
either
programmati-
cally
or
through
keyboard
entries
into formatted
menus
displayed on
the
screen; configuration
data
maintained
in
non-volatile memory)
•
Full
Editing
Capabilities(insert/delete/clearline
and
in-
sert/
delete character)
•
Display
Enhancements
(inverse
video,
blinking,
underlining,
half
bright,
and
non-displaying
security
mode)
• Adjustable Margins
and
Tab Stops
•
Programmatic
Cursor Sensing
and
Addressing
• Easy-to-Use Keyboard With
Separate
NumericKey
Pad
•
Character
or
Block Mode Operation
• Extensive Self-Test Capability
Figure
1-1.
HP
2624A Display Terminal
THE KEYBOARD
The keyboard
of
the
HP
2624A (figure 1-2) is logically
divided into five major groups
of
keys.
Alphanumeric
Keys-The
layoutofthese keys
is
similar
to
that
ofa
standard
typewriter
keyboard. These keys
are
usedfor
entering
alphabetic
and
numeric data, ASCII con-
trol
codes,
and
the
special symbolic
and
punctuation
characters such
as
()?
%&
and
• .
Numeric
Pad-The
numeric
pad is located to
the
right
of
the
alphanumeric
keys. The layout of
this
key pad
is
similar
to
that
of a
standard
office calculator. These keys
may
be used for high-speed
entry
of large
quantities
of
numeric
data.
Cursor
Control
Keys-This
group of keys is used for
moving
the
cursor around on
the
screen (up, down, left, or
right)
and
for controlling
what
portion of display memory
appears on
the
screen (home up, home down, roll up, roll
down,
next
page,
and
previous page).
Edit
Control
Keys-These
keys areusedfor
inserting
and
deleting characters
and
lines
in
relation
to
the
current
cursor position.
Function
Keys-These
keys (labeled _
through
m)
perform
different
functions
depending
upon
which
keystrokes
have
been performed.
At
any
given time,
the
applicable labelsfor
these
keys appear across
the
bottomof
the
display screen.
1-1

Introducing
the
HP
2624A
The
United
States
(USASCII) keyboard is
the
standard
keyboard. As
an
option, you
can
order
any
of
the
following
international
keyboards instead:
Swedish/Finnish (Option 001)
Danish/Norwegian (Option 002)
French
(Option 003)
German
(Option 004)
United
Kingdom (Option 005)
Spanish
(Option 006)
If
you
order
any
of
the
above keyboards,
then
your
terminal
automatically
includes
the
appropriate
language
char-
acter
ROM.
For
the
French
and
Spanish
keyboards, you
select
the
following options by
way
of
the
configuration
process:
French
AZERTY
layout
with
mute
keys
French
QWERTY
layout
with
mute
keys
French
AZERTY
layout
without
mute
keys
French
QWERTY
layout
without
mute
keys
Spanish
with
mute
keys
Spanish
without
mute
keys
THE FUNCTION KEYS
Across
the
top
ofthe
keyboard
are
eight
keys labeled
..
through
...
The
functions performed
by
these
keys
change dynamically as you use
the
terminal.
At
any
given
time,
the
applicable function labels for these keys
appear
across
the
bottom of
the
display screen (figure 1-3).
Whenyou press
the.
key
the
eight
function keysbecome
mode selection keys (figure 1-4).
In
this
c;apacity you
may
use
them
to enable
and
disable
various
terminal
operating
modes (such as remote mode
and
display functions mode).
Each
modeselection
key
alternately
enables
and
disables a
particular
mode.
When
the
mode is enabled,
an
asterisk
(
appears
in
the
associated screen label.
At
power-on
..
through
..
are
automatically
initialized
as mode selec- .
tion
keys.
When
you
press
the
..
key,
the
eight
function
keys
become
general
control keys
that
you use for configuring
the
terminal,
setting
and
clearing
margins
and
tab
stops,
enabling
and
disabling
display
enhancements,
defining
data
entry
fields,
and
so
forth. The
entire
set
of
system
function
key
labelsis
illustrated
in
figure 1-5.
Pressing
..
always
reinitializes
..
through
..
to
the
top row
of
functions (labels) shown
in
figure 1-5.
In
using
the
system
function keys, keep
in
mind
the
follow-
ing
two conventions:
1.
If
a
key
label contains
any
lowercase
letters,
pressing
it
will
transfer
you to
another
level of
system
function
keys.
2.
If
a
key
label
contains
onlyuppercase
letters,
pressing
it
will
perform
the
function suggested
by
the
key
label.
"LEFT MARGIN", for example, sets
the
left
margin
at
the
current
cursor position
whereas
"!!ervice
key!!"
transfers
you to
the
terminal
self-test function keys.
Whenyou press
the
..
and
8iJ
keys
simultaneously,
the
user
keys
definition
menu
(figure 1-6)
appears
on
the
screen.
By
filling
in
this
menu
you
can
define
the
screen
(.
label
and
functional
characteristics
for
eight
user
keys.
In
the
same
manner,
you
can
also redefine
the
functional
characteristics
of
the
_ key.
To
enable
the
eight
user
keys,
press
the
8iJ key.
Figure
1-7 shows
the
default
user
key screen labels
and
figure 1-8 shows some sample user-
supplied
user
key screen labels.
(
Figure
1-2.
HP
2624A Keyboard
1-2

Introducing
the
HP
2624A
Pressing
the
_
and
II
keys disables
the
function keys
and
removes
the
key
labels from
the
screen. To
reenable
them
press
II,
.,
or
1lIJ.
THE DISPLAY SCREEN
The
terminal's
display screen consists of 26 lines (rows),
each
containing
80
character
positions(columns). Only
the
upper
24rows
are
used
fordisplaying
data.
The
bottom
two
rows
are
used
for displaying
the
function key
labels
and
certain
control
information
(current
cursor
row
and
column
numbers,
the
characters"
I
C"
when
the
insert
char-
acter
edit
function is enabled,
and
so forth).
The
terminal
uses
a
raster
scan
deflection
technique
similar
to
that
used
in
television sets.
With
this
technique,
the
electron
beam
repeatedly
traverses
the
screen
in
a
series
of
closely spacedhorizontal lines,
starting
at
the
top
and
working downward.
Characters
are
formed from line
segments
and
dots produced
by
turning
the
beam
intensity
on
and
off'
at
appropriate times.
Figure
1-3.
Function
Keys
and
Screen Labels All
of
the
character
positions
are
fundamentally
rec-
tangles
7 dots wide
by
9
scan
lines high.
Four
additional
scan
lines
beneath
the
7X9
matrix
are
used for
the
de-
scender
areas
oflowercase
characters,
for
underlining,
and
for
the
blinking
underscore cursor. One
other
dot is
used
on
either
sidefor character-to-characterspacing,
and
onescan
line
is
reserved
at
the
top
and
bottom for row-to-row
spacing.
This
results
in
a
character
cell of9 dots
by
15 scan
lines
replicatedover
the
entire
screen
area
(see
figure
1-9).
Figure
1-4. Mode Selection
Key
Labels
AIDS
----
1&l1li_-
{DEVICE
"_"11M
........
DEVICE CONTROL
FUNCTION
GROUP DEVICE _......
...
IM
..
_
MODES • I •
II
I
.-
MARGINS/
Ell
......
IIIIIIIIMIIIIII_
TABS/COL
SERVICE
..
_--
_lIB
__
ENHANCE
......
1IIfI IBlllIBiI
l1liII1II
VIDEO
DEFINE
_II1IIl1li
...
..
IiiJaIlllIll!Ml
ENHANCEMENTS FIELDS
GROUP MODIFY
CHAR SET
I11III_--
1IIII1III_1IIiiiI
DEFINE ........
----
EDITS
CONFIG
----
----
KEYS
CONFIGURATION DATACOMM
Ell
""1!iIIII
Ii!lillllllllIBiI"
GROUP CONFIG
TERMINAL
Ell
""1!iIIII
IIiIIi
Bill
BHiI_
CONFIG
Figure
1-5.
HP
2624A
Function
Key
Hierarchy
1-3

Introducing
the
HP 2624A
fO
t'-l
f~E
TURt~
f1
Ii
LRBEL
I
f2
Ii
LRBEL
I
n Ii
LRBEL
I
f4
Ii
LRBEL
I
fS
Ii
LRBEL
i
fS
Ii
LRBEL
I·
f7
Ii
LRBEL
,
Hi
Ii
LRBEL
.:
Figure
1-6.
User
Keys Definition Menu
----
----
Figure
1-7. Default
User
Key Labels
----
Figure
1-8. Sample User-Supplied
User
Key Labels
II
ill ill
I
I
I
7 x 9
Upper
{ Case MatriX
....
r-.
...
'£
(a)
Two
types of
character
sets can be stored
within
the
ter-
minal:
alphanumeric
sets
and
microvector sets. The al-
phanumeric
sets
support
the
primary
use of
the
terminal:
displaying
textual
and
numeric
information.
Characters
are
designed
around
a basic 7X9 dot
matrix
with
provision
for lowercase descenders. The
characters
are
embellished
byuse of
the
half-shift.
With
this
type ofset,
the
character-
to-character
spacing
of
two
dots
is
hardwired.
This
prevents
the
design of
characters
that
would form con-
tinuous
horizontal lines. All 15 scan lines of
the
row are,
however, available so
that
vertically contiguous symbol
segments
can
be designed.
An
example of
this
is
the
three-
row-high
integral
sign
found
in
the
math
symbol set.
Microvector sets
use
the
entire
9-dot-by-15-scan-line char-
acter
cell
without
the
half-shift. This allows
characters
to
be designed with
both
horizontal
and
vertical
continuity.
This type of
set
finds
its
greatest
application where a min-
imal
set
of graphic
kernels
is needed to
represent
more
complex pictorial information.
The
line
drawing
set
which
can be used to display complex
data
entry
forms on
the
screen is
an
example ofsuch a set.
DISPLAY MEMORY
In
its
standard
ordering
configuration,
the
HP 2624A in-
cludes 16Kbytesofdisplaymemory. As
an
option, however,
you
may
order
an
additional
16K bytes.
Each
displayable
character
uses
one
byte
of
display
memory.
Each
change of
character
set
or video enhance-
ment
generates
a 2-byte non-displaying control sequence
which is embedded
between
the
displayable
characters
in
display memory. Similarly, each format mode function
(start
field,
start
edits,
and
stop field)
generates
a 2-byte
non-displaying control sequence. A non-displaying ter-
minator
also
generates
a
2-byte
control
sequence.
Character
set
changes
and
video
enhancement
changes
which occur
at
the
same
character
position
are
combined
into a single 2-byte control sequence. Similarly,
"start
field"
and
"start
edits" functions which occur
at
the
same
character
position
are
also combined into a single 2-byte
control sequence.
15
Scan
Lines
Figure 1-9.
Alphanumeric
Character
Generation
1-4
e
(
(

Within
display memory,
lines
from
the
display screen
are
stored
in
fixed-size blocks
of
6, 128, or 256 bytes.
Blank
lines
occupy 6-byte blocks,
lines
containing
120
or
fewer
displayable
characters
and
non-displaying control
bytes
occupy 128-byte blocks,
and
lines
containing
more
than
120 displayable
characters
and
non-displaying control
bytes
occupy 256-byte blocks.
If
a line
contains
fewer
than
80 displayable characters,
the
trailing
blanks
are
NOT recorded
in
display
memory
as
ASCII spaces.
For
each
line,
the
terminal
knows
where
the
displayable
portion
was
terminated
and
marks
that
point
in
the
memory
block
with
an
end-of-line
flag.
Con-
sequently, a
line
using
only
the
first
40
character
positions
for displayable
data
may
include changesof
character
sets,
video
enhancements,
and
so forth,
at
up
to 40
separate
positions
and
still
use
only 128 bytes ofdisplay memory. A
line
using
all
80
character
positions for displayable
data,
on
the
other
hand,
may
include changes of
character
sets,
video
enhancements,
and
so forth,
at
only 20
separate
positions
without
requiring
a 256-byte block of display
memory.
With
the
standard
16K
bytes,
the
HP
2624A will ac-
commodate
the
following
amount
of
data
at
any
given
time
in
display memory:
• 103
standard
lines
of
data
(128-byte blocks)
• 71
blank
lines
(6-byte blocks)
For
each
line
requiring
a 256-byte block,
subtract
1 from
103.
If
you
increase
the
data
comm buffer size,
the
additional
buffer
memory
is
obtained
from
the
RAM
that
is
allocated
for display memory. Consequently, doing so will reduce
the
number
of
blank
blocks
and
128-byte blocks available for
display memory.
Each
user-defined fUnction
key
definition also
uses
a por-
tion
of
the
RAM
that
is
allocated for display memory.
The
rules
described above
may
be
used
to
determine
how
much
memory
each
key
definition preempts.
Introducing
the
HP
2624A
The
optional
16K
bytes
of
additional
display
memory
provide you
with
an
additional 128
standard
lines
of
data
(128-byte blocks).
CONFIGURING THE TERMINAL
The
HP
2624A contains no physical
straps
or switches
(other
than
the
ON/OFF switch
on
the
rear
panel).
You
configure
the
terminal
through
the
use of configuration
menus
displayed on
the
screen.
Figure
1-10 shows a typical
configuration menu.
To
alter
the
content of a
particular
field, you use
the
tab
and
back
tab
functions to position
the
cursor
in
the
field.
If
the
field contains
an
underlined
parameter,
you change
the
value
using
the
systemfunction
keys
(~NEXT
CHol
CE"
and
"PREVIOUS
CHDI
CE").
If
the
field
contains a non-underlined
parameter,
you merely type
in
the
desired value.
Having
filled
in
a
particular
menu, you
then
save
the
contents
ofthe
menu
in
non-volatile memory
by pressing one of
the
system
function keys
("SAVE
CoN-
FIG"). The
parameters
saved
in
non-volatile memory
are
then
used for configuring
the
terminal
whenever a
hard
reset
is performed or whenever
the
power is
turned
on.
Some
configuration
parameters
may
also
be
altered
programmatically
using
escape sequences.
THE INTEGRAL PRINTER
The
optional
integral
printer
is a fast, quiet, bidirectional
thermal
printing
unit
that
can
be used for
generating
reproducible copy from
the
terminal's
display memory or
from a
remote
computer.
The
integral
printer
can
reproduce
anything
capable of
being
displayedon
the
terminal's
screen(including
the
line
drawing, large character,
and
math
symbol sets,
all
of
the
international
language
characters,
and
the
video enhance-
ments).
TERMINAL CONFIGURATION
BELL , C
1'0_
IIIII
Fr,~rneRate
LangLlageLlt,.
--r!atacorn/Pr-
1
n1:er
.1fWI~~~
RETURN
Def
kttURt'4"EtHER
m
Pr
,nt.erCode4
-
-
LocalEcho
..
m1
1:
F
net
n I A I
InhHndSh,'G'
I,-,I-,SlfTst'L'
FldSeparator
E51=
(j.I
rmmmo
Dec
1
rna
1
T>
pe
III
Bl~Terrnn·"3.tor
iii
'=,1:
·:tr t
Co
1
InhEI:ll
Wr
piC
J
Auto
Term
r
])
Esc
><fer
IN]
A B
'.!Un
1"I"llri':"".
FORI'IAT
i'IODE
I
R'~C
I I 8
B,
t.
,
Llne/Pal~eIDI
I:
1
eo
arT
e r m(
r'
.1
InhDcTstll\JI
I
,
Rlternate
Set
rpamW'j';!;_
a;
Tr
.3,
n:;
r(1
1 t ,n'-mr'
Figure
1-10. 'JYpical Configuration Menu
1-5

Introducing
the
HP
2624A
Using
either
the
systemfunction keys orescape sequences,
you
can
select
the
integral
printer
as
the
destination
device for
data
transfers.
Having
done so, you
can
then
perform any of
the
following types of
data
transfers
using
either
the
system function keys or escape sequences:
• Copy one line from
the
display
• Copy all lines visible
in
the
display
• Copy
all
data
from
the
current
cursor line
through
the
end ofdisplay memory
• Copy
all
ofdisplay memory
• Copy
data
directly from a
host
computer
In
addition,
the
integral
printer
offers both
report
mode
and
metric
mode. When
report
mode
is
enabled,
the
in-
tegral
printer
output
is
formatted as a seriesof8
112"
X
II"
pages
with
a top
and
bottom
margin
and
a tic
mark
bet-
ween successive pages. Metric mode produces
similar
out-
put
except
that
the
pages
are
longer
(report
mode
generates 60 lines of
text
per
page while
metric
mode
generates 64 lines of
text
per
page).
You
can
also enable
data
logging to occur from
either
the
top or bottom of display memory. With.top logging,
any
data
that
is forced off
the
top
of
display memory
is
directed
to
the
integral
printer
and/or
an
external
printer, which-
ever is currently selected
as
a "to" device. With bottom
logging,
any
data
added
to
displaymemory,
either
from
the
keyboard or from a
data
commport,
is also directed to
the
printer(s).
DATA
COMMUNICATIONS
The
HP
2624A
has
two
data
communications ports
that
may
both
be
active
simultaneously.
One
is
used
for
establishinga
data
link
with
a hostcomputer
and
the
other
is used for connecting
the
terminal
to
an
external
printer.
The two ports are configured separately. The
terminal
can
operate
at
speeds
ranging
from 110 to 9600 baud
and
offers
the
following asynchronous transmission modes:
Full
Duplex Hardwired
Full
Duplex MODEM
Half
Duplex
Main
Channel
Half
Duplex Reverse Channel
Theterminal'selectrical interface adheresto EIA RS-232C
and
CCITT
Y.24
communications interface specifications.
'fransmission can be performed
in
character mode, block
line mode, orblockpage mode;
in
all cases
the
data
may
be
either
formatted (a
data
entry
form
with
unprotected,
1-6
protected,
and
transmit-only
fields)
or
unformatted.
Formatted
data
may
be compressed
using
modify
data
(
tags.
Using
the
configuration
process, you
may
enable
the
following forms ofVRC
parity
generation
and
checking:
None (no
parity
bit)
Odd
Even
Ones (8th
bit
forced to
1)
Zeros (8th
bit
forced
to
0)
SELF-TEST
The
HP
2624A is engineered for
high
reliability, ease of
testing,
and
rapid
repair.
When
the
terminal's power is
first
turned
on,
the
power-on
self-test automatically verifies
the
integrity
of all ROM
(Read-Only Memory)
and
RAM (Random Access Memory)
chips
within
the
terminal.
It
also does a CRC verificationof
the
configuration
data
stored
in
non-volatile memory.
Using
the
systemfunction keysyou
may
also
initiate
any
of
the
following self-tests:
1.
Power-On Test. This is
the
same
test
that
is
performed
at
power-on.
2.
Data
Comm Test. This
test
verifies
the
integrity
of
either
data
communications port. Loop-back
via
a
test
hood
or
a modem
may
be performed. (
3.
Terminal Test. This self-test does a CRC verification of
all
ROM
chips
within
the
terminal,
non-destructively
verifies
the
integrity
of
all RAM chips
within
the
ter-
minal,
and
then
displays a
test
pattern
on
the
screen.
The
test
pattern
includes
all
characters
(and segments
in
the
case of
the
line
drawing
set)
as
well
as
all
the
character
enhancements.
4.
Printer
Self-Test.
This
self-test
verifies
the
proper
operationof
the
integral
printer. A
test
pattern
contain-
ing
a
variety
ofcharacters
in
standard,
compressed,
and
expanded format is printed.
5.
IdentifyROMs. This self-test
generates
a
listing
(on
the
display screen) ofall
installed
ROMs.
6.
Manufacturing Self-Test. This is a
test
that
is used by
HP
manufacturing
personnel
during
the
terminal
"burn-in"process.
It
is
actually
a
set
of
tests
that
are
run
in
a continuous loop. The set consistsof
the
Data
Comm
Test,
the
Terminal Test,
the
Printer
Self-Test (if ap-
plicable),
and
some
additional
general
hardware
verification.
(

I
IUlll.Jil
L---
______
C_O_nf_iU_u_ri_nu_t_he_li_e_rm_i_na_I----I.1
II I
INTRODUCTION
The
HP
2624A
is
def,ligned so
the
various
terminal
characteristics
can
be
configured
quickly
and
easily
through
the
use
of
menus.
These
configuration
menus
can
be displayed on
the
screen
and
their
content
altered
and
saved
(in
non-volatile
memory)
through
a few
simple
keystrokes.
The
content
of
these
menus
may
also
be
altered
from a
program
executing
in
a
host
computer
through
the
use
of
escape sequences.
The Configuration Function Keys
1b
gain
access to
the
configuration
menus
through
the
keyboard,
use
the
following
keystroke
sequence:
II
..
conf1g
keys
This
changes
the
function key labels to
the
following:
..
IiiDiiI
..
..
port1
conf1g
port2
conf1g
..
..
..
..
terminal
config
Each
function
key,
when
pressed, causes a
particular
configuration
menu
to
appear
on
the
screen
and
redefines
the
function keysto a
set
offunctions
that
will
assist
you
in
manipulating
the
various
parameters
within
the
menu.
The Configuration Menus
The
various
configuration
menus
can
be
summarized
as
shown
in
table
2-1.
The
port!
and
port2
menus
are
described
in
Section VII
of
this
manual.
The
remainder
of
this
section describes
first
howto change
the
terminal
configuration
menu
from
the
keyboard
and
then
how to
do
it
programmatically
.
THE TERMINAL CONFIGURATION MENU
When you press
the
~term1
nlSl
config"
(m)
function key,
the
menu
and
function
key
display shown
in
figure 2-1
appear
on
the
screen.
Note
that
the
menu
as
shown
in
figure 2-1
contains
the
default
settings
for all
the
fields.
If
you
had
previously
changed
the
contentof
any
of
the
fields
and
then
saved
the
menu
in
non-volatile memory,
the
menu
would
appear
on
the
screen
as
you
had
configured
it.
Table 2-1.
Summary
ofHP
2624A Configuration
Menus
Port1
Conf1guri!ltion
Port2
Conf
iguri!lt
ion
The terminal includes
two
data communications ports. These
two
configuration menus
allow
you
to specify
two
separate sets
of
parameters, each of which governsthe operation
of
one
of
the data
comm
ports.
Termini!ll
Configuri!ltion
This configuration menu defines a set of parameters
that
control
the general operation of the
terminal (the parameters are analagous
to
the Keyboard Interface straps of
an
HP
264xterminal).
TERMINRL CONFIGURRTION
BELL
Ii
C I
Ie'
IIII[
Fr
ameRa
te
LanguageiM'..
--"atacIJrn~
Pr
Inter
RETURI~
Def
~
TUR1'~'E.IITER
_
Pr
InterCode4
LocalEcho
..
n'lltFnctnIAI
InhHnd::,hh
1 G I
InhSl
fTst
I
L-I
FldSeparator
E~,(
I
(~
m;mmp
De':lr!1::!.l
T:.pe
IIIIi
Bl~Terrnn·3.tor
III
FI
'i
ruu
~,t.!lrt
Col
InhEo
lllJr
pIC
J
Auto
Term
l
])
E:;
I:
:"',f
er
1 N J
B
1·'I'_llp
5!;"I[·
F0
RI'IRT
I'TO
DE
ImplIed
Dec
D191tS
II
Tab=Spaces
_
~~.,~:
~
rlnter~~ull:;:_
R':,( I I 8
Bit'
L1
ne/
Pal!!€,
I DI
l:learTerml~·.I
In
h
[I,:
T:; t I
1'1
I I
Rlternate
rnT»iI";!;!.
Ii
Figure
2-1.
Terminal
Configuration
Menu
Set
2-1

Configuring
the
Terminal
Whenever
the
terminal
configuration
menu
is
displayed
on
the
screen,
the
terminal
is implicitly
in
format mode.
The
menu
contains a
set
of unprotected fields
that
you
access using
the
_
and
..
keys. Except
when
the
cursor is positioned
in
the
fields labeled
"RETURN
Def",
"PrinterNull!i",
"Start
Col",
"FldSeparator",
"BlkTermnator",
or
"Implied
Dec
Digit",
the
al-
phanumeric
keys
are
disabled
and
you select
the
desired
parameters
using
the
"H£XT
CHO
ICE"
<_)
and
"PREVI
OUS
CHOICE" <
..
) function keys.
The
meanings
of
the
various
fields
are
described
in
table
2-2.
BELL
Click
rrameRate
Tab-Space!!
Lan9uage
2-2
Table 2-2. Terminal Configuration Menu Fields
This field specifies whether the terminal's bell speaker is enabled or disabled. When disabled, the
bell will
NOT
sound when the cursor nears the end
of
a line nor when the cursoradvancesfrom.one
field tothe next in aformatted display. The bell will, however, still sound in response
to
an
ASCII Bell
control code (decimal
7;
control-G).
The bell is used for alerting the operator
to
certain conditions (errors, end-of-line, end-of-field).
Values:
01'1
(bell enabled)
orr
(bell disabled)
Default:
01'1
The terminal is capable
of
producing
an
audible
"click"
as
each key is pressed. This field specifies
whether that feature is enabled or disabled.
Values:
01'1
(click enabled)
orr
(click disabled)
Default:
01'1
This field specifies what line frequency
(50
or
60
Hz)
the terminal is designed
to
operate at. The
screen refresh rate is then synchronized to the specified frequency. If this field is set
to
the wrong
value, the images
on
the screen will pulsate visibly.
Values:
50
(for
50
Hz
power source)
60
(for
60
Hz
power source)
Default:
60
When this feature is enabled, pressing the _ key generates the number
of
ASCII space codes
required to move the cursor forward
to
the nexttab stop. Ifno tab stops exist between the current
cursor position and the end
of
the line, the bell sounds and no spaces are generated. Similarly,
pressing the
..
key generates the number
of
ASCII backspace codes required
to
move the
cursor backward
to
the preceding tab stop (if the cursoris already located atthe
left
margin when
the backtab is attempted, the bell sounds and no backspaces are generated).
Note that when operating in local mode, this function actually changes data characters within
display memory to spaces. In remote mode, the spaces are transmitted over the data comm
port
and the data characters within display memory are NOTchanged unless the spaces are echoed
back (either locally or from the host computer).
Values:
YES
(Tab
= Spaces enabled)
1'10
(Tab
= Spaces disabled)
Default:
1'10
As
will be described
in
Appendix
B,
Keyboards and Character Sets,
of
this m!inual, the
HP
2624A
can be ordered with any of the following keyboards:
United States (standard)
Swedish/Finnish (option 001)
Danish/Norwegian (option 002)
French (option 003)
German (option 004)
United Kingdom (option 005)
Spanish (option 006)
(
(
(

Language
(Cont'd)
Datacom/Printer
RETURN
Def
RETURN-ENTER
Printl!rCode4
Configuring
the
Terminal
Table 2-2. Terminal Configuration
Menu
Fields (Continued)
When
the
terminal includes any
of
the
optional keyboards,
it
also automatically includes the
appropriate language characterset ROM. This field specifies which national keyboard
format
is to
be used
in
interpreting keystrokes.
Values:
USASCII
(United States)
SVENSK/SUOMI (Swedish/Finnish)
DANSK/NORSK (Danish/Norwegian)
FRANCA
I S
azM
(French AZERTY layout with mutes)
FRANCAIS
CjwM
(French aWERTY layout with mutes)
FRANCA
I S
az
(French AZERTY layout)
FRANCA I S
CjW
(French aWERTY layout)
DEUTSCH (German)
UK
(United Kingdom)
ESPANOL M (Spanish with mutes)
ESPANOL (Spanish)
For the French keyboard layouts, the AZERTYand aWERTY designations refer
to
the
location of
the
A,
Z,
a,
and W keys as follows:
AZERTY: Row 3
AZERTY(etc.)
Row 2 •
QSDCl!tc.)
Row 1
-WXCCl!tc.)
QWERTY:
Row 3
QWERTY(etc.)
Row 2 • A S D C
I!t
c.
)
Row 1 •
ZXCCl!tc.)
For
the
French and Spanish keyboard layouts, the mutes designation refers
to
the mannerin which
certain accent character keystokes are handled
(.
and
..
on the French layout and ' on the
Spanish). If the mutes are enabled, those keystrokes will generate the particularaccent character
but
will NOT move the cursor. When you then type another character, that character replaces the
accenton thescreen (and the ASCII code
for
the newcharacter replacesthe accent code in display
memory). If the terminal is in remote mode, the code
for
the accent character istransmitted
to
the
host computer at the
point
in
the
datastream whereyou pressed
the
accent
key.
Mute mode is not
supported
in
block
mode.
Default: USASCI I
This field specifies which data comm
port
is assigned
to
the
host
computer
and which is assigned
to
an
external printer.
Values:
Port
1
/Port2
= Port 1 assigned
to
host;
port
2
to
printer.
Port2lPort
1 = Port 2 assigned
to
host;
port
1
to
printer.
Default:
Port
1
/Port2
This field specifiesthe definition of the _ key following power-on
or
a hard reset (in eithercase,
the
definition contained in
the
User Keys menu is destroyed). The
default
definition is an ASCII
<CR>. The definition may consist
of
up
to
two
characters. If the second character is a space,
it
is
ignored.
Default: <CR>
Thisfield specifies whether
or
not
you wantthe _ key to function
as
though
it
were the
II
key.
The value
"YES"
causes both keys
to
function in the manner defined
for
the
II
key when the
terminal is
in
remote mode (the _ key definitions in
both
the terminal configuration menu and
the user keys menu are ignored). Thevalue
"NO"
causes each key to
function
according
to
its own
definition.
Values:
YES
NO
Default:
NO
This field specifies which printer (an external printer
or
the integral printer) will respond
to
device
code
"4"
when the terminal receives a device control escape sequence from the host computer.
2-3

Configuring
the
Terminal
Table 2-2.
Terminal
Configuration
Menu
Fields
(Continued)
~--~--------------~(
PrinterCode4
Device code
"4"
is ordinarily used only
for
selecting an external printer.
Through
the use
of
this
(Cont'd) configuration parameter, however, you can redirect
the
device
control
operations
to
the
integral
printer
without
altering the host
computer
program.
PrinterNull5
LocalEcho
Cap~
Lock
Values:
EXT
(external printer)
INT (integral printer)
Default:
EXT
This field specifies the
number
of
ASCII null codes (0-255)
to
be transmitted
to
an external
printer
after
each ASCII
control
code.
Value:
0-255
Default: 0
This field is the
functional
equivalent of the HALF/FULL DUPLEX
toggle
switch
on an
HP
2645
terminal.
ON
= Characters entered
through
the keyboard are
both
displayed on the screen and transmitted
to
the host computer.
OFF
= Characters entered
through
the keyboard are transmitted
to
the
host
computer
only (if they
are
to
appear on the screen, the host
computer
must
"echo"
them
back
to
the terminal).
Default:
OFF
This field is the
functional
equivalent of the CAPS LOCK latching key on an HP 2645 terminal.
ON
= The terminal generates only Teletype-compatible codes: uppercase ASCII (00-5F, hex)
and
DEL
(7F,
hex). Unshifted alphabetic keys (a-z) generatethe codes
for
their
uppercaseequiva- (
lents, the
{,
I,
and}
keys generate the codes
for
[,
\,
and I (respectively). The keys
for
gen-
erating -
and'
are disabled.
Start
Col
ASCI18B1ts
Xm!tFnctn(A)
2-4
OFF
= The terminal generates the full 128-character ASCII set of codes.
Default:
OFF
If
the line in which you are entering data is the
bottommost
used line in display memory (there are
no printing
or
non-printing characters
following
the
current
line in display memory),
the
terminal
automaticallygenerates a logical start-of-text
pointer
to
designatethe leftmost character that you
enter in the line. This
pointer
remains
with
the line in display memory
until
the
line is deleted.
When you areoperating in MODIFY LINE
or
MODIFYALL modeand you press
II
or
II1II,
thedata
transmission from the terminal normally begins at the logical start-of-text
pointer
in
the
particular
line.
If
the line has no logical start-of-text pointer, however, the data transmission begins at
the
designated
start
column.
This designated
start
column
can be defined and saved in non-volatile
memory using
the
Shrteol
field ofthe terminal
configuration
menu. The active value
of
thisfield
can also be
temporarily
redefined using one
of
the
"marg!
n!5/tab!5/col"
function
keys.
Value:
1-80
Default: 1
When this operating mode is enabled (-YES), the terminal transmits 8-bit ASCII codes in which
the
eighth (high-order) bit, when set
(=
1), indicates
that
the character is from the alternate
character
set. This is a Hewlett-Packard convention and you will ordinarily use
it
only
when communicating
with an
HP
300
Computer
System
or
in
conjunction
with
certain
HP
line printers (such as the HP
2635A/B Printing Terminal).
Values:
YES
= 8-bit codes.
NO
= Standard 7-bit codes.
Default:
NO
This field is the
functional
equivalent of keyboard interface strap A on
an
HP
2645 terminal.
(

XmitFnctn(A)
(Cont'd)
SPOW(B)
InhEolWrp(C)
L1
ne/P"ge(D)
InHndShk(G)
"nd
I
nh
DC2(H)
Configuring
the
Terminal
Table 2-2.
Terminal
Configuration
Menu
Fields
(Continued)
YES
= The escape code sequences generated by control keys such
as
1/1
and
II
are trans-
mitted
to
the
host
computer. If local echo is
ON,
the
function
is also performed locally.
NO
= The escape code sequences
for
the major function keys are executed locally
but
NOT
transmitted
to
the
host
computer.
Default:
NO
This field is the
functional
equivalent
of
keyboard interface strap B on an
HP
2645 terminal.
NO
= Spaces entered
through
the
keyboard will overwrite existing characters.
YES
= Enable SPace OverWrite (SPOW) latch. When the SPOW latch is off, overwriting occurs
as
normal. When the SPOW latch is on, spaces entered
through
the keyboard move the cursor
forward
but
do
not
overwriteexisting characters. The SPOW latch is turned on
by
acarriage
return and is turned
off
by a line feed, home up, or tab. It may also be turned on and
off
pro-
grammatically
through
the
use of an <ESC>&k sequence as follows:
ON:
<ESC>&k
1N
OFF: <ESC>&k
ON
Default:
NO
This field is the functional equivalent
of
keyboard interface strap C on an HP 2645 terminal.
NO
= When the cursor reaches the
right
margin,
it
automatically moves
to
the
left
margin
in
the next
lower line
(a
local carriage return and line feed are generated).
YES
= When the cursor reaches the right margin,
it
remains in
that
screen column until an explicit
carriage return or
other
cursor movement function is performed (succeeding characters
overwrite the existing character in that screen column).
Default:
NO
This field is the functional equivalent of keyboard interface strap D on an
HP
2645.
LINE
= When operating in
block
mode,
the
terminal will transmit data a line at atime (or a field at a
time if format mode is enabled).
PAGE
= When operating in
block
mode, the terminal will transmit data a page at a time.
For adetailed description
of
the
differences between block lineand block page mode refer
to
"The
ENTER Key" in section
IV
of
this manual.
Default:
LINE
These fields are the
functional
equivalents of keyboard interface straps G and H on an
HP
2645
terminal. Together theydetermine what
type
of
handshaking is
to
be used whentransferring blocks
of
data from the terminal
to
the
host computer.
The various types of
block
transfers that may occur are
as
follows:
• A data transfer initiated by pressing the
am
key in character,
block
line,
or
block page mode.
• A data transfer initiated by pressing the
am
or _ key in
modify
mode.
• A data transfer initiated by pressing a transmit only
(T)
user key
("-B).
• The terminal's response
to
a cursor sense,
terminallD
status,
primary
status, secondary status,
or device status request issued from the host computer.
• The device control completion code
(S,
F,
or
U)
transmitted bythe terminal in conjunction with a
device control operation initiated by the host computer.
When performing
block
transfers, there are three possible handshakes:
1.
No handshake; terminal merely transmits block
of
data.
2-5

Configuring
the
Terminal
inHndShHG)
and
i
nh
DC2{H)
(Cont'd)
2-6
Auto
Term{J)
and
ClearTerm{K)
Table 2-2.
Terminal
Configuration
Menu
Fields (Continued)
2.
Computer
sends <DC1);
terminal
transmits
block
of
data.
3.
Computer
sends
<DCl
);
terminal
responds
with
<DC2);
computer
responds
with
another
<DCl
>;
terminal
transmits
block
of
data.
In general,
the
I
nhHndShk
(G)
and i
nh
DC2{H) fields have
the
following
effects:
inhHndShk{G) •
YES
inhDC2{H) •
YES
Both •
YES
eliminates
the
use
of
the
DC1
handshake (terminal will
either
use
the
DC1/DC2/DCl
handshake
or
no
handshake at all).
eliminates
the
use
of
theDCl
IDC2/DCl
handshake
(terminal will
either
use
the
DCl
handshake
or
no handshake at all).
No handshake.
Specifically, however,
the
type
of
handshaking
used
for
block
transfers
is
determined
by a
combination
of
the
following
factors:
1.
The
type
of
block
transfer
to
be
performed.
2.
What mode
the
terminal
is
currently
operating
in (character,
block
line,
block
page, or
modify
mode).
3.
The setting
of
the
inhHndShk(G) and
inh
DC2{H} fields.
If
your
terminal is
connected
to
a Hewlett-Packard
computer
system, you will
find
that
the
default
settings
for
these
fields
(both
OFF) are usually adequate
for
your
purposes. If you are
concerned
about
the
specific
type
of
handshake
to
be used
for
one
or
more
of
the
particular
types
of
block
transfers, however, you
should
use
the
following
summary
to
verify
(or alter)
the
settings
of
the
inhHndShk(G) and
Inh
DC2(H>
fields:
1.
GIll
key in
block
mode;
or
GIll
or
_ key
in
modify
mode;
or
Transmit
only
(T)
user
key in
block
page mode.
inhHndShk{G)
(i9nored)
inhDC2(H)
NO
- -
-)DCl
IDC2/DCl
i
nh
DC2(H)
YES
- - ->no
hand~hake
2.
GIll
key in
character
mode.
inhHndShk{G) •
YES
inhDC2(H} •
NO--->DClIDC2/DCl
Anyother
combination
--->nohand.hake
3.
Transmit
only
(T)
user key in
block
line or
character
mode;
or
Cursor sense,
terminallD
status,
primary
status,
secondary
status,
or
device
status
request; or
Device
control
completion
code.
inhHndShk(G) •
NO--->DCl
inhHndShk(G) 'YES
inhDC2(H) •
NO--->DC1/DC2/DCl
inhHndShk(G) =
YES
inh
DC2(H) •
YES
- -
-)no
hand.hake
Defaults: inhHndShk(G) =
NO
i
nh
DC2(H) =
NO
These fields are
the
functional
equivalents
of
keyboard
interface
straps
J and K on an
HP
2645
terminal.
c
(
(

Auto Term(J)
end
ClearTerm(K)
(Cont'd)
InhSlfT~t<L>
E5c
XferOD
InhDcT5t(W)
FldSeperetor
Configuring
the
Terminal
Table 2-2. Terminal Configuration Menu Fields (Continued)
The Auto Term(J) parameter only has an effect when the
II
key is pressed in block mode.
AutoTerm(J)
•
YES
Insert a non-displaying terminator at the current cursor position and then move the cursor
backward
to
the
previous displaying or non-displaying terminator (if none is found, the cursor
moves back
to
the
"home"
position).
AutoTerm(J)
•
NO
Do NOT insert a non-displaying terminator and do NOT
movE!.
the cursor backward.
CleerTerm(K) •
YES
Ifthe displaytransfer operation isterminated by encountering a non-displaying terminator, clear
the
terminator.
ClearTerm(K) =
NO
Do NOTclear any non-displaying terminators.
Defaults: Auto Term(J) •
NO
CleerTerm(K) •
NO
This field is the
functional
equivalent of keyboard interface strap L on an
HP
2645 terminal.
YES
• The Power-On
Test,
Terminal
Test,
and Manufacturing
Test
areenabled (refer
to
section
IX
of
this manual).
NO
• The Power-On
Test,
Terminal
Test,
and Manufacturing
Test
are all disabled. Any attempt
to
initiatethese tests (including an
<ESC)z
sequence) results in
the
"FUNCTION
LOCKED"
error
message;
the
terminal operator clears the message by pressing
_.
The data comm self-
test is
not
affected by
this
field.
Default:
NO
This field is the functional equivalent
of
keyboard interface strap N on an
HP
2645 terminal.
YES
• When transferring databetween displaymemoryand an external printer, escapesequences
relating
to
the display(such as those specifying displayenhancements, format mode fields,
and alternate character sets) are sent
to
the external printer
if
encountered within the
data.
NO
• Escape sequences relating
to
the
display are
not
sent
to
the external printer.
Default:
NO
This field is the functional equivalent
of
keyboard interface strap
Won
an
HP
2645 terminal.
YES
= The data comm self-test is enabled (refer
to
section
IX
of
this manual).
NO
• Thedata comm self-test is disabled. Pressing
the"
DATACOMMTEST"
(m)
function key (inthe
"5ervice
keY5"set) or issuingan
<ESC)x
results
in
the
"FUNCTION
LOCKED"
errormessage; the
terminal operator clears
the
message by pressing
_.
Default:
NO
When
yOu
press the
II
keywhile
the
terminal is in
block
page mode and displaymemorycontains
a formatted display,
the
terminal automaticallytransmits the specified field separator character at
the end
of
each unprotected field (except the final one).
Value: Any ASCII character
Default:
<US)
2-7
Table of contents
Other HP Touch Terminal manuals

HP
HP Rp3000 - Point of Sale System User instructions

HP
HP RP7 Model 7800 User manual

HP
HP 262SA User manual

HP
HP Engage Go Mobile System Assembly instructions

HP
HP RP7 Model 7800 User manual

HP
HP RP7 Model 7800 Manual

HP
HP ap5000 Specification sheet

HP
HP rp5800 User manual

HP
HP RP7 Model 7800 User manual

HP
HP Rp5000 - Point of Sale System Specification sheet