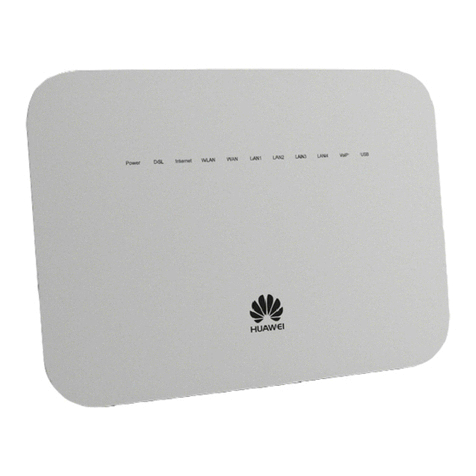
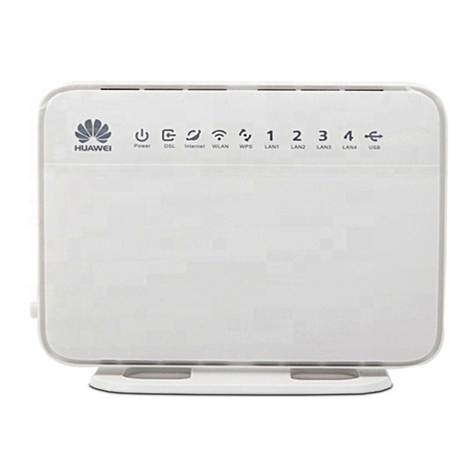
Huawei HG536a User manual

HUAWEI HG536a Home Gateway
User Guide
HUAWEI TECHNOLOGIES CO., LTD.

HUAWEI HG536a Home Gateway
V100R001
User Guide
Issue 01
Date 2010-11-12
Part Number 202264
Huawei Technologies Co., Ltd. provides customers with comprehensive
technical support and service. Please feel free to contact our local office
or company headquarters.
Huawei Technologies Co., Ltd.
Address: Huawei Industrial Base
Bantian, Longgang
Shenzhen 518129
People's Republic of China
Website: http://www.huawei.com
Email: [email protected]

Copyright © Huawei Technologies Co., Ltd. 2010. All
rights reserved.
No part of this document may be reproduced or transmitted in any form or by any means
without prior written consent of Huawei Technologies Co., Ltd.
The product described in this manual may include copyrighted software of Huawei
Technologies Co., Ltd and possible licensors. Customers shall not in any manner
reproduce, distribute, modify, decompile, disassemble, decrypt, extract, reverse
engineer, lease, assign, or sublicense the said software, unless such restrictions are
prohibited by applicable laws or such actions are approved by respective copyright
holders under licenses.
Trademarks and Permissions
, , and
are trademarks or registered trademarks of Huawei
Technologies Co., Ltd.
Other trademarks, product, service and company names mentioned are the property of
their respective owners.
Notice
Some features of the product and its accessories described herein rely on the software
installed, capacities and settings of local network, and may not be activated or may be
limited by local network operators or network service providers. Thus the descriptions
herein may not exactly match the product or its accessories you purchase.
Huawei Technologies Co., Ltd reserves the right to change or modify any information or
specifications contained in this manual without prior notice or obligation.
NO WARRANTY
THE CONTENTS OF THIS MANUAL ARE PROVIDED “AS IS”. EXCEPT AS
REQUIRED BY APPLICABLE LAWS, NO WARRANTIES OF ANY KIND, EITHER
EXPRESS OR IMPLIED, INCLUDING BUT NOT LIMITED TO, THE IMPLIED
WARRANTIES OF MERCHANTABILITY AND FITNESS FOR A PARTICULAR
PURPOSE, ARE MADE IN RELATION TO THE ACCURACY, RELIABILITY OR
CONTENTS OF THIS MANUAL.
TO THE MAXIMUM EXTENT PERMITTED BY APPLICABLE LAW, IN NO CASE
SHALL HUAWEI TECHNOLOGIES CO., LTD BE LIABLE FOR ANY SPECIAL,
INCIDENTAL, INDIRECT, OR CONSEQUENTIAL DAMAGES, OR LOST PROFITS,
BUSINESS, REVENUE, DATA, GOODWILL OR ANTICIPATED SAVINGS.
Import and Export Regulations
Customers shall comply with all applicable export or import laws and regulations and will
obtain all necessary governmental permits and licenses in order to export, re-export or
import the product mentioned in this manual including the software and technical data
therein.

Contents
1Warnings and Precautions ....................................................................... 1
2Getting to Know the HG536a................................................................... 5
2.1 Overview......................................................................................................5
2.2 Host..............................................................................................................5
2.3 Handset and Base .........................................................................................8
3Installing the HG536a ............................................................................. 10
3.1 Connecting the Cables to the Host .............................................................10
3.2 Installing the Handset.................................................................................11
Installing the Battery ................................................................................11
Replacing the Battery ...............................................................................12
Charging the Battery.................................................................................12
3.3 Powering On ..............................................................................................14
4Setting the Internet Access Parameters................................................. 15
4.1 Configuring the ADSL uplink....................................................................15
Using the Embedded PPP Dial-Up Software on the HG536a...................15
Using the PPP Dial-Up Software on Your Computer...............................16
4.2 Configuring the Wireless Network Connection..........................................17
Setting Up a Wireless Connection Through the WPS Button...................17
Setting Up a Wireless Connection Manually............................................18
5Basic Configuration for the Host ........................................................... 20
5.1 Changing the Administrator Password .......................................................20
5.2 Enabling or Disabling the Wireless Network Function ..............................20
5.3 Changing the Wireless Network Name and the Access Password .............21
i

5.4 Changing the Login IP Address .................................................................21
5.5 Restoring Default Settings..........................................................................22
6Using the Handset ................................................................................... 23
6.1 Layout ........................................................................................................23
6.2 Icons on the Handset LCD .........................................................................25
6.3 Powering On/Off the Handset ....................................................................25
6.4 Registering a Handset.................................................................................26
6.5 Calling a Handset from the Host ................................................................26
6.6 Making a Call.............................................................................................27
6.7 Answering a Call ........................................................................................28
6.8 Basic Settings for the Handset....................................................................28
Adjusting Display Contrast ......................................................................28
Locking the Handset Keypad....................................................................28
Setting the Dial Mode...............................................................................29
Setting the Ring tone ................................................................................29
Performing Auto Answer ..........................................................................29
Setting the Alarm Clock ...........................................................................30
Changing the PIN .....................................................................................30
Restoring Default Settings........................................................................30
7FAQs......................................................................................................... 32
8Appendix.................................................................................................. 38
8.1 Default Settings..........................................................................................38
8.2 Technical Specifications.............................................................................38
ii

1 Warnings and Precautions
To use the device properly and safely, read these warnings and precautions carefully
and strictly observe them during operation. Unless otherwise specified, the term
"device" refers to the device and its accessories.
Basic Requirements
zDuring storage, transportation, and operation of the device, keep it dry and prevent
it from colliding with other objects.
zDo not dismantle the device. In case of any fault, contact an authorized service
center for assistance or repair.
zWithout authorization, no organization or individual can change the mechanical,
safety, or performance design of the device.
zWhen using the device, observe all applicable laws and regulations and respect the
legal rights of other people.
Environmental Requirements for Using the Device
zBefore connecting and disconnecting cables, stop using the device, and then
disconnect it from the power supply. Ensure that your hands are dry during
operation.
zKeep the device far from sources of heat and fire, such as a heater or a candle.
zKeep the device far from electronic appliances that generate strong magnetic or
electric fields, such as a microwave oven or a refrigerator.
zPlace the device on a stable surface.
zPlace the device in a cool and well-ventilated indoor area. Do not expose the device
to direct sunlight.
zUse the device in an area with a temperature ranging from 0°C to 40°C.
zDo not block the openings on the device with any object. Reserve a minimum space
of 10 cm around the device for heat dissipation.
zDo not place any object (such as a candle or a water container) on the device. If any
foreign object or liquid enters the device, stop using the device immediately, power
it off, remove all the cables connected to it, and then contact an authorized service
center.
zDuring thunderstorms, power off the device, and then remove all the cables
connected to it to prevent it from getting damaged due to lightning strikes.
1

Precautions for Using Wireless Devices
zWhen using the device, ensure that the antenna of the device is at least 20 cm away
from all persons. When using the handset of the device, however, you can use it
close to your body.
zDo not use the device where using wireless devices is prohibited or may cause
interference or danger.
zThe radio waves generated by the device may interfere with the operation of
electronic medical devices. If you are using any electrical medical device, contact
its manufacturer for the restrictions on the use of the device.
zDo not take the device into operating rooms, intensive care units (ICUs), or
coronary care units (CCUs).
Areas with Inflammables and Explosives
zDo not use the device where inflammables or explosives are stored, for example, in
a gas station, oil depot, or chemical plant. Otherwise, explosions or fires may occur.
In addition, follow the instructions indicated in text or symbols.
zDo not store or transport the device in the same box as inflammable liquids, gases,
or explosives.
Accessory Requirements
zUse only the accessories supplied or authorized by the device manufacturer.
Otherwise, the performance of the device may get affected, the warranty for the
device or the laws and regulations related to telecommunications terminals may
become null and void, or an injury may occur.
zDo not use the power adapter if its cable is damaged. Otherwise, electric shocks or
fires may occur.
zEnsure that the power adapter meets the specifications indicated on the device
nameplate.
zEnsure that the power adapter meets the requirements of Clause 2.5 in
IEC60950-1/EN60950-1 and it is tested and approved according to national or local
standards.
zFor pluggable equipment, the socket-outlet shall be installed near the equipment
and shall be easily accessible.
Battery and Charger
zUnplug the charger from the electrical plug and the device when not in use.
2

zThe battery can be charged and discharged hundreds of times before it eventually
wears out. When the standby time and the talk time are shorter than the normal time,
replace the battery.
zUse the AC power supply defined in the specifications of the charger. An improper
power voltage may cause a fire or a malfunction of the charger.
zDo not connect two poles of the battery with conductors, such as metal materials,
keys, or jewelries. Otherwise, the battery may be short-circuited and may cause
injuries and burns on your body.
zDo not disassemble the battery or solder the battery poles. Otherwise, it may lead to
electrolyte leakage, overheating, fire, or explosion.
zIf battery electrolyte leaks out, ensure that the electrolyte does not touch your skin
and eyes. When the electrolyte touches your skin or splashes into your eyes, wash
your eyes with clean water immediately and consult a doctor.
zIf there is a case of battery deformation, color change, or abnormal heating while
you charge or store the battery, remove the battery immediately and stop using it.
Otherwise, it may lead to battery leakage, overheating, explosion, or fire.
zIf the power cable is damaged (for example, the cord is exposed or broken), or the
plug loosens, stop using the cable at once. Otherwise, it may lead to an electric
shock, a short circuit of the charger, or a fire.
zDo not dispose of batteries in fire as they may explode. Batteries may also explode
if damaged.
zDanger of explosion if battery is incorrectly replaced. Recycle or dispose of used
batteries according to the local regulations or reference instruction supplied with
your device.
Safety of Children
Keep the device and its accessories out of the reach of children. Otherwise, they
may damage the device and its accessories by mistake, or they may swallow the
small components of the device, causing suffocation or other dangerous situations.
Maintenance
zIf the device is not used for a long time, power it off, and then remove all the cables
connected to it.
zIf any exception occurs, for example, if the device emits any smoke or unusual
sound or smell, stop using the device immediately, power it off, remove all the
cables connected to it, and then contact an authorized service center.
zIf the device screen is broken by colliding with hard objects, do not touch or try to
remove the broken part. In this case, stop using the device immediately, and then
contact an authorized service center in time.
3
zDo not trample, pull, or overbend any cable. Otherwise, the cable may get damaged,
causing malfunction of the device.
zBefore cleaning the device, stop using it, power it off, and then remove all the
cables connected to it.
zUse a clean, soft, and dry cloth to clean the device shell. Do not use any cleaning
agent or spray to clean the device shell.
Emergency Call
You can use your device for emergency calls in the service area. The connection,
however, cannot be guaranteed in all conditions. You should not rely solely on the
device for essential communications.
4

2 Getting to Know the HG536a
2.1 Overview
HUAWEI HG536a Home Gateway (hereinafter referred to as the HG536a) is a type of
Asymmetrical Digital Subscriber Line (ADSL) terminal, providing the DECT module
which supports the handset (1.8 or 1.9 GHz).
At the network side, HG536a provides ADSL2+ for rapid Internet access and
high-speed broadband access. At the user side, HG536a provides four Ethernet
interfaces, one USB interface and a digital cordless handset (hereinafter referred to as
the handset), also supports wireless local area network (WLAN) access. After
connecting to a PC, STB, video phone, or another terminal, users can enjoy data, voice,
and a range of other services.
2.2 Host
Interfaces and Buttons
5

No. Description
1 Page button, which is used to call a registered handset or enable the
registration function for handset.
zPress and hold the Page button for less than three seconds to call a
registered handset.
zPress and hold the Page button for over five seconds to enable the
registration function for handset.
2 Phone button, which is used to enable or disable the DECT module.
3 Base interface, which is used to connect the base of the handset.
4 WPS button, which is used to start the WPS negotiation.
5 WLAN button, which is used to enable or disable wireless network function
quickly.
6 Power button of the host, which is used to power on or off the host.
7 Power interface of the host, which is used to connect the host to the power
adapter.
8 Reset button, which is used to restore the default settings of the host.
9 LAN interfaces, which are used to connect the host to the Ethernet interface
on the computer.
10 ADSL interface, which is used to connect the host to the MODEM interface
on the splitter or to the telephone jack on the wall.
11 Support, which is used to make the host steady.
12 USB interface, which is used to connect a USB device, such as a USB flash
drive.
Note
zThePower button and the Reset button are not used to enable or disable the DECT module for
using the handset.
zAfter you restore the default settings, your customized data for the host is lost. Therefore, use
this Reset button with caution.
6

Indications
Indicator Status Description
Blinking The HG536a is calling online. Or the handset is
registering to the host.
Phone
Off The HG536a is not calling online. Or the handset is
not registering to the host.
On The HG536a is powered on.Power
Off The HG536a is powered off.
On The HG536a is connected to WAN and transmits no
data in routing mode.
Blinking The HG536a is connected to WAN and transmits data
in routing mode.
Internet
Off The HG536a is in bridge mode. Or the HG536a is not
connected to WAN in routing mode.
On The HG536a is activated.
Blinking The HG536a is being activated.
ADSL
Off The HG536a is powered off.
On The wireless network function is enabled, but no data
is being transmitted through the WLAN.
Blinking The wireless network function is enabled, and data is
being transmitted through the WLAN.
WLAN
Off The wireless network function is disabled.
7

Indicator Status Description
On A wireless connection is set up between the HG536a
and a wireless client through the WPS function.
This state lasts 300s.
Blinking The HG536a is attempting to set up a wireless
connection with a wireless client (such as a PC on
which a wireless network adapter is installed) through
the WPS function.
This state lasts no more than 120s.
WPS
Off The WPS function is disabled.
On The Ethernet connection is set up.
Blinking Data is being transmitted through the Ethernet
interface.
LAN1- LAN4
Off The Ethernet connection is not set up.
On The USB connection is set up.
Blinking Data is being transmitted through the USB interface.
USB
Off The USB connection is not set up.
2.3 Handset and Base
8

No. Description
1 Handset, which is used to make calls.
2 Base, which is used to charge up the handset and make the handset steady.
3 Indicator, which indicates the handset charging status. There are two status:
zOn: the handset is being charged.
zOff: the handset is not be charged
4 Base interface, which is used to connect the base to the host.
5 Power interface of the base, which is used to connect the base to the power
adapter.
9

3 Installing the HG536a
3.1 Connecting the Cables to the Host
The HG536a provide the DECT module which supports the handset. You can make the
calls by using the handset, no need to connect another telephone. Besides, you can also
connect another telephone to make the calls if you need.
Using the power adapter of 12 V, 1.5 A to connect to the host.
Take the following two manners as the reference for connecting the cables to the host.
zSimple Connection.
2
3
1
1. Power adapter 2. Computer 3. Telephone jack on the wall
10

zConnecting one Telephone.
a. PHONE interface b. MODEM interface c. LINE interface
1. Power adapter for host 2. Computer 3. Splitter
4. Telephone 5. Telephone jack on the wall
If the wireless network function is used on the HG536a for the network access,
you do not need to connect the network cable.
3.2 Installing the Handset
Installing the Battery
A handset is provided with the HG536a. Install the battery before using your handset,
taking the following figure as a reference:
11

To install the battery, do as follows:
Step 1 Slide the battery cover down to remove it.
Step 2 Insert the battery into the battery compartment.
Step 3 Plug the battery connector into the receptacle in the battery compartment.
Step 4 Slide the cover up until it snaps in place.
Replacing the Battery
If the battery life has reached its end or is damaged, you should replace the battery.
Taking the following figure as a reference:
To replace the battery, do as follows:
Step 1 Slide the battery cover down to remove it.
Step 2 Pull out the battery connector from the receptacle in the battery compartment.
Step 3 Pull out the battery from the battery compartment.
Step 4 Install a new battery, please see "Installing the Battery" on page 11.
Step 5 Slide the cover up until it snaps in place.
Charging the Battery
12

Before using the handset for the first time, fully charge it for 16 hours continuously.
Step 1 Electrify the base.
The handset is charged by the base. There are two different ways to electrify
the base, taking either of the following figures as a reference:
- Electrify the base by connected to the host.
- Electrify the base by connected the power adapter.
Using the power adapter of 12 V, 0.5 A to connect to the base.
1. Power adapter for base 2. Base
13

Step 2 Place the handset on the base, taking the following figure as a reference:
After you place the handset on the base, the indicator on the base turns solid on, which
indicates that the handset is being charged.
If the handset power is low, you can also place the handset on the base for charging,
during this condition, the bars inside the icon are displayed on the LCD scroll.
3.3 Powering On
To power on the HG536a, press the ON/OFF button on the side panel of the HG536a.
After you power on the HG536a, the ADSL indicator blinks (for less than three
minutes), which indicates that the HG536a is being activated. Later, the ADSL
indicator turns solid on. The Power indicator is also solid on, which indicates that the
HG536a is working properly.
14

4 Setting the Internet Access Parameters
The HG536a supports ADSL2+ uplink. Realizes dynamic mutual backup of voice and
data services through the ADSL link.
4.1 Configuring the ADSL uplink
By configuring the HG536a and your computer, you can choose any of the following
methods to surf the Internet:
zUsing the Embedded PPP Dial-Up Software on the HG536a
zUsing the PPP Dial-Up Software on Your Computer
Using the Embedded PPP Dial-Up Software on the
HG536a
If you select this method for accessing the network, the HG536a starts to set up a
dial-up connection automatically after the startup. You can access the network after you
power on your computer. You do not need to install any special dial-up software on
your computer or perform dial-up operations on your computer.
Step 1 Set the network connection of your computer and ensure that your computer
obtains an IP address automatically.
By default, the DHCP function of the HG536a is enabled. In this case, the HG536a
assigns an IP address to your computer automatically and you do not need to configure the
IP address of your computer.
Step 2 Log in to the Web-based configuration utility of the HG536a.
1. Launch the Internet Explorer on your computer. Enter http://192.168.1.1
in the address bar, and then press Enter.
2. In the displayed dialog box, enter the user name (admin by default) and
the password (admin by default), and then click Login.
After the user name and the password are verified, you can access the
Web-based configuration utility.
Step 3 Enable the embedded dial-up function.
1. In the navigation tree on the left, choose Basic > WAN.
2. Click New to create a WAN connection.
3. Select DSL from the Link Type option button.
4. Select Enable for WAN connection.
15
Other manuals for HG536a
1
Table of contents
Other Huawei Gateway manuals

Huawei
Huawei HG635 User manual

Huawei
Huawei HG532e User manual

Huawei
Huawei HG658d User manual

Huawei
Huawei DN8245V User manual

Huawei
Huawei HG532c User manual

Huawei
Huawei HA35 User manual

Huawei
Huawei HG658 User manual

Huawei
Huawei EchoLife HG520 User manual

Huawei
Huawei ME60 Series Instructions for use

Huawei
Huawei RRU3201 User manual

Huawei
Huawei HG659 User manual

Huawei
Huawei HG659 User manual

Huawei
Huawei HG552e User manual

Huawei
Huawei eSpace EGW1530B User manual

Huawei
Huawei HG523 User manual

Huawei
Huawei eA380 User manual

Huawei
Huawei ICE D-20 EC506 User manual

Huawei
Huawei RRU3262 User manual

Huawei
Huawei SmartAX MT841 User manual

Huawei
Huawei EchoLife HG520 User manual