manuals.online logo
Brands
  1. Home
  2. •
  3. Brands
  4. •
  5. Hunter
  6. •
  7. Controllers
  8. •
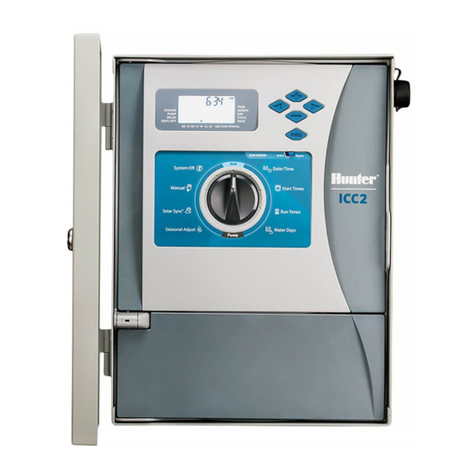
  9. Hunter ICC2 User manual

Hunter ICC2 User manual

Other manuals for ICC2

4

Other Hunter Controllers manuals

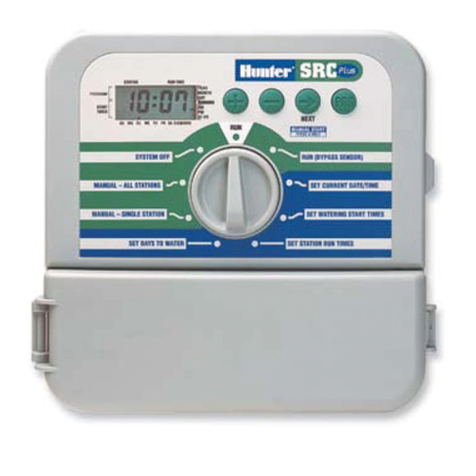
Hunter SRC Plus User manual

Hunter

Hunter SRC Plus User manual

Hunter VSX User manual

Hunter

Hunter VSX User manual

Hunter ICC2 Installation manual

Hunter

Hunter ICC2 Installation manual

Hunter 99373 User manual

Hunter

Hunter 99373 User manual

Hunter 99111 User manual

Hunter

Hunter 99111 User manual

Hunter PSC-Z Series Operating instructions

Hunter

Hunter PSC-Z Series Operating instructions

Hunter X2-400 Operating instructions

Hunter

Hunter X2-400 Operating instructions

Hunter Hydrawise HCC-800-PL User manual

Hunter

Hunter Hydrawise HCC-800-PL User manual

Hunter i-core IC-600PL Operating instructions

Hunter

Hunter i-core IC-600PL Operating instructions

Hunter Genesis User manual

Hunter

Hunter Genesis User manual

Hunter Pro-C Operating instructions

Hunter

Hunter Pro-C Operating instructions

Hunter Pro-C User manual

Hunter

Hunter Pro-C User manual

Hunter NODE-BT User manual

Hunter

Hunter NODE-BT User manual

Hunter X-CORE XC-800I Operating instructions

Hunter

Hunter X-CORE XC-800I Operating instructions

Hunter Node User manual

Hunter

Hunter Node User manual

Hunter NODE-100 Operating instructions

Hunter

Hunter NODE-100 Operating instructions

Hunter 27178 User manual

Hunter

Hunter 27178 User manual

Hunter ICC2 User manual

Hunter

Hunter ICC2 User manual

Hunter Smart Valve Controller Operating instructions

Hunter

Hunter Smart Valve Controller Operating instructions

Hunter SpectraProbe XE Instructions for use

Hunter

Hunter SpectraProbe XE Instructions for use

Hunter IC600SS User manual

Hunter

Hunter IC600SS User manual

Hunter Hydrawise Pro-HC Quick start guide

Hunter

Hunter Hydrawise Pro-HC Quick start guide

Hunter SVC User manual

Hunter

Hunter SVC User manual

Hunter Hydrawise HCC-FPUP User manual

Hunter

Hunter Hydrawise HCC-FPUP User manual

Popular Controllers manuals by other brands

Sunricher SR-ZV9003T3-RGBW-US Installation

Sunricher

Sunricher SR-ZV9003T3-RGBW-US Installation

Ksenia intro Installation and configuration manual

Ksenia

Ksenia intro Installation and configuration manual

Inovance CAN200 Series manual

Inovance

Inovance CAN200 Series manual

Gauzy LC6 FLEX Controller Installation and operation guide

Gauzy

Gauzy LC6 FLEX Controller Installation and operation guide

Viking SLP-1 Technical practice

Viking

Viking SLP-1 Technical practice

CKD KBX-30E-U Series instruction manual

CKD

CKD KBX-30E-U Series instruction manual

Sharp Energy Sun Flux User manual & installation guide

Sharp Energy

Sharp Energy Sun Flux User manual & installation guide

Yamaha RCX40 user manual

Yamaha

Yamaha RCX40 user manual

AB Quality PowerFlex 400 Frames D-H Service bulletin

AB Quality

AB Quality PowerFlex 400 Frames D-H Service bulletin

Yamaha MJC8 owner's manual

Yamaha

Yamaha MJC8 owner's manual

AL-KO ATC operating instructions

AL-KO

AL-KO ATC operating instructions

Savant SmartControl 2 Deployment guide

Savant

Savant SmartControl 2 Deployment guide

GameSir T3S user manual

GameSir

GameSir T3S user manual

Kostal inveor operating manual

Kostal

Kostal inveor operating manual

Emerson Yarway 20-55 Operating and safety instructions

Emerson

Emerson Yarway 20-55 Operating and safety instructions

CoCo ACM-LV24 Quick installation guide

CoCo

CoCo ACM-LV24 Quick installation guide

Brooks SLA5810/20 Installation and operation manual

Brooks

Brooks SLA5810/20 Installation and operation manual

SIGMA TEK SR 011 Technical manual

SIGMA TEK

SIGMA TEK SR 011 Technical manual

manuals.online logo
manuals.online logoBrands
  • About & Mission
  • Contact us
  • Privacy Policy
  • Terms and Conditions

Copyright 2025 Manuals.Online. All Rights Reserved.

ICC 2
®
IRRIGATION CONTROLLER
QUICK START PROGRAMMING GUIDE
Main Display
Dial Must Be In RUN Position For Automatic Irrigation!
Setting Current Date and Time
1. Turn the dial to the DATE/TIME position.
2. The current year will be ashing. Use the +and -buttons
to change the year. Push the ► button to proceed to
setting the month.
3. The month will be ashing. Use the +and -buttons to
change the month. Press the ► button to proceed to
the day setting.
4. The day will be ashing. Use the +and –buttons to
change the day of the month. Press the ► button to
proceed to the time setting.
5. The time will be displayed. Use the +and –buttons to
select AM, PM,or 24 hr to display all times in
24-hour mode.
6. Press the ► button to move to hours. Use the +and -
buttons to change the hour shown on the display.
7. Press the ► button to move on to minutes.
Use the +and -buttons to change the minutes shown in
the display.
Turn the dial to the RUN position. Date and time are now set.
Setting Program Start Times
1. Turn the dial to the START TIMES position.
2. Press the PRG button to select A, B, C or D.
3. Use the +and -buttons to change the start time.
The start time advances in 15-minute increments.
4. Press the ► button to add another start time, or
PRG button to set a start time for the next program.
Note: Controller can run 2 programs at once.
Eliminating a Program Start Time
With the dial set to the START TIMES position, push the +
and -buttons until you reach 12:00 AM (Midnight). From this
position, push the -button once to reach the “OFF” position.
Setting Station Run Times
1. Turn the dial to the RUN TIMES position.
2. Use the PRG button to select program (A, B, C, or D).
3. Use the +and -buttons to change the station run time on
the display. You may set station run times from 1 minute
to 12 hours.
4. Press the ► button to advance to the next station.
5. Repeat for each station.
Total Run Time Calculator
1. Turn the dial to RUN TIMES.
2. Press ◄ to view total time for all stations in program.
3. Press PRG to see total times for other programs.
Setting Water Days
1. Turn the dial to the WATER DAYS position.
2. The display will show the last program selected.
(A, B, C, or D). Switch to another program by pressing the
PRG button.
3. The pointer at the bottom of the screen shows the
currently selected day of the week. Press +or –to select
days for watering [drop] or no water [-].
Selecting Odd or Even Days to Water
1. Press ► past all days of week to ODD or EVEN.
2. Press +to select or – to cancel ODD or EVEN.
Selecting Interval Watering
1. Press ► past ODD and EVEN to INT.
2. Press +or –to set interval days.
3. Press +or –to set number of days to next watering.
Pump (PMV)
Press ► to select stations.
Press +or –to set PMV output ON or OFF for station.
(PMV is normally on for all stations).
Seasonal Adjust
Changes all run times by a percentage for local conditions.
Press +or –to change from 5% to 300% of original run times.
Solar Sync
Sets up and adjusts optional Hunter Solar Sync sensor.
1. Press +or –to select Region , 1-4 (see Solar Sync manual).
2. Press +or –to increase or decrease watering
(see Solar Sync manual).
Manual Station
1. Turn dial to Manual position.
2. Press ► to select station. Use +or –to set manual run time.
3. Turn dial to Run position to begin immediately.
Manual - Program
1. Turn dial to RUN position.
2. Press and hold ► button for 3 seconds.
3. Press PRG to select program.
4. Release button for 2 seconds. Program will begin.
5. Press ► to advance to another station within the Program.
 Station running
 Sprinkler O Days
 Program Indicators
 Water Days Symbol
 Solar Sync Symbol
 Days of the Week
Season Adjust %
Time mode (AM/PM/24)
 Rain Sensor Active/Override
 Run Time Symbol
 Start Time Symbol
 Odd/Even/Interval Days
System O
Turn dial to System OFF position. No watering will occur in
this dial position.
Programmable Rain O
1. Turn dial to System OFF position, wait for OFF
to stop blinking.
2. Press +or –to set the number of days to remain o.
3. Turn dial back to RUN position. Display will show days
o remaining, and watering will resume when O
days reach 0. To cancel Rain O, turn dial to
OFF, wait until OFF stops blinking, then turn dial
back to Run.
Test
Runs all stations for a test run time.
1. Press and hold PRG for 3 seconds.
2. Station 1 appears. Press +or -to enter run time.
3. Wait 2 seconds, each station will run for test run time.
Quick Check
Checks all station for wiring short circuits.
1. Press +, -, <, >at the same time.
Whole display illuminates.
2. Press +to begin the check. # ERR shows station
with fault.
Sensor Bypass
Overrides sensor shutdown to allow watering.
1. Move Sensor BYPASS switch to BYPASS position.
2. Return switch to ACTIVE to allow sensor shutdown.
Easy Retrieve
Saves and restores all watering programs. To save:
1. Turn dial to RUN.
2. Press and hold + and PRG for 3 seconds.
3. Display scrolls until save is complete.
To Restore: Press and hold –and PRG for 3 seconds.
Display scrolls right to le and shows "doNE" when
restore is complete.
Reset
Open inner door (control panel).
Press RESET button on back of door.
Controller restarts.
Controller Total Reset (Erase All)
1. Open inner door (control panel).
2. Press and hold PRG button.
3. Press and release the RESET button.
4. Wait 5 seconds or until display says "doNE", release
PRG button. Controller is erased.
For complete product information
visit www.Hunterindustries.com
Control Buttons
Sensor Bypass Switch










HIDDEN AND ADVANCED FEATURES
Feature Where Found Description
PROGRAMMABLE SENSOR OVERRIDE
Hold –and turn to Start Times
Sets individual stations to ignore sensor shutdowns. Select stations with ◄ or ►, (use +/
–
) to change
to OFF to ignore sensor.
CYCLE AND SOAK
Hold +and turn to Run Times. Enter Cycle, press PRG to set Soak
Sets max time a station can run at once, and minimum time it must wait before another cycle.
Divides run time into segments to prevent runo.
DELAY BETWEEN STATIONS
Hold –and turn to Run Times
Inserts a delay (seconds or minutes) between stations in a run time, for slow valves or recharging tanks.
HIDE PROGRAMS
Hold –and turn to Water Days
Use +/
–
to change from 4 to 1 to hide extra programs. 1 will show only program A,
start time 1. 4 will show all programs and start times.
SOLAR SYNC DELAY
Hold +and turn to Solar Sync
Set number of days before Solar Sync begins adjusting run times. Allows landscape establishment for a
set period of days, before Solar Sync begins adjusting automatically.
CLIK DELAY
Hold +and turn to O
Set number of days for watering to remain o, aer sensor has been activated and restored.
TOTAL RUN TIME
Turn to Run Times.
Press ◄when station 1 is shown,
PRG to select other programs.
Calculates and displays total of all run times in a program start time.
TEST PROGRAM
Hold PRG 3 secs.
Runs all stations in controller for the time entered for test or diagnostic purposes.
EASY RETRIEVE
TM Hold +and PRG to Save
Hold –and PRG to Restore
Saves all program information to restore at a later time.
TOTAL RESET
PRG and RESET button
Erases all watering information.
QUICK CHECK
TM +, –, ◄, ►together, then +
Checks all stations for wiring problems.
RUN PROGRAM
Hold ►, PRG to select
Runs all stations in selected program; use ► to advance to next station manually.
TROUBLESHOOTING GUIDE
Display Possible Cause Solutions
DISPLAY SHOWS "ERR" WITH NUMBER
Short in eld wiring, or bad solenoid.
Check eld wiring and valve solenoid. Press any button to clear ERR message.
DISPLAY SHOWS P "ERR"
Short in Pump/Master Valve wiring or solenoid.
Check wiring and solenoid at PMV. Check specications for Pump Start Relay.
DISPLAY SHOWS SP "ERR"
SmartPort error. Electrical noise is present near connection to remote or other SmartPort device.
Move connections away from sources of electrical noise.
DISPLAY SHOWS “NO AC”
There is no AC power to the controller.
Check fuse/breaker and incoming power supply to controller.
DISPLAY SHOWS WATERING BUT NO
WATER IS OCCURRING
Problem in eld wiring.Problem with solenoids. No water pressure to system.
Check eld wiring (voltmeter). Check valve solenoid(s). Verify water source is open.
FROZEN OR GARBLED DISPLAY
Power surge
Reset controller.
RAIN SENSOR DOES NOT STOP
IRRIGATION
Jumper wire is not removed. Sensor switch in
BYPASS position.
Remove jumper wire on SEN terminals. Set sensor switch to Active position.
CONTROLLER SEEMS TO WATER
CONTINUOUSLY
Too many start times.
One Start Time operates all stations in a program. Remove unnecessary start times.
© 2016 Hunter Industries Incorporated | hunterindustries.com LIT-666 - QG -US 6/16
http:// hunter.direct/icc2help