HUNTER INDUSTRIES | Built on Innovation®
1940 Diamond Street, San Marcos, CA 92078 USA
hunterindustries.com
RC-125 IG EM 10/22
© 2022 Hunter Industries™. Hunter, the Hunter logo, and all other trademarks are property of Hunter Industries, registered in the U.S. and other countries.
ST-IBS-1700 Installation Guide
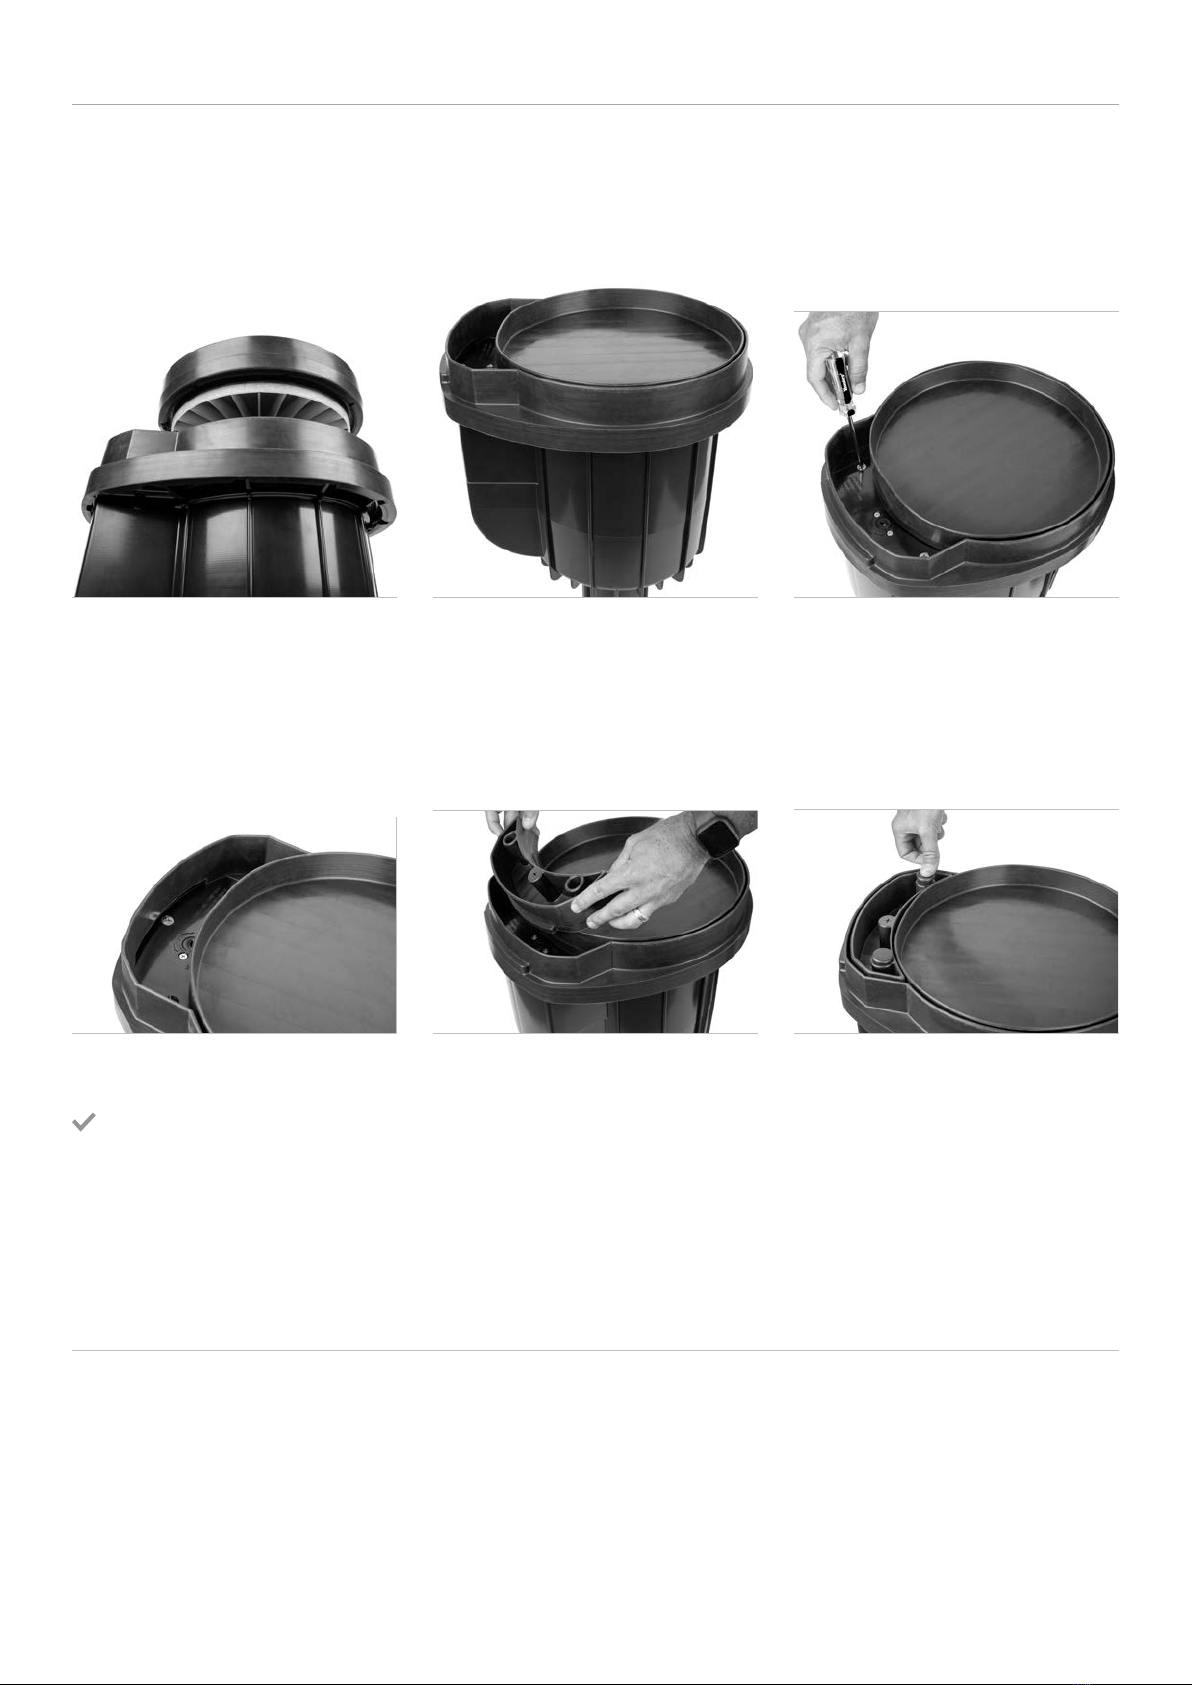
Fit and Finish
Aer installation for non-inll type material or to create a smoother transition to the playing eld, follow these additional steps.
1. Use a sharp blade or shears to trim/remove the inll barrier vertical walls.
2. Cut a round 30 cm diameter piece of the synthetic material being used for the project.
3. Use a Hunter-approved adhesive (ST-ADH-K) to attach it to the Inll Barrier System.
4. Do the same for the TTS insert, cutting a piece of the synthetic material to match its shape and securing it with the adhesive.
6. Aer all retaining segments have
been positioned, recheck to make
sure they are completely under the
logo cap.
7. Carefully lower the logo cap and
cup assembly. Take care not to
disengage the cup from the logo
cap. Make sure the cup and ring are
aligned.
8. Aer the ring and cup are installed,
unscrew the two screws on both
ends of the actuator cover.
9. Push and slide the TTS insert over
the actuator cover. Be sure the
groove from the TTS insert slides
into the gap on the ring.
9. (continued) 10. Aer the TTS Insert is installed,
secure it using the supplied screws.
Press the black plugs down to cover
the screw openings.


