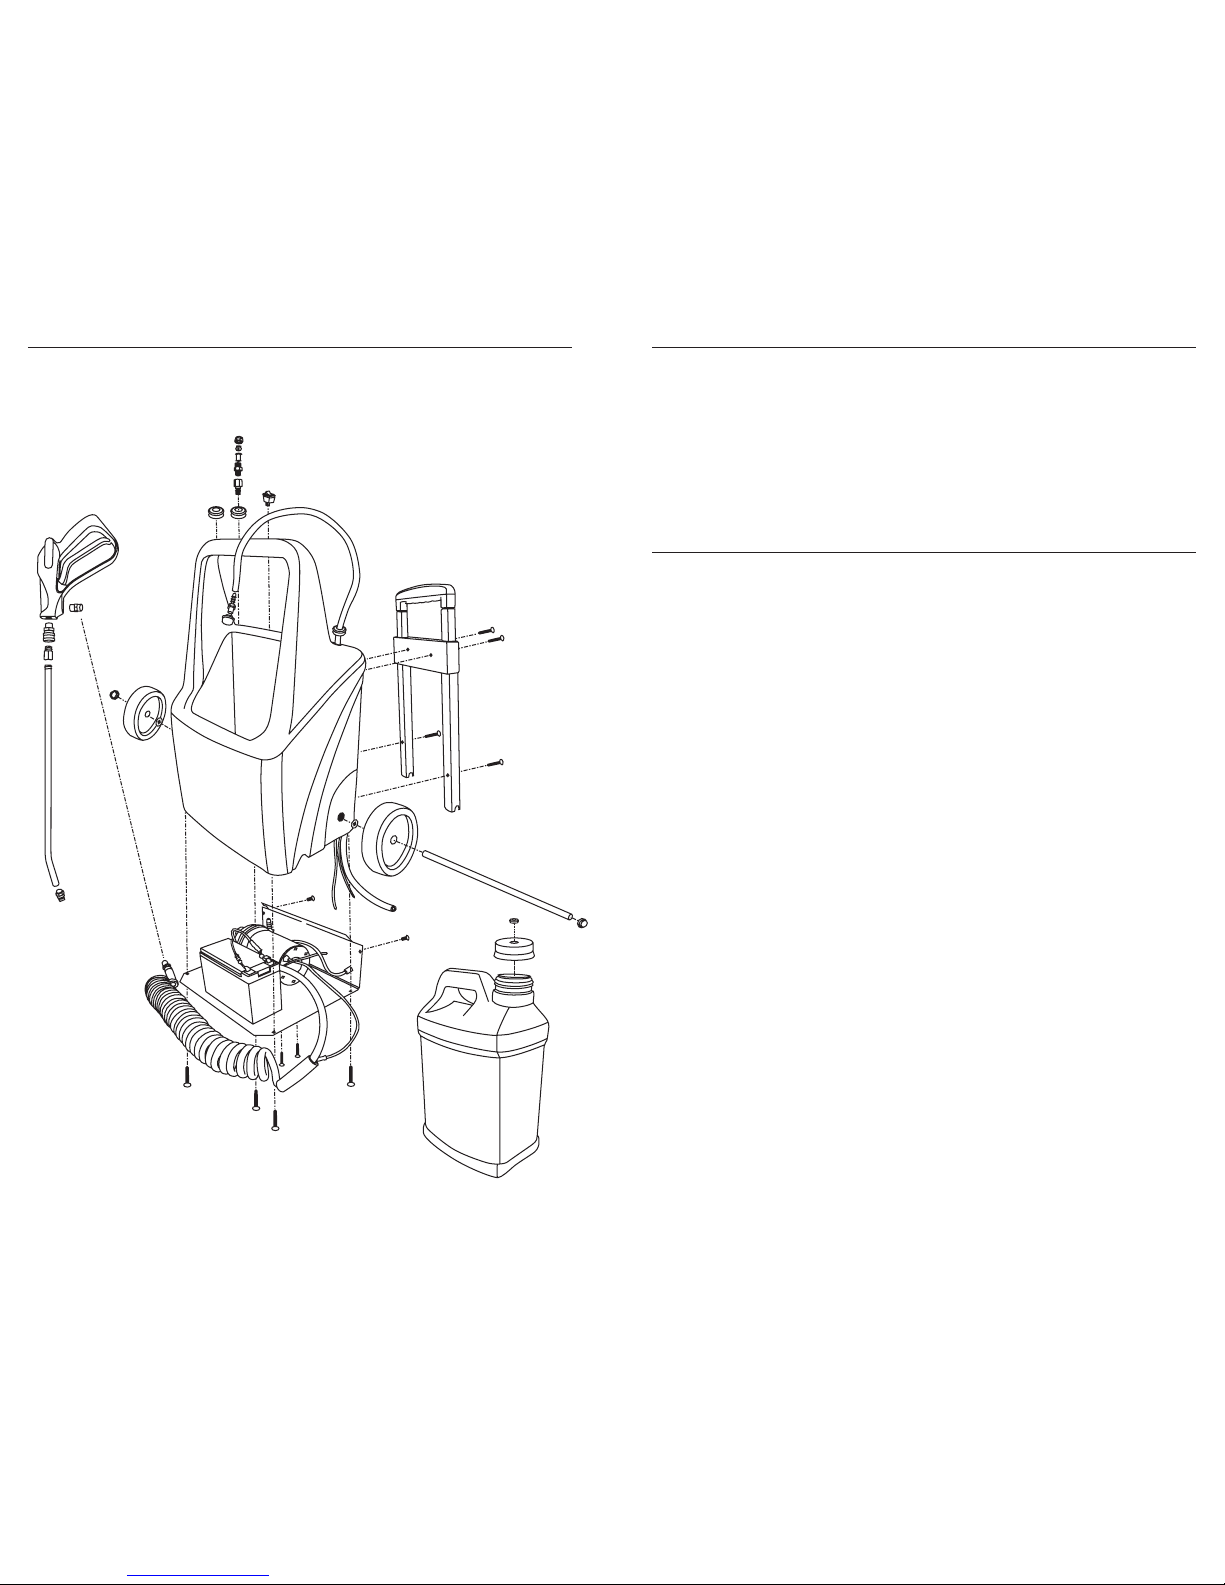
PART # DESCRIPTION QUANTITY
AP21 Water Pump 1
NM4100 Battery 1
NM5082 Coil Hose 15 feet
NA030 Spray Gun Valve 1
NA0833 Extension 1
B281 Veejet 8005 ¼”FPT 1
NM4102 Bottle 1
NM4103 Cap 1
NA0840 Strainer 1
NA0839 Barb Nylon 1
XAF1 Tubing ¼” ID 48”
BR013 Barb 1/4Fx1/4 1
NM4104 Axle Cap 2
NM4105 Wheel 1
NM4107 Handle Extendable 1
NM4106 Base Plate 1
NS123 Hose Clamps 2
NS162 Elbow Barbs 2
NS126 Power Recepticle 1
NM4111 Switch Rocker 1
NM4017 Connectors 4
NM4020 Wire Black 2 feet
NM5020 Wire Red 2 feet
NM4110 Axle 1
NM4113 Molded Plastic 1
BR335 Quick Male 2
BR337 Quick Female 1
B006 Upholstery TeeJet 6501 1
NM4116 Rubber Bushing 3/8” 3
NM4061 Base Plate Screws 10
NM4080 Handle Screws 2
BR112 Coupling ¼”FXF 1
NM5034 Pump Base Bolts 2
NM4003 Pump Base Nuts 2
NM5066 Pump Base Washers 2
NA0802 Strainer Body 1
NA0803 Strainer 1
NA0826 Teejet Cap 1
NM4074 Double Stick Tape 4 inches
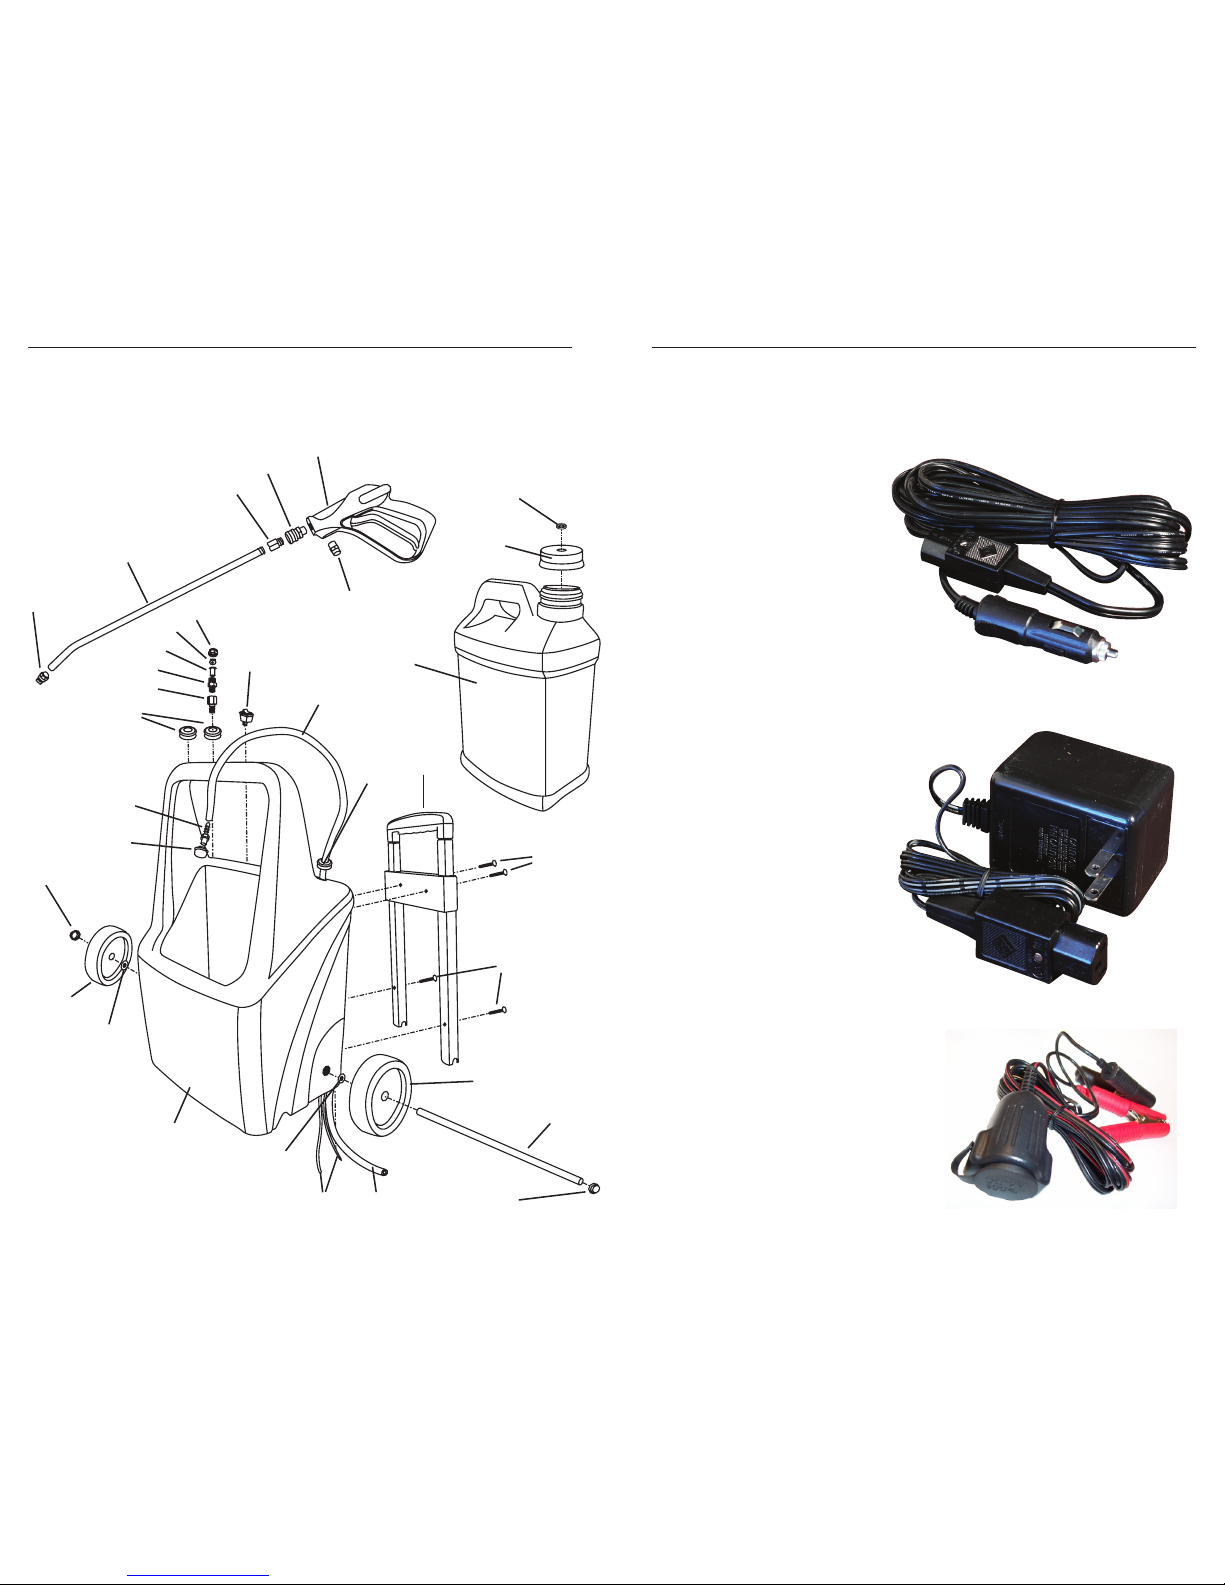
NM4109A Car Charger (included) 1
NM4108A Wall Charger (not included) optional
NM4117 Rubber Bushing 3/4” 2
NM4064 Washer Spacer 2
PLF-AGC10 Fuse 1
NS177 Fuse Casing 1
NM4118 Car Charger Adapter w/ Aligator Clips optional
PKGA10 Diode 1
Complete List of Parts
• Run fresh water through the sprayer after each day of use to flush
chemical from the pump and hoses.
• Keep chemical containers and strainer screen clean.
• Keep charger connected to sprayer and plugged into to van power
supply when not in use to maintain fully charged battery. See
Charging section for details.
• While sprayer and pump are made with chemical resistant materials,
and can handle a wide range of chemicals, do not assume chemical
compatibility.
• Contact your distributor or the manfacturer if you have questions
regarding your chemicals compatibility.
• No warranty, expressed or implied, can be considered where
component failure is caused by chemical effects.
• Label all containers to properly identify chemicals.
• Do not use to spray liquids with temperatures above 160°F. (71°C)
• Do not use to spray flammable or combustable liquids.
• Do not use sprayer where flammable vapors are present.
• Pump can run dry without damage.
• If stored in possible freezing conditions the sprayer must be liquid free
or winterized with anti-freezing chemical.
• Do not operate without inlet strainer.
The Omni-Pro Sprayer is the strongest, best-built 12 volt sprayer on the
market. With proper use,the Omni-Pro’s robust “non-memory” battery
and charging system will give long, reliable service.
The following facts apply to ANY 12-volt charging device (cell phones,
ipods, and sprayers included):
• The 12 volt vehicle accessory outlet charger is a“trickle”charger and
takes 10 or more hours to fully charge a discharged battery. The ve-
hicle charger can“top-off” the battery between jobs.
• The vehicle’s accessory/lighter outlet MUST be “live”in order for the
charger to do its job. Many accessory outlets are NOT powered when
the vehicle’s ignition is“off”.
• If the accessory/cigarette plug is NOT powered when the ignition is
“off”, an accessory outlet with alligator clip ends is available (Hydro-
Force part # NM4118). This cord can be attached directly to the termi-
nals of a truckmount or van battery, and will enable the charger to be
“on”and constantly charging the battery.
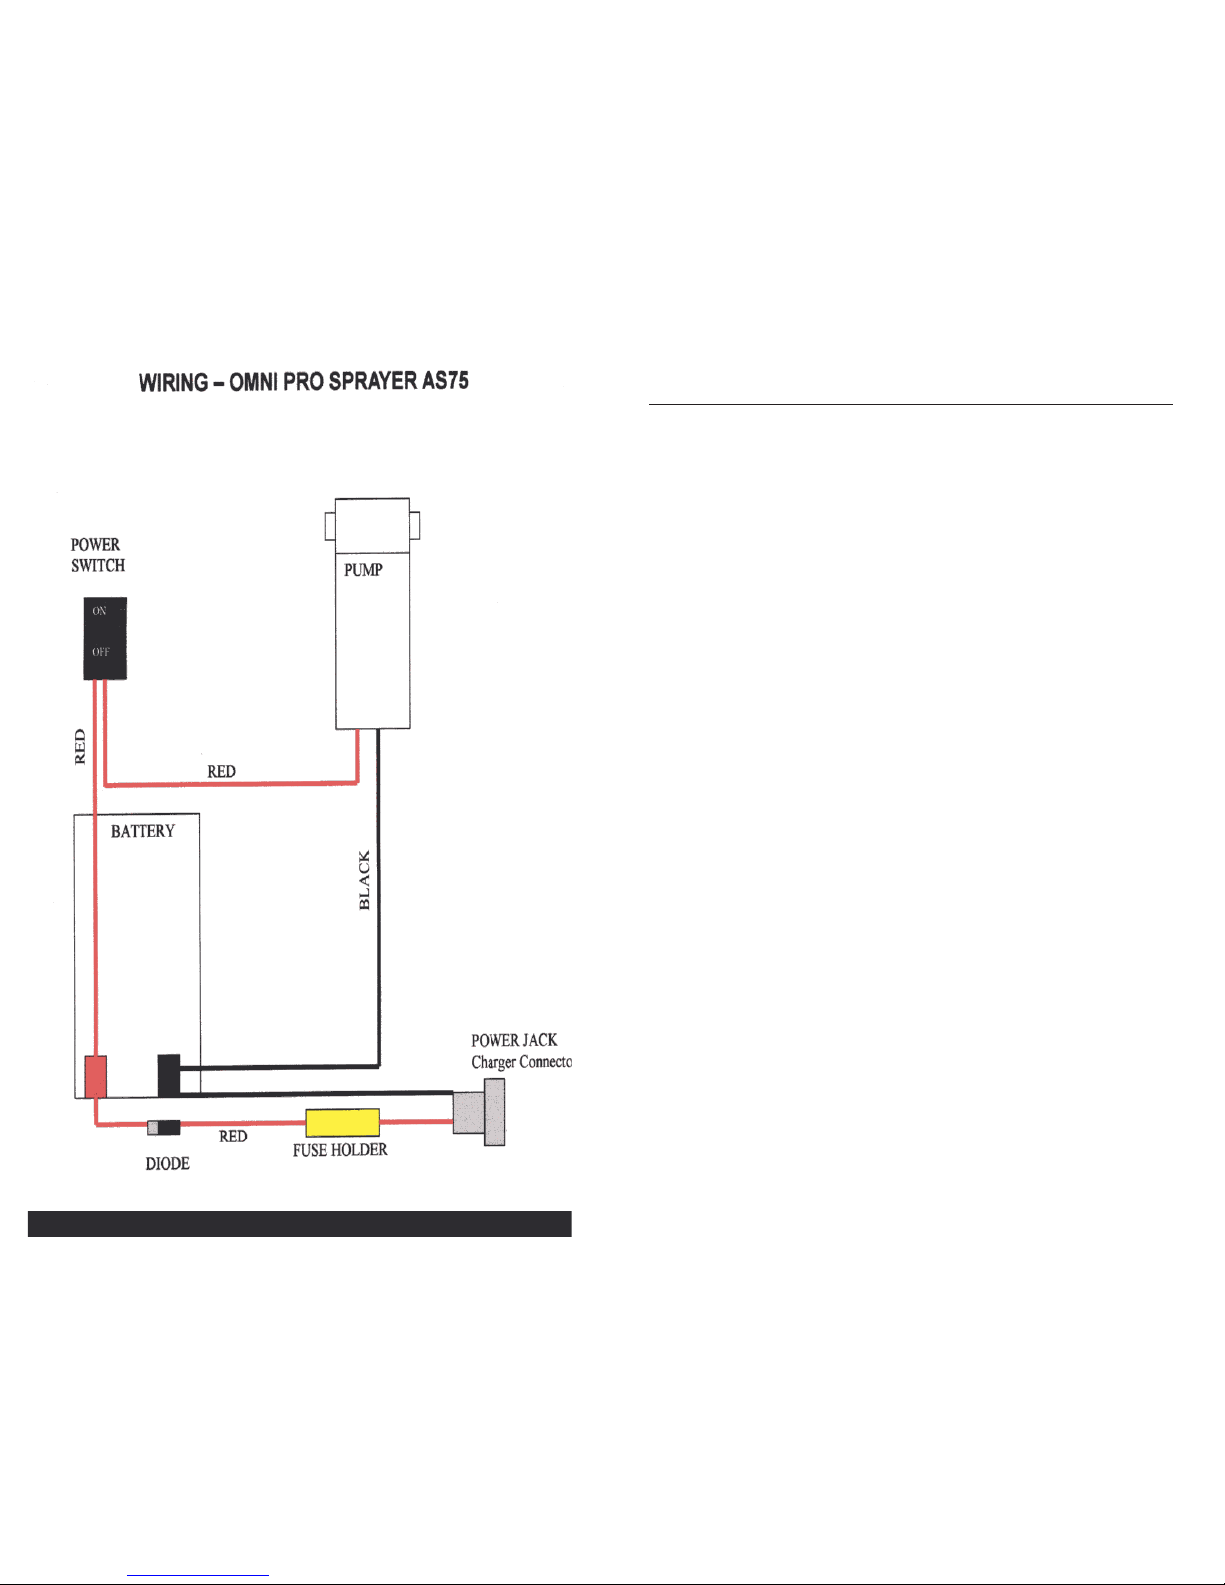
Safety and General Maintenance
Charging
512